Table of Contents
Advertisement
Available languages
Available languages
EN CONVECTION OVENS
INSTRUCTIONS FOR THE INSTALLATION, USE AND MAINTENANCE
IT
FORNI A CONVEZIONE
ISTRUZIONI PER L'INSTALLAZIONE, L'USO E LA MANUTENZIONE
DE HEISSLUFTÖFEN
ANLEITUNGEN FÜR DEN INSTALLATEUR, BEDIENUNGS-UND WARTUNG
FR FOURS À AIR PULSE'
INSTRUCTIONS POUR L'INSTALLATION, L'EMPLOI ET LA MAINTENANCE
ES HORNOS A CONVECCIÓN
INSTRUCCIONES PARA LA INSTALACIÓN, USO Y MANTENIMIENTO
NL CONVECTIEOVENS
INSTRUCTIES VOOR DE INSTALLATIE, GEBRUIK EN ONDERHOUD
FMD443S
ER304-USPE
FMD423S
ER404-USPE
FMD461
ER004-USPE
GUP-404ES
GUP-304ES
GUP-604E
GUP-004E
GUP-604ES
GUP-004ES
SN-UP-404EW
SN-UP-604EW
SN-UP-304EW
SN-UP-004EW
SN-UP-404EWS
SN-UP-604ES
SN-UP-304EWS
SN-UP-004ES
SN-SP-404E
SN-SP-604E
SN-SP-304E
SN-SP-004E
SN-CP-604E
SN-UP-604E
SN-UP-004E
Advertisement
Table of Contents

Related Manuals for Inoxtrend GUP-304ES


Summary of Contents for Inoxtrend GUP-304ES
- Page 1 FR FOURS À AIR PULSE’ INSTRUCTIONS POUR L’INSTALLATION, L’EMPLOI ET LA MAINTENANCE ES HORNOS A CONVECCIÓN INSTRUCCIONES PARA LA INSTALACIÓN, USO Y MANTENIMIENTO NL CONVECTIEOVENS INSTRUCTIES VOOR DE INSTALLATIE, GEBRUIK EN ONDERHOUD GUP-404ES GUP-304ES GUP-604E GUP-004E GUP-604ES GUP-004ES FMD443S ER304-USPE...
-
Page 2: Table Of Contents
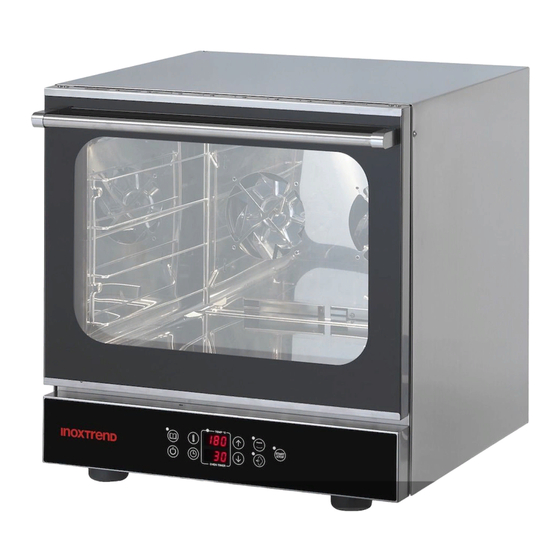
INDEX INDICE INHALT Dimensions Dimensioni Abmessungen Foreword Premessa Vorwort Declaration of Conformity Dichiarazione di conformità Konformitätserklärung European Directive Direttiva Europea Europäische Richtlinie ROHS 2012/19/UE ROHS 2012/19/UE ROHS 2012/19/UE Transport of the oven and Trasporto del forno e rimozione Transport des Ofens und packaging removal degli imballi Entfernung der Verpackung... - Page 3 4 x 2/3 GN - 4 x 460x340 Dimensioni Capacità Distanza teglie Peso a vuoto Dimensions Capacity Trays distance Empty weight Abmessungen Kapazität Einschubabstand Leergewicht Dimensions Capacité Ecartement grilles Poids à vide Dimensiones Capacidad Distancia bandejas Peso en vacío Afmetingen Capaciteit Afstand dienbladen Leeggewicht...
- Page 4 4 x 60x40 Dimensioni Capacità Distanza teglie Peso a vuoto Dimensions Capacity Trays distance Empty weight Abmessungen Kapazität Einschubabstand Leergewicht Dimensions Capacité Ecartement grilles Poids à vide Dimensiones Capacidad Distancia bandejas Peso en vacío Afmetingen Capaciteit Afstand dienbladen Leeggewicht mm 725 x 677 x h 600 4 x 60x40 70 mm 52 kg...
-
Page 5: Foreword
FOREWORD The contents of this manual are generic and not all the functions described may be available on your product. The manufacturer declines all responsibility for possible inaccuracies contained in this pamphlet, due to printing or copy errors. We reserve the right to make on our own products those changes to be considered necessary or useful, without jeopardizing the essential characteristics. -
Page 6: Installation
1.4 INFORMATIVE LABELS On each oven there are applied some metal labels, that give important info concerning characteristics of the oven, electric and plumbing connections and eventually the drain connection. On the right hand side panel there is the label A. The info contained on this label are: •... -
Page 7: Technical Data For Electrical Connection
1.7 TECHNICAL DATA FOR ELECTRICAL CONNECTION Power loading no. and motor Heating Grill Absorbed Model and voltage power power power current 4 x 2/3 GN 3.2 kW 4 x 460x340 220-240 V 1N ~ 2 x 55 W 3.1 kW 13.5 A humidification 50/60 Hz... -
Page 8: Hydraulic Connection
2.5 HYDRAULIC CONNECTION – WATER INLET If the humidification system is installed, the ovens have a water inlet coupling at the back. Always install an on-off valve between the appliance and the water mains, making sure it is easy to operate. We also suggest installing a cartridge filter on the water inlet pipe. -
Page 9: Use And Maintenance
USE AND MAINTENANCE INSTRUCTIONS FOR A SAFE USE OF THE OVEN • Ensure the oven is on a stable position and safety devices installed upstream are efficient. • Always use adequate protection gloves to introduce or pull out the trays. •... -
Page 10: Starting The Oven
4.5 STARTING THE OVEN Switch on the water interception valves and the protection electric switch, installed upstream. Press ON/OFF button to turn on the display. ATTENTION! Switching off the oven with ON/OFF button does not interrupt the power supply to the electronic boards. - Page 11 4.5F MANUAL HUMIDIFICATION Manual humidification can be activated while cooking by pressing button H. The valve that injects steam in the cooking chamber is activated only when button H is pressed. It is possible to change the parameters during the cooking in order to adapt it to the food.
-
Page 12: Maintenance
9.0 MAINTENANCE All external stainless steel parts should be: 1 - cleaned with clear, soapy water; 2 - rinsed with water; 3- dried thoroughly. It is absolutely forbidden to use scrapers, metal soap pads and other common steel tools as they could besides scratching the surface, deposit iron particles that, oxidizing would cause rust to form. - Page 13 PREMESSA Il contenuto del presente manuale è riferito a diversi modelli di forni, per questo motivo, non tutte le funzionalità descritte potrebbero essere incluse nel forno da voi acquistato. Il Costruttore declina ogni responsabilità per le possibili inesattezze contenute nel presente opuscolo, imputabili ad errori di stampa o di trascrizione.
- Page 14 1.4 TARGHETTE INFORMATIVE In ogni forno sono applicate alcune targhette metalliche che forniscono importanti informazioni riguardo alle ca- ratteristiche del forno, agli allacciamenti elettrico e idrico ed eventualmente al collegamento dello scarico. Nel fianco destro è applicata la targhetta A. Le informazioni contenute in questa targhetta sono: •...
- Page 15 1.7 TABELLA DATI TECNICI ALLACCIAMENTO ELETTRICO Potenza assorbita Numero e Potenza Potenza Corrente Modello e voltaggio potenza motori riscaldante grill assorbita 4 x 2/3 GN 3.2 kW 4 x 460x340 220-240 V 1N ~ 2 x 55 W 3.1 kW 13.5 A umidificazione 50/60 Hz...
- Page 16 2.5 COLLEGAMENTO IDRAULICO - ENTRATA ACQUA Se è installato il sistema di umidificazione manuale (optional), i forni sono provvisti di un raccordo di entrata-ac- qua situato nel retro dell’apparecchiatura. Porre sempre tra l’apparecchio e la rete di alimentazione dell’acqua una valvola di intercettazione con comando facilmente azionabile, si consiglia inoltre il montaggio di un filtro a cartuccia sulla tubazione di entrata dell’acqua.
- Page 17 USO E MANUTENZIONE AVVERTENZE PER L’USO SICURO DEL FORNO • Assicurarsi che il forno sia in posizione stabile e che i dispositivi di protezione installati a monte dell’aparecchio siano efficienti. • Utilizzare sempre adeguati guanti protettivi per introdurre e/o estrarre le teglie. •...
- Page 18 4.5 MESSA IN FUNZIONE DEL FORNO Aprire le valvole di intercettazione acqua e l’interruttore elettrico di protezione, installati a monte dell’apparecchio. Premere il tasto ON/OFF per l’accensione del pannello. ATTENZIONE! Lo spegnimento del forno tramite il tasto ON/OFF non interrompe l’alimentazione elettrica delle schede elettroniche. In caso di non utilizzo del forno è...
- Page 19 4.5F UMIDIFICAZIONE MANUALE Premendo il tasto H a cottura in corso, si attiva l’umidificazio- ne manuale. L’elettrovalvola per l’iniezione dell’acqua in came- ra rimane attiva fintanto che il tasto H rimane premuto E’ possibile modificare i parametri a cottura in corso, per adattare la cottu- ra alle esigenze del prodotto.
- Page 20 9.0 MANUTENZIONE Prima di effettuare qualsiasi operazione di manutenzione è obbligatorio disinserire l’interruttore elettrico di prote- zione e chiudere la valvola di intercettazione acqua che sono installati a monte dell’apparecchiatura. La pulizia del forno deve essere effettuata al termine di ogni giornata lavorativa, utilizzando solo i prodotti adatti allo scopo.
- Page 21 VORWORT Der Inhalt dieses Handbuchs ist allgemeingültig und nicht alle beschriebenen funktionen könnten in ihrem Produkt eingeschlossen sein. Die Herstellerfirma übernimmt keinerlei Verantwortung für eventuell in dieser Broschüre enthaltene Ungenauig- keiten, die auf Druckfehler zurückzuführen sind und behält sich das Recht vor an ihren Produkten alle für notwen- dig erachteten Änderungen anzubringen, ohne die wesentlichen Eigenschaften zu beeinflussen.
- Page 22 1.4 INFORMATIONSETIKETTEN Auf jedem Ofen finden Sie Metalletiketten, die wichtige Info über Merkmale des Ofens, Strom-und Wasseran- schlüsse und eventuell Ablaufanschluss geben. Auf der rechten Wand liegt die Etikette A. Die Informationen auf dieser Etikette sind die folgende: • Name und Adresse des Herstellers •...
- Page 23 1.7 TABELLE TECHNISCHE DATEN ELEKTROANSCHLUSS Leistung und Anz. und Modelle Heizleistung Grillleistung Strom Spannung Motorleistung 4 x 2/3 GN 3.2 kW 4 x 460x340 220-240 V 1N ~ 2 x 55 W 3.1 kW 13.5 A Beschwadung 50/60 Hz verstärkt 4 x 2/3 GN 3.6 kW 4 x 460x340...
- Page 24 2.5 ANSCHLUSS ANS WASSERNETZ – WASSERZUFUHR Wenn das manuelle Befeuchtungssystem installiert ist (optional), sind die Geräte auf der Rückseite mit einem Wasseranschluss ausgerüstet. Zwischen dem Gerät und dem Wasserversorgungsnetz muss ein leicht zugängliches Absperrventil zwischengeschaltet werden. Außerdem ist es ratsam, in der Wasserzuleitung einen Filter mit Einsatz zu montieren. Der Wasseranschluss muss immer mit Kaltwasser erfolgen.
- Page 25 BEDIENUNGS-UND WARTUNGSANLEITUNG ANWEISUNGEN FÜR SICHEREN GEBRAUCH DES OFENS • Überprüfen Sie den Ofen in einer stabilen Position liegt und die Schutzvorrichtungen aufwärts effizient sind. • Immer geeignete Schutzhandschuhe tragen, um die Bleche zu stecken und herauszuziehen. • Immer vorsichtig sein, weil der Boden wegen Dampf beim Garen rutschig sein könnte. •...
- Page 26 4.5 INBETRIEBSNAHME Öffnen Sie die Wasserabsperrventile und den vorwärts dem Gerät installierten elektrischen Schutzschalter. Die Taste Ein/Ausschalten drücken, um die Bedienungstafel einzuschalten. ACHTUNG! Das Ausschalten des Ofens mit der ON / OFF-Taste unterbricht nicht die Stromversor- gung der Platinen. Wenn der Ofen nicht benutzt wird, ist es ratsam, die Stromversorgung mit dem elektrischen Schutzschalter zu unterbrechen, der vorwärts dem Ofen installiert werden muss.
- Page 27 4.5F MANUELLE BESCHWADUNG Durch Drücken der H-Taste während des Garvorgangs wird die manuelle Beschwadung aktiviert. Das Magnetventil zum Ein- spritzen von Wasser im Garraum bleibt solange aktiv, wie die Taste H gedrückt bleibt. Es ist möglich, die laufenden Garparameter zu ändern, um das Garen an die Bedürfnisse des Produkts anzupassen.
- Page 28 9.0 WARTUNG Vor Ausführung der Wartungsarbeiten ist der Schutzschalter auszuschalten und das Wasserabsperrventil zu schlie- ßen - beide befinden sich dem Gerät vormontiert. Den Backofen am Ende eines jeden Tages reinigen, wobei geeignete Produkte zu verwenden sind. Die Edelstahlteile sind täglich: 1.
-
Page 29: Avant-Propos
AVANT-PROPOS Le contenu de ce manuel est générique et pas toutes les fonctionnalités décrites peuvent être inclus dans votre produit. Le fabricant décline toute responsabilité pour toute inexactitude contenue dans cette brochure en raison d’erreurs d’impression ou des erreurs involontaires. Nous nous réservons le droit d’apporter des modifications à ses pro- duits comme elle le juge nécessaire ou utile, sans compromettre les caractéristiques essentielles. -
Page 30: Etiquettes Informatives
1.4 ETIQUETTES INFORMATIVES Dans chaque four s’appliquent certaines étiquettes metaliques, qui donnent des renseignements importants con- cernat les caractéristiques du four, le branchement eléctrique et hydraulique et par la suite le branchement à la purge. La plaque A est apposée sur le côté droit. Les renseignements contenus dans cette plaque sont les suivantes: •... -
Page 31: Tableau Des Données Techniques
1.7 TABLEAU DES DONNEES TECHNIQUES BRANCHEMENT ÉLECTRIQUE Puissance absorbée n° et puissance Puissance de Puissance Courant Modèle et voltage moteur chauffe grill absorbé 4 x 2/3 GN 3.2 kW 4 x 460x340 220-240 V 1N ~ 2 x 55 W 3.1 kW 13.5 A humidification... -
Page 32: Raccordement Hydraulique - Arri
2.5 RACCORDEMENT HYDRAULIQUE - ARRIVÉE D’EAU Si le système d’humidification est installé, les fours sont équipés d’un raccord d’arrivée d’eau situé à l’arrière de l’appareil Il faudra toujours installer entre l’appareil et le réseau hydraulique un robinet d’arrêt avec commande facilement accessible;... -
Page 33: Description Des Éléments Du
EMPLOI ET MAINTENANCE INSTRUCTIONS POUR L’UTILISATION SÛRE DU FOUR • S’assurer que le four est installé sur une position stable et que les dispositifs installés en amont de l’appareil soient efficients. • Toujours utiliser des gants de protection pour introduire et extraire les bacs. •... - Page 34 4.5 MISE EN SERVICE DU FOUR Ouvrir les robinets d’arrêt d’eau et l’interrupteur électrique de protection installés en amont de l’appareil. Appuyer sur le bouton ON/OFF pour l’éclairage de l’écran. ATTENTION! Éteindre le four en appuyant sur le bouton ON/OFF n’interrompt pas l’alimentation des cartes électroniques.
- Page 35 4.5F HUMIDIFICATION MANUELLE En appuyant sur le bouton H pendant la cuisson, on active l’humidification manuelle. L’électrovanne d’injection de l’humi- dification dans la chambre reste active jusqu’au moment où on presse le bouton H. On peut modifier les paramètres pendant la cuisson pour l’adapter aux aliments.
-
Page 36: Que Faire Pour Résoudre Les Pro
9.0 ENTRETIEN Avant de commencer toute opération de maintenance, il est obligatoire de déconnecter l’interrupteur de protec- tion électrique et de fermer le robinet d’arrêt d’eau, installés tous deux en amont de l’appareil. Nettoyer le four à la fin de chaque journée d’utilisation avec des produits adéquats. Les parties exterieurs en acier inox doivent être: 1. - Page 37 PREMISA El contenido de este manual es generico y no todas las funcionalidades descritas podrían estar inclui- das en su producto. El fabricante declina toda responsabilidad por las posibles inexactitudes contenidas en el presente documento, im- putables a errores de impresión o relacionadas. El fabricante se reserva el derecho de aportar a sus propios pro- ductos aquellas modificaciones que se consideren necesarias o utiles, sin perjudicar las caracteristicas esenciales.
- Page 38 1.4 TARJETAS INFORMATIVAS En cada horno son aplicadas algunas placas metálicas que proporcionan información importante sobre las ca- racterísticas del horno, las conexiones eléctricas y de agua y, eventualmente, la conexión al desagüe. En el lado derecho está aplicada la tarjeta A. Los datos de esta tarjeta son: •...
- Page 39 1.7 TABLA DATOS TÉCNICOS CONEXIÓN ELÉCTRICA n° y potencia Potencia Potencia Consumo Modelo Potencia y voltaje motores calefacción grill corriente 4 x 2/3 GN 3.2 kW 4 x 460x340 220-240 V 1N ~ 2 x 55 W 3.1 kW 13.5 A humidificación 50/60 Hz potenciado...
- Page 40 2.5 CONEXIÓN HÍDRICA – ENTRADA DEL AGUA Si el sistema de humidificación manual (opcional) está instalado, los hornos disponen de una conexión para la entrada del agua, situada en la parte trasera del aparato. Entre el aparato y la red de abastecimiento es preciso intercalar una llave de paso con mando fácilmente ma- niobrable;...
- Page 41 USO Y MANTENIMIENTO ADVERTENCIAS PARA EL USO SEGURO DEL HORNO • Asegúrarse de que el horno esté en una posición estable y que los dispositivos de protección instalados por encima del mismo sean eficientes. • Utilizar siempre adecuados guantes de protección para introducir y/o extraer las bandejas. •...
- Page 42 4.5 PUESTA EN MARCHA DEL HORNO Abrir las válvulas de interceptación de agua y el interruptor eléctrico de protección instalados arriba del aparato. Pulsar el tecla ON/OFF para encender el panel de mandos. ATENCION! El apagado del horno con la tecla ON/OFF no interrumpe la alimentación eléctrica de la placa electrónica.
- Page 43 4.5F HUMIDIFICACIÓN MANUAL Presionando a tecla H mientras que el horno está cocinando, se activa la humidificación manual. La electroválvula que inyecta agua en la cámara permanece activa mientras la tecla H permanezca presionada. It is possible to change the parameters during the cooking in order to adapt it to the food.
- Page 44 9.0 MANTENIMIENTO Antes de efectuar cualquier operación de mantenimiento es obligatorio desconectar el interruptor eléctrico de protección y cerrar la llave de paso del agua instalados aguas arriba del aparato. Es preciso limpiar el horno al final de cada día, empleando productos aptos para esta operación. Las partes exteriores en acero inoxidable deben ser: 1.
-
Page 45: Introductie
INTRODUCTIE De inhoud van deze handleiding is algemeen en het kan zijn dat niet alle beschreven functies in uw product zijn opgenomen. De Fabrikant wijst elke aansprakelijkheid voor eventuele onjuistheden in deze brochure als gevolg van druk- of typefouten af. Wij behouden ons het recht voor om wijzigingen in onze producten door te voeren die noodzakelijk of nuttig worden geacht, zonder afbreuk te doen aan de essentiële kenmerken. -
Page 46: Informatieve Etiketten
1.4 INFORMATIEVE ETIKETTEN Op elke oven zijn enkele metalen etiketten aangebracht, die belangrijke informatie verschaffen over de kenmer- ken van de oven, over de elektrische en sanitaire aansluitingen en eventueel over de afvoeraansluiting. Op het rechterpaneel bevindt zich het etiket A. Dit etiket bevat de volgende informatie: •... -
Page 47: Tabel Technische
1.7 TABEL TECHNISCHE GEGEVENS ELEKTRISCHE AANSLUITING Stroomverbruik Aantal en Verwarming Grill Stroom- Modellen en voltage vermogen motoren svermogen svermogen verbruik 4 x 2/3 GN 3.2 kW 4 x 460x340 220-240 V 1N ~ 2 x 55 W 3.1 kW 13.5 A bevochtiging 50/60 Hz macht toeg. -
Page 48: Vervanging Reserveonderdelen
2.5 WATERAANSLUITING - WATERTOEVOER Als het handmatige bevochtigingssysteem (optioneel) is geïnstalleerd, de ovens zijn uitgerust met een water- toevoerkoppeling die zich aan de achterzijde van het apparaat bevindt. Plaats tussen het apparaat en de water- leiding altijd een afsluitventiel die eenvoudig te bedienen is; bovendien wordt aangeraden om een cartridgefilter op de watertoevoerbuis te installeren. -
Page 49: Gebruik En Onderhoud
GEBRUIK EN ONDERHOUD INSTRUCTIES VOOR EEN VEILIG GEBRUIK VAN DE OVEN • Controleer dat de oven op een stabiele plaats geïnstalleerd werd en dat de stroomopwaarts geïnstalleerde beveiligingssystemen efficiënt werken. • Gebruik steeds geschikte beschermende handschoenen om de ovenschalen in de oven te plaatsen of uit de oven te halen. - Page 50 4.5 INWERKINGSTELLING OVEN Zet de waterafsluiting en de elektrische beveiligingsschakelaar open, die boven het apparaat geïnstalleerd zijn. Druk op ON/OFF om het paneel in te schakelen. WAARSCHUWING! Het uitzetten van de oven met behulp van ON/OFF onderbreekt de elektrische voeding aan de elektronische kaarten niet. Indien de oven niet wordt gebruikt, wordt het aangeraden om de elektrische voeding af te sluiten met behulp van de elektrische beveiligingsschakelaar bovenop de oven geïnstalleerd.
- Page 51 4.5F HANDMATIGE BEVOCHTIGING Door te drukken op de toets H tijdens het koken, wordt de handmatige bevochtiging geactiveerd. De elektromagnetische klep voor waterinspuiting in de kamer blijft ingeschakeld zo- lang als de toets H ingedrukt is. Het is mogelijk de parameters te wijzigen tijdens het kookproces, om deze aan te passen aan de eisen van het product.
-
Page 52: Onderhoud
9.0 ONDERHOUD Voordat u enig onderhoud gaat uitvoeren is het noodzakelijk om de elektrische beschermingsschakelaar te ont- koppelen en de water- en gastoevoer die op het apparaat zijn geïnstalleerd te sluiten. De oven dient aan het einde van elke werkdag te worden gereinigd, uitsluitend met de producten die hiervoor geschikt zijn.
Need help?
Do you have a question about the GUP-304ES and is the answer not in the manual?
Questions and answers