Table of Contents

Related Manuals for SuperFish TopClear 5000


Summary of Contents for SuperFish TopClear 5000
- Page 1 user manual Gebrauchsanweisung mode d’emploi Gebruiksaanwijzing TopClear Filter 5000-10000-15000-18000 Pond pressure filter + UVC • Teich-Druckfilter + UVC-Gerät Filtre sous pression + UVC • Vijver-drukfilter + UVC...
- Page 2 35x44x58 cm Capacity of the pump* 2.000 l/h 2.900 l/h 5.300 l/h Pump* 25 Watt 45 Watt 29 Watt * Applicable only to the TopClear 5000 Kit, TopClear 10000 Kit and TopClear 18000 Kit >5cm max 2m >5cm min 0.5m...
- Page 3 Optional BackWash Valve CLEAN...
- Page 5 GB - Warranty conditions This warranty is valid for 2 year on materials and incorrect construction. Only units with a fully filled in warranty slip and official till receipt showing date of purchase will be considered. You must supply the entire unit with accessories in the event of a warranty claim.
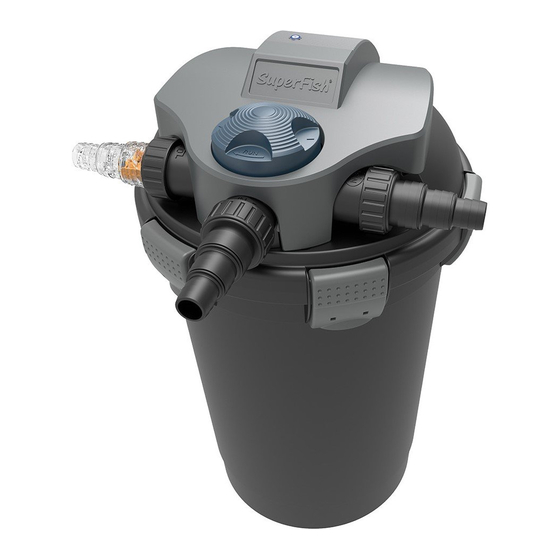
- Page 6 • Cut the hose connection on the same diameter as the diameter of the hose (C). Use a Ø20 mm pond hose for the TopClear 5000 and a Ø32 mm hose for the TopClear 10/15/18000, so that the Flow Indicator (D-c) remains visible. Unscrew the hose connection from the filter before cutting to prevent damage to the filter.
- Page 7 After cleaning, ALWAYS reinstall the end cap at the CLEAN exit. • A optional BackWash Valve is available at your SuperFish dealer, this replaces the end cap on the CLEAN exit and makes the flushing of the water more easily (BackWash Valve TopClear 5000 art.
- Page 8 Stellen zu vermeiden. • Sägen Sie den Schlauchanschluss auf die richtige Größe Ihres Schlauchdurchmessers zu (C). Verwenden Sie für den TopClear 5000 einen Ø20 mm Teichschlauch und für den TopClear 10/15/18000 einen Ø32 mm Teichschlauch, damit die Durchflussanzeige (D-c) sichtbar bleibt.
- Page 9 Schlauch kann zum Wässern des Gartens verwendet werden. Nach der Reinigung immer die Abdeckung am CLEAN-Ausgang wieder anbringen. • Bei Ihrem Superfish Händler ist ein optionaler Absperrhahn erhältlich, welcher am CLEAN-Ausgang anstelle der Verschlusskappe montiert werden kannund die Reinigung des Filters vereinfacht.
- Page 10 • Couper l’embout au bon diamètre du tuyau (C). Utilisez un tuyau de bassin de Ø20 mm pour le TopClear 5000 et un tuyau de Ø32 mm pour le TopClear 10/15/18000, de sorte que l’indicateur de débit (D-c) reste visible. Dévisser l’embout du filtre avant de commencer la coupe pour éviter d’endommager le filtre.
- Page 11 • Retirer la mousse et les rincer avec de l’eau propre. Changement de mousse un fois par an, plus souvent si nécessaire (F-b). • Retirer le déflecteur (non applicable avec le TopClear 5000) et rincez à l’eau du robinet. • Nettoyez les Bio-Balls dans un seau rempli d’eau de bassin pour maintenir la vie des bactéries.
- Page 12 • Zaag de slangtule op dezelfde grootte als de slangdiameter (C). Gebruik een Ø20 mm vijverslang voor de TopClear 5000 en een Ø32 mm vijverslang voor de TopClear 10/15/18000, zodat de Flow Indicator (D-c) zichtbaar blijft. Schroef de slangtule van het filter af voordat u gaat zagen, om schade aan het filter te voorkomen.
- Page 13 Monteer na reiniging ALTIJD de afsluitdop weer terug op de CLEAN- uitgang. • Bij uw SuperFish dealer is een optionele afsluitkraan verkrijgbaar, deze kunt u monteren op de CLEAN-uitgang (i.p.v. de afsluitdop) en maakt het schoonmaken van het filter gemakkelijker.
- Page 14 In areas with extremely hard water you may need to descale more often. Technical problems caused by scale are not under warranty. For cleaning and descaling the quartz glass special SuperFish UVC Clean is available at your dealer. Cleaning instructions: Disassemble the quartz glass carefully. Mix the cleaning fluid in a large bucket with clean tap water as instructed on the bottle.
- Page 15 34x34x40 cm 35x44x46 cm 35x44x58 cm 35x44x58 cm Capaciteit van de pomp* 2.000 l/h 2.900 l/h 5.300 l/h Pomp* 25 Watt 45 Watt 29 Watt * Alleen van toepassing bij de TopClear 5000 Kit, TopClear 10000 Kit en TopClear 18000 Kit...
- Page 16 GB - Recycle information The symbol of the barred bin printed on the product means that it must be collected separately from other rubbish when it will not be anymore in use. The user, at the end of the life of the product, will have to bring it to a proper rubbish collection centre for electric and electrical devices.
Need help?
Do you have a question about the TopClear 5000 and is the answer not in the manual?
Questions and answers
changing the bulb
To change the bulb in a SuperFish TopClear 5000:
1. Unlock the unit head and housing using the red switch lock.
2. Turn the unit head counterclockwise and pull it out carefully.
3. Loosen the screw and remove the locknut.
4. Remove the quartz glass and gasket with a gentle twist.
5. Clean the quartz glass and check for damage.
6. Remove the UV lamp along with the UV-tube clip and tube protection ring.
7. Remove the O-ring from the unit head; clean and replace it if needed.
8. Insert the new UV lamp with the clip and protection ring into the unit head.
9. Reinsert the quartz glass and gasket into the unit head.
10. Slide the locknut over the quartz glass and tighten it.
11. Reattach the screw and tighten the locknut.
12. Reinstall the unit head into the housing and lock it in place.
This answer is automatically generated
Bonjour combien de temps dois-je laisser la pompe en position nettoyage
The exact duration for leaving the SuperFish TopClear 5000 pump in cleaning mode is not specified. However, it should be used until the filter sponge is clean.
This answer is automatically generated