Advertisement
INSTALLATION NOTES:
1. Caution and Safety Instructions
•
Qualified personnel must install and/or service
this product in a manner consistent with its
intended use and in compliance with the
National Electrical Code, Canadian Electrical
Code, and/or all local and provincial codes.
•
Follow all product label information and
installation instructions.
•
Turn off power at the fuse or circuit breaker
before installation or servicing.
•
The use of damaged components may cause an
unsafe condition and void the product warranty.
2. Product Information
•
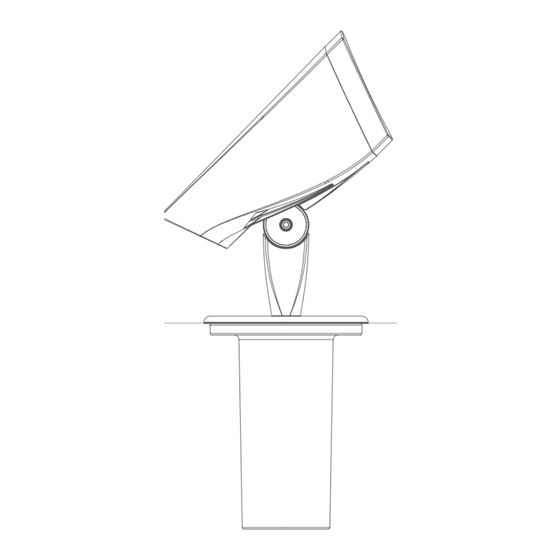
This product is suitable for mounting at grade level.
ARCHITECTURAL & LANDSCAPE LIGHTING
dCrest-
5.25"/13.3 cm
|
holmlighting.com
9
•
Do not block light emanating from this product
in whole or part.
•
Never operate the luminaire with a missing or
damaged lens. Clean the lens on a regular basis.
•
The entire luminaire may become extremely
hot. Do not touch the hot lens or luminaire body.
Do not touch the light source at any time.
•
Keep all O-rings and sealing surfaces clean
during installation and servicing; failure to do
this may lead to premature failure of the
product.
Tools Needed:
•
Installation: 7/8", 5/32", and 5/64" Allen wrenches
•
Servicing: 7/64" Allen wrench and #1 Phillips screwdriver
3YJ8
A Hunter Industries Company
Advertisement
Table of Contents

Subscribe to Our Youtube Channel
Related Manuals for Holm dCrest-9


Summary of Contents for Holm dCrest-9
- Page 1 dCrest- INSTALLATION NOTES: 1. Caution and Safety Instructions • Qualified personnel must install and/or service • Do not block light emanating from this product this product in a manner consistent with its in whole or part. intended use and in compliance with the •...
-
Page 2: Product Installation
dCrest- INSTALLATION NOTES: 3. Product Installation Diagrams 1. Secure the driver housing in-ground in accordance with local codes and regulations. 2. Connect conduit or cable runs to the bottom of the driver housing with couplings (1/2"-14 NPT – provided by others). Use the provided ½"-14 NPT plug for unused conduit openings. -
Page 3: Wiring Chart
dCrest- INSTALLATION NOTES: 3. Product Installation (continued) Diagrams Wiring Chart Line/Hot/Switching Black Common White Green (via stud or green lead) Ground 0-10V (-) Gray* 0-10V (+) Purple* *For use with 0-10V driver only 5/32" Allen Wrench Black Gray White Purple Green Upon installation, use a 5/32"... - Page 4 dCrest- INSTALLATION NOTES: 4. Repair/Replacement Instructions Standard Optics ( 20º, 40º, and 60º) ① ② Remove the cap by unfastening the 6-32 x 1/2" screw Twist the reflector optic counterclockwise and pull using a 7/64" Allen wrench. Remove the cap by lifting outward to remove.
-
Page 5: Installation Notes
Industries Incorporated (“Hunter”) warrants Holm lighting products to be free of defects in materials or workmanship under normal use for a period of five (5) years from the date of invoice. If a defect in a Holm product is discovered during the applicable warranty period, Hunter will repair or replace, at its option, the product or the defective part.
Need help?
Do you have a question about the dCrest-9 and is the answer not in the manual?
Questions and answers