Table of Contents
Advertisement
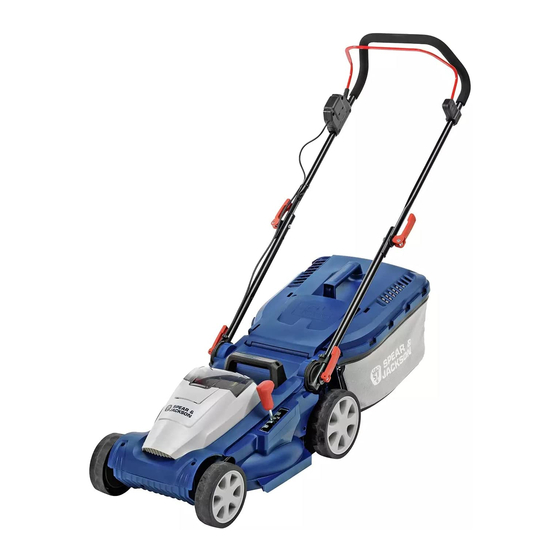
24V
Cordless
Lawnmower
S2434CR
Important - Please read these instructions
fully before starting assembly
These instructions contain important information that will help
you get the best from your mower, ensuring it is assembled
correctly and safely. If you need help or have any missing parts
call After Sales Support on 0345 605 2068.
INSTRUCTION
MANUAL
AFTER SALES SUPPORT
0345 605 2068
Advertisement
Table of Contents

Related Manuals for Spear & Jackson S2434CR


Summary of Contents for Spear & Jackson S2434CR
- Page 1 INSTRUCTION MANUAL Cordless Lawnmower S2434CR Important - Please read these instructions fully before starting assembly AFTER SALES SUPPORT 0345 605 2068 These instructions contain important information that will help you get the best from your mower, ensuring it is assembled correctly and safely.
- Page 2 SPEAR & JACKSON SINCE 1760 For more than 250 years gardeners have enjoyed high quality performance and great results using Spear & Jackson tools. Our garden power tools combine continuous innovation and the latest in manufacturing technologies with a proud heritage. Each product is carefully designed with performance, comfort and durability firmly in mind, which has earned Spear &...
-
Page 3: Table Of Contents
CONTENTS Safety Information ........................4 Intended Purpose ..........................4 Warning Symbols ..........................4 Work Area Safety ..........................6 Electrical Safety ..........................6 Machine Use and Care ........................7 Personal Safety ..........................7 Battery & Charger ..........................8 Operating Safety ..........................9 Maintenance and Storage Safety .................... -
Page 4: Safety Information
SAFETY INFORMATION INTENDED PURPOSE The following warning symbols appear throughout this assembly manual and indicate the appropriate safety measures you should take when assembling and operating the mower. WARNING SYMBOLS Wait until all moving parts have stopped Take extra care, beware completely before of hazards. - Page 5 SAFETY INFORMATION Do not dispose of We accept no liability for batteries in rivers or damage or accidents which immerse in water. result from non-compliance with these instructions. Do not dispose of battery packs in a fire. This appliance is not They will explode and intended for use by persons cause injury.
-
Page 6: Work Area Safety
SAFETY INFORMATION WORK AREA SAFETY ELECTRICAL SAFETY • Inspect the area where the • The plug must match the machine is to be used and outlet. Never modify the remove all objects which plug in any way. Unmodified can be thrown by the plugs and matching outlets machine. -
Page 7: Machine Use And Care
SAFETY INFORMATION MACHINE USE AND CARE any other condition that may affect the operation. If • Do not force the mower. damaged, have the machine Use the correct cutting repaired before use. Many height. If the mower is accidents are caused by labouring due to the length poorly maintained machines. -
Page 8: Battery& Charger
SAFETY INFORMATION BATTERY& CHARGER is in the off position before connecting to power source • Rechange only with the and/or battery pack, picking charger specified by the up or carrying the machine. manufacturer. A charger • Do not carry the machine that is suitable for one type with your finger on the of battery pack may create... -
Page 9: Operating Safety
SAFETY INFORMATION OPERATING SAFETY avoid contact. If contact accidentally occurs, flush TRAINING with water. If liquid contacts • Read the instructions eyes, additionally seek carefully. Be familiar with the medical help. Liquid ejected controls and the proper use from the battery may cause of the machine. - Page 10 SAFETY INFORMATION used and remove all objects controls and correct which can be thrown by the operation of the product. machine. • Before using the product or • Before using, always after any impact, check for visually inspect to see that signs of wear or damage the blade, blade bolt and and repair as necessary.
- Page 11 SAFETY INFORMATION • Do not use the charger if the switching on the motor, cable is damaged or worn. except if the machine has to be tilted for starting. In this • Warning! The cutting blade case, do not tilt it more than may continue to move after absolutely necessary and lift the product is switched off.
- Page 12 SAFETY INFORMATION and damage to property. under some circumstances interfere with active or • Switch off and disconnect passive medical implants! from the power supply if To reduce the risk of there is any malfunction. If serious or fatal injury, we necessary have the machine recommend persons with checked by a qualified...
-
Page 13: Maintenance And Storage Safety
SAFETY INFORMATION MAINTENANCE AND STORAGE SAFETY technician. • Keep all nuts, bolts and • Use parts and accessories screws tight to be sure the made for this machine by machine is in safe working the manufacturer. Failure to condition. do so can result in personal injury. -
Page 14: In The Box
IN THE BOX PARTS Upper handle Grass collection Carry Handle Battery release button Handle fastner Grass collector full Cutting height indicator Charger Lower handle adjustment handle Cable clip Battery charger Grass collector Deck mains plug handle Safety button Rear wheel Deflector guard Switch Lever Front wheel... -
Page 15: Assembly
ASSEMBLY Unpacking i. Unpack all parts and lay them on a flat, stable surface. ii. Remove all packing materials and shipping devices if applicable. iii. Make sure the delivery contents are complete and free of any damage. If you find that parts are missing or show damage do not use the product but contact the aftersales helpline within 28 days of purchase. - Page 16 ASSEMBLY Assemble the grass box i. Insert the handle in the upper cover of grass collection bag ii. Place the metal frame inside the grass collection bag, Make sure that these clips are fully secured to the metal frame. iii. Lift up the safety guard and attach the grass collection bag.
-
Page 17: Preparation
PREPARATION Check battery capacity Push the power indicator to show remaining battery capacity. The battery is equipped with a charge-level indicator panel which indicates its’ charge condition. This charge-level indicator panel consists of 4 LEDs on the battery. Press and hold the charge indicator button on the battery to actuate the charge level indicator. - Page 18 PREPARATION iii. The indicator lights on the charger show the charger status: Symbol Indicator lights Status charging paused red, flashing see instructions below. red, connected to continuous power supply green, charging flashing green, fully charged continuous The intelligent charger measures the charge level of the battery and charges the battery accordingly with the required current and voltage based on battery temperature and voltage.
- Page 19 PREPARATION Fit the battery i. Lift the cover, slide the battery along the rails until it locks into position. ii. Insert the isolator key. AFTER SALES SUPPORT 0345 605 2068...
-
Page 20: Operation
OPERATION MOWING TIPS • Verify that the lawn is free of stones, sticks, wires ,and other objects that could damage the lawn mower. • When cutting thick grass, reduce walking speed in order to allow for a more effective cut and a proper discharge of the clippings. - Page 21 OPERATION Grass bag full indicator i. If the collection bag is empty or it is not full with grass, the grass full indicator will open. ii. If the collection bag is full with grass, the grass full indicator will close. Battery indicator panel Battery indicator on the switch box can be used to indicate the battery status.
-
Page 22: Maintenance
MAINTENANCE WARNING! Always switch the product off, remove the battery from the mower and let it cool down before performing inspection, maintenance and cleaning work! i. Keep the underbody and cutting blade clean and free of debris. Remove clippings from the discharge chute. ii. - Page 23 MAINTENANCE Storage i. Switch the product off and remove the battery. ii. Clean the product as described above. iii. To reduce storage space, the upper handle can be folded down, open the quick release levers to release the handles. Transportation i.
-
Page 24: Technical Data
TECHNICAL DATA Model S2434CR Voltage Battery type Lithium-Ion No load speed 3200/min Cutting width 34cm Height of cut 22/32/42/52/62mm Net weight 11.6kg Grass collector capacity Charger Model no. 24LFC12 charger input 220-240V~ 50Hz,110W charger output Charging Period (battery fully discharged) - Page 25 TECHNICAL DATA Sound values Sound pressure level L : 84.4dB(A) Sound power level L : 90.8dB(A) Uncertainty K: 1.8dB(A) Guaranteed sound power level L : 96dB(A) Vibration values Hand arm vibration a : ≤2.5m/s² The sound values have been determined according to noise test code given in EN 60335-2-77, using the basic standards EN ISO 11201 and EN ISO 3744.
-
Page 26: Troubleshooting
TROUBLESHOOTING Suspected malfunctions are often due to causes that the user can fix themselves. Therefore, check the product using this section. In most cases the problem can be solved quickly. WARNING! Only perform the steps described within these instructions! All further inspection, maintenance and repair work must be performed by a qualified specialist if you cannot solve the problem yourself! Gloves and appropriate protective clothing must be worn when performing these... - Page 27 TROUBLESHOOTING Fault Possible Cause Solution Area of cut (battery duration) Height of cut too low Increase height of cut and walk not large enough slower Grass too high Increase height of cut and walk slower Grass wet or damp Wait until grass is dry and walk slower Grass is dense Increase height of cut, walk...
-
Page 28: Warranty
WARRANTY If your device develops a fault, please don’t hesitate to contact our after sales support on 0345 605 2068, the majority of problems can be solved directly on the phone. 1. These warranty terms cover additional warranty rights and do not affect your statutory warranty rights.
Need help?
Do you have a question about the S2434CR and is the answer not in the manual?
Questions and answers
The nut that holds the blades has snapped of can I replace it