Table of Contents
Advertisement
Quick Links
Visual Verification
Visual Verification
Wi-Fi CAMERA module
Wi-Fi CAMERA module
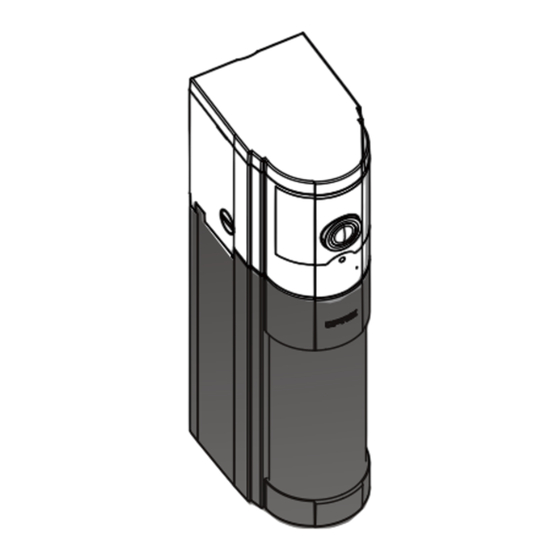
VXI-CMOD
VXI-CMOD
for VXI-ST/-AM/-DAM
for VXI-ST/-AM/-DAM
Get PDF file and also troubleshooting
VXI-CMOD
information at the following website.
[VXI-ST]
[VXI-AM]
[VXI-DAM]
(Sold separately)
http://navi.optex.net/manual/50262
FEATURES
When the VXI-ST/-AM/-DAM generates an alarm signal,
the VXI-CMOD starts recording a 30 second video clip onto the microSD card.
The clip can then be reviewed via your smart phone from a remote location.
180 degree View Angle
Night vision with strong & wide IR light
Sensor trigger recording function with a 2 second pre-recording
Power from a control panel can be used for both the VXI-CMOD and the VXI-ST/-AM/-DAM
1
INTRODUCTION
1-1 BEFORE INSTALLATION
- Read this INSTALLATON & OPERATION MANUAL carefully prior to installation.
- After reading, store this manual carefully in an easily accessible place for reference.
- This manual uses the following indications for correct use of the product, harm to you or other people and damage to your
assets, which are described below. Be sure to understand the description before reading the rest of this manual.
Warning
Failure to follow the instructions provided with this indication and improper handling may cause death or serious injury.
Caution
Failure to follow the instructions provided with this indication and improper handling may cause injury and/or property damage.
This symbol indicates prohibition.
Warning
Do not drop the product and/or avoid scratches on the lens as it may affect it s performance.
Be careful to avoid pinching the wires when assembling.
Read and follow the instructions provided with the VXI-ST/-AM/-DAM.
Adjust, set and check the VXI-ST/-AM/-DAM before starting the VXI-CMOD installation.
NOTE
It is hard to access to the inside of the VXI-ST/-AM/-DAM after mounting the VXI-CMOD.
Refer to the manual of VXI-ST/-AM/-DAM.
1-2 CHOOSE LOCATION
Field of view
Horizontal:180°
PIR coverage
12 m max
Mounting height
Field of view
0.8 to 1,2 m
Vertical:100°
1-5 PARTS IDENTIFICATIONS
< Accessories >
[VXI-CMOD]
CMOD cap
External PCB
terminal
[Top view]
(without the CMOD cap)
Lock screw hole
Power indicator
2
INSTALLATION
1
Disassemble the VXI-ST/-AM/-DAM while refering to
2
2-1 1 through 4 in the instllation instructions
of the VXI-ST/-AM/-DAM.
No.59-2753-0 1811-09
INSTALLATION & OPERATION MANUAL
Newly added
Alarm signal
Event recording
Wi-Fi router
Text notification
from a Control Panel
Control Panel
Caution
Wi-Fi
The radio environment and a
smart phone may affect the
Wi-Fi communication state.
1-3 LOCAL STORAGE
microSD card
For local storage use, a microSD card (not included)
is required.
Suitable microSD cards are as follows:
- FAT 32 format
- 32 GB max.
- Format in OPTEX Vision App
Power off the VXI-CMOD when installing microSD card.
To power down the VXI-CMOD disconnect the power or
remove the ribbon cable.
There is a 120 second boot up cycle.
Camera mount
Ribbon
cable
Waterproof
Mounting
sponge
screws
[Rear view]
[Bottom view]
(inside the body)
(without switch cover)
Ribbon cable
Antenna internal/
connector
external switch
IR-LED high/low
Reset switch
switch
microSD card slot
Switch cover
2
Make wiring knockout holes on the back box of the VXI-ST/-AM/-DAM.
3
Connect between terminals of VXI-ST/-AM/-DAM and the external PCB terminal.
Power
(9.5 to 18 V DC)
EN
+ -
SP TR COM AL TP TP
External PCB terminal
Internet
NOTE
TROUBLE wiring not
+ -
SP TR COM AL TP TP
required for VXI-ST.
Visual verification
Trouble
Power
(9.5 to 18 V DC)
Smartphone
+ -
SP TR COM AL TP TP
VXI-ST/-AM/-DAM
Ribbon cable
70 mm
(included)
(Recommended)
[1]
[4]
Wires
(not included)
[7]
'
Open the
1.
switch cover.
Insert a
microSD card
NOTE
If the PEU (Plug-in EOL) option is used on the VXI-ST/-AM/-DAM, remove it
from the terminal, then place it in the external PCB terminal of the VXI-CMOD.
VXI-ST/-AM/-DAM
The external antenna (option) for the VXI-CMOD can extend the reach of the Wi-Fi communication.
Follow this instruction only if external antenna is needed.
1
Set the antenna internal/external switch to EXT.
Lock screw
QR code label
for Device ID
3
APP INSTALLATION
1
Visit either the App store or Google play.
4
SETUP WIZARD
1
Start the OPTEX Vision application.
- 1 -
to a control panel
NOTE
A separate power supply of 9.5 to 18 V DC is required
for VXI-ST/-AM/-DAM when VXI-CMOD is powered
by a source over 18 to 24 V DC.
(over 18 to 24 V DC)
to the VXI-CMOD
External PCB terminal
Tamper
Alarm
Power
(9.5 to 18 V DC)
[2]
[5]
3.
2.
Return the switch
Set the ribbon cable
cover to the original
to the connector, and
position.
Accessing inside of the VXI-CMOD may be necessary in
attach the connector
cover.
the following process. Fix with the lock screw and attach
the CMOD cap at step 6.
External PCB terminal
2
Mount the bracket and set the main body.
Main body
Bracket
Jump to step 4 , if the OPTEX Vision App has already been installed.
Jump to step 5 , if the Wi-Fi network has already been set.
2
Search for OPTEX Vision in the store.
OPTEX Vision
Requirement;
iPhone 5S with iOS 9.0 or later.
Android smartphone 5.X or later.
2
Tap "Add Device" to start "Setup Wizard" .
Power
to a control panel
to the VXI-CMOD
Tamper
Alarm
VXI-ST/-AM/-DAM
[3]
Wires
(not included)
[6]
[8]
Place the VXI-CMOD on the
VXI-ST/-AM/-DAM back box
temporarily.
NOTE
Adjust the switch settings, if necessary.
IR-LED high/low switch
Recommended Current draw
distance
(max.)
Position
(max.)
at 12 V DC
high
12 m
1.0 A
low
6 m
400 mA
(default)
3
Connect cables to the VXI-CMOD.
3
Download and install the
OPTEX Vision application.
Advertisement
Table of Contents

Subscribe to Our Youtube Channel
Related Manuals for Optex VXI-CMOD

Summary of Contents for Optex VXI-CMOD
- Page 1 Ribbon cable 70 mm (included) (Recommended) Sensor trigger recording function with a 2 second pre-recording Power from a control panel can be used for both the VXI-CMOD and the VXI-ST/-AM/-DAM Wires INTRODUCTION (not included) 1-1 BEFORE INSTALLATION - Read this INSTALLATON & OPERATION MANUAL carefully prior to installation.
- Page 2 URL: www.optexamerica.com URL: www.optex-europe.com/fr URL: www.optexkorea.com Optex VXI-CMOD shall be supplied by a SELV and LPS (or UL1310 class 2) power supply or connected to a dedicated control unit with SELV and LPS output. OPTEX (EUROPE) LTD./EMEA HQ (U.K.) OPTEX SECURITY Sp.z o.o. (Poland) OPTEX (DONGGUAN) CO.,LTD.
Need help?
Do you have a question about the VXI-CMOD and is the answer not in the manual?
Questions and answers