Risco LightSYS 2 Quick Installation Manual
Hide thumbs
Also See for LightSYS 2:
- User manual (61 pages) ,
- Quick installation manual (28 pages) ,
- Quick user manual (12 pages)

Subscribe to Our Youtube Channel
Related Manuals for Risco LightSYS 2


Summary of Contents for Risco LightSYS 2
-
Page 1: Quick Installation Guide
LightSYS™2 Quick Installation Guide For detailed information please refer to the full LightSYS™2 Installer Manual provided on our website: www.riscogroup.com... - Page 2 Note: For mounting the LightSYS™2 inside a metal enclosure (RP432BM, RP432BM1) refer to the instructions supplied with the box. Note: 1.5A PS can be mounted inside either the plastic enclosure RP432B or the metal box RP432BM. 4A PS can be mounted only in the metal enclosure RP432BM1. ...
- Page 3 Note: For mounting GSM inside a metal enclosure, refer to the instructions supplied with the box LightSYS™2 Quick Installer Guide...
-
Page 4: Table Of Contents
Table of Contents Introduction ..........................5 Selecting Mounting Location ....................5 Installing Hardware ........................ 5 Main Unit — BUS Connection ................... 5 Setting Bus Accessory ID Numbers ..............6 Zone Inputs Connection ..................7 Wiring Auxiliary Devices ..................8 Wiring Internal Bell ....................9 Wiring Bell Tamper .................... -
Page 5: Introduction
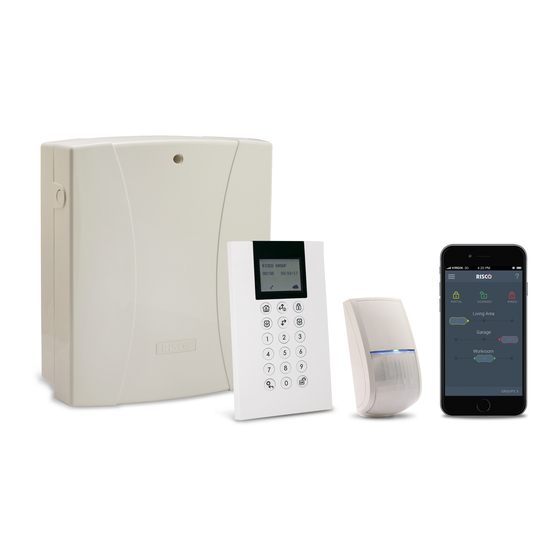
Thank you for purchasing the LightSYS™2 hybrid security system, offering Smartphone App control and communication flexibility as well as a choice of wired, 2-way wireless, or RISCO Bus detectors. This simple setup procedure guide covers all common LightSYS™2 installation and programming steps (based on factory default settings) required in order to set up a working system. -
Page 6: Setting Bus Accessory Id Numbers
Notes: 1. The parallel wiring system supports parallel connections from any point along the wiring. 2. The maximum wire run permitted is 300 meters (1000 feet) for all legs of the bus. 3. In case of bus communication problems, connect two 2.2KΩ resistors, one at each end of the data bus terminals, between the green and yellow wires. -
Page 7: Zone Inputs Connection
Notes: The main unit can support a maximum load of 1.4 Amp. If more current is required install additional power supply modules (3 Amp max.). On 3 AMP supervised power supplies and on the wireless expander, there are two programmable outputs. These programmable outputs belong to the ‘Output’ family. These outputs have dedicated DIP switches that identify the OUTPUT ID. -
Page 8: Wiring Auxiliary Devices
3. In the LightSYS™2 you have the ability to define separately the end-of-line resistance of the zones on the main unit and of the wired zones for each eight-unit expander block (Quick key Selection is done by the software with the following available options: DEOL DEOL TEOL... -
Page 9: Wiring Internal Bell
Wiring Internal Bell The Bell/LS terminal provides power to the internal siren. When connecting an internal sounding device, pay attention to the polarity. It is important to position the BELL/LS Dip Switch SW1 correctly. The position varies depending on the type of internal siren. Note: To avoid bell loop trouble, if no connections are made to an internal siren, use a 2.2KΩ... - Page 10 Connecting BUS Detectors to the Main LightSYS™2 BUS: Set the bus detector ID number (1-32) using the detector's DIP switches. Note: For WatchOUT, LuNAR, WatchIN, BWare and Seismic set the switch that defines the detector operation mode to bus mode Wire the bus terminals AUX(RED), COM (BLK), BUS (YEL) and BUS (GRN) to the LightSYS™2 Bus.
-
Page 11: Gsm Communication Module
GSM Communication Module The GSM Module provides voice and data communication on the LightSYS™2 over the cellular network 1. Power down the LightSYS™2. 2. Plug in the GSM module to the LightSYS™2 main board. 3. Insert the dedicated SIM card and, if required, enter the enabling PIN code or disable the SIM PIN Code in advance by placing it in a cell phone and disabling the code. -
Page 12: Programming Menu Concept
Used to toggle displayed menu options from ‘N’ to ‘Y’ and vice-versa. Used to increase or decrease selected screen digital values. If you do not know where you are in the menu structure, press repeatedly to return to the main menu. Entering Text Descriptions (Labels): ... -
Page 13: Enter Installer Programming Mode
Enter Installer Programming Mode From the main display press Enter the Installer code (default: ) and press Select [1] Programming and press You are now in Installer Programming mode. Move to the section "Identifying the connected devices" described below Identifying the connected devices Automatic Setting Note:... -
Page 14: Wireless Zones
You can define the basic parameters for a zone using the “One By One” option or you can define all attributes using the zones category (Quick key (Zones, Parameters) From the main Installer Programming menu select Select [One By One] and press Using the numeric keys, enter the desired zone number and press Important The display next to the selected zone number defines the type of zone and its location in the... -
Page 15: Step 2: Calibrate The Receiver
The calibration measurement above shows the amount of background ‘noise’ that the receiver can ‘hear’ on the same frequency as the RISCO wireless devices. This ‘noise’ could be neighboring devices of another system or other devices operating on the same frequency nearby. These are ‘unwanted’... -
Page 16: Bus Detectors
Bus Detectors The following section describes the flow of adding bus detectors to the LightSYS™2. Bus detectors can be programmed to the main unit or to a bus zone expander. Programming bus detectors on the main bus Step 1: Adding Bus Detector to the Main Unit Note: If you have already performed Auto Settings, skip to Step 2 below: Assign Bus Detectors to a Zone ID and set basic parameters. -
Page 17: Communication Method
Note When the bus zone is connected to a BUS expander, you should define the X in the (x:yy) display as the BUS expander ID (1,2,3 or 4). The yy represents the bus detector ID number (up to 32) as set by the detector's DIP switches. Step 3: Set Bus Zone Basic Attributes Refer to section Programming Zones Attributes to define the zone parameters. -
Page 18: General Settings
• Partitions: Specify the partitions that will initiate the Follow Me report due to a certain event that occurred in the assigned partitions • The events that will be sent, organized by category (possibly including Alarms, Arm/Disarm, Troubles, GSM, Environmental, Miscellaneous) •... - Page 19 Options for the 1-Way Keyfob: For each button (1-4), define its function, from the available options (see table below for a description of options). Use the respective “Quick key” to designate an option for each button: • Button 1 options (): None, Arm. Stay, Group, UO •...
-
Page 20: Exiting Programming Mode
Step3: Setting Slim Keypad Options On the LCD keypad, from the installer (Programming) menu, select 8) Devices > 1) Keypad > keypad type (see below) Select the user that the slim keypad belongs to, and then press Use the arrow keys to scroll between menus and the key to select menu options: Available Options per Keypad Type:... -
Page 21: Connecting The Lightsys™2 To The Cloud
Connecting the LightSYS™2 to the Cloud LightSYS™2 can be configured to be constantly connected to a server, enabling user Smartphone applications and also seamless Configuration Software connectivity. When connected to the server, the server handles all communication between the system, service providers and web users, enabling monitoring and control to be performed via the Web. -
Page 22: User Definitions And System Operation
[For Configuration Software connection] To configure the CS settings: In the Connection Settings node > Cloud area, specify: IP Address: (as per above) Port: (set to 34000) CPID: System panel ID User Definitions and System Operation Instruct the user to define the actual user codes. Advise the user to change the default Grand Master code. -
Page 23: Technical Specifications
Technical Specifications Main Technical Information Input Power: AC/DC Adaptor 100-240V 50/60Hz 14.4V—1.5A or 4A PS Current Consumption: 60 mA, typical / 70 mA, maximum Rechargeable Standby Battery: 1.5A PS: 12 Volts up to 7 Amp-Hours (AH), typical 4A PS: 12 Volts up to 17 Amp-Hours (AH), typical Power Outputs: Auxiliary Power: 1.5A PS: Total current 800mA;... -
Page 24: Troubleshooting
Troubleshooting Scenario Possible Cause Solution • Set the DIP Switch -2 to OFF An error message appears DIP Switch -2 is in ON position when exiting the position Programming menu • “DFT DIP2 is on” • An “Open Tamper” message One of the Tampers in the Check all Tampers in the appears on the Keypad while... - Page 25 "Manual Configuration" section RED Compliance Statement Hereby, RISCO Group declares that this equipment is in compliance with the essential requirements and other relevant provisions of Directive 2014/53/EU. For the CE Declaration of Conformity please refer to our website: www.riscogroup.com. LightSYS™2 Quick Installer Guide...
- Page 26 RISCO, for a period of (i) 24 months from the date of delivery of the Product ( the “Warranty Period”). This Limited Warranty covers the Product only within the country where the Product was originally purchased and only covers Products purchased as new.
- Page 27 P2P services or any other service made available by RISCO in relation to the Product, are not covered under this Limited Warranty. Refer to the Terms of Service at: https://riscocloud.com/ELAS/WebUI/UserLogin/License for details of your rights and obligations with respect to the use of such applications, software or any service.
- Page 28 Contacting RISCO Group RISCO Group is committed to customer service and product support. You can contact us through our website www.riscogroup.com or as follows: United Kingdom China (Shanghai) Tel: +44-(0)-161-655-5500 Tel: +1-631-719-4400 Tel: +86-21-52-39-0066 support-uk@riscogroup.com support-usa@riscogroup.com support-cn@riscogroup.com Italy France Israel...
Need help?
Do you have a question about the LightSYS 2 and is the answer not in the manual?
Questions and answers