Risco LightSYS User Manual
Hide thumbs
Also See for LightSYS:
- Installation and programming manual (232 pages) ,
- User manual (61 pages) ,
- Quick installer's manual (44 pages)
Table of Contents
Advertisement
Advertisement
Table of Contents

Related Manuals for Risco LightSYS


Summary of Contents for Risco LightSYS
- Page 1 User Manual...
-
Page 2: Summary Of Keypad Main User Commands
[Zone Status] View Partition Status Code > View Event Log [Code] [Event Log] Keypad Chime [Code] [Activities] [Keypad On/Off sound] [Chime] Edit User Code [Code] [Codes/Tags] [Define] Zone Testing (Walk [Code] [Maintenance] [Walk Test] Test) LightSYS User Manual Page 2... -
Page 3: Table Of Contents
Summary of Keypad Main User Commands ............2 Chapter 1 Mastering Your System ................5 Introduction ............................5 Main System Capabilities ........................5 LightSYS Architecture ......................... 6 User Operating Tools .......................... 7 System Monitoring ..........................8 Report to Alarm Receiving Center ................... 8 Follow Me Messaging ........................ - Page 4 Quick Activation/Deactivation of a Weekly Program ............34 Macro Keys............................35 Programming Macro Keys ...................... 35 Activating a Macro........................36 Parking Control with LightSYS Gate Control Keyfobs ..............36 Assign New Keyfob ........................36 Delete a keyfob......................... 37 Delete All keyfobs ........................37 Change keyfob buttons that controls the outputs ..............
-
Page 5: Chapter 1 Mastering Your System
Introduction Congratulations on your purchase of RISCO Group's LightSYS Security System. The LightSYS has been specifically designed to meet a wide range of security needs for residential and commercial applications. LightSYS is designed to recognize abnormal conditions and inform the system of the status of any protected door, window, hallway, room, or area. -
Page 6: Lightsys Architecture
Mastering Your System LightSYS Architecture Your LightSYS controls and monitors a variety of sensors, detectors, and contacts placed throughout the premises, which provide external, perimeter and internal intrusion protection. The system is supervised, meaning that the panel checks the status of each sensor to detect problems. If a fault is detected, you are notified both with panel beeps and indicator lights as well as remote messaging. -
Page 7: User Operating Tools
Mastering Your System User Operating Tools LightSYS can easily be managed locally or remotely depending on your system configuration. You can issue commands to the system and in turn, the system will communicate information to you via its display, indicators, voice messages, SMS messages, Email messages and by the sounds it makes. -
Page 8: System Monitoring
The definition of the telephone number or Email address for each destination is defined by the grand master (see page 31) Notes: Voice messaging requires using the LightSYS voice module. This module also enables the LightSYS to announce various local messages to residents. LightSYS User Manual Page 8... -
Page 9: Keypad Indication
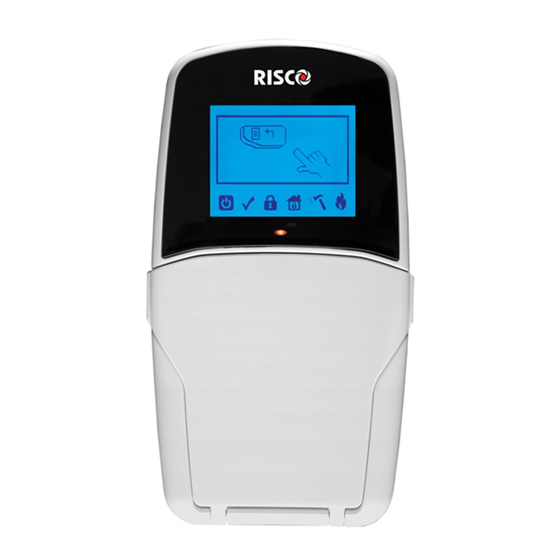
Email messaging (via ADLS/Cable connection) requires the use of the LightSYS IP module. Keypad Indication The LightSYS LCD keypad is the primary system interface and reports its status via its LCD icons, as described below. Keypad LCD Icons System is operating properly from AC power, its backup battery is in good condition and there are no faults in the system. -
Page 10: Lcd Blank Display
No sound (1) Emergency Keypad A momentary bleep No sound No sound Emergency / Medical System is set: System is set: Setting or No Sound 1 chirp 1 chirp Unsetting System is unset: 2 chirps (Keyfob) LightSYS User Manual Page 10... - Page 11 Any intrusion zone, if selected for the chime feature, will, when violated during the unset period, cause the keypad to annunciate the event. The chime can also be disabled when not required. Page 11 LightSYS User Manual...
- Page 12 Mastering Your System LightSYS User Manual Page 12...
-
Page 13: Chapter 2 Setting And Unsetting
As a user of your security system, you'll mostly be concerned with the keypad. The LightSYS LCD keypad is the primary system interface. Each keypad in your system reports its status via its LCD icons, as described below. Through its keys, you can enter commands to set and unset the system, omit intrusion zones, report emergencies, and more, as described in the subsequent chapters of this manual. -
Page 14: Full Setting
If defined by your engineer, it might be required that all faults in the system should be confirmed to enable the setting operation. Your LightSYS supports the following kinds of setting: Full setting Full setting ( prepares all of the system's intrusion detectors to activate an alarm if violated, and is used when leaving the premises. -
Page 15: Partition Setting
Partition setting A key LightSYS advantage is its ability to divide the system into up-to-four partitions. Each partition can be managed as a separate security sub-system, that is, set and unset... -
Page 16: Group Setting
Enter your code, followed by pressing for two seconds the key for the corresponded group you want to set (A The selected group is set. For example, to set group C, enter: [Code] [ for two seconds]. To set another group, repeat the above steps . LightSYS User Manual Page 16... -
Page 17: Setting With Faults In The System
Setting in Blank Display Mode To perform setting while the system is in blank display mode: Release the keypad by pressing [CODE] + Within 2 minutes time press: For full setting For part setting Page 17 LightSYS User Manual... -
Page 18: Unsetting Your System
The unsetting operation will be followed by a local message announcement (if defined). LightSYS unsetting varieties include the following: Full Unsetting If outside the premises, open an "entry" door. The keypad(s) beeps, indicating that the entry delay time period has begun. -
Page 19: Unsetting After An Alarm
In special cases (if programmed by your engineer) setting the system after an alarm might require a engineer code. On the LCD, a Not ready - engineer reset message may appear. For more information, consult with your engineer. Page 19 LightSYS User Manual... -
Page 20: Resetting After An Alarm
Call your alarm receiving center (ARC) or engineer and quote the RANDOM CODE displayed on your keypad. The ARC or engineer will give you a return Anti-Code. Enter this Anti code followed by to reset the system. LightSYS User Manual Page 20... -
Page 21: Duress Unsetting
Using the arrow keys, scroll to the option Activities and press Scroll to Advanced and press Scroll to Switch AUX and press The fire alarm is disabled for a predefined amount of time. Page 21 LightSYS User Manual... -
Page 22: Additional Set/Unset Capabilities
Additional Set/Unset Capabilities Automatic Set/Unset The LightSYS has the ability to define automatic system setting at a predefined time of a day. A Set/Unset program automatically sets and unsets the system during your required time intervals. When defining the automatic setting/unsetting program, you need to define the following parameters: Partition, Setting Mode (Full/Part), Time, and Label. -
Page 23: Remote Set/Unset Using A Phone
Setting and Unsetting Remote Set/Unset Using a Phone If your LightSYS is equipped with the voice module you can perform setting/unsetting operations and operate the system from a remote touch‐tone phone by initiating a telephone call to or from the system and interacting with voice menus that guide you through your required remote operation. -
Page 24: Emergency Alarms
System programming also determines whether these emergency alarms are audible and/or capable of being communicated to the alarm receiving center. LightSYS User Manual Page 24... -
Page 25: Chapter 3 User Functions And Settings
User Codes To perform many of the LightSYS functions, a security code (often called a user code) must be input. LightSYS can support up to 16 different user codes. User codes may have variable lengths of up to six digits. -
Page 26: Authority Levels
This code can be changed by the engineer or the grand master. Notes: Your LightSYS was given a grand master code of 1-2-3-4 during manufacturing. RISCO advises that you modify this code to one that is unique and personalized as herein described, unless your alarm company has already done so. -
Page 27: Setting / Changing User Codes
Select the user index number and press Select Edit Code and press Note: In the LightSYS system, the User Index number range is from 00 to 15. (00=Grand master) Enter the new code followed by If successful, a single confirmation beep is sounded; if not, three quick error beeps are... -
Page 28: User Code Labels
Notes: Users can define or delete their individual proximity tags. The grand master can define or delete any user's tag. Each proximity tag can be assigned to only one user. LightSYS User Manual Page 28... -
Page 29: Adding A New Proximity Tag
Deleting proximity tags can be performed in either of two manners: By user number: Use this option to delete a tag for which the user is known By tag: Use this option to delete a tag for which the user is not known Page 29 LightSYS User Manual... -
Page 30: Setting And Changing System Time And Date
If the system does not recognize the proximity tag, the following message is displayed: TAG NOT DEFINED IN MEMORY. Setting and Changing System Time and Date The correct time and date must be set to ensure proper operation of LightSYS. To set/change the system time: Press... -
Page 31: Setting Follow Me Destinations
Switch from Pulse to Tone (or from Tone to Pulse). Send the DTMF character. Send the DTMF # character [*] Delete numbers from the cursor position simultaneously When done with your complete entry, press to store it. Page 31 LightSYS User Manual... -
Page 32: Omitting Zones
You can access the one-time omit option in a quick way by pressing [Code][ Zones defined for One Time Only omit are automatically un-omitted when the system is set and then subsequently unset. icon turns off when setting in full set mode. LightSYS User Manual Page 32... -
Page 33: Scheduling Weekly Programs
User Functions and Settings Scheduling Weekly Programs The LightSYS enables you to automate some system operations. Each program can be defined with up to two time intervals per day, during which the system automatically performs one of the following functions: ... -
Page 34: Automated Output Operation
Using the arrow keys, scroll to the Scheduler option and press Using the arrow keys, scroll to the Schedule Enable option and press Select the Schedule program index number. Use the key to toggle activate /deactivate and press LightSYS User Manual Page 34... -
Page 35: Macro Keys
LightSYS enables the engineer or grand master to record a series of keystrokes and assign them to a macro. When the macro is pressed, the recorded commands are executed from beginning to end. Up to four macros can be programmed to a system using the LightSYS keypad or the LightSYS Configuration Software. -
Page 36: Activating A Macro
A/B/C/D respectively. Parking Control with LightSYS Gate Control Keyfobs If your system is equipped with wireless receiver it can support up to 200 keyfobs that can be used for controlling two outputs for gate and parking control. These keyfobs are additional to the keyfobs that can be used to control the security applications of the system. -
Page 37: Delete A Keyfob
Using the arrow keys, scroll to the PO Buttons option and press key to toggle to Y and press Use the . This will replace button 3 to button 1 and button 4 to button 2. Page 37 LightSYS User Manual... -
Page 38: Complete List Of User Functions
Outputs √ √ Allows user control of previously designated external devices. Consult with your engineer as to which outputs can be activated. If no outputs are defined, this option will not appear on the list. LightSYS User Manual Page 38... - Page 39 SIM card. For more information consult your engineer. Reset SIM: After charging a prepaid SIM card, the user has to reset the SIM expire time manually. The time period duration for expiration is defined by your engineer. Page 39 LightSYS User Manual...
- Page 40 Should be used when the system has detected a problem, which is evidenced by the rapid flashing of the power icon, as described on page 9. Alarm Memory √ √ √ Displays the five most recent alarm conditions stored by the system. LightSYS User Manual Page 40...
- Page 41 Allows the display of any previously entered service information and the system version √ √ IP Address Use this option to view the IP address of the LightSYS. This option is available only if IP module is defined in the system Codes/Tags √ √...
- Page 42 Full walk test — The test displays the detected zones and type of detection. Quick walk test —The test displays the undetected zones. √ √ Keypad test Momentarily tests the keypad indicators. Sounder test √ Activates the squawk sound in the selected sounder. LightSYS User Manual Page 42...
- Page 43 35. Stand Alone Keyfobs √ √ LightSYS enables the engineer or GM to assign up to 200 keyfobs that can be used for gate control. For addition information refer to page 36. Page 43 LightSYS User Manual...
-
Page 44: Appendix A - System Faults
Appendix A – System Faults The following table lists possible fault conditions, their descriptions, and recommended responses. Fault Description Response Low Battery The capacity of the battery is low or Contact your dealer. missing and needs to be recharged or replaced. -
Page 45: Appendix B - Glossary
(usually via the telephone network) and dispatches the proper authorities. Partition: One of the LightSYS advantages is its ability to divide any system into a number of partitions. You can think of each partition as a separate security system that can be set and unset individually. - Page 46 Programming output (PO): A household appliance. In addition to your system's normal operation, it is possible to place a household appliance or premises lighting under the control of the LightSYS where it can be conveniently turned on and off automatically, or by user command from any system keypad.
-
Page 47: Appendix C - Scheduling Tables
User Access Authorization You can choose any user in the system. Note: Start Time Stop Time 1 Start Time Stop Time 2 1 HH:MM HH:MM 2 HH:MM HH:MM Sunday Monday Tuesday Wednesday Thursday Friday Saturday Page 47 LightSYS User Manual... -
Page 48: Appendix D - Sms Operation
Appendix D – SMS Operation The LightSYS enables you to perform remote control operations using simple SMS commands. The following section describes the SMS commands and the response of the system to these commands. Note: This application is available only if a GSM/GPRS module is installed in your system. -
Page 49: Appendix E - System Testing And Maintenance
Appendix E – System Testing and Maintenance The LightSYS should be tested once a week. In addition, the system should be checked by a qualified engineer at least every 3 years. Your weekly test should include System setting System unsetting ... -
Page 50: Important Notice
Important Notice This guide is delivered subject to the following conditions and restrictions: This guide contains proprietary information belonging to RISCO Group. Such information is supplied solely for the purpose of assisting explicitly and properly authorized users of the system. - Page 51 RISCO Group Limited Warranty RISCO Group and its subsidiaries and affiliates ("Seller") warrants its products to be free from defects in materials and workmanship under normal use for 24 months from the date of production. Because Seller does not install or connect the product and because the product may be used in conjunction with products not manufactured by the Seller, Seller cannot guarantee the performance of the security system which uses this product.
- Page 52 Contacting RISCO Group RISCO Group is committed to customer service and product support. You can contact us through our website www.riscogroup.com or as follows: United Kingdom Brazil Tel: +44-(0)-161-655-5500 Tel: +55-11-3661-8767 E-mail: support-uk@riscogroup.com E-mail: support-br@riscogroup.com Italy China (Shanghai) Tel: +39-02-66590054 Tel: +86-21-52-39-0066 E-mail: support-it@riscogroup.com...
Need help?
Do you have a question about the LightSYS and is the answer not in the manual?
Questions and answers