Table of Contents
Advertisement
Advertisement
Table of Contents

Related Manuals for Magellan ProMark 500


Summary of Contents for Magellan ProMark 500
- Page 1 ProMark ™ Getting Started Guide...
- Page 2 The Magellan U-Link transmitter is protected by a 4-A When ProMark 500 is used with an external power sup- fuse inserted in the data/power cable. This Y-shaped ca- ply or connected to an external device using the USB...
-
Page 3: Table Of Contents
GSM/GPRS Connection ............18 Getting Started With FAST Survey............19 Registering as a FAST Survey User ........19 Creating a New FAST Survey Job...........20 How FAST Survey Interfaces with ProMark 500 Via Bluetooth ..21 RTK Base Configuration ..............23 Prerequisites ...............23 Set Manufacturer & Model ...........23 Check/Change Bluetooth Connection ........23... - Page 4 Set Manufacturer & Model ...........25 Set Bluetooth Connection .............25 Set Receiver Parameters............26 Set RTK Mode ..............26 Load Configuration to the Rover ..........27 RTK Surveying .................. 28 Uploading Stakeout Points to the Field Terminal.....28 Staking Out Points...............28 Logging Points..............31 Downloading RTK Points to GNSS Solutions......32 Logging Raw Data ................
-
Page 5: Introduction
No more cables, no more clip-on modules: ProMark 500 will be the reliable tool you are expecting for all your GNSS survey operations! Scope of this This guide is designed to help you rapidly familiarize yourself with your new equipment. -
Page 6: System Components Overview
Part Number Picture AC/DC Power Supply Kit (includes external AC adapter, battery charger and cable extension for powering 802064 ProMark 500 directly from the AC adapter) USB Device Cable (short). 702103 Makes ProMark 500 a USB host. USB Host Cable (long) 702104 Makes ProMark 500 a USB device. -
Page 7: Communication Modules And Associated Antennas
Field bag 205923 Optional carrying case, rigid, for 206215 base/rover system Communication Modules and Item Part Number Picture Associated Magellan U-Link 110991 Antennas Transmitter Quad-band GSM 111397 antenna PacCrest Trans- TN2PDL35W mitter, high power 802068-10 (410-430 MHz, 12.5 kHz) Radio receiver kit... -
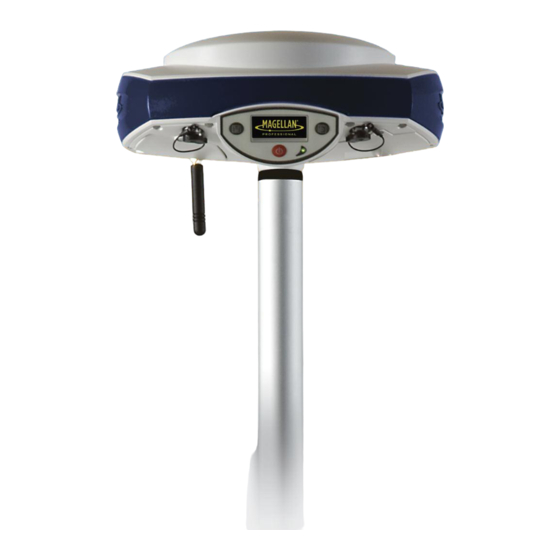
Page 8: Equipment Description & Basic Functions
LED technology (OLED). It is oriented slightly downwards so the screen can easily be read when the ProMark 500 is installed on top of a range pole. Used in conjunction with the Scroll button, the display screen allows you to view different pages of information. -
Page 9: Bottom View
After a few seconds of inactivity (i.e. Scroll button idle), the display will go out. Scroll button Press this button shortly to scroll through the different pages of information viewed on the screen. If an alarm is reported on the display screen, a short press on the Scroll button will acknowledge the alarm. -
Page 10: Battery, Connectors & Module
Radio Antenna A coaxial female connector (TNC type) allowing you to connect a radio whip antenna to the ProMark 500. This connector is available only if the ProMark 500 has been fitted with a radio module. Radio Module A module allowing ProMark 500 to receive and process corrections from a base. - Page 11 USB key or upgrade the ProMark 500 firmware from the files stored on the key. 2. For a USB device allowing ProMark 500 to be seen as a disk from the computer connected to this port. In this configuration, files can be transferred between the ProMark500’s internal memory and the computer.
-
Page 12: Antenna Characteristics
Special Button • With the ProMark 500 OFF, pressing the Power, Log and Scroll buttons simultaneously for a few seconds will Combinations restore all the factory settings. -
Page 13: Display Screens
– AUTO: Autonomous GPS position – FLOAT: Float solution – FIXED: Fixed solution (RTK is operational) – BASE: This ProMark 500 is configured as a base. • Number of satellites used [4]: Number of satellites involved in the position processing, regardless of the... - Page 14 ProMark 500 is operated from an external power source. • Power status [10]. Icon...
-
Page 15: Memory Screens
• [13]: USB status and/or Bluetooth status. Icon Definition USB port connected to active device Bluetooth active These two icons will appear successively when both the USB port and Bluetooth are active. Blank USB port unconnected and Bluetooth inactive. Memory Screens From the General Status screen, press the Scroll button to access the Memory screens. -
Page 16: Receiver Identification Screen
What if there is no USB mass storage device connected to ProMark 500? • Parameters relevant to the USB key size and space used and available are void (three dots displayed instead). • Number of files is forced to “0”. -
Page 17: Charging Batteries Before Use
Charging Batteries Before Use Make sure the battery is fully charged for each ProMark 500 you will be using in the field. Follow the instructions below to charge a battery. Removing the Unless the battery has already been taken out, do the... -
Page 18: Inserting The Battery In The Promark 500
• When the three LEDs are on, this means the battery is fully charged and can be disconnected from the charger. Inserting the • With the ProMark 500 upside down, insert the battery into the compartment making sure the battery has the right Battery in the... -
Page 19: Rtk Base Setup
• To operate the base with a radio, you need an external 9- to 28-V DC power source such as a standard 12-V DC battery (not provided), which means the ProMark 500 internal battery will not be needed in this case. -
Page 20: Magellan Radio Link
Magellan Radio The connection diagram is as follows. Link ProMark 500 Base U-Link Transmitter Power RS (Port A) Cable P/N 730476 Cable P/N 730477 External 12 -V Battery Mount the different items as shown on the picture. -
Page 21: Paccrest Radio Link
PacCrest Radio The connection diagram is as follows. Link ProMark 500 Base Radio Antenna PDL 35-W Transmitter Power RS (Port A) Data/Power Cable Cable P/N 730477 External Battery Mount the different items as shown on the picture. -
Page 22: Rtk Rover Setup
SIM card as shown on the picture. Radio Link Mount the different items as shown on the picture, including the ProMark 500 [1], the radio antenna [2], the range pole [3] and the field terminal with its mounting bracket [4]. GSM/GPRS Connection... -
Page 23: Getting Started With Fast Survey
If you cannot find this option on your Start menu, then open the Control Panel and choose RAM backup. With a Magellan MobileMapper CX, the code is automatically and safely saved at the end of the registration procedure (no extra save operation is required). -
Page 24: Creating A New Fast Survey Job
(or future jobs). Only the parameters that make sense with a GNSS system such as the ProMark 500 are presented below. All other parameters should be kept with their default settings. On the System tab: –... -
Page 25: How Fast Survey Interfaces With Promark 500 Via Bluetooth
Interfaces with Right after you start FAST Survey and create or open your first job, FAST Survey will try to re-activate the Bluetooth ProMark 500 Via connections established during the previous session. Bluetooth Because it’s your first session, the Bluetooth Devices window will open instead, prompting you first to define a Bluetooth connection with the base. - Page 26 • Set Receiver PIN: Do not use this button. In its default configuration, ProMark 500 does not request a PIN code to allow a third equipment to connect to it via Bluetooth. • Delete Receiver: Removes the selected receiver from the list of remote receivers detected by Bluetooth.
-
Page 27: Rtk Base Configuration
Tap Yes. This opens the Current tab of the GPS Base window. • Set the Manufacturer (“Magellan Navigation”) and Model Set Manufacturer (“ProMark 500”) of the equipment used as the base. & Model • Tap on the Comms tab. Since the Bluetooth connection Check/Change... -
Page 28: Set Radio Link & Transmitter
• Tap on the RTK tab and set the radio link according to the Set Radio Link & table below. Transmitter Field Magellan Pacific Crest Device Magellan Radio Pacific Crest Baud (forced to 19200 Bd) “38400 Bd” recommended. Available formats are: Available formats are: RTCM Message RTCM V3.0, RTCM V2.3,... -
Page 29: Rtk Rover Configuration
Tap Yes. This opens the Current tab of the GPS Rover window. • Set the Manufacturer (“Magellan Navigation”) and Model Set Manufacturer (“ProMark 500”) of the equipment used as the rover. & Model • Tap on the Comms tab. Set Bluetooth •... -
Page 30: Set Receiver Parameters
Set Receiver • Measure or read the length of the range pole on top of which the ProMark 500 is mounted. Parameters • On the field terminal, tap on the Receiver tab. • Select the Vertical option for the antenna height measurement. -
Page 31: Load Configuration To The Rover
• If you choose “Pacific Crest”, tap on the Config button next to the Device field to set the radio receiver: Field Setting Protocol “Magellan” recommended Power Management “Automatic” recommended Choose channel used (Channel No. - Fre- Channel quency) Squelch “High”... -
Page 32: Rtk Surveying
RTK Surveying Uploading In your office, do the following: Stakeout Points to • Connect the field terminal to your office computer using the USB data cable. the Field Terminal • Make sure ActiveSync is installed on your computer and is allowed to perform USB connections. - Page 33 select a pre-defined point from the points list (see File>List Points). You can also define graphically the point by tapping on the point on the graphic screen, or define the point according to azimuth, slope and horizontal distance. Name of Provides access to point list.
- Page 34 5. When the distance to the stakeout point is too small to be Yellow helmet gives access to Function clearly seen on this screen, tap on the surveyor’s helmet Menu! in the upper-left corner and select Text from the menu that pops up.
-
Page 35: Logging Points
if you agree. The “Point Stored” message appears 7. Tap briefly. The screen then comes back to the Stake Points screen where you can choose the next point to be staked. 8. After staking out all your points, tap in the upper- right corner of the screen to return to the menu. -
Page 36: Downloading Rtk Points To Gnss Solutions
3. Tap on the “A” button 4. Enter the number of readings you want before FAST Survey is allowed to compute an average position for this point. For example, type in “5” and tap Messages follow successively indicating that the system is taking the five requested readings. -
Page 37: Logging Raw Data
Logging Raw Data Introduction ProMark 500 allows you to log raw data in two different ways: • Standalone: You simply need to use the Log button to start and stop raw data logging. Later, during the post-processing, you will need to manually correct all computed elevations for the antenna height. -
Page 38: Downloading Raw Data
• Connect the USB mass storage device to the ProMark 500 via the short USB Device cable provided (P/N 702103). If raw data files are present in the ProMark 500’s internal... -
Page 39: Deleting Raw Data Files
• To confirm the file transfer, press the Log button. The General status screen will re-appear once the file transfer is complete. • To cancel the file transfer, press the Scroll button. • If you do not press any button within the next 10 seconds, the download procedure will be canceled automatically and the screen will come back to the previous display. - Page 40 Li-ion battery Log button Data link icon Log Raw GPS Data transfer screen Long-range radio link DC power input Delete files Magellan transmitter (connection diagram) Delete Receiver Device cable (USB) Magellan U-link transmitter Direct IP Manufacturer Display screen Memory screens...
- Page 41 Message type Squelch Model (equipment) Stake out Stake points Standalone (raw data logging) Network Status (position) NTRIP Stop&Go Storage medium OLED Store points Over the Air Baud Tag New Site Pac Crest transmitter Tagging PacCrest transmitter (connection diagram) Transmitter settings Tribrach Pages (of information) Tripod...
- Page 42 Magellan follows a policy of continuous product improvement; specifications and descriptions are thus subject to change without notice. Please contact Magellan for the latest product information. © 2008 Magellan Navigation, Inc. All rights reserved. ProMark is a registered trademark of Magellan Navigation, Inc. All other product and brand names are trademarks of their respective holders.
Need help?
Do you have a question about the ProMark 500 and is the answer not in the manual?
Questions and answers