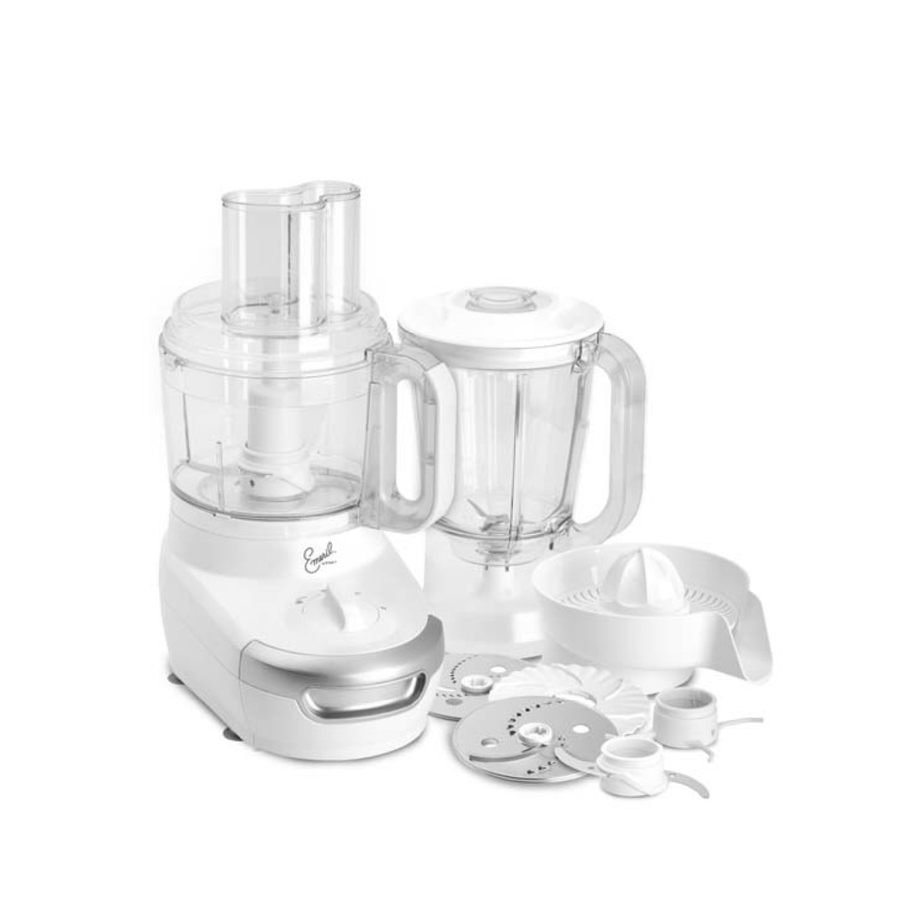
T-Fal Emerilware Instructions For Use Manual
3-in-1 food processor
Hide thumbs
Also See for Emerilware:
- Instructions for use manual (24 pages) ,
- Instructions for use manual (13 pages) ,
- Instructions for use manual (12 pages)
Table of Contents
Advertisement
Advertisement
Table of Contents

Summary of Contents for T-Fal Emerilware
- Page 1 3-in-1 Food Processor Instructions for Use...
-
Page 2: Table Of Contents
TABLE OF CONTENTS Important Safeguards ....... . 3-4 Safety Recommendations ......5 Introduction . -
Page 3: Important Safeguards
T-fal service examination, repair or adjustment. 8. The use of accessory attachments not recommended by T-fal may cause injuries. 9. Do not use outdoors. 10. Do not let cord hang over edge of table or counter. -
Page 4: Important Safeguards
SAVE THESE INSTRUCTIONS CAUTION: This appliance is for household use only. Any servicing other than cleaning and user maintenance should be performed by the nearest authorized T-fal Service Center. Do not immerse base in water. SPECIAL CORD INSTRUCTIONS A. A short power-supply cord has been provided to reduce the risks resulting from becoming entangled in or tripping over a longer cord. -
Page 5: Safety Recommendations
FOR HOUSEHOLD USE ONLY • Do not use the appliance if the power cord or plug is damaged. The power cord must be replaced by an authorized T-fal service center to avoid danger. • Do not use the appliance if the juicer unit is damaged. -
Page 6: Introduction
INTRODUCTION Emeril’s 3-in-1 food processor will revolutionize the way you prep and cook. A major multi-tasker, your new Emerilware™ BAM Machine by T-fal will ® chop, slice, shred, mix, blend, juice, emulsify, make dough - and more! Use it to blaze your way to amazing meals. Stainless steel blades and discs can chop, mix and slice in seconds. -
Page 7: Descriptive Diagram
The 3-in-1 Food Processor Description 1. Pusher with measuring marks 2. Lid with feeder tube 3. Transparent bowl 4. Motor shaft 5. Speed selector: position 0-1-2-Pulse 6. Motor unit 7. Storage drawer for accessories 8. Spindle ACCESSORIES (DEPENDING ON MODEL): 9. -
Page 8: Using Your Food Processor
USING YOUR FOOD PROCESSOR Getting Started • Before using for the first time, wash all accessory parts in hot, soapy water then dry thoroughly. Or place them in the dishwasher. • Set the motor unit on a clean, dry flat surface. •... -
Page 9: Mix/Chop/Knead/Blend
USING YOUR FOOD PROCESSOR Mix/Chop/Knead/Blend ACCESSORIES USED • Bowl unit (parts 1, 2 and 3). • Spindle (8). • Metal blade (9) for chopping and mixing. • Plastic dough hook (10) for kneading or mixing ASSEMBLING THE ACCESSORIES (Fig. 6) 1. -
Page 10: Grate/Slice
USING YOUR FOOD PROCESSOR Grate/Slice ACCESSORIES USED • Bowl unit (parts 1, 2 and 3). • Spindle (8). • Disc as desired (11 or 12) ASSEMBLING THE ACCESSORIES (Fig. 7) 1. Place the bowl (3) on the motor unit (6) without locking it. 2. -
Page 11: Blend/Mix
USING YOUR FOOD PROCESSOR Blend/Mix Very Finely ACCESSORIES USED • Blender Assembly (parts 15, 16 and 17). ASSEMBLING THE ACCESSORIES (Fig. 9) 1. Place the ingredients in the blender jug (17) without exceeding the maximum level indicated on the jug. 2. -
Page 12: Juicing Citrus Fruit
USING YOUR FOOD PROCESSOR Juicing Citrus Fruit ACCESSORIES USED • Citrus Press Unit (parts 18, 19, 20 and 21). ASSEMBLING THE ACCESSORIES (Fig. 10) 1. Slide the citrus press spindle (21) onto the motor shaft (4). 2. Place the juice receptacle (20) on the motor unit (6). 3. -
Page 13: Storing The Accessories
USING YOUR FOOD PROCESSOR Storing the Accessories Your food processor is equipped with: a storage drawer (7) which can hold the metal blade (9), the spindle (8), 2 cutting discs (11 and 12) as well as the emulsifying unit (13). Place them in the order and position shown in Figure 12. -
Page 14: Cleaning & Storage
CLEANING AND STORAGE Cleaning • Unplug the appliance. • For easier cleaning, rinse the accessories immediately after use. • Wash and wipe dry the accessories or place them in the dishwasher. • Pour hot water containing a few drops of dishwashing washing liquid into the blender (17). Close the lid (16) with its measuring cap (15) on. -
Page 15: One-Year Limited Warranty
3) If it is determined that you should return your product for replacement - send the product along with original proof of purchase and a description of the problem to the closest authorized T-fal return facility (see www.T-falusa.com or call 1-800-395-8325) 4) Be sure to include your name, address and home telephone number with your shipment. -
Page 16: Warranty
If the inspection shows that the product is defective, under our Limited Warranty, the return facility will notify T-fal to replace the defective part or product at no cost to you. Comparable substitutions are based on replacement product availability and at the sole discretion of the Manufacturer.


Need help?
Do you have a question about the Emerilware and is the answer not in the manual?
Questions and answers