Table of Contents
Advertisement
Hardware Installation Guide
HotPort
HotPort Series 6000
Indoor and Outdoor Wireless Mesh Nodes
Series 6100 - Indoor Node
Series 6200 - Outdoor Node
Manual Revision 1.06 012909
The contents of this Installation Guide are subject to change without notice.
Please refer to the Firetide partners web site, partners.firetide.com, for current versions.
Advertisement
Table of Contents

Subscribe to Our Youtube Channel
Related Manuals for Firetide HotPort 6100 Series


Summary of Contents for Firetide HotPort 6100 Series
- Page 1 Indoor and Outdoor Wireless Mesh Nodes Series 6100 - Indoor Node Series 6200 - Outdoor Node Manual Revision 1.06 012909 The contents of this Installation Guide are subject to change without notice. Please refer to the Firetide partners web site, partners.firetide.com, for current versions.
- Page 2 Copyright Notice: ©2003-2007 Firetide, Inc. All rights reserved. Trademarks: Firetide, the Firetide logo, Instant Mesh Networks, HotPort, and HotPoint are trademarks of Firetide, Inc. All other trademarks are the prop- erty of their respective owners.
-
Page 3: Table Of Contents
Appendix E - Waterproofing Instructions ................26 Firetide Instant Mesh Networks 3... - Page 4 Caution! Risk of electric shock! POWER LINES CAN BE LETHAL • If a tower or pole begins falling, don’t attempt to catch it. Stand back and let it fall. Do not install the HotPort outdoor mesh node where possible con- tact with power lines can be made.
-
Page 5: Hotport Node Installation
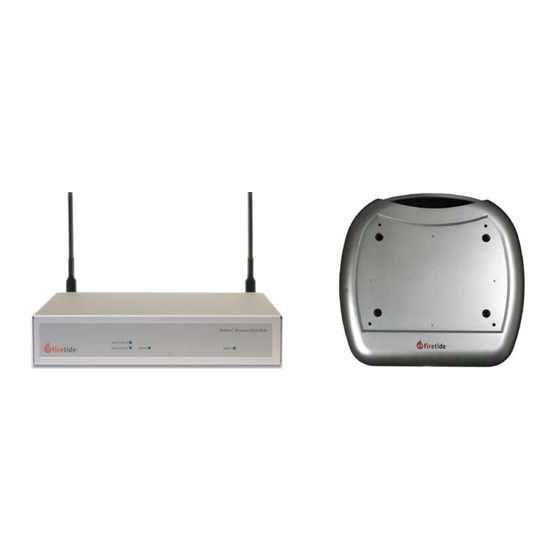
1 is the transmit antenna and antenna two is the (optional) diversity antenna. Package Contents The HotPort node package contains the following items. If you are missing any of these items, contact your Firetide reseller. Figure 1 shows the indoor unit as packed. Figure 2 and Figure 3 show the outdoor unit. - Page 6 Figure 1. Contents of 6102 Kit Quick Install; AC Power Warranty Brick Antennas HotPort Node Figure 2. Contents of 6202 Kit: Left, showing weatherproof Ethernet kit; Right, showing hardware kit E’net Cable N to SMA adapter Antennas Hardware Hardware AC Power Cord Figure 3.
-
Page 7: Planning Your Installation
Hose clamps, band clamps, U-bolts, or similar brackets, to mount your chosen antennas to your chosen antenna mast. Depending on the installation location, you may need ladders, a lift truck, or other means to access the actual installation locations. Firetide Instant Mesh Networks 7 January 2009... - Page 8 Operating Modes Series 6000 nodes can be operated in either of two modes. Firetide’s Auto-Channel Assignment (ACA) mode is also known as linear mode. This mode is recommended for most applications. In Auto-Channel...
- Page 9 50 ohm cable. Contact your local distributor to nas in a coaxial configuration, that is, one below the other. Refer to obtain a 50 ohm cable with the correct connectors. Firetide rec- the previous page for a complete discussion of antenna placement.
-
Page 10: Indoor Node Installation
Indoor Node Installation Indoor node installation is straightforward. Firetide recommends Figure 10. Optional Mounting Bracket that you power up and configure all nodes on a table or bench before HotPort Mesh Node deployment. Use HotView or HotView Pro to configure your mesh. -
Page 11: Outdoor Node Installation
The HotPort node and its antenna must both be grounded. Your CD has a copy of Firetide’s Antenna Guide. Contact your Firetide Reseller for assistance in selecting and ordering outdoor antennas Use weatherproofing kits that include non-vulcanized rubber suitable for your application(s). -
Page 12: Mounting The Universal Bracket
Mounting the Universal Bracket The HotPort enclosure should be mounted securely. You can mount the enclosure to a wall, a light pole, or an irregularly shaped pole. The universal mounting bracket has been designed with multiple holes and slots to allow mounting with bolts, straps, or other methods. Extra nuts and bolts are provided for this purpose;... -
Page 13: Using Mounting Straps
Most outdoor applications use separately-mounted antennas, if so, mount your antennas now. If you are using the temporary staging antennas, the next step is to attach the HotPort node itself. Firetide Instant Mesh Networks 13 January 2009... -
Page 14: Mounting The Node
Mounting the Node Your HotPort node is shipping with its backing plate attached. If it Then tighten the four captive screws on the node assembly. This has been removed for any reason, re-attach it now. Note that the locks the node onto the bracket. Don’t leave these screws loose; if holes in the node are pre-tapped for the supplied metric screws;... -
Page 15: Connecting Cables
(Port 1 cannot.) A Powered Device can receive data and the power to process the data from the HotPort node, which functions as Power Sourcing Equipment (PSE) in this configuration. To receive power from a HotPort node, the device must support the IEEE 802.3af standard, which defines PoE functionality. Firetide Instant Mesh Networks 15 January 2009... -
Page 16: Connecting Ethernet Cables
Connecting Ethernet Cables If you are using your Series 6200 with a companion Firetide HotPoint access point, a special Ethernet cable is available to connect the two units and to supply PoE power to the AP. The cable is shown in Figure 24, and is supplied with your HotPoint AP. -
Page 17: Typical Connections
All are visible in Figure 29, a close-up of a MAC address label is shown in Figure 30. Your CD has a copy of Firetide’s Antenna Guide. Contact your Firetide Reseller for assistance in selecting and ordering outdoor antennas suitable for your application(s). -
Page 18: Adding A Hotpoint Ap To A Hotport Node
Adding a HotPoint AP to a HotPort Node The Series 6200 HotPort nodes have been designed to co-mount Next, re-attach the backing plate to the body of the AP, as shown in with Series 4600 HotPoint outdoor access points (APs). An AP can Figure 33. - Page 19 Figure 35. HotPoint-HotPort Assembly; Vertical and Horizontal Mounts Once you have completed the installation and verified that the system works correctly, you must weatherproof the connections. Directions for this are shown in Appendix E. Firetide Instant Mesh Networks 19 January 2009...
-
Page 20: Appendix A - Contacting Firetide
If you need additional HotPort wireless mesh nodes or accessories, Firetide dealer directly. All authorized Firetide dealers are trained please contact your Firetide dealer directly. If you do not know your dealer’s name, simply email sales@firetide.com and we will send... -
Page 21: Appendix B - Connector Wiring
Pin 1 is neutral; pin 2 is line, and pin 3 is ground. Figure 36. Series 6200 AC Power Connector 3-ground 3-ground 1-neutral 2-line 2-line 1-neutral Series 6200 AC Power Series 6200 AC Power Cable-End View Connector View Firetide Instant Mesh Networks 21 January 2009... -
Page 22: Hotport Outdoor Node Dc Power Connector
Custom Power Cables Firetide offers an accessory DC power cable. The part number is 3200-2401, and this cable can be used to connect other DC sources to your Series 6200 node. One end of the cable has the six-pin connector used by the Series 6200; the other end has a weatherproof 4-pin connec- tor. -
Page 23: Appendix C - Specifications
Dynamic Frequency Selection (DFS) capable in conjunction with 6201 Outdoor, Worldwide, 2.4, 4.9, 5 GHz Firetide Software application 6202 Outdoor, Worldwide, 2.4, 4.9, 5 GHz • Transmit Power Control (TPC) capable in conjunction with Firetide For all models: Software application Bands (GHz) Frequency (GHz) Restrictions 802.11a 5.15-5.25 Mesh Protocol 5.25-5.35... -
Page 24: Series 6200 Outdoor Unit Specifications
• Bracket for pole and wall mounting al and directional antennas available (order separately). See • External power cord Firetide Antenna Guide. • Removable sun shield • One weatherized Ethernet transition cable with watertight RJ- 45 coupling. Additional cable kits may be ordered. -
Page 25: Appendix D - Regulatory Notices
Modifications Any modifications made to this device that are not approved by Firetide, Inc. may void the authority granted to the user by the FCC to operate this equipment. Firetide Instant Mesh Networks 25... -
Page 26: Appendix E - Waterproofing Instructions
Ensure the connector and cables are free of foreign substances such as oil, water, grease, or dirt. Fasten connectors securely together. Use pliers to tighten. Then verify that Firetide node is working, us- ing HotView™ mesh management software. Step 2 Tightly wrap a layer of electrical tape, STICKY SIDE OUT, over the connector from base of unit to one inch over the cable. - Page 27 Waterproofing the Cable to Node Connections Fig. 5a Waterproofing the connection of the cable to the lighning suppres- sor and the lightning suppressor to the Firetide node is essentially the same process as the antenna connector. Step 5 Wrap a layer of electrical tape, STICKY SIDE OUT, around the supres- sor-to-node connection, as shown in Figure 5b and 5c.
- Page 28 Firetide, Inc. 16795 Lark Avenue, Suite 200 Los Gatos, CA 95032...
Need help?
Do you have a question about the HotPort 6100 Series and is the answer not in the manual?
Questions and answers