
Related Manuals for Motorola GMUN1006


Summary of Contents for Motorola GMUN1006
- Page 1 GMUN1006 Telephone Style Handset Telefon-Handhörer Combiné style téléphone Auricular telefónico convencional Cornetta tipo telefono Telefoonhandset...
- Page 3 6866537D03 User Guide/Installation Instructions INSTALLATION Carefully select the installation location for the GMUN1006 Telephone Style Handset. Plan the installation so that the handset’s location is within convenient reach of the user, but will not interfere with the vehicle’s operation. Also, consider seating, leg space, and the operation of other vehicle accessories.
- Page 4 VEHICLES EQUIPPED WITH AIRBAGS VEHICLES EQUIPPED WITH AIRBAGS An airbag inflates with great force. An airbag inflates with great force. DO NOT place objects, including DO NOT place objects, including W A R N I N G communication equipment, in the area communication equipment, in the area C a u t i o n over the airbag or in the airbag...
- Page 5 Mounting the Adjustable Angle Bracket Once an installation location has been decided, refer to Figure 1 and perform the following steps: 1. Verify that the selected mounting surface is strong enough to support the mounting hardware and handset. 2. Use the base of the adjustable angle bracket as a template to center punch and drill four 3.2 mm (0.136”) diameter holes.
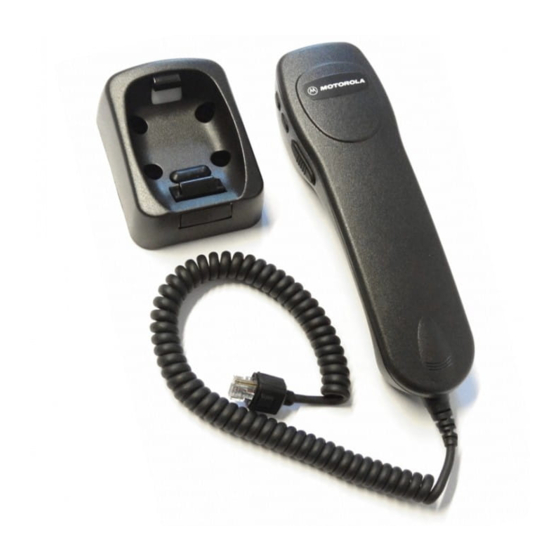
- Page 6 Head. OPERATION PTT Button When the GMUN1006 Telephone Style Handset is installed and connected to the mobile radio, the receive audio is also routed to the earpiece of the handset. Picking the handset from the hang up cup will disconnect the radio speakers and the receive audio will only be heard in the earpiece of the handset.
- Page 7 Each button follows the functionality of button F1 and F2 on the Standard Control Head. The functionality of F1 and F2 must be programmed via the Customer Programming Software (CPS) in the Service Support Centers. PTT Button F1 Button F2 Button Figure 2. Telephone Style Handset GMUN1006...
- Page 8 SERVICE The GMUN1006 telephone style handset is not field repairable. Please order a replacement handset as required.
- Page 9 © 2002 Motorola, Inc. MOTOROLA and the Stylized M Logo are registered in the U.S. Patent and Trademark Office. All other product or service names are the property of their respective owners. MOTOROLA und das stilisierte Motorola Logo sind beim ameri- kanischen Patentamt eingetragen.
Need help?
Do you have a question about the GMUN1006 and is the answer not in the manual?
Questions and answers