Advertisement
- 1 Equipment Approval Information
- 2 Introduction
- 3 Important Safety Instructions
- 4 Features
- 5 Parts Checklist
- 6 Handset Layout
- 7 Connection and Setup
-
8
Programming the Phone
- 8.1 Language
- 8.2 Call Volume
- 8.3 Ringer Volume
- 8.4 Ring Tone
- 8.5 Priority Line
- 8.6 Delay Ring
- 8.7 Phone ID / Handset Name
- 8.8 Intercom Auto Answer
- 8.9 Call Alert Tone
- 8.10 Key Tone
- 8.11 No Unknown/Blocked Caller ID Record Blocker
- 8.12 Display Contrast
- 8.13 Display Backlight
- 8.14 Local Area Code
- 8.15 Regional Area Code
- 8.16 Reset Phone Settings
- 8.17 Restore Default Settings / Factory Reset
- 9 Basic Operation
- 10 Hold
- 11 Transferring and Conferencing
- 12 Intercom Calls
- 13 Caller ID
- 14 Phonebook
-
15
Answering System
- 15.1 Answering System On/Off
- 15.2 Playing Messages
- 15.3 Deleting Messages
- 15.4 Forwarding a Message to Another Extension
- 15.5 Recording a Greeting
- 15.6 Playback of a Greeting
- 15.7 Call Screening
- 15.8 Memo Recording
- 15.9 Accessing the Answering System from Another Location
- 15.10 Remote Access On/Off
- 15.11 Changing the Remote Access Password
- 15.12 Accessing your Messages Remotely
- 15.13 Answer Delay
- 16 Display Messages
-
17
Troubleshooting
- 17.1 No dial tone
- 17.2 Dial tone is ok, but can't dial out
- 17.3 Phone does not ring
- 17.4 You cannot be heard by the other party
- 17.5 You experience static, noise, or fading in and out
- 17.6 Directory dialing doesn't work
- 17.7 No Caller ID
- 17.8 No display
- 17.9 Date/Time setting is restored to default setting
- 17.10 Intercom does not function correctly
- 17.11 Unit locks up and no communication between the base and cordless handset
- 17.12 Out Of Range shows in the handset display
- 17.13 Battery
- 17.14 Causes of poor reception
- 18 General information
- 19 Documents / Resources
Equipment Approval Information
Your telephone equipment is approved for connection to the Public Switched Telephone Network and is in compliance with parts 15 and
68, FCC Rules and Regulations and the Technical Requirements for Telephone Terminal Equipment published by ACTA.
Notification to the Local Telephone Company
On the bottom of the equipment is a label indicating, among other information, the US number and Ringer Equivalence Number (REN) for the equipment. You must, upon request, provide this information to your telephone company.
The REN is useful in determining the number of devices you may connect to your telephone line and still have all of these devices ring when your telephone number is called. In most (but not all) areas, the sum of the RENs of all devices connected to one line should not exceed 5. To be certain of the number of devices you may connect to your line as determined by the REN, you should contact your local telephone company.
A plug and jack used to connect this equipment to the premises wiring and telephone network must comply with the applicable FCC Part 68 rules and requirements adopted by the ACTA. A compliant telephone cord and modular plug is provided with this product. It is designed to be connected to a compatible modular jack that is also compliant. See installation instructions for details.
NOTE
- This equipment may not be used on coin service provided by the telephone company.
- Party lines are subject to state tariffs, and therefore, you may not be able to use your own telephone equipment if you are on a party line. Check with your local telephone company.
- Notice must be given to the telephone company upon permanent disconnection of your telephone from your line.
- If your home has specially wired alarm equipment connected to the telephone line, ensure the installation of this product does not disable your alarm equipment. If you have questions about what will disable alarm equipment, consult your telephone company or a qualified installer.
- US Number is located on the cabinet bottom of the Motorola ML1000 base station that the cordless handset is registered to.
- REN number is located on the cabinet bottom of the Motorola ML1000 base station that the cordless handset is registered to.
Rights of the Telephone Company
Should your equipment cause trouble on your line which may harm the telephone network, the telephone company shall, where practicable, notify you that temporary discontinuance of service may be required. Where prior notice is not practicable and the circumstances warrant such action, the telephone company may temporarily discontinue service immediately. In case of such temporary discontinuance, the telephone company must:
- promptly notify you of such temporary discontinuance;
- afford you the opportunity to correct the situation; and
- inform you of your right to bring a complaint to the Commission pursuant to procedures set forth in Subpart E of Part 68, FCC Rules and Regulations.
The telephone company may make changes in its communications facilities, equipment, operations or procedures where such action is required in the operation of its business and not inconsistent with FCC Rules and Regulations. If these changes are expected to affect the use or performance of your telephone equipment, the telephone company must give you adequate notice, in writing, to allow you to maintain uninterrupted service.
This product meets the applicable Innovation, Science and Economic Development Canada technical specifications. The Ringer Equivalence Number (REN) indicates the maximum number of devices allowed to be connected to a telephone interface. The termination of an interface may consist of any combination of devices subject only to the requirement that the sum of the RENs of all the devices not exceed five.
Interference Information
This device complies with Part 15 of the FCC Rules and the Industry Canada license-exempt RSS standard(s). Operation is subject to the following two conditions:
- This device may not cause harmful interference; and
- This device must accept any interference received, including interference that may cause undesired operation.
Privacy of communications may not be ensured when using this telephone.
This equipment has been tested and found to comply with the limits for a Class B digital device, pursuant to Part 15 of the FCC Rules. These limits are designed to provide reasonable protection against harmful interference in a residential installation.
This equipment generates, uses, and can radiate radio frequency energy and, if not installed and used in accordance with the instructions, may cause harmful interference to radio communications. However, there is no guarantee that interference will not occur in a particular installation.
If this equipment does cause harmful interference to radio or television reception, which can be determined by turning the equipment off and on, the user is encouraged to try to correct the interference by one or more of the following measures:
- Reorient or relocate the receiving antenna (that is, the antenna for radio or television that is "receiving" the interference).
- Reorient or relocate and increase the separation between the telecommunications equipment and receiving antenna.
- Connect the telecommunications equipment into an outlet on a circuit different from that to which the receiving antenna is connected.
- Consult the dealer or an experienced radio/TV technician for help.
If these measures do not eliminate the interference, please consult your dealer or an experienced radio/ television technician for additional suggestions. Also, the Federal Communications Commission has prepared a helpful booklet, "How To Identify and Resolve Radio/TV Interference Problems." This booklet is available from the U.S. Government Printing Office, Washington, D.C. 20402. Please specify stock number 004-000-00345-4 when ordering copies.
Notice: The changes or modifications to this equipment not expressly approved by the party responsible for compliance could void the user's authority to operate the equipment.
Introduction
Your Motorola multi-line / 4-line phone is a fullfeatured phone ideally suited for home or office use. It is designed to receive call on up to four incoming telephone lines and serve up to 9 extensions with the Motorola ML1000 Base Station. The Motorola ML1200 Cordless Handset will expand the Motorola multi-line phone system operating in the DECT 6.0 frequency range.

When installing and using telephone equipment, there are basic safety instructions that should always be followed. Refer to the provided in the section below.

Because cordless phones operate on electricity, you should have at least one phone in your home that isn't cordless, in case the power in your home goes out.
Important Safety Instructions
Some of the following information may not apply to your particular product; however, when using telephone equipment, basic safety precautions should always be followed to reduce the risk of fire, electric shock and injury to persons, including the following:
- Read and understand all instructions.
- Follow all warnings and instructions marked on the product.
- Unplug this product from the wall outlet before cleaning. Do not use liquid cleaners or aerosol cleaners. Use a damp cloth for cleaning.
- Telephones should not be used while you are in a bathtub, shower or pool. Immersion of the telephone or handset in water could cause an electrical shock.
- Slots and openings in the cabinet back or bottom are provided for ventilation, to protect it from overheating. Do not block or cover these openings. Do not block the openings by placing the product on a bed, sofa, rug, or other similar surface. Do not place this product in a built-in installation unless proper ventilation is provided.
- Only operate this product from the type of power source indicated on the marking label. If you are not sure of the type of power supply to your home, consult your dealer or local power company.
- Plug the adaptor into an easily accessible electrical outlet near the equipment.
- Do not allow anything to rest on the power cord. Do not locate this product where the cord will be abused by persons walking on it.
- Do not overload wall outlets and extension cords as this can result in the risk of fire or electric shock.
- Never push objects of any kind into this product through cabinet slots as they may touch dangerous voltage points or short out parts that could result in a risk of fire or electric shock. Never spill liquid of any kind on the product.
- Never spill liquid of any kind on the product.
- To reduce the risk of electric shock, do not disassemble this product. If service or repair work is required, take it to a qualified serviceman. Opening or removing covers may expose you to dangerous voltages or other risks. Incorrect reassembly can cause electric shock when the appliance is subsequently used.
- Do not expose the product to extreme temperatures such as areas near a hot radiator, stove or in a hot car. Do not place product upon other consumer electronic products such as; computer monitors, power amplifiers, etc.
- Do not place lighted candles, cigarettes, cigars, etc., on the telephone.
- Never touch uninsulated telephone wires or terminals unless the telephone line has been disconnected at the network interface.
- Never install or modify telephone wiring during a lightning storm.
- Never install telephone jacks in wet locations unless the jack is specifically designed for wet locations.
- Use caution when installing or modifying telephone lines to prevent electrical shock and/or fire.
- Under the following conditions, unplug this product from the wall outlet and refer servicing to qualified service personnel:
- The power supply cord or plug is damaged or frayed.
- The product has been exposed to rain or water.
- The product does not operate normally by following the operating instructions.
- The product's cabinet has been damaged.
- The product exhibits a distinct change in performance.
- Avoid using a telephone (other than a cordless type) during an electrical storm. There may be a remote risk of electric shock from lightning.
- Do not use the telephone to report a gas leak in the vicinity of the leak.
- Do not place this product on an unstable cart, stand, or table. The product may fall, causing serious damage to the product.
- Only use attachments/accessories specified by the manufacturer.
- Unplug this apparatus during lightning storms or when unused for long periods of time.
Battery Safety Instructions
IF YOUR PRODUCT UTILIZES BATTERIES, THE FOLLOWING ADDITIONAL PRECAUTIONS SHOULD BE OBSERVED:
- Use only the type and size battery(ies) specified in the user manual.
- Do not use this product if the battery door is removed or missing.
- Replace batteries that appear to be swollen or have damaged wiring.
- Do not dispose of the battery(ies) in fire. They may explode. Check with local codes for possible special disposal instructions.
- Do not open or mutilate the battery(ies). Released electrolyte is corrosive and may cause damage to the eyes or skin. It may be toxic if swallowed.
- Exercise care in handling battery(ies) in order not to short out the battery(ies) with conducting materials such as rings, bracelets, and keys. The battery(ies) or conductor may overheat and cause burns.
- Do not attempt to recharge the battery(ies) provided with or identified for use with this product that are not rechargeable. The battery(ies) may leak corrosive electrolyte or explode.
- Do not attempt to rejuvenate the battery(ies) provided with or identified for use with this product by heating them. Sudden release of the battery(ies) electrolyte may occur causing burns or irritation to eyes or skin.
- When replacing battery(ies), all batteries should be replaced at the same time. Mixing fresh and discharged batteries could increase internal cell pressure and rupture the discharged battery(ies).
(Applies to products employing more than one separately replaceable primary battery.) - When inserting battery(ies) into this product, the proper polarity or direction must be observed. Reverse insertion of battery(ies) may result in leakage or explosion.
- When inserting battery(ies) into this product, do not twist or pinch the wires or allow wires to become pinched in battery door.
- If storing over 30 days, remove battery(ies) from this product because the battery(ies) could leak and damage the product.
- Discard "dead" battery(ies) as soon as possible since "dead" batteries are more likely to leak in a product.
- Do not store this product, or the battery(ies) provided with or identified for use with this product, in high-temperature areas. Batteries that are stored in a freezer or refrigerator for the purpose of extending shelf life should be protected from condensation during storage and defrosting. Batteries should be stabilized at room temperature prior to use after cold storage.
- If your product uses rechargeable battery(ies), charge the battery(ies) only in accordance with the instructions and limitation specified in the User Guide.
- Keep batteries out of the reach of children.
Features
- Call Waiting and Caller ID
- 99 Phonebook Memory
- Hold and Call Transfer
- Conference Call and Intercom
- Speakerphone
This telephone has been designed to be simple to use, however you can reach its potential more quickly by taking a few minutes to read this instruction book. This telephone is a multifunction product for use with Call Waiting and Caller ID services available from your local telephone company.
NOTE
Your Caller ID Call Waiting phone allows you to:
- View the name and telephone number of a caller while you are on the phone (Call Waiting Caller ID).
- Identify callers before you answer the phone.
- View the time and date of each incoming call.
- Record up to 99 Caller ID records sequentially in each handset.
- Know who called while you are on the line or when you were away.
- Screen unwanted calls, eliminate harassment from annoying calls, or to get prepared before answering a call.
In order to use all the features of this telephone, you must subscribe to two separate services available from your local telephone company: the standard Name/Number Caller ID Service to know who is calling when the phone rings and Caller ID with Call Waiting Service to know who is calling while you are on the phone.
Parts Checklist
Make sure your package includes the following items:
- Cordless handset
- Charging cradle
- Handset battery cover
- Handset battery pack
- Belt clip
- AC power adaptor
NOTE
Digital Security System
Your cordless phone uses a digital security system to protect against false ringing, unauthorized access, and charges to your phone line.
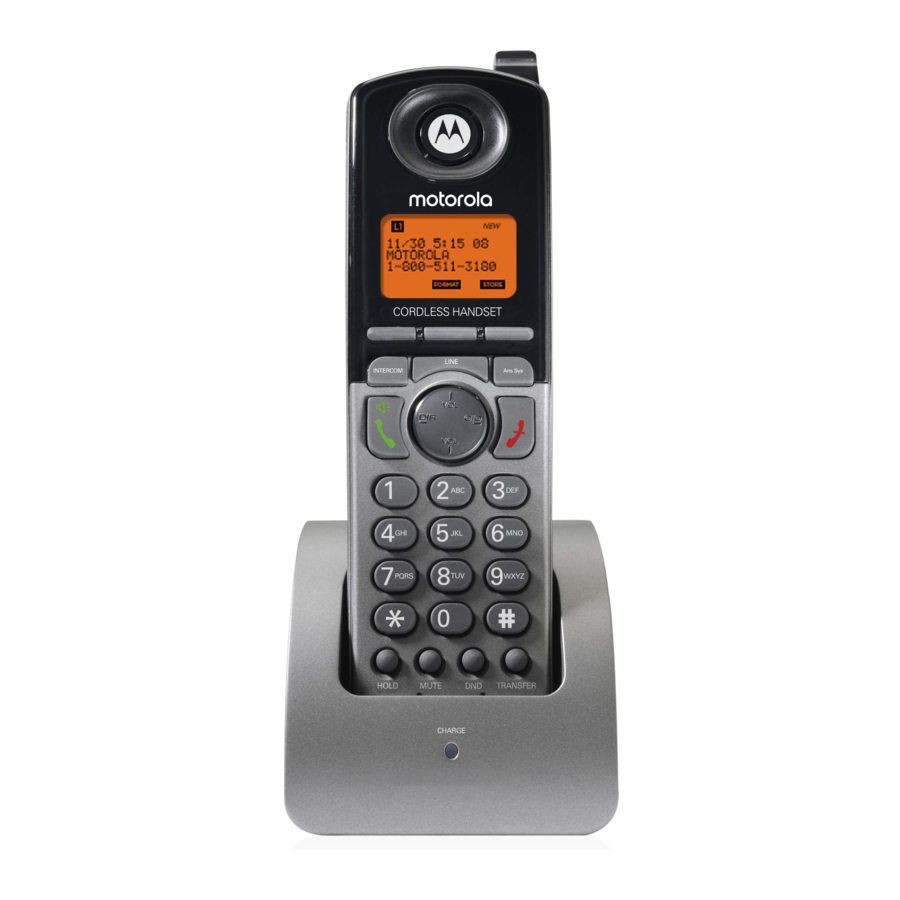
Handset Layout

- Line
- Extension / Intercom
- Talk / Speakerphone
- Navigation Button
- Mute
- Hold
- LED Event Indicator
- 3 Softkeys
- Headset Jack
- Digital Answering System
- End
- Do Not Disturb (DND)
- Transfer
Connection and Setup
Important Installation Information
- Never install telephone wiring during a lightning storm.
- Never install telephone jacks in wet locations unless the jack is specifically designed for wet locations.
- Never touch uninsulated telephone wires or terminals unless the telephone line is disconnected from the network.
- Use caution when installing or modifying telephone lines.
- Temporarily disconnect any other equipment connected to the telephone.
Important Installation Guidelines
- Install telephone near both a telephone jack and an electrical power outlet.
- Avoid sources of noise, such as a window or a busy street, and electrical noise, such as motors, microwave ovens and fluorescent lighting.
- Avoid heat sources, such as heating air ducts, heating appliances, radiators and direct sunlight.
- Avoid areas of excessive moisture or extremely low temperature.
- Avoid dusty locations.
- Avoid other cordless telephones or personal computers.
Always disconnect all phone cords from the base unit before battery installation or replacement.
NOTE
Certain other communications devices may also use the DECT 6.0 frequency for communication, and, if not properly set, these devices may interfere with each other and/or your new telephone. If you are concerned with interference, please refer to the owner's manual for these devices.
Installing the Handset Battery
You must connect the handset battery before use.
- Locate battery and battery door which are packaged together inside a plastic bag and are separate from the handset.
- Locate the battery compartment on the back of the handset.
- Plug the battery pack connector into the jack inside the compartment. To ensure proper battery installation, the connector is keyed and can be inserted only one way.
- Place the battery pack in recessed area of the handset battery compartment. Close the battery compartment by pushing the door up until it snaps into place.
To reduce the risk of fire or personal injury, use only the approved Nickel-metal Hydride (Ni-MH) battery pack (2.4V, 550mAh rechargeable batteries).
Connecting the AC (Electrical) Power
Plug the power adaptor cord into the power jack on the back of the charging cradle and the other end into an electrical outlet. The charge indicator turns on to indicate the battery is charging when the handset is on the cradle.
Allow the phone to charge for 14 hours prior to first use. If you do not properly charge the phone, battery performance is compromised.

For pluggable equipment, the socket-outlet (power adaptor) shall be installed near the equipment and shall be easily accessible.
To reduce risk of personal injury, fire, or damage use only the power adapter supplied. This power adapter is intended to be correctly orientated in a vertical or floor mount position.
Class 2 Power source.
Changing / Charging the Handset Battery
- Make sure handset is OFF (not in TALK mode) before you replace battery.
- Remove the battery compartment door.
- Disconnect the battery pack connector from the jack inside the compartment and remove the battery pack from the handset.
- Insert the new battery pack and plug the battery pack connector to the jack inside the compartment.
- Put the battery compartment door back on.
- Place handset in the charging cradle to charge.
Allow the handset battery to properly charge for 14 hours prior to first use or when you install a new battery pack. If you do not properly charge the phone, battery performance will be compromised.
To reduce the risk of fire or personal injury, use only the approved Nickel-metal Hydride (Ni-MH) battery pack (2.4V, 550mAh rechargeable batteries).
Connecting your System
Once the Motorola ML1000 phone is set up and has dial tone, it is ready to be wirelessly connected to the other Motorola ML1100 phones and Motorola ML1200 handsets that will make up your system.
Once you have unboxed and plugged in your Motorola ML1200 handset, it will be ready to register to the base.
To Register a Motorola ML1200 Cordless Handset to the System
- On your Motorola ML1000 base, press Menu softkey.
- Using the navigation button, move the indicator to Add/Remove Phones. Press Select softkey.
- Select Register Phone option and press Select softkey. This will put the Motorola ML1000 base in registration mode as it searches for another phone to register.
- On your Motorola ML1200 cordless handset, press REG softkey. It will also enter registration mode and search for the base.
- If registration is successful, both phones will beep and display Registration Complete!. If registration is not successful, move the phones closer together and try again.
NOTE
If your Motorola ML1200 does not display the Press "REG" To Initiate Registration message on the display when you plug it in, the Register Phone option is available in the Add/Remove menu.
To remove a Motorola ML1200 from the system
To remove a Motorola ML1200 from the system you must deregister it from the Motorola ML1000 base phone.
- On your Motorola ML1000 base, press Menu softkey.
- Using the navigation button, move the indicator to Add/Remove Phones. Press Select softkey.
- Move the indicator to Deregister Phone and press Select softkey.
- Select from the list the extension you wish to remove and press Select softkey. Confirm by pressing Yes softkey.
NOTE
Removing an extension from the system will leave it unable to make or receive calls until it is re-registered to a Motorola ML1000 base.
Programming the Phone
When programming the phone or changing the settings, if at any time you wish to discontinue programming press Back or Home softkey until you reach the idle screen. The phone will also return to the idle screen if left on any menu screen for several seconds without input.
Language
Set the display language to show messages in either English, Spanish, Portuguese or French.
- Press Menu softkey while in idle mode.
- Using the navigation button, move the indicator to Phone Setting. Press Select softkey.
- Move the indicator to Language and press Select softkey.
- Using the navigation button, move the indicator to your chosen language and press Select softkey.
Call Volume
The ringer, speaker, handset and headset volumes are set independently with the VOL (+ or -) buttons. There are 8 possible volume levels in each mode. The volume indicator is displayed on the screen during volume adjustment. To adjust the volume, press the VOL (+ or -) buttons during an active call while using either the speaker, handset, or headset.
Ringer Volume
To change the volume of the telephone ringer:
- Press Menu softkey while in idle mode.
- Using the navigation button, move the indicator to Line Setting. Press Select softkey.
- Move the indicator to Ring Vol and press Select softkey.
- This menu will allow you to control the ring volume for all lines (and the intercom) separately. Using the navigation button, move the indicator to the phone line whose volume you wish to change. When selected, each line will play a sample of the current ringtone at the selected volume.
- Using the left and right of the navigation button, adjust the volume to your liking. Press Select softkey when you are finished.
NOTE
To mute a ringer, reduce the volume to Off.
Ring Tone
The ringers for all four lines and intercom may be set differently.
- Press Menu softkey while in idle mode.
- Using the navigation button, move the indicator to Line Setting. Press Select softkey.
- Move the indicator to Ringtone and press Select softkey.
- This menu will allow you to control the ring tones on each line and the intercom. Using the navigation button, move the indicator to the phone line you wish to change the tone for. When selected, each line will play sample of the ringtone.
- Using the left and right of the navigation button, select the desired ring tone. Press Select softkey when you are finished.
Priority Line
The priority line has precedence over the other three lines and, if available, will be used automatically when the c button is pressed. If the priority line is in use, the next available line will be selected.
- Press Menu softkey while in idle mode.
- Using the navigation button, move the indicator to Line Setting. Press Select softkey.
- Move the indicator to Priority Line and press Select softkey.
- Using the navigation button, move the indicator to the phone line you wish to set as the priority line and press Select softkey.
Delay Ring
Use this setting to delay this phone's ringer. Other phones on the system will still ring immediately on incoming calls.
- Press Menu softkey while in idle mode.
- Using the navigation button, move the indicator to Phone Setting. Press Select softkey.
- Move the indicator to Delay Ring and press Select softkey.
- Using the up and down of the navigation button, select how many rings this phone will remain silent before ringing during an incoming call.
Phone ID / Handset Name
Phone ID / Handset Name is what you name your phone and how it will appear on the intercom lists of the other phones on the system.
- Press Menu softkey while in idle mode.
- Using the navigation button, move the indicator to Phone Setting. Press Select softkey.
- Select Handset Name option and press Select softkey.
- Using the alphanumeric dial pad, enter a phone name up to 11 characters. More than one letter is stored in each of the number keys. For example, to enter "Lorraine," press the 5 key three times for the letter L, press the 6 key three times for the letter O, press the 7 key three times for the letter R, and so on.
- When finished, press Save softkey to save the name to your phone. If you make a mistake, press Clear softkey to delete the previous character.
Intercom Auto Answer
For hands-free operation, your phone can be set to answer an intercom call by automatically activating the speaker. This feature may also be used for room monitoring.
- Press Menu softkey while in idle mode.
- Using the navigation button, move the indicator to Phone Setting. Press Select softkey.
- Move the indicator to Auto Answer INT and press Select softkey.
- Choose either On or Off and press Select softkey.
Call Alert Tone
Turn on the call alert to hear a tone for incoming calls while you are using the telephone. This setting can be changed for each individual line.
- Press Menu softkey while in idle mode.
- Using the navigation button, move the indicator to Phone Setting. Press Select softkey.
- Move the indicator to 2ND Call Alert and press Select softkey.
- Using the left and right of the navigation button, to indicate which line you want to change. Then, using the up and down of the navigation button choose either On or Off for that line. Repeat for other lines if desired and press Select softkey.
Key Tone
If you wish to hear or silence the tone that plays whenever a key is pressed, follow the steps below.
- Press Menu softkey while in idle mode.
- Using the navigation button, move the indicator to Phone Setting. Press Select softkey.
- Move the indicator to Key Tone and press Select softkey.
- Choose either On or Off and press Select softkey.
No Unknown/Blocked Caller ID Record Blocker
This feature allows you to decide whether caller ID records from unknown or blocked caller ID calls are saved or not. If you choose No, the records will be saved in the call history.
- Press Menu softkey while in idle mode.
- Using the navigation button, move the indicator to Phone Setting. Press Select softkey.
- Move the indicator to No Unk/Blocked and press Select softkey.
- Choose Yes or No and press Select softkey.
Display Contrast
- Press Menu softkey while in idle mode.
- Using the navigation button, move the indicator to Phone Setting. Press Select softkey.
- Move the indicator to Contrast and press Select softkey.
- Using the left and right of the navigation button, adjust the contrast to your liking and press Select softkey.
Display Backlight
- Press Menu softkey while in idle mode.
- Using the navigation button, move the indicator to Phone Setting. Press Select softkey.
- Move the indicator to Backlight and press Select softkey.
- Choose either Always On or Automatic and press Select softkey. When the Backlight is on Automatic mode it will only light up during calls and when the user interacts with the phone. It will automatically turn off after several seconds of inactivity.
Local Area Code
Setting up Home and Local area codes helps the phone determine the number format to display when a valid caller ID record is received. Call records matching any of the set area codes are displayed as 10 digits.
- Press Menu softkey while in idle mode.
- Using the navigation button, move the indicator to Phone Setting. Press Select softkey.
- Move the indicator to Area Code and press Select softkey.
- Using the dial pad, enter the three digits of the area code of the phone number assigned to this phone and press Select softkey to save.
Regional Area Code
If your area has more than one area code in use, you can add more to the Regional Code menu.
- Press Menu softkey while in idle mode.
- Using the navigation button, move the indicator to Phone Setting. Press Select softkey.
- Move the indicator to Regional Code and press Select softkey.
- Using the dial pad, enter the three digits of the area code. If you wish to add more than one area code, use the right and left of the navigation button to select the next regional code. You may add up to six more area codes. When you are finished press Select softkey.
Reset Phone Settings
This feature will reset the phone settings to the original default settings.
- Press Menu softkey while in idle mode.
- Using the navigation button, move the indicator to Phone Setting. Press Select softkey.
- Using the navigation button, move the indicator to Reset Settings. Press Select softkey.
- Move the indicator to Yes and press Select softkey. Confirm the action once more and the phone will reboot with the default settings.
Restore Default Settings / Factory Reset
This feature will reset the phone settings back to the original factory defaults.
- Press Menu softkey while in idle mode.
- Using the navigation button, move the indicator to Factory Reset. Press Select softkey.
- Move the indicator to Yes and press Select softkey. Confirm the action once more and the phone will reboot with the default settings.
NOTE
This will erase records in call history and phone book, all greetings, and all messages in the memories.
Basic Operation
Your phone provides the convenience of accessing four separate telephone lines, each having its own phone number. It can have up to ten telephones or cordless handsets sharing multiple lines. Each station is interconnected to all others by an intercom.
Making Calls with the Handset
- Press c and the phone automatically selects the priority line. If the priority line is in use, it will select the next open line or you may select a line by pressing LINE key.
- Wait for the dial tone, then dial a phone number.
- Press e when finished.
Making Calls with the Speakerphone
- Press c once to open a line, and again to use the speakerphone. If the priority line is in use, it will select the next open line or you may select a line by pressing LINE key.
- Wait for the dial tone, then dial a phone number.
- Press e when finished.
Making Calls with the Optional Headset
- Connect the headset plug into the headset jack on the right side of the handset.
- Adjust the headset so the microphone is approximately 2 to 3 inches away from your mouth.
- Press c and the phone automatically selects the priority line. If the priority line is in use, it will select the next open line or you may select a line by pressing LINE key.
- Wait for the dial tone, then dial a phone number.
- Press e when finished.
NOTE
If the headset is not connected (or if not completely inserted into headset jack), pressing c will enter the receiver talk mode.
Although this device will accept a variety of standard 2.5mm telephone headsets, Motorola does not guarantee compatibility with third party devices. Performance may vary depending on the quality of the headset.
Pre-Dialing
- Before pressing c, enter the telephone number on the cordless handset dial pad. The number will show in the display.
- Press c to take a line and the number will automatically be dialed.
Answering Calls
When receiving an incoming call,
- Press
![]() . If you wish to answer on speakerphone, press
. If you wish to answer on speakerphone, press ![]() twice.
twice. - When finished, press
![]() .
.
 . If you wish to answer on speakerphone, press
  .
.Mute
If you are on an active call and do not wish the other party to hear you, use the Mute feature. You will still, however, be able to hear them.
- Press MUTE to toggle the feature. The screen will display Mute for as long as the feature is active.
- Press MUTE again to unmute the call.
Inserting a Pause in the Dialing Sequence
Press j twice to insert a delay in dialing sequence when a pause is needed to wait for a dial tone (for example, after you dial 9 for an outside line, or to wait for a computer access tone). Each pause counts as one digit in the dialing sequence, and is shown as P in the display.
Do Not Disturb (DND)
This feature will disable your telephone's ringer for a set period of time to prevent incoming calls from interrupting. When an incoming call or intercom call occurs, the status indicators will light up but the phone will not ring.
- Press DND when the phone is in idle mode.
- Using the up and down of the navigation button, choose the duration you wish to remain undisturbed. You may select as short as 15 minutes or as long as 24 hours. After that time expires, the phone will automatically turn off the DND feature.
- Press Select softkey to enable DND for your chosen duration. A DND timer will appear on the top of the display indicating how much time remains before the DND feature is automatically turned off. DND can be cancelled manually at any time by pressing DND again.
Line Privacy
This feature, when enabled, will prevent other phones on the same system from accessing the line used by your active call.
- Press Menu softkey while in idle mode.
- Using the navigation button, move the indicator to Phone Setting. Press Select softkey.
- Move the indicator to Line Privacy and press Select softkey.
- Choose either On or Off and press Select softkey.
Hold
Placing a Call on Hold
When on an active call, press HOLD to put the line in use on hold. The line indicator for the held line will flash red on each phone on the system. The caller will hear either your Music on Hold selection or a reminder beep (set in Motorola ML1000 Base menu), letting them know the call is still connected.
Releasing a Call from Hold
Once a call is placed on hold, it can be released from hold on any phone on the system that has access to that phone line. Press HOLD or LINE and enter the corresponding line number using the dial pad to release that line's call from hold. The call will now be active.
Transferring and Conferencing
Transferring a Call to Another Station
- While on an active call, press TRANSFER.
- A list of the extensions on your system will appear on the display. Using the up and down of the navigation button, choose the destination extension for your call and press Select softkey.
- Selecting an extension will initiate an intercom call to that extension. If you do not wish to attend the transfer, you may hang up now and the call transfer will be completed. For an attended transfer, wait until the other party has answered, then press Conf softkey when you are ready to include all parties. When you hang up, their call will continue.
Conference Calls
- While on an active call, press HOLD to put that call on hold.
- The phone will return to the idle screen. Make another call as usual by dialing the number or make an intercom call.
- When the second call is connected, press Conf softkey. The two active calls will be put into conference with you.
Intercom Calls
Making an Intercom Call
Press INTERCOM and a list of your systems extensions will appear on the display. Using the up and down of the navigation button, indicate the extension you wish to call and press Select softkey. The phone will immediately begin the call.
Answering an Intercom Call
When you receive an intercom call, the display will indicate who the call is from. To answer the call press c.
Caller ID
Press Calls softkey to bring you to the Call History screen. This summary screen shows the current time, date and the phone number and name. Using the up and down of the navigation button, you can scroll through the call history. To redial a record, simply move the indicator to the desired call record and press c.
Viewing a Caller ID Record
Using the up and down of the navigation button, scroll to the desired call record. Press View softkey. This will display the full record of the call, including the full phone number, the date, and the time. If the number in the record is not in the correct 7, 10, or 11 digit format, press Format softkey and the number will be cycled through the 7, 10 and 11 digit formats.
NOTE
Each phone can store up to 99 caller ID records. When the memory is full, a new call record automatically replaces the oldest call in memory.
Storing a Caller ID Record in the Phonebook
- Using the up and down of the navigation button, scroll to the desired call record. Press View softkey. Then press Store softkey.
- You will be prompted to add a name to the phonebook record. Using the alphanumeric dial pad, enter a name up to 16 characters. More than one letter is stored in each of the number keys. For example, to enter "Lorraine," press the 5 key three times for the letter L, press the 6 key three times for the letter O, press the 7 key three times for the letter R, and so on. If you make a mistake, press Clear softkey to delete the previous character. When finished, press Save softkey.
- You will then be asked to confirm the phone number for this record. You can delete characters using Clear softkey and enter numbers using the dial pad. When finished, press Save softkey.
Deleting a Caller ID Record
- Using the up and down of the navigation button, scroll to the desired call record. Press Delete softkey.
- You will be asked to confirm the deletion. Press Yes softkey to permanently delete the record. Press No softkey to cancel.
Deleting All Caller ID Records
- Press and hold Delete softkey for 3 seconds.
- You will be asked to confirm the deletion of all records. Press Yes softkey to permanently delete all caller ID records. Press No softkey to cancel.
Call Waiting Caller ID
This feature allows you to see who is calling when you hear the call waiting beep. The caller identification information appears on the display after you hear the tone. Press Flash softkey to put the current call on hold and answer the incoming call.
To use all the features of this unit, you must subscribe to either the Standard Name/Number Caller ID Service or Caller ID with Call Waiting Service. To know who is calling while you are on the phone, you must subscribe to Caller ID with Call Waiting service.
Phonebook
Dialing a Phonebook Record
Press Ph. Book softkey to bring you to the Phonebook screen. This summary screen shows the name assigned to each phonebook stored in alphabetical order. Using the up and down of the navigation button, you can scroll through the phonebook entries. To dial a record, simply move the indicator to the desired record and press c.
Viewing a Phonebook Record
Using the up and down of the navigation button, scroll to the desired phonebook record. Press View softkey. From here you can also dial the number by pressing c.
Adding a New Phonebook Record
- When no record is stored, press Ph. Book and then New softkey to create a new phonebook record.
Or, if there are records stored, press Ph. Book and then View softkey and New softkey to create a new phonebook record. - You will be prompted to add a name to the phonebook record. Using the alphanumeric dial pad, enter a name up to 16 characters. More than one letter is stored in each of the number keys. For example, to enter "Lorraine," press the 5 key three times for the letter L, press the 6 key three times for the letter O, press the 7 key three times for the letter R, and so on. If you make a mistake, press Clear softkey to delete the previous character. When finished, press Save softkey.
- You will be prompted to enter the phone number of this phonebook record. Using the numbers on the dial pad, enter the phone number. If you make a mistake, press Clear softkey to delete the previous character. When finished, press Save softkey.
Editing a Phonebook Record
- Using the up and down of the navigation button, scroll to the desired call record. Press View softkey, then Edit softkey.
- You will be prompted to confirm or change the name of the phonebook record. Using the alphanumeric dial pad, enter a name up to 16 characters. More than one letter is stored in each of the number keys. For example, to enter "Lorraine," press the 5 key three times for the letter L, press the 6 key three times for the letter O, press the 7 key three times for the letter R, and so on. If you make a mistake, press Clear softkey to delete the previous character. When finished, press Select softkey.
- You will then be asked to confirm or change the phone number for this record. You can delete characters using the Clear softkey and enter numbers using the dial pad. When finished, press Save softkey.
Deleting a Phonebook Record
- Using the up and down of the navigation button, scroll to the desired phonebook record. Press Delete softkey.
- You will be asked to confirm the deletion. Press Yes softkey to permanently delete the record. Press No softkey to cancel.
Answering System
Each extension on the system can have access to a mailbox of it's own on the answering system. The
Answering System can store approximately 200 minutes of messages, memos, and announcements. If there is a new message waiting, the light on the top of the handset will be lit.
Answering System On/Off
- Press Menu softkey while in idle mode.
- Using the navigation button, move the indicator to Ans. System Press Select softkey.
- Select MB On/Off option and press Select softkey.
- Choose either On, Off, or Announce Only if you wish to have a greeting for callers but do not want them to be able to leave a message.
Playing Messages
When you have messages the light on the top of the handset will be lit.
- Press Ans Sys while in idle mode.
- Using the navigation button, move the indicator to Play Messages or Access Gen. MB, Press Select softkey.
- Starting with your newest messages, all messages will be played. Messages are played through the speakerphone by default.
Deleting Messages
To delete the message that is currently playing, press Delete softkey. You will be asked to confirm the deletion by pressing Yes or No softkeys.
To delete all old messages on the answering system, move the indicator to the Delete All Old option and press Select softkey. You will be asked to confirm the deletion by pressing Yes or No softkeys.
Forwarding a Message to Another Extension
- If you wish to forward the current message to another extension, press Fwd softkey during playback.
- Using the up and down of the navigation button, indicate the extension you wish to foward the message and press Select softkey. The message will arrive in their mailbox as a new message.
Recording a Greeting
- Press Menu softkey while in idle mode.
- Using the navigation button, move the indicator to Ans. System. Press Select softkey.
- Choose either MB Greeting or Announce Only greeting. Move the indicator to your choice and press Select softkey.
- Move the indicator to Record Greeting or Record Ann. Only and press Select softkey.
- Record your greeting. Press Save softkey. The greeting will play back for you and automatically save. If you are not satisfied, simply select Record Greeting option again and re-record.
NOTE
The Announce Only option will not allow callers to leave a message after playing.
Playback of a Greeting
- Press Menu softkey while in idle mode.
- Using the navigation button, move the indicator to Ans. System. Press Select softkey.
- Choose either MB Greeting or Announce Only greeting. Move the indicator to your choice and press Select softkey.
- Select Play Greeting or Play Ann. Only option and press Select softkey. Your current greeting will be played.
Call Screening
If you wish incoming messages to be played over the speakerphone, activate the Call Screening feature.
- Press Menu softkey while in idle mode.
- Using the navigation button, move the indicator to Ans. System. Press Select softkey.
- Move the indicator to Call Screening and press Select softkey.
- Choose either On or Off and press Select softkey.
Memo Recording
This feature allows you to record a memo to yourself and store it on the answering system.
- Press Ans Sys while in idle mode.
- Using the navigation button, move the indicator to Record Memo. Press Select softkey.
- Record your memo after the beep. Press Finish softkey when your memo is complete.
NOTE
Your memo will be stored with your other incoming messages in your inbox. To hear it again, play your messages.
Accessing the Answering System from Another Location
You can access many features of this answering system when you are away from your phone. To access your mailbox, you must turn on the remote function and set a three-digit remote password.
NOTE
Your Answering System must be set to On for this feature to function.
Remote Access On/Off
- Press Menu softkey while in idle mode.
- Using the navigation button, move the indicator to Ans. System. Press Select softkey.
- Move the indicator to Remote Password and press Select softkey.
- Choose either On or Off and press Select softkey.
Changing the Remote Access Password
- Press Menu softkey while in idle mode.
- Using the navigation button, move the indicator to Ans. System. Press Select softkey.
- Move the indicator to Remote Password and press Select softkey.
- Move the indicator to Set Passcode and press Select softkey.
- Using the dial pad, enter your three digit passcode, then press Save softkey.
Accessing your Messages Remotely
- From a phone outside of your Motorola multi-line phone system, dial one of the phone numbers your system uses. When the Answering System answers, enter the number of the extension whose messages you wish to check.
- After the Answering System answers and plays your greeting, enter your three digit remote access passcode.
- If the passcode is entered correctly, the Answering System will play your messages. The voice menu will also direct you to the following options:
Press 2 to play messages, press 2 again to stop
Press 3 to skip
Press 1 to review
Press 0 while playing message to erase
Press 4 to turn on and off
Press 6 to play greeting
Press 7 to review menu again - When finished reviewing your messages, hang up.
Answer Delay
This sets the number of rings before the Answering System picks up the call.
- Press Menu softkey while in idle mode.
- Using the navigation button, move the indicator to Ans. System. Press Select softkey.
- Move the indicator to Answer Delay and press Select softkey.
- Choose either 2 Rings up to 7 Rings, or Toll Saver. The default is 2 Rings.
- Press Select softkey to save.
NOTE
Toll Saver can save you the cost of a call when you access your message from another phone.
- If you have new messages, the unit answers after the 3rd ring.
- If you have no new messages, the unit answers after the 5th ring.
- You can hang up after the 3rd or 4th ring and save the pay telephone or long distance charge.
Display Messages
The following indicators show the status of the a message or of the unit.
| Line On Hold | The line you selected is currently on hold. |
| Out Of Range | Handset is out of range of the base. |
| Incomplete Data | Caller ID Information not received properly. |
| Delete All? | Confirm deletion of all Caller ID records. |
| New Call | Call has not been reviewed. |
| No Number | No Caller Number was received. |
| No Name | No Caller Name was received. |
| No Data | No Caller ID information was received. |
| Blocked Call | Caller ID from that number has been blocked. |
| Blocked Name | The caller's name is blocked from Caller ID. |
| Blocked Number | The caller's number is blocked from Caller ID. |
| Unknown Call | The incoming call is from an area not serviced. Caller ID or the information was not sent. |
Troubleshooting
No dial tone
- Check or repeat installation steps.
Make sure the base power cord is connected to a working electrical outlet.
Make sure the telephone line cords are not damaged and are connected to the phone and the wall jack. - Disconnect the base station from the wall jack and connect another phone to the same jack. If there is no dial tone in the second phone, the problem might be your wiring or local service.
- The handset may be out of range of the base. Move closer to the base.
- Make sure the battery is properly charged (for 14 hours).
Dial tone is ok, but can't dial out
- Make sure the base station is set to the correct dial mode.
Phone does not ring
- Make sure the phone is properly registered with the Motorola ML1000 base.
- Make sure the ringer is turned On.
- Make sure the Do Not Disturb feature is not activated.
- The handset may be out of range of the base. Move closer to the base.
- You may have too many extension phones on your line. Try unplugging some phones.
- See solutions for 'No dial tone'.
You cannot be heard by the other party
- Make sure the Mute feature is not turned on.
- Make sure the headset cord is inserted properly and securely.
Incoming voice too low or none at all
- Check call volume setting.
You experience static, noise, or fading in and out
- The handset may be out of range of the base. Move closer to the base.
- Make sure the base station is not plugged into an electrical outlet with another household appliance. If necessary, relocate the base.
- Make sure the battery is properly charged (for 14 hours).
Directory dialing doesn't work
- Did you program the memory location keys correctly?
- Make sure the phone number is formatted properly.
No Caller ID
- You must subscribe to the standard Name/ Number Caller ID service from your local telephone company to receive CID information.
No display
- Make sure the unit is connected to a non-switched electrical outlet. Disconnect the power adaptor from the charging cradle and reconnect it.
- Make sure the battery is properly charged (for 14 hours).
Date/Time setting is restored to default setting
- This maybe caused by power failure. Set Date/ Time at the base station again.
Intercom does not function correctly
- Make sure the phone is properly registered with the Motorola ML1000 base.
- The handset may be out of range of the base.
Move closer to the base.
Unit locks up and no communication between the base and cordless handset
- Unplug the power adaptor from the electrical outlet and the bottom of the base. Remove the handset battery. Wait for 30 seconds and plug the power adaptor back into the base and electrical outlet. Reconnect the battery and charge for 14 hours.
Out Of Range shows in the handset display
- Move the handset closer to the base.
- Make sure the base power cord is connected to a working electrical outlet.
Battery
If you experience any of the following problems, even after recharging the battery, you may need to replace the battery pack:
- Short talk time.
- Poor sound quality.
- Limited range.
Causes of poor reception
- Aluminum siding.
- Foil backing on insulation.
- Heating ducts and other metal construction that can shield radio signals.
- You're too close to appliances such as microwaves, stoves, computers, etc.
- Atmospheric conditions, such as strong storms.
- Base is installed in the basement or lower floor of the house.
- Base is plugged into AC outlet with other electronic devices.
- Baby monitor is using the same frequency.
- Handset battery is low.
- Make sure the hook switch pops up when the handset is lifted.
- You're out of range of the base.
- The 5 AAA batteries in the base station need replacing or are improperly installed or not installed at all.
General information
Cleaning
- Clean the phone with a damp (not wet) cloth, or an anti-static wipe.
- Never use household polish as this will damage the product. Never use a dry cloth as this may cause static shock.
Environmental
- Do not expose to direct sunlight.
- The phone may become warm when the batteries are being charged or during prolonged periods of use. This is normal. However, we recommend that to avoid damage, do not place the product on antique / veneered wood.
- Do not place your product on carpets or other surfaces which generate fibres, or place it in locations preventing the free flow of air over its surfaces.
- Do not submerge any part of your product in water and do not use it in damp or humid conditions, such as bathrooms.
- Do not expose your product to fire, explosives or other hazardous conditions.
- There is a slight chance that your phone could be damaged by an electrical storm. We recommend that you unplug the power cord during an electrical storm.

Documents / ResourcesDownload manual
Here you can download full pdf version of manual, it may contain additional safety instructions, warranty information, FCC rules, etc.
Download Motorola ML1200 - 4-Line Cordless Handset Accessory Manual
Advertisement


Need help?
Do you have a question about the ML1200 and is the answer not in the manual?
Questions and answers