KVH Industries TracPhone V7-HTS Conversion Instructions
Hide thumbs
Also See for TracPhone V7-HTS:
- Replacement instructions (3 pages) ,
- Quick start manual (2 pages) ,
- Installation manual (61 pages)
Advertisement
Quick Links
TracPhone V7
Conversion Instructions
Important! BEFORE you start the conversion process, you MUST do the following:
1. Read the document titled Understanding the Network Configuration Changes. This document, which is
provided in the conversion kit, explains how the V7-HTS ICM (Integrated CommBox Modem) differs from
the V7-IP, particularly its network structure and configurations. Be sure you understand these differences.
You may need to modify the vessel network.
2. Update the current V7-IP system to the latest software version. Follow the instructions in the system's
Help menu or User's Guide. If the antenna does not have V7-IP software version 117.0 or later installed, it
will not be able to communicate properly with the new HTS ICM when you convert the system to V7-HTS.
The following instructions explain how to convert a
®
TracPhone
V7-IP system for V7-HTS operation.
Tools Required
This procedure requires the following tools:
• Phillips screwdrivers
• 7/16" open-end wrench
• 7/16" torque wrench set to 15 and 20 in.-lbs
• 3/32" hex key
• 3/32" torque wrench set to 11 in.-lbs
Refer to the TracPhone V7-HTS Installation Guide
(supplied in the V7-HTS Welcome Kit) for the tools
list and installation steps for the new ICM.
Technical Support
If you need technical assistance, please contact KVH Technical Support:
Europe, Middle East, Africa, Asia-Pacific:
Phone: +45 45 160 180
Email: mvbsupport@kvh.com
KVH, TracPhone, and the unique light-colored dome with dark contrasting baseplate are registered trademarks of KVH Industries, Inc.
All other trademarks are property of their respective companies. The information in this document is subject to change without notice.
No company shall be liable for errors contained herein. © 2017-2019 KVH Industries, Inc., All rights reserved.
to V7
IP
HTS
54-1238 Rev. D| 72-0797, 72-0790, 72-0821
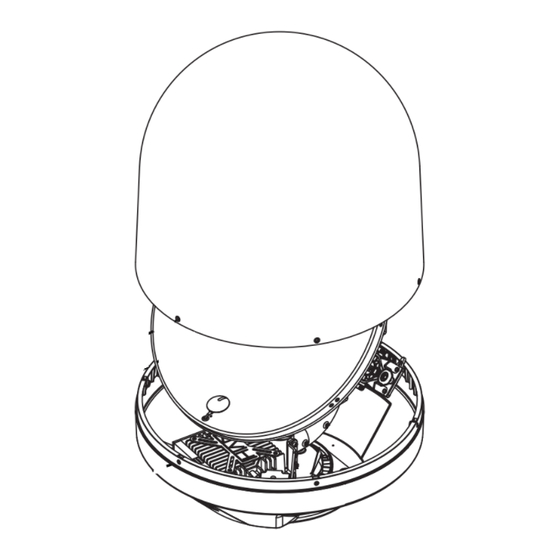
Figure 1: V7-HTS Main Conversion Components
North/South America, Australasia:
Phone: 1 866 701-7103 (U.S. only) or +1 401 851-3806
Email: mvbsupport@kvh.com
1
Advertisement

Related Manuals for KVH Industries TracPhone V7-HTS


Summary of Contents for KVH Industries TracPhone V7-HTS
-
Page 1: Technical Support
Email: mvbsupport@kvh.com KVH, TracPhone, and the unique light-colored dome with dark contrasting baseplate are registered trademarks of KVH Industries, Inc. All other trademarks are property of their respective companies. The information in this document is subject to change without notice. -
Page 2: Step 1 - Update The System Software
Step 1 - Update the System Software Figure 2: Remove the Radome Connect power to the system. Then follow the instructions in the system’s Help menu or User’s Guide to update the system software to the latest version of V7-IP software. Step 2 - Power Off the System and Remove the Radome #10-32 Screw (x6) - Page 3 Step 3 - Replace the LNB There are three possible LNB types installed in the antenna. Identify the LNB by sight, then continue to the relevant page to replace the LNB. Antenna LNB Serial No.* Kit Part No. Go to Legacy LNB-1 150300408 and earlier 72-0797...
- Page 4 Legacy LNB-1 (Kit 72-0797) Figure 3: Legacy LNB RF Cable and Orientation to OMT To convert an antenna with a serial no. earlier than 150300409 to a V7-HTS antenna, follow the steps below. Important! Before removal, note the LNB orientation (the LNB notch, shown in Figure 3 and Figure 4, faces the OMT), and be sure to match this orientation when installing the new LNB.
- Page 5 LNB-1 With Filter (Kit 72-0797) Figure 6: LNB With Filter RF Cable and Orientation to OMT To convert an antenna with a serial no. between 150300409 and 150800889 to a V7-HTS antenna, follow the steps below. Important! Before removal, note the LNB orientation (the LNB notch, shown in Figure 6 and Figure 7, faces the OMT), and be sure to match this orientation when installing the new LNB.
- Page 6 LNB-1 Without Filter (Kit 72-0790) Figure 9: LNB Without Filter RF Cable and Orientation to OMT To convert an antenna with a serial no. between 150800890 and 170100021 to a V7-HTS antenna, follow the steps below. Important! Before removal, note the LNB orientation (the LNB notch, shown in Figure 9, faces the OMT), and be sure to match this orientation when installing the new LNB.
- Page 7 Step 4 - Convert the Feed Tube Figure 12: Old Feed Tube Removal (Kits 72-0790 and 72-0797) Follow the steps below to convert the feed tube. Important! Use extreme care when removing and installing the set screws that secure the feed tube to the skew collar.
- Page 8 3. Be sure to provide a vessel heading input to the new ICM from a NMEA talker, as explained in the TracPhone V7-HTS Installation Guide. The V7- HTS system requires a heading input. A two- position terminal strip connector is supplied in the kit for connecting the NMEA cable.
- Page 9 5. Be sure to perform all other steps in the Figure 19: Jumper Cable and Wi-Fi Antenna Connection installation guide that follow the initial ICM Wi-Fi Antenna (x2) preparation, mounting, and wiring steps, including the following: • Connect the ICM Jumper Cable (see Figure 19).
- Page 10 Step 6 - Configure the LNB Type Figure 21: PuTTY Configuration Screen Follow the steps below to set the LNB type. NOTE: These instructions assume you will be using PuTTY to enter antenna commands. However, you may use a different terminal emulator program, such as HyperTerminal.
-
Page 11: Step 7 - Complete Setup
Step 7 - Complete Setup Figure 22: TracPhone V7-HTS Installation Guide Follow the instructions in the TracPhone V7-HTS Installation Guide to finish converting the system (see Figure 22). Be sure to complete the following installation steps: • Update the Software - Ensure the latest version of V7-HTS software is installed in the system.
Need help?
Do you have a question about the TracPhone V7-HTS and is the answer not in the manual?
Questions and answers