Table of Contents
Advertisement
Available languages
Available languages
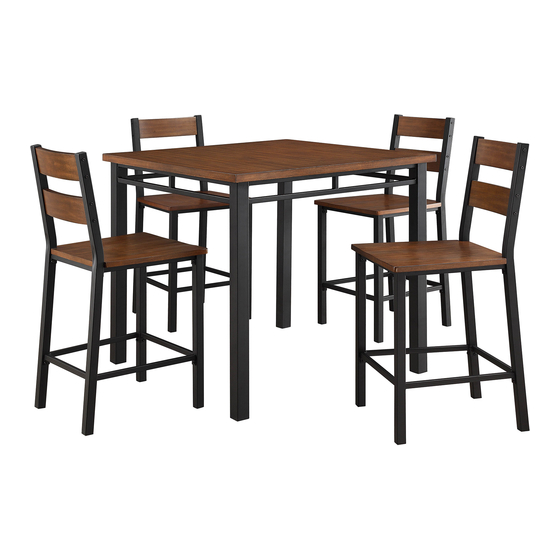
Austen 5pc Counter Height Dining
If you have any questions regarding assembly or if parts are missing, DO NOT return this item to the
store where it was purchased. Please call our customer service number and have your instructions
and parts list ready to provide the model name, part name or factory number:
Pacific Standard Time: 8:30 a.m. - 4:30 p.m., Monday - Friday
Or visit our web site 24 hours a day, 7 days a week for product assistance at
THIS INSTRUCTION BOOKLET CONTAINS IMPORTANT SAFETY INFORMATION.
Stock # BH16-084-499-03
ADULT ASSEMBLY REQUIRED
www.whalenstyle.com
Or e-mail your request to parts@whalenfurniture.com
PLEASE READ AND KEEP FOR FUTURE REFERENCE.
Date 2019-01-10
866-942-5362
Rev. 0001-A
LOT NUMBER:
DATE PURCHASED: /
/
Advertisement
Table of Contents

Related Manuals for Better Homes and Gardens Austen Series


Summary of Contents for Better Homes and Gardens Austen Series
- Page 1 LOT NUMBER: DATE PURCHASED: / Austen 5pc Counter Height Dining Stock # BH16-084-499-03 ADULT ASSEMBLY REQUIRED If you have any questions regarding assembly or if parts are missing, DO NOT return this item to the store where it was purchased. Please call our customer service number and have your instructions and parts list ready to provide the model name, part name or factory number: 866-942-5362 Pacific Standard Time: 8:30 a.m.
- Page 2 M A X I M U M R E C O M M E N D E D W E I G H T L O A D S MANUFACTURER: Whalen Furniture Manufacturing CATALOG: Austen 5pc Counter Height Dining MODEL # BH16-084-499-03 MADE IN MALAYSIA MAXIMUM LOAD 181.4 kg / 400 lb.
- Page 3 Parts and Hardware List Please read completely through the instructions and verify that all listed parts and hardware are present before beginning assembly. A- Table Top (Qty. 1) B- Table Apron (Qty. 4) C- Table Leg (Qty. 4) D- Backrest Left Post (Qty. 4) E- Backrest Right Post (Qty.
- Page 4 Parts and Hardware List Please read completely through the instructions and verify that all listed parts and hardware are present before beginning assembly. (1) 1/4" x 5/8" Bolt (2) 1/4" x 1-3/4" Bolt (Qty. 92+2 extra) (Qty. 32+1 extra) (3) Lock Washer (4) Flat Washer (Qty.
- Page 5 Assembly Instructions for Table Flat Washer 1/4" x 5/8" Bolt Lock Washer (12 used in this step) (12 used in this step) (12 used in this step) ① ③ ④ DO NOT fully tighten the bolts initially until all the bolts are ready to assemble.
- Page 6 Assembly Instructions for Table Flat Washer Lock Washer 1/4" x 5/8" Bolt (16 used in this step) (16 used in this step) (16 used in this step) ③ ① ④ 4. Attach four Legs (C) to the Aprons (B) with sixteen 5/8" Bolts (1) and sixteen Washers (3 and 4). 5.
- Page 7 Assembly Instructions for Chair 1/4" x 1-3/4" Bolt ② (8 used in this step) 6. Combine two Backrest Slats (I) between the Backrest Left and Right Posts (D and E) with eight 1-3/4" Bolts (2).
- Page 8 Assembly Instructions for Chair Flat Washer 1/4" x 5/8" Bolt Lock Washer (8 used in this step) (8 used in this step) (8 used in this step) ① ④ ③ 7. Attach the Seat Frame (F) and Footrest (G) to the assembled backrest with eight 5/8" Bolts (1) and eight Washers (3 and 4).
- Page 9 Assembly Instructions for Chair 1 3 4 Lock Washer 1/4" x 5/8" Bolt Flat Washer (8 used in this step) (8 used in this step) (8 used in this step) ③ ① ④ 8. Proceed to attach the two Chair Front Legs (H) to the Seat Frame (F) and Footrest (G) with eight 5/8" Bolts (1) and eight Washers (3 and 4).
- Page 10 Assembly Instructions for Chair 15 mm Wood Screw (6 used in this step) ⑤ 9. Place one Seat Panel (J) upside down on the carton or other support surface as shown. NOTE: Place a protective cover (like the bubble wrap packing material) over the carton or other support surface to prevent from scratching.
-
Page 11: Care And Maintenance
Care and Maintenance Use a soft, clean cloth that will not scratch the surface when dusting. Use of furniture polish is not necessary. Should you choose to use polish, test first in an inconspicuous area. Using solvents of any kind on your furniture may damage your furniture’s finish. ... - Page 13 LOTE NÚMERO: FECHA DE COMPRA: Comedor Austen de 5piezas altura de barra Serie # BH16-084-499-03 ENSAMBLE REQUERIDO POR ADULTO Si tiene alguna pregunta acerca del ensamble o si alguna parte está faltante, no retorne este producto a la tienda en que lo compró. Por favor llame a nuestro departamento de ayuda al cliente teniendo su instructivo y lista de partes para proveer el modelo, nombre de parte o el número de fábrica: 866-942-5362 Hora Estándar del Pacífico: 8:30 a.m.
- Page 14 P E S O S M Á X I M O S R E C O M E N D A D O S FABRICANTE: Whalen Furniture Manufacturing CATALOGO: Comedor Austen de 5piezas altura de barra MODELO # BH16-084-499-03 HECHO EN MALASIA CARGA MÁXIMA 181.4 kg / 400 lb.
- Page 15 Lista de partes y material de ferretería Por favor lea completamente las instrucciones y verifique que estén todas las partes y ferretería antes de iniciar el ensamblado. A- Superficie de tapa (Cant. 1) B- Delantal de tapa (Cant. 4) C- Pata de mesa (Cant. 4) D- Poste izquierdo (Cant.
- Page 16 Lista de partes y material de ferretería Por favor lea completamente las instrucciones y verifique que estén todas las partes antes de iniciar el ensamblado. (1) Tornillo 1/4" x 5/8" (2) Tornillo 1/4" x 1-3/4" (Cant. 92+2 extra) (Cant. 32+1 extra) (3) Arandela de presión (4) Arandela plana (Cant.
- Page 17 Instrucciones de ensamble para mesa Tornillo 1/4" x 5/8" Arandela de presión Arandela plana (12 usados en este paso) (12 usados en este paso) (12 usados en este paso) ① ③ ④ NO APRETAR completamente los tornillos al comenzar, hasta que todos los tornillos esten listos para el ensamble.
- Page 18 Instrucciones de ensamble para mesa Arandela plana Tornillo 1/4" x 5/8" Arandela de presión (16 usados en este paso) (16 usados en este paso) (16 usados en este paso) ① ③ ④ 4. Adjuntar las cuatro patas de mesa (C) a los delantales de mesa (B) con dieciséis tornillos de 5/8" (1) y dieciséis arandelas (3 y 4).
- Page 19 Instrucciones de ensamble para silla Tornillo 1/4" x 1-3/4" ② (8 usados en este paso) 6. Combinar dos soportes de silla (I) entre los postes izquierdo y derecho (D y E) con ocho tornillos de 1 3/4" (2).
- Page 20 Instrucciones de ensamble para silla Arandela plana Tornillo 1/4" x 5/8" Arandela de presión (8 usados en este paso) (8 usados en este paso) (8 usados en este paso) ① ③ ④ 7. Fije el marco del asiento (F) y el descanso (G) al respaldo ensamblado con ocho tornillos de 5/8" (1) y ocho arandelas (3 y 4).
- Page 21 Instrucciones de ensamble para silla 1 3 4 Arandela plana Tornillo 1/4" x 5/8" Arandela de presión (8 usados en este paso) (8 usados en este paso) (8 usados en este paso) ④ ① ③ 8. Proceder para unir las dos patas frontales de silla (H) al marco del asiento (F) y el descanso (G) con ocho tornillos de 5/8"...
- Page 22 Instrucciones de ensamble para silla Tornillo de 15 mm para madera (6 usados en este paso) ⑤ 9. Colocar un panel de la silla (J) boca abajo en la caja de cartón u otra superficie de soporte tal como se muestra.
- Page 23 Mantenimiento y cuidados Use una toalla suave y limpia para evitar daños y rayaduras. El uso de cera para pulir muebles no es necesario. Si desea usar cera pruebe en un área que no sea visible para revisar su funcionamiento. ...
Need help?
Do you have a question about the Austen Series and is the answer not in the manual?
Questions and answers