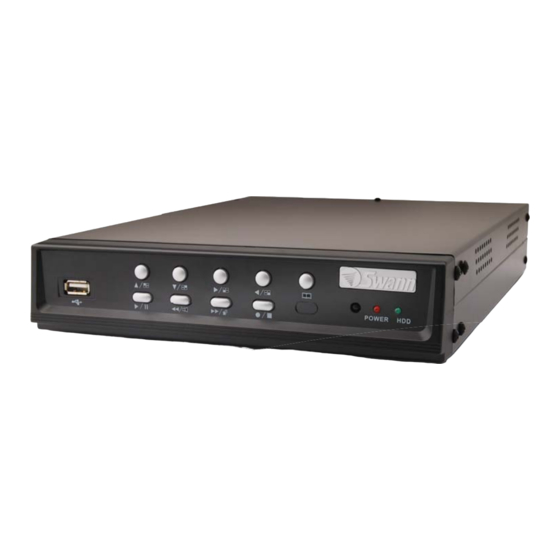
Swann DVR4-1000 DVR4-1000 Operating Instructions Manual
4 channel digital video recorder
Hide thumbs
Also See for DVR4-1000 DVR4-1000:
- User manual (26 pages) ,
- Operating instructions manual (24 pages) ,
- Specifications (2 pages)
Table of Contents
Advertisement
Quick Links
Swann Technical Support
All Countries E-mail: tech@swannsecurity.com
Telephone Helpdesk
USA toll free
1-800-627-2799
(Su, 2pm-10pm US PT)
(M-Th, 6am-10pm US PT)
(F 6am-2pm US PT)
USA Exchange & Repairs
562-777-2551
(M-F, 9am-5pm US PT)
AUSTRALIA toll free
See http://www.worldtimeserver.com for information on time zones and the
current time in Melbourne, Australia compared to your local time.
© Swann Communications 2008
24
24
1300 138 324
(M 9am-5pm AUS ET)
(Tu-F 1am-5pm AUS ET)
(Sa 1am-9am AUS ET)
NEW ZEALAND toll free
0800 479 266
INTERNATIONAL
+61 3 8412 4610
SR242-DU2-10005-040309
Advanced security made easy
DVR4-1000™
4 Channel Digital Video Recorder
Operating Instructions
SW242-DU2 / SW244-DUX / SW244-DUM
www.swannsecurity.com
plug&playsecurity
1
Advertisement
Table of Contents

Summary of Contents for Swann DVR4-1000 DVR4-1000
-
Page 1: Channel Digital Video Recorder
(M-F, 9am-5pm US PT) AUSTRALIA toll free See http://www.worldtimeserver.com for information on time zones and the current time in Melbourne, Australia compared to your local time. © Swann Communications 2008 Advanced security made easy DVR4-1000™ 4 Channel Digital Video Recorder... -
Page 2: Before You Begin
Swann. The end user is responsible for all freight charges incurred to send the product to Swann’s repair centres. -
Page 3: Table Of Contents
Technical Specifications Video/Audio Video Format: NTSC / PAL depending on region Operating System: Embedded RTOS Video Input: BNC x 4 Audio Input: RCA x 1, Line-In Video Output: BNC x 1 Audio Output: RCA x 1, Line-Out Display and Recording Display Frame: NTSC: 120 fps (4 ×... -
Page 4: Package Contents
Solution: Analog wireless cameras suffer from interference. The DVR interprets the change of image as motion and records. Swann recommends the use of wired cameras or digital wireless cameras such as the ADW-300 for DVR recording. -
Page 5: Dvr Layout
Viewing Backup Footage on a PC (cont) Extract footage from a larger video clip When dealing with larger backup fi les it may be necessary to extract smaller clips. The following describes how to extract footage and export to a new .VVF fi le. 1. -
Page 6: Remote Control Layout
Remote Control Layout 1-4. Camera Select Buttons Changes to corresponding camera when pressed 5. Record / Stop Button Start or stop recording 6–7. Up & Down Buttons Moves up / down in menus 8-9. Rewind & Fast Forward Moves left / right in menus 10. -
Page 7: Backup Footage
Backup Footage The DVR4-1000™ has a backup feature via the USB port on the front of the DVR. The DVR accepts fl ash drives or thumbdrives up to 2GB in size. Follow the steps below to backup footage: 1. Insert a USB fl ash drive / thumbdrive (not included) to the USB port. 2. -
Page 8: Connecting The Dvr To A Tv Monitor
To turn on your DVR connect the Power Adapter to the DC 12V input on the back of the unit. To turn the DVR off unplug the DVR from the wall outlet or power point. If the DVR will not be in use for extended periods of time Swann recommends unplugging the unit. Auto-Recovery Feature The DVR4-1000™... -
Page 9: System Menu
USB Flash Drive. Do not remove the Flash Drive while the fi rmware is updating as it may damage the DVR. Only use updates authorized by Swann. When complete, remove the Flash Drive and restart the DVR. -
Page 10: Installing Or Changing A Hard Drive
Installing or Changing a Hard Drive IMPORTANT NOTE: The following instructions are for installing or changing the hard drive. If your DVR4-1000™ already has a hard drive pre-installed disregard these steps. Installing / Changing a Hard Drive in the DVR4-1000™ 1. -
Page 11: Starting The Dvr With A New Hard Drive
Motion Detection Menu The Motion Detection menu allows you to set motion options for each camera. Note: The DVR detects motion based on the level of change in the picture. Channel: Select which camera attributes to change from camera 1-4. Sensitivity: Set the amount of movement necessary before motion detection triggers recording. -
Page 12: Motion Detection Menu
Menu Operation Accessing and Navigating the Menu System The main Setup Menu can be accessed by pressing the Menu Button To navigate the menus press the directional arrow keys To select the highlighted option press To return to the previous menu press Note: The menu cannot be accessed while in playback or backup mode.


Need help?
Do you have a question about the DVR4-1000 DVR4-1000 and is the answer not in the manual?
Questions and answers