Sign In
Upload
Download
Table of Contents
Contents
Add to my manuals
Delete from my manuals
Share
URL of this page:
HTML Link:
Bookmark this page
Add
Manual will be automatically added to "My Manuals"
Print this page
×
Bookmark added
×
Added to my manuals
Manuals
Brands
Fujitsu Manuals
Server
CELVIN NAS QE807
Operating manual
Fujitsu CELVIN NAS QE807 Operating Manual
Hide thumbs
1
2
3
4
Table Of Contents
5
6
7
8
9
10
11
12
13
14
15
16
17
18
19
20
21
22
23
24
25
26
27
28
29
30
31
32
33
34
35
36
37
38
39
40
41
42
43
44
45
46
47
48
49
50
51
52
53
54
55
56
57
58
59
60
61
62
63
64
65
66
67
68
69
70
71
72
73
74
75
76
77
78
79
80
81
82
83
84
85
86
87
88
89
90
91
92
93
94
95
page
of
95
Go
/
95
Contents
Table of Contents
Troubleshooting
Bookmarks
Table of Contents
Table of Contents
Your CELVIN® NAS Server
Notational Conventions
Safety Instructions
CE Marking
FCC Compliance Statement
FCC Class B Compliance Statement
FCC Radiation Exposure Statement
Hardware Overview
Celvin® Nas Qe707
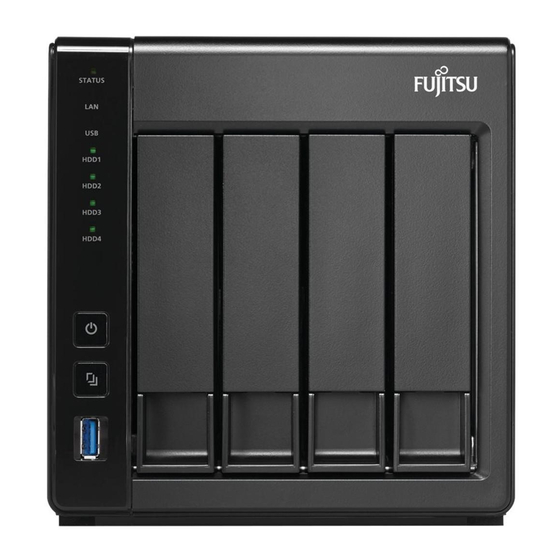
Celvin® Nas Qe807
Installing the NAS
List of Recommended Hard Disks
System Ventilation
System Status Checks
Overview of LED Indicators & System Status
Alarm Buzzer
Configuring the Software Settings
Connecting a Network Drive
Connecting to the NAS
Using the Public Folder (Public Network Share)
Administering the NAS Via a Web Browser under Windows
Administrations Interface
Opening the Main Menu
Open the Control Panel/Applications
Accessing the NAS from Linux
Storage Management
Use Flexible Volume Management
Architecture of the Flexible Volume Management
Creating a New Storage Pool
Expanding Storage Pool Capacity Online
Creating a New Volume
Expanding Volume Capacity Online
Creating a New Block-Based Iscsi-LUN
Unit Number Disk Drive)
Expanding Iscsi-LUN Capacity Online
Copying Data Using the Front USB Port
Web Server
Mysql Administration
Sqlite Administration
FTP Server
Using the Qsync Synchronisation Software
Getting Started
Requirements for the Use of Qsync
Create a User Account on the NAS
Install Qsync Utility
Log on at NAS
Start Using Qsync
Synchronisation
Offline Editing
File Sharing Via Download Links
Share Folder with a Group
Synchronisation Manager
Add Files and View the Synchronisation Result on the NAS
Control Synchronisation Process
Information on Synchronisation and Sharing
Manage or Track Qsync Status Via Web Browser
Netbak Replicator
Installing Netbak Replicator
Using Netbak Replicator
Surveillance Station
Prepare IP Camera
Prepare USB Webcam (Optional)
Set up Surveillance Station
Use Further Cameras
Firmware Update
Updating the System Firmware Using Fujitsu Qfinder
NAS Maintenance
Shutting Down/Rebooting the Server
Resetting the Administrator Password and Network Settings
Failure or Malfunction of a Hard Disk
Power Failure or Abnormal Shut down
Abnormal System Software Behaviour
System Temperature Protection
Configure Eup (Configuration for Compliance with Legal Standby Requirements)
Troubleshooting RAID Operation Errors
Troubleshooting
Replacing Hard Disks During Ongoing Operation
RAID Restore
Technical Data
Gnu General Public License
Terms and Conditions
Advertisement
Quick Links
1
Celvin® Nas Qe707
2
Installing the Nas
3
Connecting to the Nas
Download this manual
System
Operating Manual
CELVIN® NAS
Table of
Contents
Previous
Page
Next
Page
1
2
3
4
5
Advertisement
Table of Contents
Troubleshooting
Troubleshooting RAID operation errors
82
Troubleshooting
83
Need help?
Do you have a question about the CELVIN NAS QE807 and is the answer not in the manual?
Ask a question
Questions and answers
Related Manuals for Fujitsu CELVIN NAS QE807
Server Fujitsu Primergy N800 Manual
Server system (142 pages)
Server Fujitsu CELVIN NAS QE707 Operating Manual
(95 pages)
Server Fujitsu Fujitsu M10-4 Service Manual
(342 pages)
Server Fujitsu Fujitsu M10-1 Service Manual
(230 pages)
Server Fujitsu PRIMERGY TX300 S4 Options Manual
(137 pages)
Server Fujitsu PRIMERGY RX2520 M4 Upgrade And Maintenance Manual
(456 pages)
Server Fujitsu PRIMERGY TX1310 M3 Upgrade And Maintenance Manual
(234 pages)
Server Fujitsu PRIMERGY TX300 S7 Upgrade And Maintenance Manual
(962 pages)
Server Fujitsu PRIMERGY TX1330 M2 Operating Manual
(86 pages)
Server Fujitsu PRIMERGY RX2520 M5 Upgrade And Maintenance Manual
(508 pages)
Server Fujitsu PRIMERGY RX100 S8 Upgrade And Maintenance Manual
(296 pages)
Server Fujitsu PRIMERGY TX2540 M1 Upgrade And Maintenance Manual
(422 pages)
Server Fujitsu PRIMERGY RX300 S3 User Manual
(313 pages)
Server Fujitsu PRIMERGY CX2550 M2 Upgrade And Maintenance Manual
(222 pages)
Server Fujitsu SPARC Enterprise M3000 Installation Manual
(76 pages)
Server Fujitsu Primergy BX2560 M1 Operating Manual
Server blade (68 pages)
This manual is also suitable for:
Celvin nas series
Celvin nas qe707
Table of Contents
Save PDF
Print
Rename the bookmark
Delete bookmark?
Delete from my manuals?
Login
Sign In
OR
Sign in with Facebook
Sign in with Google
Upload manual
Upload from disk
Upload from URL


Need help?
Do you have a question about the CELVIN NAS QE807 and is the answer not in the manual?
Questions and answers