Table of Contents
Advertisement
1
INSTRUCTIONS
Balanced flue
Gas
Models
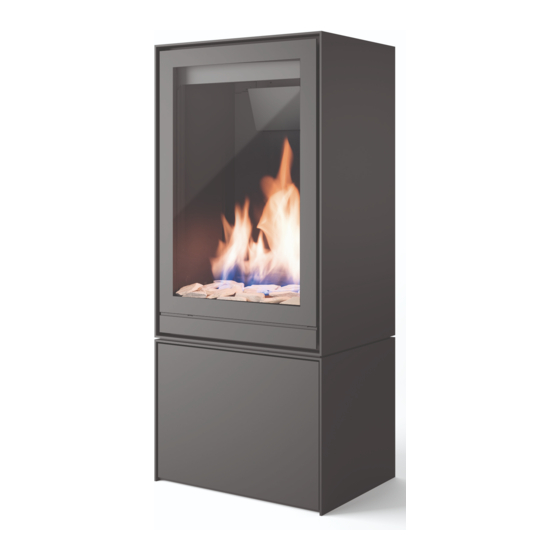
Models
H15 ALSO KNOWN AS S15, S15+ AND C15
H15 ALSO KNOWN AS S15 AND C15
H45 ALSO KNOWN AS S45, S45+ AND C45
H45 ALSO KNOWN AS S45 AND C45
TQH35 ALSO KNOW AS FH35 AND RH35
RH35 ALSO KNOW AS FH35
H25 ALSO KNOWN AS S25, S25+ AND C25
H25 ALSO KNOWN AS S25 AND C25
H35 ALSO KNOWN AS S35, S35+ AND C35
H35 ALSO KNOWN AS S35 AND C35
TQH15
TQH15
Industrias Hergóm S.A.
Soto de la Marina.
Cantabria. España
Advertisement
Table of Contents

Related Manuals for NESTOR MARTIN H15


Summary of Contents for NESTOR MARTIN H15
- Page 1 INSTRUCTIONS Balanced flue Models Models H15 ALSO KNOWN AS S15, S15+ AND C15 H15 ALSO KNOWN AS S15 AND C15 H45 ALSO KNOWN AS S45, S45+ AND C45 H45 ALSO KNOWN AS S45 AND C45 TQH35 ALSO KNOW AS FH35 AND RH35...
-
Page 2: Table Of Contents
Content 1. General Notes 2. User instructions. 2.1 First Time of Operation 2.2 Remote Control Overview 2.3 Batteries 2.4 Replacing the batteries 2.5 Setting the Transmitter code 2.6 To Ignite the appliance 2.7 To Turn the appliance OFF 2.8 Adjusting the Flame setting 2.9 N/A 2.10 Setting °C/24 hour or °F/12 hour clock 2.11 Setting the Time... -
Page 3: General Notes
The appliance is designed to fit numerous installation situations as listed in these installation instructions. However only flue approved by Nestor Martin for this appliance may be used. This appliance is a balanced flue product and is room sealed and as such requires no additional ventilation for operation. -
Page 4: User Instructions
2.2 Remote Control Overview This Nestor Martin Gas Appliance has been constructed with an advanced remote control system. This consists of three main parts; Handset (fig. 1.1), Receiver (fig. 1.2) and Gas Valve with Manual Override (fig. -
Page 5: Batteries
An alternative AC Mains Adaptor may be used to power the Receiver instead of the 4 AA batteries. Only an AC Mains Adapter supplied by Nestor Martin may be used. The Mains Adaptor is plugged into the DC 6V socket on the end of the receiver. -
Page 6: To Turn The Appliance Off
User instructions 2.7 To Turn the appliance OFF Press the OFF button (Button B fig. 1.1) on the Handset. This will extinguish all Burners including Pilot. Note:- Repeated presses of the small flame (Button D fig. 1.1) will turn the main burner OFF, but will leave the Pilot alight. -
Page 7: Installation Instructions
Installation instructions 3. Installation instructions. Before commencing Installation, confirm that the details on the appliance data plate correspond to the local distribution conditions, gas type and pressure to which the appliance is to be installed. Ensure that gas supply and supply pipe is capable of delivering the required volume and pressure of gas and is in accordance with the rules in force. - Page 8 3.3.1 Building the Fireplace A=550 B=600 C=750 D=400 E=100 F=800 Control access door if required 280 min The stove must be located at least 280mm from any combustible materials. A combustible shelf may be fitted over the appliance, if in the case of a 150mm or less deep shelf, there is at least 280mm clearance above the top of the stove.
-
Page 9: Flue Connection
This appliance may only be used with Balanced Flue (otherwise known as Concentric Flue) parts as specified by Nestor Martin. The Nestor Martin specified flue parts have been approved with the appliance. If the appliance is installed on non- Nestor Martin approved parts, Nestor Martin cannot guarantee or accept and responsibility for the proper and safe working of the appliance. - Page 10 When the products of combustion are discharged, they should not cause a nuisance to adjoining or adjacent properties and they should be positioned so that damage cannot occur to other parts of the building. If the outer wall surface is constructed of combustible material, a non-combustible plate should be fitted behind the terminal projecting 25mm beyond the external edges of the terminal.
- Page 11 * I addition, the terminal should not be nearer than 300mm to an opening in the building fabric formed for the purpose of accommodating a built in element such as a window frame. Installation instructions 3.4.6 Horizontal Wall Vent Termination type C Flue sizing: Ø100/150 throughout.
- Page 12 Installation instructions 3.4.7 Vertical Roof Vent Termination C Flue sizing: 35mm flue restrictor, Ø100/150 Spigot on appliance When incorporating and horizontal flue runs, these horizontal runs must be less than 0.5 times the overall flue height. IMPORTANT Every 45° bend equivalent to 25cm of Horizontal Flue and every 90° bend equivalent to 50cm of Horizontal Flue.
-
Page 13: Fuel Bed Arrangements
Installation instructions 3.5 Fuel Bed Arrangements. H15 LPG... - Page 14 Installation instructions H15 NG...
- Page 15 Installation instructions H25 LPG...
- Page 16 Installation instructions H25 NG...
- Page 17 Installation instructions H35 LPG...
- Page 18 Installation instructions H35 NG...
- Page 19 Installation instructions TQH35 LPG...
- Page 20 Installation instructions TQH35 NG...
- Page 21 Installation instructions H45 LPG...
- Page 22 Installation instructions H45 NG...
- Page 23 Installation instructions TQH15 LPG...
- Page 24 Installation instructions TQH15 NG...
-
Page 25: Dimensions
Installation instructions 3.6 Dimensions H15 REAR FLUE H15 TOP FLUE... - Page 26 Installation instructions S25 REAR FLUE S25 TOP FLUE...
- Page 27 Installation instructions S35 REAR FLUE S35 TOP FLUE...
- Page 28 Installation instructions RH35 REAR FLUE RH35 TOP FLUE...
- Page 29 Installation instructions H45 REAR FLUE H45 TOP FLUE...
- Page 30 Installation instructions TQH15 (TOP FLUE ONLY)
- Page 31 Installation instructions TQH35...
-
Page 32: Commissioning The Appliance
Installation instructions 3.7 Commissioning the Appliance 3.7.1 Pilot Ignition Check Ignite the pilot light as described in the User Instructions Check that the pilot flame stays alight Extinguish the pilot light 3.7.2 Main Burner Check Ignite the pilot light as described in the User Instructions Turn on the main burner as described in the User Instructions Check that the pilot smoothly cross-lights to the main burner and that the main burner and pilot stay alight... -
Page 33: Servicing
Turn the appliance OFF and isolate the gas supply. Ensure the appliance is fully cold before attempting to start servicing the appliance. No liability can be accepted by Nestor Martin for injury caused by burning or scolding by a hot appliance. -
Page 34: Spare Parts
Servicing 4.3 Spare parts For spare parts contact Nestor Martin quoting the name and part number of the appliance and the type of spare part you require. -
Page 35: Technical Information
Technical Information Countries of destination // types of gas... -
Page 36: Technical Data
Technical Information 5.2 Technical Data G20/G25 G20/G25 G30/G31 Gas type 2ELL 3B/P(30/50) 3P(37,50) 3P(30) Supply Pressure mbar 20/25 30/50 37/50 30/37 Nominal Heat Input Gross (Hs) Nominal Heat Input Nett (Hi) Consumption m³/hr 0.631 0.631/0.741 0.741 0.741 0.191 0.191 0.248 0.248 Burner Pressure (hot) mbar... - Page 37 Technical Information G20/G25 G20/G25 G30/G31 Gas type 2ELL 3B/P(30/50) 3P(37,50) 3P(30) Supply Pressure mbar 20/25 30/50 37/50 30/37 Nominal Heat Input Gross (Hs) Nominal Heat Input Nett (Hi) Consumption m³/hr 0.878 0.878/1.010 1.010 1.010 0.234 0.234 0.305 0.305 Burner Pressure (hot) mbar 4.9\7.2 28.8...
- Page 38 Technical Information TQH35 G20/G25 G20/G25 G30/G31 Gas type 2ELL 3B/P(30/50) 3P(37,50) 3P(30) Supply Pressure mbar 20/25 30/50 37/50 30/37 Nominal Heat Input 13.5 13.5 13.5 13.5 Gross (Hs) Nominal Heat Input 12.2 12.2 12.2 12.2 Nett (Hi) Consumption m³/hr 1.25 1.250/1.460 1.460 1.460...
Need help?
Do you have a question about the H15 and is the answer not in the manual?
Questions and answers