
Related Manuals for Axis AX-1119


Summary of Contents for Axis AX-1119
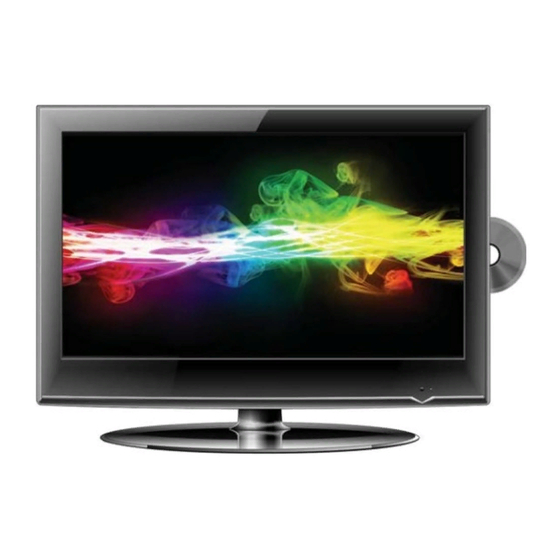
- Page 1 LED TV 47cm / 55cm with Built-in DVD Player Model: AX-1119/AX-1122 “More information https://www.caravansplus.com.au"...
-
Page 2: Table Of Contents
Contents Important safety instructions Usage conditions and restrictions Electrical safety, power cord and plug Position Cleaning and maintenance Accessories Connections and functions Remote control Wall mounting instructions Basic installation First time installation Installing The Batteries Using the Remote Control Selecting an Input Source Operating The Menu Channel Menu Auto Tuning... - Page 3 Contents Music menu Movie menu USB Multimedia Playback Format PVR (Personal Video Recorder) EPG (Electronic Program Guide) DVD Function System setup Audio setup Preferenace page FAQs “More information https://www.caravansplus.com.au"...
-
Page 4: Important Safety Instructions
Important Safety Instructions Read this manual thoroughly before first use and keep it in a safe place for future reference, along with the warranty card, purchase receipt and carton. The safety precautions enclosed herein reduce the risk of fire, electric shock and injury when correctly adhered to. Usage conditions and restrictions To prevent any injuries, the following safety precautions should be observed in the installation, use, servicing and maintenance of equipment. -
Page 5: Electrical Safety, Power Cord And Plug
Important Safety Instructions Electrical safety, power cord and plug Before installing this TV set, make sure your outlet voltage corresponds to the voltage stated on the appliance rating label. To reduce the risk of fire or electric shock, do not expose this appliance to rain or moisture. Do not overload the power cord or power outlet. - Page 6 Important Safety Instructions Do not dismantle this product by yourself, as this may cause damage. There are no user- serviceable parts contained in the TV set. If your TV set has been damaged, contact the after sales support line for advice or take it to a local service centre or for inspection or repair.
-
Page 7: Accessories
Accessories The configuration of the components may look different from the following illustration. Car adaptor “More information https://www.caravansplus.com.au"... -
Page 8: Connections And Functions
Connections and functions Front View 1. Press “STANDBY” button to turn standby 2. Press “SOURCE” to select the input source. 6. Press ” “ button to play/pause the program in DVD mode. 3. Press “MENU” to bring up the main menu 7. -
Page 9: Remote Control
Remote Control Remote Control TV MODE STANDBY: SOURCE: Press to cycle through the input source. PMODE: Select picture mode. SMODE: Select sound mode. AUDIO: SLEEP: Sets the TV sleep time. MUTE: Press to mute the sound. Press again or press V+ to un-mute the TV. - Page 10 Remote Control TELETEXT MODE* NUMBER BUTTONS: Press 0-9 to select a teletext page. TEXT: Press to switch between TV and Teletext mode. P.MODE S.MODE COLOUR BUTTONS: Select 4 preferred teletext pages. HOLD: Freeze the current page. REVEAL: Reveal or hide the hidden words. SIZE: Change the picture size.
- Page 11 Remote Control DTV MODE NUMBER BUTTONS: Press 0-9 to select a teletext page. FAV: Display your favourite channel list. MENU: Brings up the main menu to the screen. DISPLAY: Press to display the source and channel’s information. / / / /OK ENTER: Allows you to move, select and setup the OSD options.
- Page 12 Remote Control DVD MODE : Press to eject the disk NUMBER BUTTONS: Press 0-9 to select a teletext page. DISPLAY: Press to display the DVD information of DVD. D. SETUP: Used for selecting programs. It may also be used to execute commands. / / / /OK ENTER: Allows you to move, select and setup the OSD options.
-
Page 13: Wall Mounting Instructions
Wall Mounting Instructions the stand To attache the stand, place the stand on the neck of the TV, insert and tighten the screws in the circled area. Remove the stand To remove the stand, remove the screws in the circled area and the neck will come off. -
Page 14: Basic Installation
Basic Installation Antenna Connection To ensure good picture and sound, a TV antenna system needs to be connected. The antenna system as shown can be sourced from TV equipment stores, which will provide service for the correct installation and connection. After installation, insert the 75-OHM antenna plug into the antenna jack (RF) as shown. - Page 15 Component (YPbPr) Connection Connect the YPbPr output of the DVD or VCR to the YPbPr input on the set. The picture quality is improved compared to connecting a regular VCR to the AV input. Connect the Audio output of the DVD or VCR to the Audio input jacks on the set using the RCA cable. Match the jack colours: Y is green, Pb is blue, Pr is red, Audio left is white and Audio right is red, Select Component input source using the SOURCE button on the remote control.
- Page 16 HDMI Connection HDMI is a digital connection for sending both Video & Sound signals through the one cable. HDMI supports 1080p Video and Multi-channel Digital Audio. Select HDMI 1 or HDMI 2 input source using the SOURCE button on the remote control MEDIA (USB) Connection Connect portable USB storage device for use with PVR function.
-
Page 17: First Time Installation
First Time Installation When you switch on the TV for the first time, the First Time Installation menu will be displayed on the screen. - Use the buttons to select the country and then use the ENTER button to go to the next page. - Use the buttons to select the language and then use ENTER button to start searching for all the ATV/DTV programs in your area. -
Page 18: Installing The Batteries
Installing the batteries 1. Open the cover at the back of the remote control unit completely. 2. Insert two 1.5V AAA batteries, ensuring the polarities (+ / -) of the batteries are correctly aligned and the batteries are properly pushed into place so they can power the remote control unit. -
Page 19: Selecting An Input Source
Selecting an Input Source You can select an input signal source by pressing the SOURCE button on the your remote control or control panel of your TV. The on screen display menu shows the diagram below on the screen, and you can either press the SOURCE button on the control panel or the arrows buttons on your remote control to choose an input signal source. -
Page 20: Operating The Menu
Operating the Menus 1. Press the MENU button on the remote control, the on-screen menu will appear on the screen. 2. Use the left and right navigation keys to select your main option. The main menu items, from left to right, are: Channel Picture Sound... -
Page 21: Atv Manual Tuning
ATV Manual Tuning Press button to select ATV Manual Tuning, then press OK button. Press button to select channel number you want to store. Press button to select the third option. Press button to select audio system. Press button to select search, then press OK button to start tuning. Press OK button on your remote control to save the settings and menu button to go back to the previous menu. -
Page 22: Dtv Manual Tuning
DTV Manual Tuning Press button to select DTV Manual Tuning, then press OK button. Press button to select channel, then press OK button to search program. Program Edit Press button to select Program Edit, then press OK button to enter sub menu. This option has 5 functions in ATV mode and 3 options in DTV mode. -
Page 23: Operating The Menu (Dtv)
Operating the Menu (DTV) Picture menu Press MENU button to display the main menu. Press button to select PICTURE in the main menu. 1. Press button to select the option that you want to adjust in the PICTURE menu. 2. Press OK button to adjust. MENU button to save and return back to the previous menu. -
Page 24: Sound Menu
Sound menu Press MENU button to display the main menu. Press button to select SOUND in the main menu. SPDIF Mode Auto 1. Press button to select the option that you want to adjust in the SOUND menu. 2. Press button to adjust. -
Page 25: Time Menu
Time menu Press MENU button to display the main menu. Press button to select TIME in the main menu. Time Zone NSW/ACT 1. Press button to select the option that you want to adjust in the TIME menu. 2. Press button to adjust. -
Page 26: Lock Menu
Lock menu Press MENU button to display the main menu. Press button to select LOCK in the main menu. Lock System Press button to select Lock System, then press OK button and enter password to make the following 3 options valid. (Default password is ‘ 0000’) Set Password Press button to select Key Lock, then press OK button to enter sub menu to select... -
Page 27: Setup Menu
Setup menu Press MENU button to display the main menu. Press button to select SETUP in the main menu. 1. Press button to select the option that you want to adjust in the OPTION menu. 2. Press button to adjust. MENU button to save and return back to the previous menu. - Page 28 Blue Screen Press / keys to select Blue Screen, then press OK button to select ON/OFF. Displays a blue screen when there is no signal on the current source mode. First Time Installation Use the / keys to select this option select First Time Installation, then press OK key to set relevant options including OSD language, country and tuning.
-
Page 29: Operating The Menu (Atv)
Operating the Menu (ATV) Channel menu Press MENU button to display the main menu. Press button to select CHANNEL in the main menu. 1. Press button to select the option that you want to adjust in the CHANNEL menu. 2. Press button to adjust. -
Page 30: Component / Hdmi / Av
Component / HDMI / AV menu Component / HDMI / AV menu NOTES: • PICTURE menu and description are the same as that for DTV mode. • SOUND menu and description are the same as that for DTV mode. • LOCK menu and description are the same as that for DTV mode. •... -
Page 31: Media (Multimedia) Menu
Media (Multimedia) Menu NOTE: Before operating Media menu, plug in a USB storage device, then press SOURCE button to set the input source to MEDIA. Press button to select MEDIA in the Source menu, then press OK button to enter. Press button to select the option you want to adjust in the Media menu, then press OK button to enter. -
Page 32: Music Menu
Press media button to display picture. picture will be previewed in the center. Press press res of enter button on your remote control to enter sub menu. Press Music menu Press button to select MUSIC in the main menu, then press OK button to enter. Press MENU button to return back to the previous menu and EXIT menu to quit. -
Page 33: Movie Menu
Press button to select drive disk you want to watch, then press OK button to enter. Press button to select return option to go back to the previous menu. music will be previewed in the center. Press Press button to select menu in the bottom you want to run, then press OK button to operate. -
Page 34: Usb Multimedia Playback Format
USB Multimedia Playback Format “More information https://www.caravansplus.com.au"... -
Page 35: Pvr (Personal Video Recorder)
PVR (Personal Video Recorder) This TV features a PVR recording and playback function which lets you: • Instantly record a TV program (via the one-touch recording button on your remote control), • Time-shift playback of a TV program, and • Set a timer to record future television programs (via the EPG). NOTE: For any type of recording with this television, you must have plugged in a USB storage device into the appropriate USB port. - Page 36 Select Disk Choose the disk for storing the content you want to record. Check PVR File System Select “Check PVR File System” and press OK to check your USB device. USB Disk If no USB device is connected, a notice will advise you accordingly. Format If your USB device is recognised, you can select Format.
- Page 37 Speed After Check PVR File System, it shows the USB available speed and indicates if it will support recording HD or SD signals. Record Start/Stop When in DTV mode you can press the REC button to start (and the button to stop) recording directly.
-
Page 38: Epg (Electronic Program Guide)
EPG (Electronic Program Guide) EPG stands for Digital Electronic Program Guide. It is supplied by the program providers and by pressing the EPG button on the remote control, the menu will appear on the screen, as below: NOTE: no EPG information is displayed after you have brought up the EPG menu, use the left/right buttons to navigate to the channel you wish to display the information from and when it is highlighted, press OK on the remote control to activate it. -
Page 39: Dvd Function
DVD Function System setup page - Press the DVD SETUP key and then press to display the general setup page when in DVD mode. - Press the key to move the highlight to select following option. - Press the OK key to go into the following menu and then press the key to select a menu item. -
Page 40: Audio Setup
Audio Setup Page - Press the DVD SETUP key and then press to display the audio setup page when in DVD mode. - Press the key to move the highlight to select following option. - Press the OK key to go into the following menu and then press the key to select a menu item. -
Page 41: Preferenace Page
Preference Page - Press the DVD SETUP key and then press to display the preference page when in DVD mode. - Press the key to move the highlight to select following option. - Press the OK key to go into the following menu and then press the key to select a menu item. - Page 42 Specifications MODEL AX-1119 Panel System 18.5”LED panel with Built-in DVD Player Display Resolution 1366x768 Television System PAL/NTSC Inputs/Outputs HDMI input 640x480/60Hz 800x600/60Hz 1024x768/60Hz 1366x768/60Hz Audio (AV/PC) R/L 200mVrms (max3.0vp-p) 20K RCA Audio R/L 200mVrms (max3.0vp-p) 20K Video Video 1.0 Vp-p 75 Audio L/R R/L 200mVmrs (max3.0Vp-p) 20K...
-
Page 43: Faqs
FAQs Problem Solution No picture, no sound 1. Check if the house fuse or circuit breaker is working by checking that all the fuse inside your main fuse box are ON or test the wall outlet is working by trying with another electrical product e.g. - Page 44 FAQs Problem Solution Pixelation If the antenna is located in the fringe area of a television signal where the signal is weak, the picture may be marred by dots. When the signal is extremely weak, you may need to install a special antenna to improve the reception.
- Page 45 WARRANTY Congratulations on your purchase of a quality Mobile Video System! You’re joining thousands of satisfied customers who enjoy & experience the benefits of the products we distribute. In the unlikely event that some technical difficulty arises with your purchase, be assured that we are most anxious to see that the problem is quickly rectified to your satisfaction.
Need help?
Do you have a question about the AX-1119 and is the answer not in the manual?
Questions and answers