Advertisement
Available languages
Available languages
Quick Links
Fax +32 2 359 95 50
Gyros-, Döner- und Hähnchengrill / Senkrechtgrill
Griglia per girarrosto/kebab / Griglia Verticale
I/B Version
170110
Copies of the I/B. Please reproduce them without any
changes except under special instruction from Team
International BELGIUM. The pages must be reproduced
and folded in order to obtain a booklet A5 (+/- 148.5 mm
width x 210 mm height). When folding, make sure you
keep the good numbering when you turn the pages of
the I/B. Don't change the page numbering. Keep the
language integrity.
Rotisserie / Vertical Grill
Rôtisserie / Grill Vertical
Gyrosgrill / Verticale Grill
Rostisserie / Parrilla Vertical
Grill pionowy / Rożen / Kebab-grill
Front cover page (first page)
Assembly page 1/57
TKG DGR 1000
230V~ 50Hz 1500W
Advertisement

Related Manuals for Team Kalorik TKG DGR 1000


Summary of Contents for Team Kalorik TKG DGR 1000
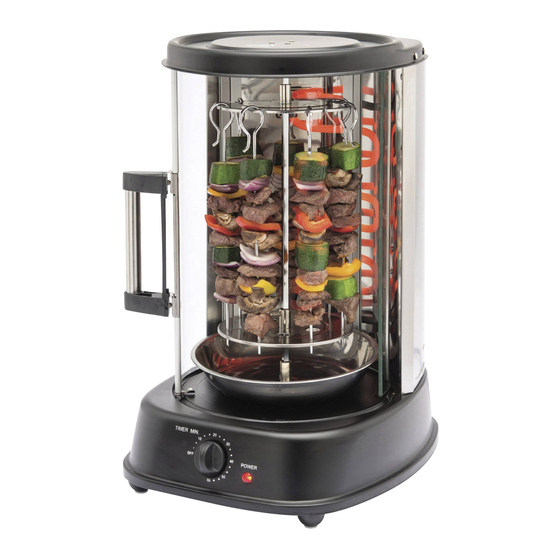
- Page 1 Rotisserie / Vertical Grill Rôtisserie / Grill Vertical Gyrosgrill / Verticale Grill Rostisserie / Parrilla Vertical Griglia per girarrosto/kebab / Griglia Verticale Grill pionowy / Rożen / Kebab-grill TKG DGR 1000 I/B Version 230V~ 50Hz 1500W 170110 Front cover page (first page)
- Page 2 10. Brochettes pour kebab (7 pièces) 10. Spiesjes (7 stuks) 11. Support supérieur pour kebab 11. Bovenste steunplaatje 12. Support inférieur pour kebab 12. Onderste steunplaatje 13. Plateau collecteur de graisse 13. Vetopvangschaal TKG DGR 1000 - 170110 Assembly page 2/57...
- Page 3 Pojemnik na skropliny Alloggiamento superiore Base Resistenza Maniglia dello sportello Porta in vetro Timer Spia luminosa Spiedo Fine forca Spiedini Kebab (7 pezzi) Supporto superiore (per kebab) Supporto inferiore (per kebab) Raccoglitore di grasso TKG DGR 1000 - 170110 Assembly page 3/57...
-
Page 4: Wichtige Sicherheitsvorschriften
Steckdose hängt oder wenn es abkühlt. Kontrollieren Sie, ob die Netzspannung mit der auf dem Gerät vermerkten Spannung übereinstimmt, bevor Sie das Gerät benutzen. Lassen Sie Ihr Gerät niemals beim Gebrauch unbeaufsichtigt. TKG DGR 1000 - 170110 Assembly page 4/57... - Page 5 Gerät könnte dadurch beschädigt werden. Ziehen Sie niemals an der Anschlussleitung, um das Gerät zu bewegen. Achten Sie darauf, dass die Anschlussleitung nicht zufälligerweise irgendwo hängen bleibt und dies zum Fall des TKG DGR 1000 - 170110 Assembly page 5/57...
- Page 6 Gerät, um Risikos auszuschließen. Legen Sie auch kein Papier, Karton oder Plastik in das Gerät. Sie sollten das Gerät sauber halten, da es fast in direktem Kontakt mit Nahrungsmitteln ist. TKG DGR 1000 - 170110 Assembly page 6/57...
- Page 7 Ziehen Sie sofort den Stecker, wenn Sie irgendeine Beschädigung der Tür bemerken, und wenden Sie sich an einen Fachmann (*). Ihr Gerät darf niemals über eine externe Zeitschaltuhr oder irgendein anderes, separates Fernbedienungssystem eingeschaltet werden. TKG DGR 1000 - 170110 Assembly page 7/57...
- Page 8 Die Spannung der Verlängerungsschnur sollte mindestens 16 Ampere sein. Eine • Verlängerungsschnur von weniger als 16 Ampere könnte überheizen und beschädigt werden. • Um Unfälle zu vermeiden, darauf achten, dass die Anschlussleitung nicht herunterhängt und Sie darüber stolpern. TKG DGR 1000 - 170110 Assembly page 8/57...
- Page 9 Sie die Schraube fest. • Führen Sie das spitze Ende mittig durch die zu bratenden Lebensmittel. • Schieben Sie die andere Endgabel so auf den Drehspieß, dass die Zinken zum Grillgut zeigen. TKG DGR 1000 - 170110 Assembly page 9/57...
- Page 10 Bauen Sie den Kebabhalter wie auf den Bildern zu sehen zusammen: • Stellen Sie die runde Tropfschale zum Auffangen der Tropfen unten in das Gerät. • Stecken Sie das feste Ende des Drehspießes in die Antriebsöffnung in der Mitte der Tropfschale. TKG DGR 1000 - 170110 Assembly page 10/57...
- Page 11 • Reinigen Sie die Glastür mit einem Tuch oder Schwamm befeuchtet mit warmem Seifenwasser und trocknen diese anschließend gründlich ab. Reinigung außen • Zur äußeren Reinigung des Gerätes ein feuchtes Tuch benutzen. TKG DGR 1000 - 170110 Assembly page 11/57...
- Page 12 ErP Deklaration – VO 1275/2008/EG Wir, die Team Kalorik GmbH bestätigen hiermit, dass unser Produkt den Anforderungen der VO 1275/2008/EG entspricht. Unser Produkt verfügt über keinen Bereitschaftszustand, da das Gerät direkt nach Beendigung des Vorganges komplett abschaltet und somit keine Energie verbraucht! Die Bedienungsanleitung ist auf einfache Nachfrage auch verfügbar in elektronischem Format...
-
Page 13: Important Safeguards
Never use the appliance if cord or appliance shows any signs of damage. In that case, repairs should be made by a competent qualified electrician(*). Should the cord be damaged, it must be replaced by a competent TKG DGR 1000 - 170110 Assembly page 13/57... - Page 14 - leave at least 10 cm of free space on each side and above the appliance. As a general rule, make sure there is enough ventilation in the room around this appliance TKG DGR 1000 - 170110 Assembly page 14/57...
- Page 15 Also make sure not to cover the appliance and do not put anything on top of it. Make sure nothing comes into contact with the heating element of the appliance. TKG DGR 1000 - 170110 Assembly page 15/57...
- Page 16 (*) Competent qualified electrician: after-sales department of the producer or importer or any person who is qualified, approved and competent to TKG DGR 1000 - 170110 Assembly page 16/57...
- Page 17 Put the timer knob on the desired cooking time. The pilot light will illuminate to show that the appliance is heating. You'll hear a signal when the cooking time has elapsed. The appliance will switch off automatically and the pilot light will go out. TKG DGR 1000 - 170110 Assembly page 17/57...
- Page 18 • Using a pot holder, loosen the screws on the rotisserie forks and remove the rotisserie spit from the roast. Carefully remove the rotisserie forks and carve the roast. TKG DGR 1000 - 170110 Assembly page 18/57...
- Page 19 Rinse with clear water and dry thoroughly before putting them back in place. These parts can also be washed in the dishwasher except for the screws of the forks which have to be washed by hand. TKG DGR 1000 - 170110 Assembly page 19/57...
- Page 20 ErP Declaration – Regulation 1275/2008/EC We, Team Kalorik SA/NV, hereby confirm that our product meets the requirements of regulation 1275/2008/EC. Our product does not dispose of a standby mode as this product switches off completely immediately after the operation is finished and as a consequence does not...
-
Page 21: Pour Votre Securite
Avant d'utiliser l'appareil, vérifiez que la tension du réseau correspond bien à celle de l'appareil. Ne laissez jamais votre appareil sans surveillance lorsque celui-ci est en fonctionnement ou sous tension. TKG DGR 1000 - 170110 Assembly page 21/57... - Page 22 Ne déplacez jamais l’appareil en tirant sur le câble. Veillez à ce que le cordon d’alimentation ne puisse être accidentellement accroché et ce, afin d’éviter toute chute de l’appareil. Evitez TKG DGR 1000 - 170110 Assembly page 22/57...
- Page 23 Ne placez pas non plus les matières suivantes dans votre grill: papier, carton ou plastique... Il est indispensable de garder cet appareil propre étant donné qu’il est en contact semi-direct avec la nourriture. TKG DGR 1000 - 170110 Assembly page 23/57...
- Page 24 Votre appareil ne doit jamais être mis en fonctionnement par le biais d’une minuterie extérieure ou d’un autre système de commande à distance séparé. TKG DGR 1000 - 170110 Assembly page 24/57...
- Page 25 Afin d’éviter tout risque d’accident, assurez-vous que la rallonge ne pend pas (d’un coin de table par exemple) ou qu’elle ne traîne pas par terre. AVANT LA PREMIERE UTILISATION • Déballez l’appareil et les accessoires, puis lavez les accessoires et essuyez-les. TKG DGR 1000 - 170110 Assembly page 25/57...
- Page 26 Placez l’autre fourchette de l’autre côté de la broche avec les dents face au centre. Ajustez les aliments pour qu’ils soient centrés sur la broche. Vérifiez que les fourchettes • soient sécurisées sur les aliments et sur la broche et serrez les vis. TKG DGR 1000 - 170110 Assembly page 26/57...
- Page 27 Desserrez les vis des fourchettes de la broche et retirez-la du rôti. Retirez délicatement les fourchettes et découpez la viande. Utilisation du grill en kebab • Pour assembler le système pour le kebab, suivez les étapes ci-dessous: TKG DGR 1000 - 170110 Assembly page 27/57...
- Page 28 Avant d’utiliser l’appareil, montez la poignée en suivant les instructions sur l'image jointe. • Nettoyez la porte en verre avec un chiffon ou une éponge trempée dans de l'eau chaude savonneuse et séchez-la soigneusement. TKG DGR 1000 - 170110 Assembly page 28/57...
- Page 29 à la directive. Déclaration ErP – Directive 1275/2008/CE Nous, Team Kalorik SA/NV, confirmons par la présente que notre produit correspond aux exigences de la directive 1275/2008/CE. Notre produit n’est pas équipé d’un mode veille, car il s’éteint complètement immédiatement après avoir fini sa fonction principale et par conséquent ne consomme pas d’énergie électrique!
-
Page 30: Belangrijke Veiligheidsvoorschriften
Laat uw toestel tijdens het gebruik nooit zonder toezicht. Controleer regelmatig of het toestel of het snoer niet beschadigd is. Gebruik het toestel niet indien TKG DGR 1000 - 170110 Assembly page 30/57... - Page 31 Draai het snoer niet rond het toestel en plooi het niet. Gelieve de volgende installatievoorschriften te respecteren om iedere mogelijke schade ten TKG DGR 1000 - 170110 Assembly page 31/57...
- Page 32 Wanneer het toestel in werking is, kunnen toegankelijke delen ervan, zoals bijvoorbeeld de deur, een zeer hoge temperatuur bereiken. Raak deze delen noch tijdens het gebruik, noch TKG DGR 1000 - 170110 Assembly page 32/57...
- Page 33 Uw toestel mag nooit worden aangezet door middel van een externe timer of een separaat systeem met afstandsbediening. Opgelet: Wanneer het symbool op een bepaald oppervlak gekleefd is, moet u voorzichtig TKG DGR 1000 - 170110 Assembly page 33/57...
- Page 34 VOOR HET EERSTE GEBRUIK • Pak het toestel en de accessoires uit, spoel de accessoires en droog ze af. TKG DGR 1000 - 170110 Assembly page 34/57...
- Page 35 Pas indien nodig de voedingsmiddelen aan zodat ze goed in het midden van het spit steken. Zorg dat de vorken goed op de voedingsmiddelen en op het spit vastzitten en draai de vijzen vast. TKG DGR 1000 - 170110 Assembly page 35/57...
- Page 36 Gebruik met de spiesjes • Volg de onderstaande stappen om het spiesjessysteem samen te stellen: • Plaats de ronde vetopvangschaal onderin het apparaat om het vleesnat op te vangen. TKG DGR 1000 - 170110 Assembly page 36/57...
- Page 37 • Maak de glazen deur schoon met een doek of spons gedrenkt in een warm sopje en droog de deur zorgvuldig af. TKG DGR 1000 - 170110 Assembly page 37/57...
- Page 38 ErP-verordening – EU-richtlijn 1275/2008 Wij, Team Kalorik SA/NV, bevestigen hierbij dat ons product voldoet aan de vereisten van richtlijn 1275/2008/EU. Ons product beschikt niet over een stand-bystand (slaapstand), want het schakelt zich volledig uit onmiddellijk nadat de werking is beëindigd en verbruikt dan...
- Page 39 Procure que el aparato no entre en contacto con materiales fácilmente inflamables como cortinas, tejidos, etc., cuando esté en funcionamiento, ya que podría provocar un TKG DGR 1000 - 170110 Assembly page 39/57...
- Page 40 La escupidera gira frente a una estructura abierta de elementos calefactores con reflectores de acero inoxidable semicirculares para un uso óptimo de la energía. Con uso frecuente, los residuos de grasa podrían quemarse en el reflector. Por consiguiente, le aconsejamos cobrar TKG DGR 1000 - 170110 Assembly page 40/57...
- Page 41 Coloque el extremo sólido del espetón en el zócalo situado en el centro de la cubeta de goteo. • Coloque el extremo acanalado del espetón ubicado en el interior superior de la parrilla. TKG DGR 1000 - 170110 Assembly page 41/57...
- Page 42 Cierre la puerta de cristal bien y la luz interior se apaga automáticamente. • Ajuste el control del temporizador al tiempo de cocción deseado. • Cuando el asado esté terminado, gire el control del temporizador a "Off" y desenchufe el aparato. TKG DGR 1000 - 170110 Assembly page 42/57...
- Page 43 Limpie el aparato con papel absorbente o con un paño suave y seco. • No use estropajo metálico o productos abrasivos para no estropear el revestimiento. No sumerja nunca el aparato en el agua o en cualquier otro líquido. TKG DGR 1000 - 170110 Assembly page 43/57...
- Page 44 Declaración ErP – Regulación 1275/2008/CE Nosotros, Team Kalorik SA/NV, confirmamos por la presente que nuestro producto cumple con los requisitos del Reglamento 1275/2008/CE. Nuestro producto no dispone de la función “modo de espera”, por lo cual, este producto se apaga por completo inmediatamente...
- Page 45 Assicurarsi che l’apparecchio non entri in contatto con materiali facilmente infiammabili, come tende, tovaglie,… per evitare il rischio di incendi. Assicurarsi in più che l’elemento riscaldante non entri in contatto con alcun oggetto. TKG DGR 1000 - 170110 Assembly page 45/57...
- Page 46 La griglia verticale permette di cuocere carne, pesce, pollame con grande facilità. La preparazione dei piatti risulta semplice: è sufficiente posizionare la carne sullo spiedo e tagliarla TKG DGR 1000 - 170110 Assembly page 46/57...
- Page 47 Inserire l'estremità intera del girarrosto nella presa unità situato nel centro della leccarda. • • Inserire l'estremità scanalata nel supporto spiedo situato sul lato interno superiore della griglia. Chiudere la porta di vetro e la luce • interna si spegne automaticamente. TKG DGR 1000 - 170110 Assembly page 47/57...
- Page 48 Per preparare lo shashlik, mettere il maggior quantitativo di carne possibile. Girare glie spiedini manualmente di tanto in tanto per ottenere una cottura uniforme. Eliminare o riutilizzare il grasso nel vassoio con un cucchiaio. TKG DGR 1000 - 170110 Assembly page 48/57...
- Page 49 Dichiarazione ErP – Regolamento 1275/2008/CE Noi, Team Kalorik SA/NV, con la presente confermiamo che il nostro prodotto soddisfa i requisiti del regolamento 1275/2008/CE. Il nostro prodotto non dispone di una modalità di attesa, il prodotto si spegnerà...
- Page 50 I/B. Don’t change the page numbering. Keep the language integrity. Fax +32 2 359 95 50 Il libretto d’istruzioni è disponibile anche in formato elettronico facendo richiesta al servizio post-vendita (vedi scheda di garanzia). TKG DGR 1000 - 170110 Assembly page 50/57...
- Page 51 Uważaj, aby gorące części urządzenia nigdy nie stykały się z łatwopalnymi materiałami, takimi jak firanki, tkaniny itp., gdyż może to spowodować pożar. Również nie należy przykrywać urządzenia i kłaść czegokolwiek na nim. Upewnij się, że nic nie styka się z TKG DGR 1000 - 170110 Assembly page 51/57...
- Page 52 To prowadzi do ciągłego wypływu tłuszczu nadającego ten sam efekt co w przypadku pieczenia marynowanego mięsa. Włókna mięsna nie twardnieją, a powstały sos jest nie wymaga przyprawiania przez przyprawy. Ten tryb gotowania pozwala na uzyskanie bardzo zdrowo przyrządzonego mięso. TKG DGR 1000 - 170110 Assembly page 52/57...
- Page 53 • Uwaga! Pamiętaj o podstawce ociekowej na spływający tłuszcz. • Umieścić górną koniec rożna do wrzeciona napędowego w środku zasobnika na zużyty tłuszcz. • Górny koniec rożna zamotuj w górnej pokrywie. TKG DGR 1000 - 170110 Assembly page 53/57...
- Page 54 Gdy mięso jest już gotowe przekręć pokrętło programatora na pozycję OFF i wyłącz urządzenie. TIMER Maksymalny czas działania do 60 minut. Jeśli chcesz ustawić mniej niże 5 minut ustaw go na więcej niż 5 minut a następnie ustaw ponownie na żądany czas. TKG DGR 1000 - 170110 Assembly page 54/57...
- Page 55 Dbając o pozbycie się produktu w należyty sposób, można zapobiec potencjalnym negatywnym skutkom dla środowiska naturalnego i zdrowia ludzkiego, jakie mogłyby wyniknąć z niewłaściwego postępowania z odpadami powstałymi ze zużytego sprzętu elektronicznego. TKG DGR 1000 - 170110 Assembly page 55/57...
- Page 56 Waga netto urządzenia – 5.8 kg Deklaracja ErP – Rozporządzenie Komisji (WE) nr 1275/2008 My, Team Kalorik SA/NV, niniejszym oświadczamy, że nasz produkt spełnia wymagania Rozporządzenia Komisji Europejskiej (WE) nr 1275/2008. Nasz produkt nie posiada funkcji tryb czuwania, ponieważ po zakończeniu użytkowania termostat wyłącza urządzenie całkowicie i w konsekwencji nie pobiera już...
- Page 57 210 mm height). When folding, make sure you keep the good numbering when you turn the pages of the I/B. Don’t change the page numbering. Keep the language integrity. Fax +32 2 359 95 50 TKG DGR 1000 Deutsch English Français Nederlands Español...
Need help?
Do you have a question about the TKG DGR 1000 and is the answer not in the manual?
Questions and answers