Table of Contents
Advertisement
Quick Links
Advertisement
Table of Contents

Related Manuals for NGM Droid Duo


Summary of Contents for NGM Droid Duo
- Page 1 DROID DUO User manual ENGLISH...
-
Page 2: Table Of Contents
Contents For Your Safety ..........................7 Brief Introduction .......................... 9 Your phone’s label ........................... 9 Phone image ............................9 Key definition ............................10 Touch screen............................11 Silent mode ............................13 Screen sleep ............................13 Screen lock ............................14 Shortcuts ............................... 15 Wireless off ............................ - Page 3 Battery tips ................................. 29 Use and maintenance ............................30 System settings ......................... 32 Wireless controls ............................... 32 Call settings................................ 33 Sound & display ..............................34 Security & location ............................. 36 Applications ................................ 37 SD card & phone storage ..........................39 Date &...
- Page 4 Contacts settings ............................... 50 XT9 Smart Input ......................... 52 Overview ................................52 Settings ................................53 Input text XT9 ..............................54 User dictionary ..............................56 Text input ................................56 Ambiguous text entry ............................58 Explicit text entry..............................58 Using selection list ............................. 59 Word completion ..............................
- Page 5 Make a call by dialing ............................82 Answer an incoming call ........................... 85 In-call options ..............................85 Multiple calls ..............................86 Call log................................89 Call settings................................ 91 Calendar ............................ 94 Calendar views ..............................94 Create an event ..............................96 The View event screen ............................98 Event reminders ..............................
- Page 6 Greedy Snake ..............................122 Battery Information........................123 Accessories ..........................124 Safety of the battery ............................124 Rapid travel charger ............................124 Data cable ................................ 124 Certifications ..........................125...
-
Page 7: For Your Safety
For Your Safety SWITCH ON SAFELY Do not use in prohibited areas or when it may cause any interference or danger. SWITCH OFF IN HOSPITALS Follow any restrictions. Switch the phone off near medical equipment. SWITCH OFF WHEN REFUELING Do not use the phone at a refueling point. Do not use near fuel or chemicals. - Page 8 MAINTENANCE Only authorized and qualified personnel may repair this product. WATER RESISTANCE Your phone is not water-resistant. Keep it dry. INTERFERENCE All wireless devices may be susceptible to interference, which could affect its performance. Damage to the security seal will invalidate the warranty. Warning: Improper use will invalidate the warranty.
-
Page 9: Brief Introduction
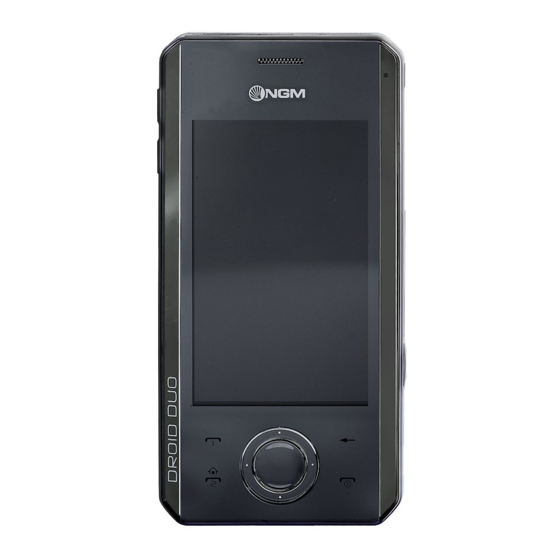
Brief Introduction Your phone’s label The barcode label includes important information about services and customer support. Please keep it properly. Phone image Note: All the illustrations, simulated screen and related images in the manual are for reference only. They may be slight different from your handset. Please refer to your handset for actually. -
Page 10: Key Definition
Volume up key Menu key Volume down key Receiver Touch screen Microphone Navigation keys Stylus Call key Loudspeaker Home key Camera lens Power & End key USB port Back key Camera key Key definition A few simple keys make it easy to operate. Home key ... -
Page 11: Touch Screen
Press to wake up the screen, and press again to unlock the screen. Navigation keys: Press to navigate selectable items on the screen. Volume keys: Press to adjust the volume. Camera key When on the Home screen, press & hold to go to the capture screen. ... -
Page 12: Context Menus
when an item on the screen is selected when its color changes. Context menus To open the context menu for an item on the screen, touch & hold the item on the screen with your fingertip. You must hold for one full second before the context menu will appear. Scroll To scroll up or down in a list or page on the screen, you can either: ... -
Page 13: Silent Mode
Touch the screen to open the zoom-in and zoom-out controls Touch the control to zoom in. With each touch you zoom in closer. Scale & scroll To navigation quickly to a section of a large web page, use the “scale & scroll” interface: Touch the screen to reveal the zoom controls and the “scale &... -
Page 14: Screen Lock
Set screen timeout period Return to the home screen, then press the Menu key to select Settings>Sound & display. Select Screen timeout, then select a time or never timeout from the menu. Prevent sleep while charging Return to the home screen, then press the Menu key to select Settings>Applications. Select Development, then select the Stay awake check box. -
Page 15: Shortcuts
When your unlock your screen, if you want your pattern to be hidden as you draw it, clear the Use visible pattern check box. Shortcuts Use these control buttons from anywhere on your phone: Lock screen and put phone to sleep Press the Power &... -
Page 16: Wireless Off
window displays (up to) the last six applications you used since last restarting your phone. Select an application to open it. Wireless off When you need to turn off all your phone radios, switch to “airplane” mode: Return to the home screen, then press the Menu key and select Settings. Select Wireless controls, then select the... -
Page 17: Power On/Off
incoming call, press the Call key or the Home key. To end a call, press the Power & End key. While in a call, press the Menu key to reveal the in-call options. Show dialpad: Displays the on-screen dial pad. Add call: Put current call on hold and displays the on-screen dial pad so you can dial another number. -
Page 18: Update Software To Your Phone
Update software to your phone Create a folder at the top-level of your memory card called „update‟, and copy files „*.zip‟ and „recover.img‟ into your phone‟s memory card. Make sure your phone is off, and press the Home key together with the Power & End key to enter the recovery mode, do the operations following the UI indication: Press the Home key to search the zip file from your memory card, and press the Home key again to update the software. -
Page 19: Home Screen
Home screen Home screen The Home screen is your starting point for using all the applications on your phone. You can customize your Home screen to display applications, shortcuts and widgets as you like. Tip: To hear a sound when an item is selected, select the Audible selection check box in Settings>Sound &... -
Page 20: Extended Home Screen
Extended home screen The home screen actually extends beyond the screen width. Slide your fingertip left and right along the screen to reveal the full width of the Home screen. This additional space gives you more room to customize Home with applications, shortcuts, and widgets. Create Home screen shortcuts and widgets Start from the Home screen, then touch &... -
Page 21: Move Objects On The Home Screen
Move objects on the Home screen To move an icon or other item on the Home screen, you must first touch & hold it to enter move mode. The object will magnify when it‟s ready to be moved. Without lifting your finger (or you‟ll drop out of move mode), drag the object to the new position. -
Page 22: Notification And Connection Status Icons
picture from the Wallpaper gallery that comes preinstalled on your phone: From the Home screen, press the Menu key and select Wallpaper. Alternatively, you can touch & hold the Home screen to open the Add to Home screen menu. Select Wallpapers, then select either Pictures Wallpaper gallery. - Page 23 New instant message New voicemail Upcoming event Alarm is set Song is playing Data is syncing SD card full! More (undisplayed) notifications Call in progress Missed call Call on hold Call forwarding is on Speakerphone is on Ringer is off (Silent mode) Ringer on vibrate only Phone on mute Uploading/downloading...
-
Page 24: Read Your Notifications
Battery is charging Wireless services are off (Airplane mode) Bluetooth® is on, Bluetooth device connected No SIM card in phone No memory card in phone USB connected Read your notifications When you see a notification in the status bar, touch the bar and slide your finger down the screen to open the list of notifications displayed in the sliding window. - Page 25 Open the notifications window to reveal the New voicemail notification. Select the notification. Your voicemail number is dialed.
-
Page 26: Getting Started
Getting Started Installing the battery Press the downside of the back cover, slide it down, and remove the cover. Position the battery with the contacts aligned to the metal contacts of the phone. Insert the battery into the battery slot. -
Page 27: Installing The Sim Card
Place the back cover on the phone and slide it up to lock it. Installing the SIM card Warning: Do not bend, scratch your SIM card; avoid exposing your SIM card to static electricity or dirt. 1. Push SIM cards into the SIM card slots following instructions reported on the phone. -
Page 28: Installing A Memory Card
Installing a memory card Insert the memory card into the card slot with the metal face downwards. Charging the battery To ensure the best performance of your phone‟s battery, please charge the battery fully before using it for the first time (Approx. 12 hours), using the method described below. Please note: some batteries require several full charge/discharge cycles to reach their best performance. -
Page 29: Battery Tips
Tips: If your phone is off, there will be a blue light at the upper right corner of the phone‟s front side when being charged. When the phone is fully charged, the blue light will disappear. It may take 4-5 hours to fully charge. ... -
Page 30: Use And Maintenance
Do not place or charge the battery in very hot or very cold locations as extreme temperatures can adversely affect the battery. Please keep the charger and handset out of the reach of young children. Please ensure that the metal contacts of the battery are kept clean and free of dirt. ... - Page 31 Please keep all metal objects away from the charger port located at the top of the phone to avoid damaging the electronic circuits.
-
Page 32: System Settings
System settings Control phone-wide settings from the Home settings screen: Press the Home key, then press the Menu key to select Settings. You can also select the Settings icon from the Home screen. Wireless controls Wi-Fi on/off Select this check box if you prefer to use Wi-Fi for your data connection. Wi-Fi settings screen Open the Wi-Fi settings screen to: View and scan for available networks - Press the Menu key and select Scan. -
Page 33: Call Settings
FTP Server – when selected, you can receive files by Bluetooth. Mobile network settings Data network - Select the SIM card you like from SIM1 and SIM2. The phone will automatically use the one selected when needs the GRPS flow. Select data roaming capability. -
Page 34: Sound & Display
moments. Fixed Dialing Numbers This feature allows you to restrict outgoing calls to a fixed set of numbers. To enable this feature you must know the SIM PIN2 code for your phone. You can get this number from your wireless operator if this feature is supported. Voicemail Select to set a voicemail number that isn‟t being read from the SIM card. -
Page 35: Sound Settings
Message ringtone Select to decide on a ringtone to use for incoming messages of SIM1 and SIM2. Sound settings Ringer volume Select to open the volume control, then slide your finger along the volume bar to set incoming call volume and notification volume. Phone vibrate Select to have your phone vibrate for incoming calls. -
Page 36: Security & Location
Select to switch orientation automatically when the phone orientation changes (except the home screen) Animation Select to show animation when opening/closing windows. Brightness Select to open the brightness control, then slide your finger along the brightness bar to set the level. -
Page 37: Applications
make the pattern visible or invisible as you draw it. SIM card lock settings Lock your SIM card for extra security. You can also change your SIM card PIN from this screen. If you don‟t know your SIM PIN, you can obtain it from your wireless operator. Visible passwords Select to have your password display as you type it. - Page 38 View all the applications stored on your phone and how much space they occupy. If you‟ve downloaded an application from Android Market, you can uninstall it from this screen. Select a specific application to: Clear your user data (if you have any associated with a particular application). Disassociate the application with any actions.
-
Page 39: Sd Card & Phone Storage
SD card & phone storage View and manage the data storage on your phone SD card Monitor and manage the use of your memory card from this screen: View the total space of your memory card. View how much space you are using on your memory card. Unmount your memory card from your phone. -
Page 40: Search
Text settings XT9 Text Input Languages Select the text input language. Keyboard layouts Select your text input keyboard from Keyboard, reduced keyboard, phone keypad or mix mode. Preferences Select your text input preferences from following option: Vibrate on key press, Sound on key press, Auto-capitalization, Auto-punctuation, Auto-correction, Word completion and Word reselection. -
Page 41: Accessibility
Searchable items Apps: When selected, relevant application shows as you type the word in the search box. Browser: When selected, relevant information in the network shows as you type the word in the Clear search shortcuts Accessibility (before operating this feature, you must confirm that you have installed voice data) Select the Accessbility check box to turn on this feature. -
Page 42: About Phone
About phone View your phone Status. This screen lists a variety of information, including your phone number, the network you are currently using, the type of network, signal strength, whether you are roaming or not, any Wi-Fi addresses you‟re connected to, and more. Select Legal information for copyright and licensing information, as well as the Google... -
Page 43: Bluetooth
Bluetooth You can use Bluetooth to send and receive calls using a headset or hands-free car kit. Turn on Bluetooth services Press the Menu key to select Settings in the home screen Select Wireless controls, then select the Bluetooth check box to turn on Bluetooth services. When it on, the Bluetooth icon appears in the status bar. -
Page 44: Pair & Connect With Bluetooth Devices
Your new device name appears on the Bluetooth settings screen. Pair & connect with Bluetooth devices Before your phone can communicate with a Bluetooth headset or hands-free car kit, the devices must “pair”, then “connect”: Make sure you have turned Bluetooth on, as described in “Turn on Bluetooth services”. Press the Menu key to select Settings >... -
Page 45: Rescan For Bluetooth Devices
If you pair with a second headset while connected to the first, the first headset will remain connected. To switch connection to the second headset you must manually select that headset again after pairing. Rescan for Bluetooth devices If you want to update the list of Bluetooth devices, press the Menu key to select Scan for devices. -
Page 46: Contacts
Contacts Your contact list To view the contacts on your phone, select Contacts in the home screen. You can also press the Call key to select the Contacts tab. Contacts belonging to a specific group (you can choose which group) are listed in the Contacts tab. -
Page 47: Add A Contact
brush movement in either direction accelerates the scrolling. Touch the screen to stop the scrolling. Or press the Menu key to select Search in the Contacts main menu, type the keywords in the text box, then tap the magnifier beside the text box to start searching. Add a contact Press the Menu key to select New contact... -
Page 48: Edit Contact Details
Select Add to favorites. Now your contact will be listed in Favorites and display with a colored star. Their details screen will also display the colored star. Edit contact details You can always make changes to the information you‟ve stored for a contact: From Contacts, touch &... - Page 49 screen) by SIM1, or press the Home key to dial by SIM2. To dial a different number for the contact, select the contact‟s name, and then select the number on their details screen. From the contact details In the Call mobile section, select the number you want to dial. The number is dialed.
-
Page 50: Display A Contact Group
Complete your message and select Send. Map a contact’s address To map a contact‟s address, you must have a postal or physical address stored for them in their contact details. From your contact list, select the contact whose address you want to map. On the contact‟s details page, in the Map address section, select the address. - Page 51 SIM2 contact. Once the list of names and numbers appears you can: Import all names/numbers in the list – Press the Menu key and select Import all. Import only certain names/numbers in the list - Select the name/number you want to import, then repeat for others as you wish.
-
Page 52: Xt9 Smart Input
XT9 Smart Input Overview T9 software has set the bar for mobile usability, creating mobile user experiences that help drive consumer demand for and use of mobile communications devices and services. The T9 portfolio now includes XT9 Smart Input: a first of its kind multi-modal user interface solution for feature-rich smartphones and advanced mobile devices. -
Page 53: Settings
wrong key. XT9 compensates for the challenge presented to big fingers by tiny keys. For example, if you inadvertently type in "m-o-o-b," XT9 presents "moon" because the "b" is just one key away from the "n," and the word "moon" is a more likely choice. - Extensive Language Support An expert linguistics team, native language speakers, and other researchers participate in carefully constructing and testing T9 language databases. -
Page 54: Input Text Xt9
Input text XT9 The XT9 for Android supports ambiguous and explicit text entry. For all alphabetic languages, both methods are available. The keyboard layouts share common keys that make it easy for the user to get to access languages, numbers, symbols, input methods, etc. The diagram below displays most of these keys: Sample Full Keyboard Layout Sample Reduced Keyboard Layout... - Page 55 Sample Symbols Page The XT9 IME makes it easy for users to get to the characters or symbols they want through popup menus. By long-pressing certain keys, an additional menu is displayed. For instance, when the user long-presses the emoticon key (:-)), a popup menu of several emoticon options is displayed.
-
Page 56: User Dictionary
- Automatic correction: automatically corrects typing errors and spelling (high, medium, low and off) - Completion of the word sets the number of times a button is pressed before displaying the completion of words (can be enabled or disabled after entering the key from one to six times) - Redial of the word appears again the select list of a word previously entered. - Page 57 When selected as the XT9 input method, a horizontal bar appears on top of the keyboard where the suggestions are displayed in the sequence of key presses. The visible selection list is a feature of the XT9 IME where words appear in a horizontal list above the keyboard.
-
Page 58: Ambiguous Text Entry
the best match is highlighted in the list. Ambiguous text entry Ambiguous text entry automatically determines which letters the user is trying to enter on keyboard layouts where more than one letter is assigned to each key. Therefore, ambiguous text entry pertains to reduced keyboard and phone keypad layouts. -
Page 59: Using Selection List
To enter text in Multitap mode, the user presses or taps a text-entry key. The XT9 IME displays the first character mapped to that key and a timer is set. If the user presses or taps the same key again before the timer expires, the XT9 IME replaces the character with the next one mapped to the key and a new timer begins. -
Page 60: Word Completion
and add it to the input sequence. Left and right arrows are displayed on either end to indicate more candidates. By sweeping a finger, the user can move the list to the left or right. The XT9 IME takes into consideration features such as word completion, regional error correction, and spell correction that may or may not be enabled. -
Page 61: Word Reselection
Word reselection Even after a word has been accepted, the XT9 IME allows the user to go back to the word and reselect it. By placing the cursor at the end of the word and pressing the delete key once, the word is highlighted and the original selection list is displayed. -
Page 62: Email And Messaging
Email and Messaging Email POP3 and IMAP email accounts Add an email account You can fetch messages from up to five POP3 or IMAP accounts. Follow these steps: Press the Home key, then select the Email application. The Set up new account screen appears. Type your account email address and password. - Page 63 From the Inbox, press the Menu key and then select Refresh to update your Inbox with any previously-unfetched email. Read email You can display or collapse the messages in your Inbox by selecting Inbox. Unread messages display with a colored band. (Each account you add will use a different color.) To open an email for reading, select it.
-
Page 64: Remove An Email Account
you have not typed anything. Empty Trash Once you‟ve moved a message to the Trash, a Trash folder will display below your Inbox. To empty messages in the Trash you must delete each message individually: Expand the Trash folder to display the messages. Touch &... -
Page 65: Sms And Mms Messaging
regardless of this setting. Default account If you have more than one POP3 or IMAP email account set up on your phone and want to use this account by default when selecting Compose from the Accounts screen, select this check box. Email notifications If you want an icon to appear in the status bar when a new message arrives, select this check box. -
Page 66: The Message List
multimedia message as soon as you add a subject or an attachment, or if you address the message using an email address rather than a phone number. The message list Text and multimedia messages are grouped with the replies you receive into conversations or “message threads”... - Page 67 Links in messages If a message contains a link to a Web page, it will be selectable. To view the Web page in the Browser, simply select it. Forward messages In the message read view, touch & hold the message to open the context menu, then select Forward to forward it to others.
-
Page 68: Compose Text And Multimedia Messages
- Delivery problem - Message delivered - Message is being delivered Read more about delivery and read reports in “Text and multimedia message settings” on page Compose text and multimedia messages Press the Menu key and select Compose. The Compose screen opens. Add recipients by typing a name, phone number, or email address in the field. -
Page 69: Save Message As Draft
Save message as draft While composing, press the Back key. Your message automatically saves as a draft. To resume composing, in the message list, touch to open the message to edit. Text and multimedia message settings To set text and multimedia message preferences, from the message list, press the Menu key and select Settings. - Page 70 Auto-retrieve: To retrieve all your multimedia messages automatically (the header plus the message will download to your phone), select this check box. If you clear this check box, then only the message headers will be retrieved and display in your message list. You can retrieve the full message by selecting the Download button that displays in the header.
-
Page 71: Browser
Browser About the Browser To open the Browser, select the Browser application in the home screen. The Browser always opens to the last Web page you were viewing. The first time you enter the Browser after powering on, your home page will display. You can change your home page by pressing the Menu key and selecting More >... -
Page 72: The Browse Screen
The Browse screen From the Browse screen you can do the following: Go to a Web page You can press the Menu key and select to open the Go to window opens. Possible matches appear in the drop-down menu. Select a match or continue typing the URL. Select beside the URL to go to the page. - Page 73 opens, showing the Web page you started from, plus a “new window”. Select window. Your home page opens in a new window. To return to one of the other windows, press the Menu key and select Windows. Select the page you want to view. View the page in a window Select a window to view it full-screen.
-
Page 74: Manage Bookmarks
View page info From a Web page, press the Menu key and select Windows. The Current windows screen appears. Touch & hold the window whose page you want. The context menu opens. Select Page info. When you‟re finished reading the information, select OK. Go to Bookmarks screen From the Current windows screen, press the Menu key and select Bookmarks... -
Page 75: Edit Bookmark
Touch & hold the bookmark you want to send. The context menu opens. Select Share link. Send the link via email or message, and then a Compose screen opens with the URL as the message. Address your message and finish composing. Select Sim1 Send Sim2... -
Page 76: Set Your Home Page
opens. Confirm or edit the information, then select OK. Set your home page You set your home page from the Settings screen: Press the Menu key and select More>Settings. The Settings screen opens. In the Page content settings section, select Set home page to open the dialog box. -
Page 77: Browser History
Bookmark the link Save the link Share link via email or message Copy the link to the clipboard Phone numbers Select a linked phone number to: Call the number - The Dialer opens, ready for you to send the call. ... -
Page 78: Download Web Files And Applications
Download Web files and applications Before you download any files or applications using the Browser, note the following: Before you can download Web applications, you must explicitly “allow” downloading from the Settings screen in Home screen: 1. Press the Home key, then press the Menu key and select Settings. 2. -
Page 79: Page Content Settings
Page content settings Text size Select to open the Set text size menu. Default setting is Normal, but you can increase the size to Large or Huge, or decrease to Small or Tiny. Note that this text size setting only affects pages you view through the Browser. -
Page 80: Privacy Settings
Privacy settings Select one of the privacy settings to clear the following: Browser cache Browser page-visited history stored cookie data saved form data Accept cookies Select this check box if you want the Browser to save cookies. Some Web sites might not work properly with cookies disabled. - Page 81 richer platform for Web applications. Gears settings View permissions granted to Web sites to use Gears. Reset to default Select if you want to reset all Browser settings to factory default values, except for your home page.
-
Page 82: Dialer & Voice Dialer
Dialer & Voice Dialer About the dialers You can use your phone to make phone calls by using either the Dialer or the Voice Dialer: To dial a number using the on-screen dial pad, press the Call key, or press the Home key and select the Dialer. -
Page 83: Make A Call By Speaking
You have several choices for placing a call: Dialer tab Touch the on-screen dial pad to enter a number. Select to delete numbers you‟ve entered. Touch & hold to delete all the numbers in the field. Call log tab Select an entry listed in the log to call the number. Contacts tab Contacts with phone numbers are listed. - Page 84 You can tell the Voice Dialer any of the following: “Dial number”, where number can be 3 digits (e.g., 911), 7 digits (e.g., 555-0123), or 10 digits (e.g., 205-555-0123). If you‟re speaking a phone number, then always say “Dial” before the number.
-
Page 85: Answer An Incoming Call
Answer an incoming call To answer a call, simply press the Call key or Home key, and the Call-in-progress screen appears. Press the Power & End key to reject the incoming call. In-call options While on a call, press the Menu key to reveal the in-call options: Speaker, Mute, and Hold. Note that if Bluetooth services are on and you are connected to a hands-free device, the menu indicator will show Bluetooth on. -
Page 86: Multiple Calls
Speaker To use the speaker, press the Menu key and select Speaker so it shows a green bar. To turn it off, select it again so the bar is unfilled. The status bar will display this icon when the speaker is on. Mute To mute your side of the conversation, press the Menu key and select Mute... - Page 87 The incoming call will display in the foreground. Press the Call key or Home key to answer the incoming call and place the call in progress on hold. You can also press the Menu key and select Hold current call & answer.
-
Page 88: End All Calls
End all calls If you have one call in progress and one caller on hold, to end both calls, press & hold the Power & End key. Conference calling While on a call, you can conference up to six callers, counting yourself. Note that you can also have an additional caller on hold during a conference call, regardless of how many participants are on the conference. -
Page 89: Call Log
To end the conference call and disconnect all callers, press the Power & End key. Call log The call log is one of the tabs on the Dialer. Press the Call key to open the call log of SIM1, and press the Home key in the home screen or Contacts list screen to open the call log of SIM2. - Page 90 The call log lists all incoming and outgoing calls, including missed calls. To call any of the numbers in the list, simply select the name or number. To clear the entire call log, press the Menu key and select Clear call log.
-
Page 91: Call Settings
Select to add the phone number to your Contacts list. You can select to add a new contact, or add the number to an existing contact. Remove from call log Select to remove only this entry from the call log. Call settings Your phone is a dual-SIM phone, so you can do the call settings for two SIM card separately. -
Page 92: Call Forwarding
Voicemail Select this setting to set or change your voicemail number. Note that this number is usually set by your wireless operator and is stored on your SIM card. Call forwarding Set the following: Always forward calls - Select to specify a forwarding number and to enable this feature. When this feature is enabled, the following three features are disabled. -
Page 94: Calendar
Calendar To open Calendar service, select the Calendar application in the home screen. You can view calendar, view month, edit event, etc. Calendar views You can view multiple calendars on your phone, so each calendar event is coded with a color. Note: To create new calendars, you must go to Google Calendar on the Web. -
Page 95: Agenda View
can also press the Menu key and select event. Jump to current day - Press the Menu key and select Today. Agenda view Events in the current month are shown vertically in a list, one event after the other. Days with no events are not displayed. -
Page 96: Create An Event
fingertip left/right. Jump to current day - Press the Menu key and select Today. The current time is highlighted. Day view Days are divided into hour time slots. Events are shown tiled and span the time they last. All-day events are displayed at the top of the day list. - Page 97 When finished, select Save Discard changes. Press the Back key also saves the events.
-
Page 98: The View Event Screen
The View event screen In the Day and Week views, when you highlight an event, a pop-up window with more details opens (the window stays open for three seconds). To see even more details, open the View event screen by touching the pop-up window. From the Agenda view, simply select an event to open the View event screen. - Page 99 displayed. To read more details about the event, select the reminder. If you have other reminders pending, they will be listed on this screen as well. You can snooze or dismiss the reminder(s), or press the Back key to keep the reminder(s) pending in the notifications bar. The snooze time is five minutes.
-
Page 100: Edit An Event
Edit an event To edit an event, you must have the View event screen open. Press the Menu key and select Edit event. Note: If your event repeats, you will be asked to choose which events you want changed (all events in the series, or the current event plus future events). - Page 101 Select this check box to have your phone vibrate when you are reminded of an event. Default reminder Select to open the default reminder menu. The time you select will appear by default in the Reminder section when you create a new event.
-
Page 102: Camera, Camcorder & Gallery
Camera, Camcorder & Gallery Before you begin All the pictures you can capture or view and all the videos you can record or play on your phone are stored on a memory card, which must be installed in your phone. Before you can use the Camera or Camcorder, or view pictures/videos in Gallery, make sure you have a card installed. -
Page 103: Video Recorder
Or touch the icon at the right bottom in the screen to take a picture. Tip: In capture mode, press the Menu key to select Switch to video, the screen switch to video recording mode. View your pictures To view the pictures you‟ve captured, go to the Gallery application, or in capture mode, press the Menu key to select Galley. -
Page 104: Gallery
you know where the photo was taken. Some applications, such as Picasa Web albums, can then display the picture on a map. Select video quality Select the photo quality from Low (for MMS message) High (for SD card). Select video duration Select the video duration from minute, 10 minutes... -
Page 105: Picture Options
Zoom in Touch the screen to open the zoom-in and zoom-out controls Touch the control to zoom in. With each touch you zoom in closer. Zoom out Touch the screen to open the zoom-in and zoom-out controls Touch the – control to zoom out. With each touch you zoom out further. Navigate in zoomed-in view Slide your fingertip in any direction to shift your view. - Page 106 slideshow, it will resume where you left off. Share a picture In full-screen view, press the Menu key and select Share. Select to share your picture via email, Messaging (MMS). The relevant compose screen opens. Complete your message and send it. Rotate picture In full-screen view, press the Menu key and select Rotate.
- Page 107 When you‟re happy with the cropped area, select Save. View picture details In full-screen view, press the Menu key and select More > Details. The picture details window opens. You can see the title, resolution, file size, and date of the picture.
-
Page 108: Music & Video Player
Music & Video player Music Your library of music Press the Home key and select the Music to open your music library. Your music is organized into four categories: Artists, Albums, Songs, and Playlists. Select a category to view the lists within each. Once in a category, keep selecting until you reach the music you want to play. -
Page 109: Play Back Music
number of files or folders at the root level to a minimum. So, if you wish, create a folder at the top-level called “music” (or whatever you want) to store your files. Open this folder and copy music files into it. If you want, create folders within “music” to organize your music further. - Page 110 Go to next song Touch once Rewind Touch & hold Go to beginning of song Touch once Go to previous song Touch twice View current playlist Touch Party shuffle To start “party shuffle” (all the songs in your library are added to a playlist in random order), press the Menu key and select Party shuffle.
-
Page 111: Create Ringtones From Songs
Select Add to playlist. In the Add to playlist menu that opens, select to create a new playlist, or one of the existing playlists. The song(s) are added. Manage your playlists Go to the Library screen and select Playlists. All your playlists appear. You can do the following from this screen: Play songs in list Select the playlist. -
Page 112: Video Player
you can delete music stored on the card: From the Library screen, select either the Artists, Albums, or Songs category. Go to the screen that shows the artist, album, or song that you want to delete. Touch & hold the item to open the context menu. Select Delete. -
Page 113: Search For Videos
Adjust volume Press the Volume keys to adjust the volume. Search for videos To find a video by typing a keyword, press the Menu key and select Search. The search window appears. Type your keyword, then tap the magnifier to start to search. Settings Screen pixel: Set the size of video-playing. -
Page 114: Tools & Game
Tools & game Wireless tether In the application screen, select Wireless Tether to enter. Press the Wi-fi icon in the middle of the screen to start tethering. The state of your Wi-Fi and BT tether displays in the screen. Settings Use Wi-Fi Select to turn or or off Wi-Fi tether Wi-Fi tether settings... -
Page 115: Use Bluetooth
Use Bluetooth Select to turn on or off Bluetooth PAN tether. Bluetooth tether setting IP configuration Select to change Bluetooth IP configuration. Enable notification Select to enable notification when a device connects. Sound on connect Select to play sound when a device connects. Vibrate on connect Select to set the handset to vibrate when a device connects. -
Page 116: Alarm Clock
Alarm Clock To open alarm clock, select the Alarm Clock in home screen. The Alarm clock offers as many alarms as you want. Set an alarm Three alarms are set up for you, ready to customize. All three alarms are turned off by default. To begin, select one of the default alarms to open Alarm settings. -
Page 117: Add More Alarms
The current ringtone selection is shown. Select Ringtone to pick another ringtone that will play when the alarm rings. (When you select a ringtone, it plays briefly.) Vibrate Select this check box to have your phone vibrate when it goes off. Repeat The current repeat selection is shown. -
Page 118: Calculator
to display. To hide the clock, press the Menu key and select Hide clock. Change date & time display You can change the format of the time displayed in your alarms from the global Settings screen: Go to the home screen, then press the Menu key and select Settings. Scroll down and select Date &... -
Page 119: File Manager
Switch back and forth between calculator panels by pressing the Menu key and selecting Advanced panel Basic panel, as you wish. As soon as you select an advanced operator, the panel switches back to Basic, where your operator appears. When you touch a key on the screen, the key flashes red to let you know the selection was made. -
Page 120: Spare Parts
Touch and hold a file to open the context menu, you can copy, cut, paste, rename the file or delete the content in the file. Search file The directory of the folder you visited shows on the upper side of the screen. Touch the rightmost icon to open the search textbox, input the file name you want to search in this folder, then press the magnifier to start searching. -
Page 121: Fm Radio
go to the home screen by pressing the Power & End key. Select Go to sleep, and your phone will be locked and go to sleep when you press the Power & End key. Select Home, then sleep, and your phone will be locked and go to the home screen when you press the Power & End key. Haptic feedback: Select the check box to use haptic feedback with user interaction. -
Page 122: Greedy Snake
Search channel In FM radio, press the Menu key to select Seek channel, enter the frequency of the radio channel, and select to search. Adjust the volume In FM radio, press the Volume keys to adjust the volume. Settings Channel settings Auto save channel –... -
Page 123: Battery Information
Battery Information Type Capacity Li-ion 1200mAh --The battery life depends on many factors, including the SIM card, network conditions, settings , usage and enviorenment. --Making calls, turning on the backlight and multimedia player will consume more battery power. --The standby time is shorter when the network is not available than in the standard status. --For power saving, the backlight turns off automatically if your phone stands idle for an assigned time. -
Page 124: Accessories
Accessories Safety of the battery Please use the battery provided by the original manufacturer. Use of any other battery will invalidate the warranty and the manufacturer of the phone will take no responsibility in repairing the phone damaged by the use of unapproved fittings. Please keep any metal things (e.g. -
Page 125: Certifications
Certifications Declaration of Conformity (R&TTE) NGM Italia declare under our sole responsibility that the product identified as: GSM Mobile Phone: Droid Duo conforms to the following standards and specifications: Health EN 50360, EN 62209-1 Safety EN 60950-1+A11 EN 301 489-1/-7/-17... - Page 126 Technical documentation preserved NGM Italia S.r.l. Available Upon Request. (Legal representative in EU) NGM Italia S.r.l. Via L. Da Vinci, 7 – Ponticelli 56020 Santa Maria a Monte (Pi) SAR certification information (Specific Absorption Rate) This phone meets European Union (EU) requirements concerning exposure to radio waves coming from telecommunication and radio devices.
Need help?
Do you have a question about the Droid Duo and is the answer not in the manual?
Questions and answers