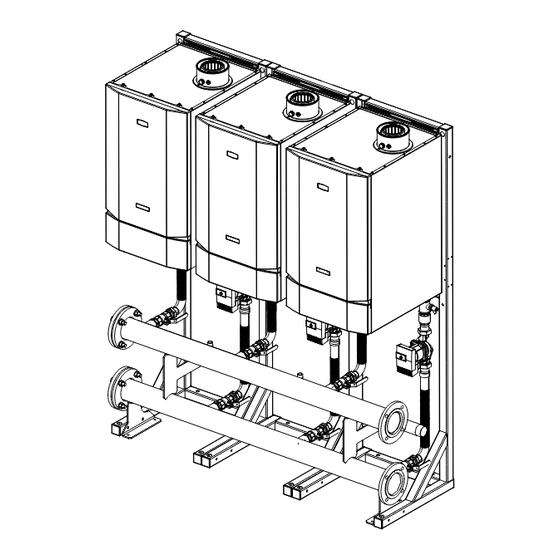
ideal commercial Evomax 40 Manual

Standard height frame & header kits
Hide thumbs Also See for Evomax 40:

Advertisement

STANDARD HEIGHT
FRAME & HEADER KITS
EVOMAX
30 - 150
30P - 80P
EVOMAX 2
30 - 150
30P - 120P
When replacing any part on this appliance, use only spare parts that you can be assured conform to the safety and performance specification that we
require. Do not use reconditioned or copy parts that have not been clearly authorised by Ideal.
For the very latest copy of literature for specification and maintenance practices visit our website www.idealcommercialboilers.com
where you can download the relevant information in PDF format.
April 2019
UIN 220380 A01

Advertisement

Table of Contents
loading

Summary of Contents for ideal commercial Evomax 40

  • Page 1 STANDARD HEIGHT FRAME & HEADER KITS EVOMAX 30 - 150 30P - 80P EVOMAX 2 30 - 150 30P - 120P When replacing any part on this appliance, use only spare parts that you can be assured conform to the safety and performance specification that we require.
  • Page 2: Table Of Contents

    This kit is suitable for the following boilers: Evomax 30, 40, 60, 80, 100, 120, 150, 30P, 40P, 60P 80P Evomax 2 30, 40, 60, 80, 100, 120, 150, 30P, 40P, 60P 80P, 100P, 120P CONTENTS 1 Introduction ..............3 2 General Description of Cascade Systems ....3 3 Multiple Boiler System Components ......5 4 Wall Mounted Installation Procedure ......8 5 Frame Kit Installation Procedure ........10...
  • Page 3: Introduction

    INTRODUCTION This technical data contains information for dimensioning & assembly of a cascade system kit for the Evomax and Evomax 2 ranges. Header and Frame kits are available in both ‘in line’ (6 boilers long) and back to back options (3 boilers long). GENERAL DESCRIPTION OF FRAME &...
  • Page 4: Multiple Boiler Installations

    2.2 MULTIPLE BOILER INSTALLATIONS For installing 2 to 6 boilers, the product range includes water and gas headers capable of assembly using threaded socket, compression and flange connections. 2.3 HYDRONIC ISOLATION: LOW LOSS HEADER & PLATE HEAT EXCHANGER A low loss header or plate heat exchanger allows flow separation within a hydronic system. This allows two flow circuits to operate with their own flow and pressure drop environments whilst effectively transferring heat to its adjoined water circuit.
  • Page 5: Multiple Boiler System Components

    MULTIPLE BOILER SYSTEM COMPONENTS 3.1 GENERAL The multiple boiler systems consist of the following components: • Frame kit (optional 1 per boiler) • Boiler gas header. • Boiler flow and return headers supported on mounting skid • Low loss mixing header (optional) •...
  • Page 6 3.6 BOILER CONNECTION KITS RETURN FLOW The connection kit contains the following components: 1. Boiler return leg complete with isolating valve, pump, non return valve, drain cock and fibre seals. 2. Boiler flow leg complete with isolating valve, pressure relief valve and fibre seals. 3.
  • Page 7: Important Points

    IMPORTANT POINTS Before commencing installation: If Wall mounting; • Ensure wall is capable of supporting the weight of boilers to be mounted • Mark drill points of header using floor mounting template • Mark height on to the wall from the floor to the top of the boiler •...
  • Page 8: Wall Mounted Installation Procedure

    WALL MOUNTED INSTALLATION PROCEDURE 4.1 WALL MOUNTED SIDE BY SIDE OPTION Ensure wall is capable of supporting the weight of boilers to be mounted. Note. boiler weights can found in the boiler Installation Instructions. 1. Cut the sides off the cardboard wall mounting template/s (found in the boiler packaging) to create the 50mm side clearance required.
  • Page 9 4.1 WALL MOUNTED SIDE BY SIDE OPTION CONT'D.... SIDE VIEW PLAN VIEW Plate Heat Exchanger or Low Loss Header optional Careful consideration MUST be given to the installation tolerances. If these are not adhered to, hoses may become kinked or connections may not fit. Standard Height Frame &...
  • Page 10: Frame Kit Installation Procedure

    FRAME KIT INSTALLATION PROCEDURE 5.1 SIDE BY SIDE FRAME KIT MOUNTING PROCEDURE 1. Place the frame kit sections in the required position and bolt them together at the top and bottom with the bolts, nuts and washers provided. IMPORTANT: MOUNTING FRAME MUST BE SECURED TO THE FLOOR WITH BOLTS 2.
  • Page 11: Header Kit Assembly

    5.2 BOILER MOUNTING 1. As appropriate mount the boilers onto either the wall plates or the side by side frame kit. 2. Ensure the boiler bottom fixing bracket is screwed to the frame or wall. HEADER KIT ASSEMBLY (OPTIONAL ACCESSORY) 6.1 FITTING MIXING HEADER AND BLANKING FLANGES 1.
  • Page 12 6.2 FITTING HEADER KIT ASSEMBLY 1. Slide the header kit assembly between the frame legs but do not screw the header kit to the frame at this stage. 2. Screw the header legs to the frame feet with the bolts, nuts &...
  • Page 13 6.3 FITTING GAS CONNECTION NOTE: Gas Isolation Valve is supplied with the boiler. 1. Fit the conical male adapter to the gas isolation valve. 2. Fit the gas isolation valve assembly to the boiler gas connection ensuring the sealing washer is fitted. 3.
  • Page 14: Installation Drawings For Multiple Boiler Systems

    INSTALLATION DRAWINGS FOR MULTIPLE BOILER SYSTEMS 7.1 GENERAL The multiple boiler systems are available in three formats: • 2 to 6 boilers in a linear configuration, mounted on a wall. • 2 to 6 boilers in a linear configuration, mounted on a free-standing frame. •...
  • Page 15 7.2.2 INSTALLATION DRAWING WITH 2 - 120/150 BOILERS (SIDE BY SIDE) LOW LOSS HEADERS OR PLATE HEAT EXCHANGERS 100/150 Concentric Flue Connector 550 CRS BETWEEN BOILERS 1480 664 - 150kW 574 - 120kW 1100 SYSTEM FLOW DN80 FLANGE CONN SYSTEM RETURN DN80 FLANGE CONN Note 1: Mixing header and gas connections can be 2"...
  • Page 16 7.2.4 INSTALLATION DRAWING WITH 3 – 120/150 BOILERS (SIDE BY SIDE) LOW LOSS HEADERS OR PLATE HEAT EXCHANGERS 550 CRS 550 CRS 100/150 Concentric Flue Connector BETWEEN BETWEEN BOILERS BOILERS 2030 664 - 150kW 1650 574 -120kW SYSTEM FLOW DN100 FLANGE CONN SYSTEM RETURN DN100 FLANGE CONN Note 1: Mixing header and gas connections can be...
  • Page 17 7.2.6 INSTALLATION DRAWING WITH 4 – 120/150 BOILERS (SIDE BY SIDE) LOW LOSS HEADERS OR PLATE HEAT EXCHANGERS 550 CRS 550 CRS 550 CRS 100/150 Concentric Flue Connector BETWEEN BETWEEN BETWEEN BOILERS BOILERS BOILERS 2580 664 - 150kW 2200 574 - 120kW SYSTEM FLOW DN100 FLANGE CONN SYSTEM RETURN...
  • Page 18 7.2.8 INSTALLATION DRAWING WITH 5 - 120 BOILERS (SIDE BY SIDE) LOW LOSS HEADERS OR PLATE HEAT EXCHANGERS 550 CRS 550 CRS 550 CRS 550 CRS 100/150 Concentric Flue Connector BETWEEN BETWEEN BETWEEN BETWEEN BOILERS BOILERS BOILERS BOILERS 3130 2750 (574 - 120kw) SYSTEM FLOW DN100 FLANGE CONN...
  • Page 19: Back To Back Frame Kit Configuration

    7.2.10 INSTALLATION DRAWING WITH 6 – 30-150 BOILERS (SIDE BY SIDE) LOW LOSS HEADERS 550 CRS 550 CRS 550 CRS 550 CRS 550 CRS Concentric Flue Connector 100, 120, 150kW = 100/150 30-80kW = 80/125 BETWEEN BETWEEN BETWEEN BETWEEN BETWEEN BOILERS BOILERS BOILERS...
  • Page 20 7.3.2 INSTALLATION DRAWING WITH 2 – 120/150 BOILERS (BACK TO BACK) LOW LOSS HEADERS OR PLATE HEAT EXCHANGERS 264 CRS 100/150 Concentric Flue Connector 1323 - 150kW 1148 - 120kW SYSTEM FLOW DN80 FLANGE CONN SYSTEM RETURN DN80 FLANGE CONN 2"...
  • Page 21 7.3.4 INSTALLATION DRAWING WITH 3 – 120/150 BOILERS (BACK TO BACK) LOW LOSS HEADERS OR PLATE HEAT EXCHANGERS 550 CRS 264 CRS 100/150 Concentric Flue Connector BETWEEN BOILERS 1323 - 150kW 1480 1148 - 120kW 1100 2" BSP Female SYSTEM FLOW Gas Connection DN100 FLANGE CONN SYSTEM RETURN...
  • Page 22 7.3.6 INSTALLATION DRAWING WITH 4 – 120/150 BOILERS (BACK TO BACK) LOW LOSS HEADERS OR PLATE HEAT EXCHANGERS 550 CRS 264 CRS 100/150 Concentric Flue Connector BETWEEN BOILERS 1323 - 150kW 1480 1148 - 120kW 1100 2" BSP Female SYSTEM FLOW Gas Connection DN100 FLANGE CONN SYSTEM RETURN...
  • Page 23 7.3.8 INSTALLATION DRAWING WITH 5 – 120 BOILERS (BACK TO BACK) LOW LOSS HEADERS OR PLATE HEAT EXCHANGERS 550 CRS 264 CRS 100/150 Concentric Flue Connector BETWEEN BETWEEN BOILERS BOILERS 2030 1148 - 120kW 1650 2" BSP Female SYSTEM FLOW Gas Connection DN100 FLANGE CONN SYSTEM RETURN...
  • Page 24: Electrical Connections & Wiring Diagram

    ELECTRICAL CONNECTIONS & WIRING DIAGRAM Standard Height Frame & Header Kits...
  • Page 25: Commissioning And Testing

    COMMISSIONING AND TESTING 1. Electrical and gas safety checks must be carried out on completion of installation as with individual boiler commissioning. 2. Pump setting - follow instructions on pump types shown below; EVOMAX EVOMAX 2 UPML for use with Low Loss Headers UPMXXL for use with Plate Heat Exchangers IMPORTANT: PWM Control to be wired directly to the boiler PCB &...
  • Page 26 NOTES Frame & Header Kits...
  • Page 27 NOTES Frame & Header Kits...
  • Page 28 Technical Training The Ideal Technical Training Centre offers a series of first class training courses for domestic, commercial and industrial heating installers, engineers and system specifiers. For details of courses please ring:....01482 498432 Ideal Boilers Ltd. pursues a policy of continuing improvement in the design and performance of its products. The right is therefore reserved to vary specification without notice.

Table of Contents