Table of Contents
Advertisement
Quick Links
OWNER'S GUIDE & INSTALLATION INSTRUCTIONS
Transom Mount
with Integrated Release Bracket
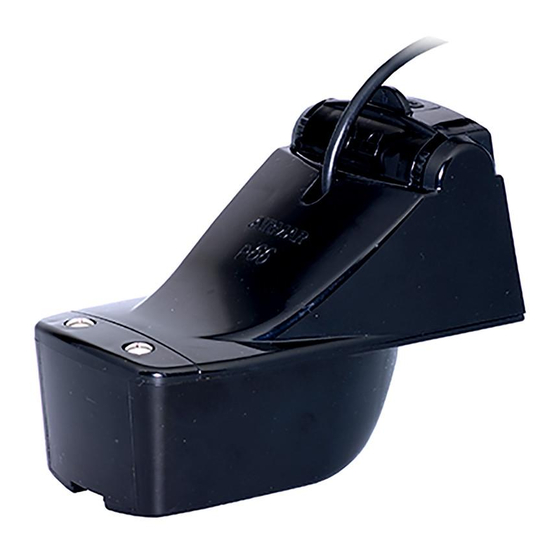
Depth Transducer
Depth & Temperature Model: P66
Multisensor: P66
TRIDUCER
®
Smart
Chirp TRIDUCER
Multisensor: IC-TM90M
®
Chirp Model: TM165HW
Patent http://www.airmar.com/patent.html
Follow the precautions below for optimal
product performance and to reduce the risk of
property damage, personal injury, and/or death.
WARNING: Always wear safety glasses, a dust mask,
and ear protection when installing.
WARNING: When the boat is placed in the water,
immediately check for leaks around the screws and
any other holes drilled in the hull.
CAUTION: Do not attach the sensor to the bracket
before fastening the bracket to the hull. It is VERY
difficult to separate them if the bracket is unattached.
CAUTION: IC-TM90M, TM165HW Chirp
transducer—Always operate the transducer in water.
Operating in air will allow the transducer to overheat
resulting in failure.
CAUTION: Never pull, carry, or hold the sensor by the
cable as this may sever internal connections.
CAUTION: Never strike the transducer with anything
except the palm of the hand. Never strike the
paddlewheel.
CAUTION: The bracket protects the sensor from
frontal impact only.
CAUTION: Never use solvents. Cleaner, fuel, sealant,
paint, and other products may contain solvents that
can damage plastic parts, especially the transducer's
face.
IMPORTANT: Please read the instructions completely
before proceeding with the installation. These
instructions supersede any other instructions in your
instrument manual if they differ.
with Temperature Sensor
Sensor: P66
™
Record the information found on the cable tag for future reference.
Part No._________________Date___________Frequency________kHz
TM165HW
Applications
• Recommended for boats up to 8m (25')
• Not recommended for boats with inboard engine(s)
• Not recommended for a stepped hull
• Adjusts to transom angles from 2
• Vertically orients sound beam on hull with deadrise angle up to 28
• Good operation up to 44kn (50MPH)
Pretest Speed & Temperature Functions
Connect the sensor to the instrument and spin the paddlewheel.
Check for a speed reading and the approximate air temperature. If
there is no reading(s) or it is inaccurate, check the connections
and repeat the test. If there is still no reading(s) or it is inaccurate,
return the product to your place of purchase.
Tools & Materials
Safety glasses
Dust mask
Ear Protection
Scissors
Masking tape
Electric drill
Drill bits and hole saws:
Bracket holes
Transom hole (optional) 2mm or 1/16" larger than connector Ø
Cable clamp holes
Angle finder
Marine sealant (suitable for below waterline)
Screwdrivers
Straight edge
Pencil
Grommet(s) (some installations)
Cable ties
Water-based anti-fouling paint (mandatory in salt water)
P66
TRIDUCER
Multisensor
– 22
4mm, #23, or 9/64"
3mm or 1/8"
®
Advertisement
Table of Contents

Related Manuals for Airmar Depth & Temperature P66


Summary of Contents for Airmar Depth & Temperature P66
- Page 1 Smart Sensor: P66 ™ Chirp TRIDUCER Multisensor: IC-TM90M ® Chirp Model: TM165HW Patent http://www.airmar.com/patent.html TRIDUCER ® Multisensor Applications • Recommended for boats up to 8m (25') Follow the precautions below for optimal • Not recommended for boats with inboard engine(s) product performance and to reduce the risk of •...
- Page 2 Figure 2. Mounting location on single drive boat CAUTION: To prevent drilling too deeply, wrap masking tape Copyright © 2003 - 2019 Airmar Technology Corp. around the bit 22mm (7/8") from the point. NOTE: Fiberglass hull—Minimize surface cracking by running the drill in reverse until the gelcoat is penetrated.
- Page 3 Figure 7. Servicing the speed sensor self-tapping screws to prevent water seepage into the transom Copyright © 2003 - 2019 Airmar Technology Corp. (Figure 5). Screw the bracket (and shim if needed) to the hull. Do not tighten the screws at this time.
- Page 4 (either side). Push up on the Figure 10. Attaching the bracket to the sensor screwdriver while lifting up on the sensor. Copyright © 2003 - 2019 Airmar Technology Corp. 2°–10° transom angle 12°–18° transom angle 11°...
- Page 5 Cable Routing & Connecting sensor to the instrument. CAUTION: Do not remove the connector to ease cable routing. If the cable must be cut and spliced, use Airmar’s splash-proof Junction Box Checking for Leaks No. 33-035 and follow the instructions provided. Removing the...
- Page 6 Gemeco Tel: 803-693-0777 email: sales@gemeco.com Airmar EMEA Europe, Middle East, Africa Tel: +33.(0)2.23.52.06.48 email: sales@airmar-emea.com Smart™ Sensors only 35 Meadowbrook Drive, Milford, New Hampshire 03055-4613, USA • www.airmar.com Copyright © 2000 - 2019 Airmar Technology Corp. All rights reserved.
Need help?
Do you have a question about the Depth & Temperature P66 and is the answer not in the manual?
Questions and answers