Advertisement
Quick Links
Tower &
Accessories
Care / Maintenance / Operation
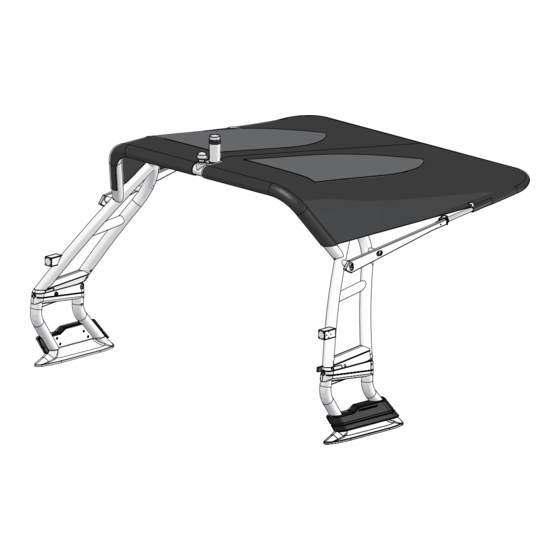
Moomba A3 tower
Tower Center Section # C915-117100, C915-117101, C915-119105
Tower Port Side # C915-117103, C915-117105
Tower Starboard Side # C915-117102, C915-117104
Bimini Arms # C915-117179
Bimini # C915-119153, C915-116382
Triton Board Rack # C915-118179
Push Button Swivel with Quick release # C915-116063
Wake Surf Rack # C915-116071
Information: info@roswellmarine.com
Warranty: warranty@roswellmarine.com
If you have any questions please call : 1-321-638-1331
Rev. 17-Oct-18
Advertisement

Related Manuals for Roswell Moomba A3 Tower

Summary of Contents for Roswell Moomba A3 Tower
- Page 1 Tower & Accessories Care / Maintenance / Operation Moomba A3 tower Tower Center Section # C915-117100, C915-117101, C915-119105 Tower Port Side # C915-117103, C915-117105 Tower Starboard Side # C915-117102, C915-117104 Bimini Arms # C915-117179 Bimini # C915-119153, C915-116382 Triton Board Rack # C915-118179...
- Page 2 Table of Contents About your A3 tower 04-05 Tower Features 06-09 Bimini Un-folding Bimini pg 10 Folding Bimini pg 11 Trailering pg 12 Tightening Canvas pg 13 Tips & Tricks pg 14 15-16 Folding Tower 17-24 Board Racks Triton Rack pg 18-20 Swivel Operation pg 21...
- Page 3 Check the clearance between your tower and any overhead obstacles including bridges, canals etc. NEVER USE CLEANERS ON YOUR TOWER OR ACCESSORIES! Your Roswell tower has been treated with an automotive paint coating that forms a protective layer. A mild soap and water combination may be used to remove traveling grime or water spots.
- Page 4 Tower Folding Upgrade Kits Fold the tower with ease when you need. Upgrade Kits on your Moomba A3 tower include Whether you need to drive under a bridge or Moomba Accent lights that can be activated store your tower, this tower folds with Roswell’s from your boat dash.
- Page 5 Moomba Tower Features ww w.roswellmarine.com A3 Tower Features Two Styles of Mounts for Two Styles of Board Racks Choose between a fixed mount or a swivel mount. The swivel mount also comes with a quick release option for your Wakesurf Rack or your vertical Triton Board Rack. QR Swivel Board Rack Fixed Board Rack C915-116063 with...
- Page 6 Corrosion and/or oxidation on coated surfaces as well as on all hardware are specifically excluded from warranty as their care, maintenance, and environments of use cannot be controlled by Roswell Marine. Damage due to misuse or improper care is also excluded from warranty. For full warranty details please contact your local dealer.
- Page 7 Moomba Tower Bimini ww w.roswellmarine.com Preparing your tower Bimini Mounts Rubber Plugs Remove the 4 rubber plugs from the bimini mounts on your tower. These are press fit into the bimini mounts and do not require any tools to remove. Port Bimini Arm Installing Bimini Arms Bolt Washers...
- Page 8 Moomba Tower Bimini ww w.roswellmarine.com Bimini Frame Assembly **This step requires 2 people** Remove the plastic wrapping from your bimini frame. Grab the 2 shoulder bolts, 2 pivot washers, and 2 shoulder bolt washers from your bimini box. Apply red Loctite to the 2 bolts.
- Page 9 Moomba Tower Bimini ww w.roswellmarine.com Attach all 8 velcro straps on the rear of the bimini to the rear tower tube and the 2 Final Velcro buckle straps to the rear bimini mount. After attaching all straps, adjust and secure them until the bimini canvas fits tight.
- Page 10 Moomba Tower Bimini ww w.roswellmarine.com Unfolding your Moomba Bimini Unfold the frame from the tower. Unzip the bimini Undo the 2 straps that secure the bimini to your tower. boot from the bimini frame. Unroll your fabric and middle bow. Bimini Boot Tie Down Straps Adjust and secure the 2 velcro straps located on...
- Page 11 Moomba Tower Bimini ww w.roswellmarine.com Folding up your Moomba Bimini Undo all 8 velcro straps and 2 buckle straps attaching the rear of the bimini canvas to the the tower. Undo the 2 velcro straps attaching the sides of the canvas to the bimini frame. Velcro Straps Buckle Straps Fold the middle bow toward the front bow and wrap...
- Page 12 Moomba Tower Bimini ww w.roswellmarine.com Tower folding / Trailering Quick release pins must be inserted into the bimini arms for trailering to avoid damage to parts **Middle Bow Hinge Pins also need to be inserted into the hinge to avoid any tower damage.** *** Illustrated is the ONLY acceptable way to safely fold your Moomba tower or trailer your Moomba boat with the bimini on*** ATTENTION...
- Page 13 Moomba Tower Bimini ww w.roswellmarine.com Tightening your Moomba Bimini Canvas It is normal that your bimini canvas will stretch over time and use. Your Moomba Bimini has been designed to allow you to tighten your canvas as needed. Canvas Tightening This method is best executed with 2 people Remove the rear bimini arm bolts on port and starboard sides.
- Page 14 If your quick release pins are still difficult to remove and insert Now that your shim washers have been added your frame and with the addition of the arm shim washers, Roswell recommends arms should be parallel or much closer. Test removing and using a drill with a 5/16”...
- Page 15 Moomba Tower Folding ww w.roswe llmarine.com Folding Your Tower BEFORE ATTEMPTING TO FOLD YOUR TOWER : - Ensure all boards have been removed from racks. - Ensure swivels are locked into either the inside or outside positions. - Ensure your bimini is folded against the tower and secured. - Ensure no body parts are near the folding area of the tower.
- Page 16 Moomba Tower Folding ww w.roswe llmarine.com To raise the tower up repeat steps B & C in reverse. Raise the tower up PORT Side Locking: Turn lever COUNTERCLOCKWISE. PORT Side Unlocking: Turn lever CLOCKWISE until it stops. This is the reset position. STARBOARD Side Locking: Turn lever CLOCKWISE.
- Page 17 Board Racks/ Swivel/ Quick Release ww w.roswellmarine.com Board Racks/ Swivel/ Quick Release Triton Board Rack # C915-118179 Wake Surf Rack # C915-116071 Push Button Swivel with Board Rack Quick release # C915-116063 Information: info@roswellmarine.com If you have any questions please call : 1-321-638-1331...
-
Page 18: Mounting Options
Board Racks/ Swivel/ Quick Release ww w.roswellmarine.com Triton Board Rack Assembly Instructions Hardware Parts Tools Required 5/32" Allen Key Triton Spacer Triton Adapter Triton Board Rack • Always ensure your boards are securely fastened in place • Never trailer your boat with boards in the racks. Racks by the rack. - Page 19 Board Racks/ Swivel/ Quick Release ww w.roswellmarine.com Fixed mounting This is how your Triton rack installation should look. 1- Mount the adapter to the 2- Mount the triton rack to the adapter tower block with the 4 bolts using the 4 long bolts provided with included with your adapter.
- Page 20 Board Racks/ Swivel/ Quick Release ww w.roswellmarine.com Your Triton rack is designed to be adjustable to fit just about any size of wakeboard, wakesurfer or wakeskate. There are 2 settings, one for narrower boards, one for wider boards. In the wide setting, the max board width should be no greater than 23”...
- Page 21 Board Racks/ Swivel/ Quick Release ww w.roswellmarine.com Swivel Operation Swivel assemblies must be completely locked to avoid damage to boat or injury to occupants. Proper swivel operation is crucial to ensure racks do not swing into boat unintentionally. To ensure proper engagement and releasing of locking pin, swing racks until they compress the rubber bumper at end of travel.
- Page 22 Spacer x2 5/32" Allen Key ** BOARD RACK BUNGEE CORD NOT ILLUSTRATED FOR IMAGE CLARITY ** Below are the recommended mounting options for Roswell board racks. Installation instructions available with respective mounting products. Fixed Tower Mount Quick Release Swivel Mount...
- Page 23 Board Racks/ Swivel/ Quick Release ww w.roswe llmarine.com Board Rack Quick Release Assembly Instructions Hardware Tools Required Parts QR Tool QR Tower Adaptor 1/4" Allen Key 5/16" Allen Key 3/16" Allen Key QR Male QR Female Adaptor with Adaptor Swivels Apply RED Loctite to 4x C bolts and mount the QR Tower Adaptor First, place the QR Female Adaptor onto the QR Tower Adaptor.
- Page 24 Board Racks/ Swivel/ Quick Release ww w.roswellmarine.com Carefully slide the Male Adaptor into the Female Adaptor, and fasten Apply RED Loctite to the board rack’s 4 bolts and mount the rack to together with an A bolt and your QR tool. the Swivel.
- Page 25 Moomba Weight Assist Adjustment ww w.roswellmarine.com Aviator Weight Assist Adjustment Instructions Tools Required 5/16” Allen Key 1/4” Allen Key 1/8” Allen Key Tape Measure 1/2” Wrench First ensure nothing is in the way of the tower. Remove the 2 bolts as shown below. 1/4”...
- Page 26 Moomba Weight Assist Adjustment ww w.roswellmarine.com Remove each spring assembly. Take extra caution to not scratch your paint when removing the spring fittings. Prior to taking any measurements in this step, ensure all parts are sitting together properly by lightly pulling on the robline thimble and pushing on the spring fitting.
- Page 27 Moomba Weight Assist Adjustment ww w.roswellmarine.com Insert each spring assembly back into the tower. Take extra caution to not scratch your paint when installing the spring fittings. Using a 5/16” allen key, secure each spring assemble with the 2 bolts on each side.
- Page 28 Adding speakers, board racks and/or a bimini will provide additional counter weight. If a simple, no accessory setup is what you are going for, Roswell recommends disconnecting one of the spring assemblies. This would mean simply removing one of the bolts installed in Step H.
- Page 29 Wiring Diagrams Tower Wiring / Speaker wiring...
- Page 30 STBRD (-) PURPLE & BLACK STBRD (+) PURPLE ALT STBRD (-) GREY & BLACK ALT STBRD (+) GREY ALT PORT (-) WHITE & BLACK ALT PORT (+) WHITE PORT (-) GREEN & BLACK PORT (+) GREEN ALL ROUND (+) DARK GREY DIRECTIONAL (+) DARK BLUE ACCENT (+)
- Page 31 Moomba Tower Installation Notes ww w.roswe llmarine.com NOTES...
Need help?
Do you have a question about the Moomba A3 Tower and is the answer not in the manual?
Questions and answers