Table of Contents
Advertisement
Quick Links
Table of Contents
SECTION 1: GENERAL INTRODUCTION
VER DY20130812RPIF-EN
1
SECTION 1: GENERAL INTRODUCTION
I. CONTACT INFORMATION
Apex Locator iFinder is manufactured by:
DENJOY DENTAL CO., LTD
Address: 4
th
Floor, A3 Building, Lugu International Industry Park,
No. 229 Tongzipo Road West, Changsha City, P. R. China 410205
Website: www.denjoy.cn
E-mail: denjoy@denjoy.cn
Manufacturing:
Company name: DENJOY DENTAL CO., LTD
Address: 4
Floor, A3 Building, Lugu International Industry Park,
th
No. 229 Tongzipo Road West, Changsha City, P. R. China 410205
Authorized European Representative:
Company name: SPETECHCULAR LTD
Address: 16, Quainton Close, Cambridge, CB5 8LR. UK
Please contact local sales distributor from whom you purchase this
unit for user's record and further after-sale service.
VER DY20130812RPIF-EN
2
Advertisement
Table of Contents

Related Manuals for Denjoy iFinder


Summary of Contents for Denjoy iFinder
-
Page 1: Table Of Contents
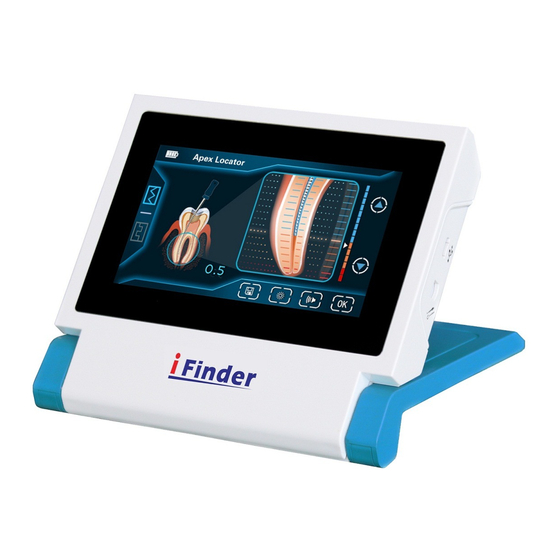
VER DY20130812RPIF-EN SECTION 1: GENERAL INTRODUCTION I. CONTACT INFORMATION Table of Contents Apex Locator iFinder is manufactured by: DENJOY DENTAL CO., LTD Address: 4 Floor, A3 Building, Lugu International Industry Park, No. 229 Tongzipo Road West, Changsha City, P. R. China 410205 SECTION 1: GENERAL INTRODUCTION Website: www.denjoy.cn... - Page 2 VER DY20130812RPIF-EN VER DY20130812RPIF-EN II. PRODUCT DESCRIPTION Caution: Consult accompanying documents Apex locator iFinder is our latest model with touch-screen LCD used Authorized Representative in the European for determining the position of apex of root canal with the up-to-date Community technology multi-frequency operation system.
-
Page 3: Section 2: Main Technical Index
VER DY20130812RPIF-EN VER DY20130812RPIF-EN SECTION 2: MAIN TECHNICAL INDEX 1. Maximum valid values of amplitude Valid values of amplitude between file holder and stainless electrode hook is ≤130mV 2. AC Adapter:Input voltage:100-240V 50/60Hz 0.25A Output voltage:5V 1A Battery:3.7V 2200mAh 3. Display mode: 4.3 inch TFT 480*272 color screen 4. -
Page 4: Section 4: Lcd Screen Display
VER DY20130812RPIF-EN VER DY20130812RPIF-EN SECTION 4: LCD SCREEN DISPLAY On the Main Interface, after insert the TF card, touch save key, as I. APEX LOCATOR INTERFACE shown in Figure 1, it means save successfully. Otherwise, If no TF card inserted or something wrong with TF card, as shown in Figure 2, it means save unsuccessfully. - Page 5 VER DY20130812RPIF-EN VER DY20130812RPIF-EN Figure 4 b, Brightness control key On the Main Interface, user can adjust the 4 level brightness of the screen by touching the brightness control ket. After adjustment, touch the enter key, as shown in Figure 3, it means set successfully. Please note, no operation for 10 seconds, it will automatically return to Main Interface..
- Page 6 VER DY20130812RPIF-EN VER DY20130812RPIF-EN II. SELF CALIBRATION INTERFACE Figure 5 Figure 6 MARK 1. Calibration key for control part MARK 2. Calibration key for accessories (probe wire, file holder and hooks) a, Calibration key for control part On the self-calibration interface, insert the calibrator test instrument into matching socket, touch calibration key for control part (MARK 1), b.
-
Page 7: Section 5: Operation
VER DY20130812RPIF-EN VER DY20130812RPIF-EN Figure 7 1. The plug of the probe wire should be completely inserted into the socket on the right side of the control part. Note: Do not pull out the probe wire by taking the wire instead of catching hold of the plug to avoid breaking down the probe wire. -
Page 8: Section 6: Safety Precautions
VER DY20130812RPIF-EN VER DY20130812RPIF-EN of the apical constriction. (Generally we suggest to use 0.5 for measurement result. measurement the length of root canal). When change the battery, do not mix the old battery with the new Note: Please do not make the measurement when in charge. one and mix the alkali battery with the manganic one. -
Page 9: Section 7: Toubleshooting Guide
VER DY20130812RPIF-EN VER DY20130812RPIF-EN complete self-checking procedure automatically and successfully. Question: No alert When following situations appear, please use paper point part to Answer: make root canal dry to increase accuracy of measurement. a. Check the alert adjustor button of panel on top of unit. ●... -
Page 10: Section 9: Cleaning And Disinfection
Transportation is applicable to all common methods. MAIN BODY CLEANING INSTRUCTION SECTION 11: PACKING LIST When the surface of main body is polluted, please rub the surface with dry soft cloth ONLY. iFinder Control Part 1pc REMARKS: Probe Wire File Holder 2pcs Any liquid lotion like ethanol, banana oil and light oil are not allowed. - Page 11 VER DY20130812RPIF-EN WARRANTY REGISTRATION FORM Item Name: Model Name: Serial No.: Date of Purchase: Name: Address: Phone: Email: Name of Distributor: Authorized Distributors: Stamp and Signature 21 ...
Need help?
Do you have a question about the iFinder and is the answer not in the manual?
Questions and answers