Table of Contents
Advertisement
Advertisement
Table of Contents

Related Manuals for CraftUnique CraftBot 3


Summary of Contents for CraftUnique CraftBot 3
-
Page 2: Table Of Contents
TABLE OF CONTENTS 1. INTRODUCTION 1.1. Important 1.2. Warnings 1.3. Caution 1.4. Unpacking the printer 1.5. Contents of box 2. INTRODUCTION TO THE CRAFTBOT 3 3. ASSEMBLING THE PRINTER 3.1. Installing the encoders 3.2. Installing the filament guide tube 3.3. Installing the filament spool holders 3.4. Mounding the filament spools 3.5. Attaching the power cord 4. -
Page 3: Introduction
Congratulations on your purchase of the CraftBot 3D printer and welcome to the word of 3D crafting! At CraftUnique we believe that 3D printing opens a new window to enhance creativity. It offers outstanding crafting experience even without prior programming or 3D printing experience. -
Page 4: Important
All information in this user manual is subject to change at any time without notice and is provided for convenience purposes only. CraftUnique reserves the right to modify or revise this user manual in its sole discretion and at any time. By using the manual, you agree to be bound by any modifications and/or revisions. -
Page 5: Unpacking The Printer
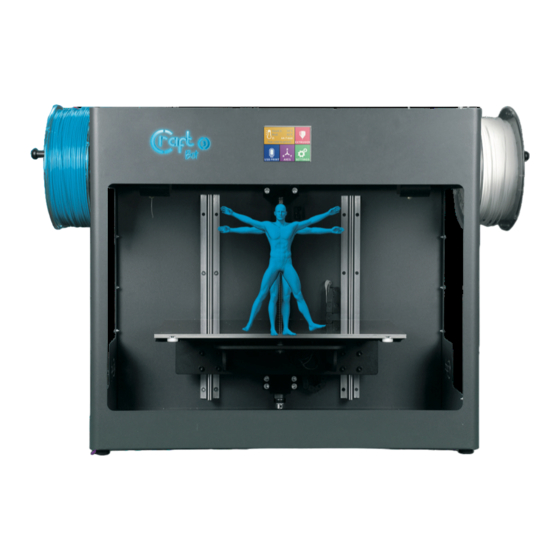
CraftBot 3 1.4. UNPACKING THE PRINTER 1. Place the CraftBot cardboard box on an even surface with open space around. 2. Open the box with care, avoid damaging the contents when using any cutter tools. 3. Remove the protective cardboard cover. You will find the Quick Start Guide at the top of the inner packaging. - Page 6 CraftBot 3 2. INTRODUCING THE CRAFTBOT 3D PRINTER Touchscreen LCD display Filament guide tube Separated dual heads Removable build plate Leveling knobs Filament spool holder Filament spool FMS encoder USB for flash drive USB for PC connection AC power socket and ON/OFF switch...
-
Page 7: Assembling The Printer
CraftBot 3 3. ASSEMBLING THE PRINTER 3.1. INSTALLING THE ENCODERS • Select the desired position for the encoders. Choose their position so that the filament spool bracket fits beside them. And the filament drives directly up into the encoders from the spool. -
Page 8: Mounding The Filament Spools
CraftBot 3 3.4. MOUNDING THE FILAMENT SPOOLS • Fit both of the filament spools onto the filament spool holders, so that the filament feeds, directly up into the Encoder and up into the guide tube. 3.5. ATTACHING THE POWER CORD •... -
Page 9: First Steps
CraftBot 3 4. FIRST STEPS 4.1. SWITCHING ON THE APPLIANCE • Switch on CraftBot by the ON/OFF button located on the back part of the appliance. • The LCD panel on the front will light up. 4.2. SETTING THE LANGUAGE •... -
Page 10: Connecting The Craftbot3 Printer To A Wireless Network
CraftBot 3 4.5. CONNECTING THE CRAFTBOT3 PRINTER TO A WIRELESS NETWORK • Select the Settings menu n the LCD screen and go to page 3 with right arrow. Select the Wi-Fi icon • Select the search Wi-Fi Network” icon – the third icon in the bottom row. -
Page 11: Preparing The Printer
CraftBot 3 5. PREPARING THE PRINTER 5.1. HEATING UP THE PRINTER For printing or loading / unloading the filament, heat up the printer according to the type of filament you are printing with. On the main menu press the thermometer icon. -
Page 12: Removing The Filament From The Extruder
CraftBot 3 3. Cut the end of the filament free from any kinks and bad ends. Insert the filament from the spool into the bottom hole of the filament FMS encoder. Please make sure that the filament spool feeds directly into the FMS encoder from the bottom so that the filament keeps itself straight on course and free from any snagging. - Page 13 CraftBot 3 Calibration process: 1. Heat up the heads and remove the filaments. It’s easier without filament. 2. Select the Settings menu on the LCD screen go to. page 1 select the Leveling icon (three crossed circles which represent the three knobs and screw) 3.
-
Page 14: Dual Head Calibration (Z)
CraftBot 3 4. Repeat the process with the two back knobs. First the right back, then the left back knob will be adjusted. 5. Before switching from knob to knob, please remove the leveling card. When the nozzle is in the correct location replace the card as necessary for further testing at that location point. - Page 15 CraftBot 3 5. When the first head has moved to the reference point which will be at the front screw point, the build platform and the nozzle tip must be set perfectly to each other with the nozzle JUST touching the surface of the build platform.
-
Page 16: Dual Head Calibration (X-Y)
CraftBot 3 5.4.3. DUAL HEAD CALIBRATION (X-Y) The X-Y axis must be calibrated so that the coordinate system of the two heads is completely aligned. So, if we send both heads to the same coordinates then they should be at the same point. This is important when we are printing an object with both heads. -
Page 17: Fms Operation
CraftBot 3 9. When your lines aligned in the 15th, 16th or 17th lines: • Chose the head’s number in the LCD screen, and wait for the text message. If you see the yellow congratulation message, the calibration is correct and you can exit to the main menu. - Page 18 CraftBot 3 Calibration: 1. Select the Settings menu on the LCD screen and go to the 4th page. Select the encoder settings icon 2. Here you can view the status and see whether the function is turned on or off. You can change this with the first button.
-
Page 19: Wizard Settings
CraftBot 3 Automatic error correction process: : • The printer enters paused status, the head goes to the pause position. • It then retracts the filament, following which it attempts to extrude. • Point two will be attempted three times. -
Page 20: Activating The Fans
CraftBot 3 5.4.7. ACTIVATING THE FANS CraftBot has five fans: object 1 fan, extruder 1 fan, object 2 fan, extruder 2 fan, case fan, and dome fan. You can Activate and deactivate some of these fans while the printing is taking place. (The dome has to be activated and set before printing starts). -
Page 21: Sound Settings
Warnings Only. 5.4.9. REPORT FUNCTION Registered users on Craftunique website can register their printer using its serial number on the website. After registration, when the function switched on if the printer is connected to wifi then the printer every day at midnight or at the very first power on that day, it will send the actual hours of operation, and the filament usage of the printer to the website. -
Page 22: Configuration Of Colored Red Strip
CraftBot 3 5.4.11. CONFIGURATION OF COLORED RED STRIP A custom colour can be set for each mode of operation. Modes: idle, printing, heating, pause, print finished, error 1. Select the Settings menu on the LCD screen and go to the 4th page. Select the three intersecting rings icon 2. -
Page 23: Printing Modes
Gcode will determine whether the printer operates with one or two printheads. If an object was sliced for a single head printer, but contains a support structure, the CraftBot 3 is able to print the object with normal filament while printing the support with PVA filament. The advantage to this is that you don’t have to re-slice the existing gcodes if you also want to print with PVA. -
Page 24: Navigate The Build Plate And The Extruders
CraftBot 3 6. NAVIGATE THE BUILD PLATE AND THE EXTRUDERS Select the AXES on the menu. The first “grey” button will, of course, return you to the main menu. • The small house icon indicates the „home” position of the extruders which is this location the front corners of the build plate. -
Page 25: Using The Printer
To print a 3D object, CraftBot needs toolpath information generated from 3D object files like .obj or .stl. Toolpath information is simply called “gcode”. CraftWare software converts 3D designs into printing commands for the CraftBot 3D printer. CraftWare has been developed by CraftUnique with the aim of easing and perfecting the printing process. -
Page 26: Dual Head Printing In Craftware
CraftBot 3 4. To generating the toolpath information (gcode) Click on the Slice button to the right side of the screen. A new screen pops up with options to specify the printing quality and material to be used along with pages of information on adjustable setting for your model. When you have finished making your adjustments press the Slice button at the bottom of the setting page. - Page 27 CraftBot 3 In parallel and mirror printing mode you can see the full body of the model in the left area, on the right side in the red area is the ghost of the original model. After the Slicing you can see just the body in the left, but don’t worry about it, it will be printed as well.
-
Page 28: Printing Objects From Usb Flash Drive
2. When saved, Insert the USB drive into the USB slot located on the top front of the appliance (above the LCD screen). 3. Select the USB Print option from the main menu . CraftBot 3 users have the option to initiate a printing via the CraftBot app application. -
Page 29: Tweak Function Menu
CraftBot 3 7.4.1. TWEAK FUNCTION MENU Setting function enables to change temperature, print speed, extrusion ratio, lighting, object fan control settings. The in-print tweaks overrule the settings in the gcode. Temperature modification: Heads and bed temperature can be changed, with heads object fans. Set the speed of the object fan. -
Page 30: Pause Menu
Make sure that your CraftBot 3 printer is switched on and connected. • The app will search for your CraftBot 3 in its reach (if there are more, it will find all your printers and you can select your CraftBot 3 to connect to from the list) •... -
Page 31: Cleaning And Maintenance
CraftBot 3 9. CLEANING AND MAINTENANCE IMPORTANT! Cleaning and lubrication should only be conducted while the extruder and built plate are cold. Please allow the CraftBot 3D printer to cool down at least 30 minutes before cleaning or maintenance. It is necessary to clean the printer after every 1000 hour. -
Page 32: Troubleshooting
CraftBot 3 9. Remove the rag from the CraftBot interior. 10. Plug in and power up the CraftBot and move the build plate to the lowest point. (enter the“Axes” menu, home position and then go to the directional menu and press the Z down arrow until the bed reaches the lowest point). -
Page 33: Removing The Nozzle
If you have the older printers and you find that you have the original hotend assembly and you would like to change this for a new upgrade parts, then these are available from the Craftunique webshop. Just remember the new hotends parts, are not compatible with the older hotends. So you will need to... -
Page 34: Firmware Update
1. Download CraftPrint® software from Craftunique® website: https://craftbot.com/craftware/ 2. Install the CraftPrint® application on your computer. 3. Download the pr3Dator® firmware file from Craftunique website and extract the ZIP file on your computer. Please read the attached Release Notes. https://www.craftunique.com/firmware 4. - Page 35 CraftBot 3 8. On successful load you will get a confirmation message, click OK! 9. Open again the “…” menu and select Update CraftBot firmware from loaded file… 10. When asked please turn off the printer at least 5 seconds.
-
Page 36: Firmware Update On Older Printers
CraftBot 3 11.2. FIRMWARE UPDATE ON OLDER PRINTERS If you have an older printer and update it a long time ago the first need to restart your printer. Follow the next easy instructions and update your Firmware. From time-to-time you may encounter a traffic jam scenario when attempting to upload this new firmware;... -
Page 37: Useful Things
CraftBot 3 Remove the protective sheet from the new Kapton sheet then apply some window cleaning liquid onto the stick surface of the New sheet, then spray the liquid onto the clean surface of the aluminium build plate. Place the sticky side of the new sheet onto the plate. the access liquid will help you to position the new sheet correctly. - Page 38 CraftBot 3 30.- G104: Extrude width timeout: E T 31.- G195: Reset motion. 32.- G196: Reset all. 33.- G197: Pause. 34.- G198: Resume. 35.- G199: Imadiate pause. 36.- G194: Imadiate abort. 37.- M18: Disable stepper motors. 38.- M82: Set extruder to absolute mode.
- Page 39 CraftBot 3 77.- M1015: Get PWM duty. 78.- M1020: Puffer mode: S 79.- M1104: Get Info: P 80.- M1105: Get HMI mode. 81.- M1106: Set HMI mode. 82.- M1114: Get machine coordinates. 83.- M1115: Get queue. 84.- M1116: Set Min Q: Q 85.- M1123: Set T7 pin high or low: S...
-
Page 40: Useful Links
CraftBot 3 123. - M4005: Set maximum bed heat temp: H S 124. - M5000: Set XY Z jog feed: X Z 125. - M5001: Set mechanical parameters: E X Z 126. - M5002: Set XY offset: X Y 127. -
Page 41: Guarantee
With the exceptions included in the regulations concerning the guarantee and to the greatest extent permitted by the relating act, CRAFTUNIQUE Ltd. is not responsible for any direct, indirect, specific, stochastic or consecutive damage claims which are stem from the breaching of the terms of guarantee, respectively any other legal theory, included, but not limited to •...
Need help?
Do you have a question about the CraftBot 3 and is the answer not in the manual?
Questions and answers