Advertisement
Quick Links
Advertisement

Related Manuals for Inova Sofa-WallBed


Summary of Contents for Inova Sofa-WallBed
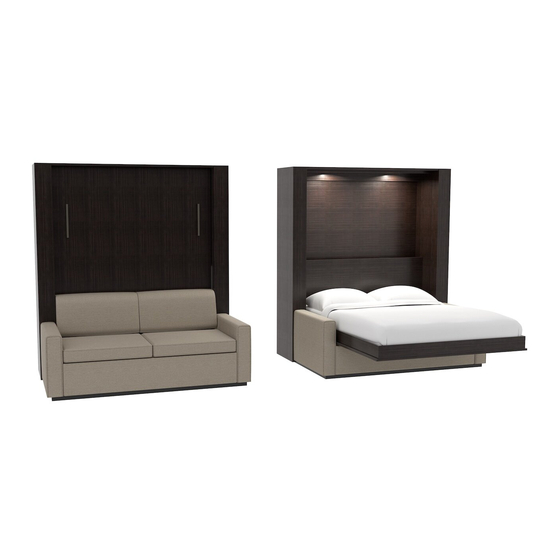
- Page 1 | ASSEMBLY MANUAL Sofa-WallBed Inova LLC 2 Van Buren Blvd. Guilderland Center, NY 12085...
- Page 2 QUEEN SIZE Inova LLC 2 Van Buren Blvd. Guilderland Center, NY 12085 Sofa-WallBed | ASSEMBLY MANUAL...
- Page 3 QUICK START GUIDE Sofa-WallBed | ASSEMBLY MANUAL...
-
Page 4: Helpful Information
• Hardware is packed by STEP #, not PART # videos or go directly to YouTube (include link). Tech support is readily available if needed PLEASE NOTE: Your Bed may look different Sofa-WallBed | ASSEMBLY MANUAL support@inovabed.com Email: than what is shown in the pictures and Phone: 866.528.2804... - Page 5 Tech support is readily available if needed PLEASE NOTE: Your Bed may look different Sofa-WallBed | ASSEMBLY MANUAL support@inovabed.com Email: than what is shown in the pictures and Phone: 866.528.2804...
-
Page 6: Tools Needed
(To view videos) H-107s Flat Head Euro Screws H-062 Double-Ended Minifix Pin Tech support is readily available if needed PLEASE NOTE: Your Bed may look different Sofa-WallBed | ASSEMBLY MANUAL support@inovabed.com Email: than what is shown in the pictures and Phone: 866.528.2804... - Page 7 Sofa-WallBed: Hardware Overview The illustrations drawn are general representations of your product’s hardware. H-003 H-067 H-011 H-068 H-014s H-073 H-019 H-021 H-077 H-062 H-065 H-085...
- Page 8 Sofa-WallBed: Hardware Overview, cont. The illustrations drawn are general representations of your product’s hardware. H-086 H-087 H-088 H-143 H-107s H-162 H-112 H-184 H-114 H-187...
- Page 9 Sofa-WallBed: Hardware Overview, cont. The illustrations drawn are general representations of your product’s hardware. H-919 H-189 H-920 H-210 H-921 H-425 H-923 H-738 H-924 H-739 H-766 H-767 Headboard Guide...
- Page 10 STEP 1 OPEN BACK: Prepare Right Pier Use this version of Step 1 if your Sofa-WallBed is an Open Back Model H-003 A. Lay the Right Pier on the floor as shown. B. Screw the H-011 Minifix Pins into the small holes.
- Page 11 STEP 1 CLOSED BACK: Prepare Right Pier Use this version of Step 1 if your Sofa-WallBed is a Closed Back Model H-003 H-011 A. Lay the Right Pier on the floor as shown. B. Screw the H-011 Minifix Pins into the small holes.
- Page 12 STEP 2 OPEN BACK: Attach Valance to Cabinet Top & Attach Shelf to Cabinet Back Use this version of Step 2 if your Sofa-WallBed is an Open Back Model H-065 Cabinet Top Cabinet Top A. Hold the Valance next to the Cabinet Top B.
- Page 13 STEP 2 CLOSED BACK: Attach Valance to Cabinet Top & Attach Shelf to Closed Back Use this version of Step 2 if your Sofa-WallBed is a Closed Back Model H-065 Cabinet Top Cabinet Top A. Hold the Valance next to the Cabinet Top B.
- Page 14 STEP 3 OPEN BACK: Attach Cabinet Top and Cabinet Back to Right Pier Use this version of Step 3 if your Sofa-WallBed is an Open Back Model Cabinet Back Cabinet Top A. Lay the Right Pier from Step 1 on the floor as shown, using padding to protect it from getting scratched.
- Page 15 STEP 3 CLOSED BACK: Attach Cabinet Top and Closed Back to Right Pier Use this version of Step 3 if your Sofa-WallBed is a Closed Back Model Closed Back Cabinet Top A. Lay the Right Pier from Step 1 on the floor as shown, using padding to protect it from getting scratched.
- Page 16 STEP 4 OPEN BACK: Prepare Left Pier Use this version of Step 4 if your Sofa-WallBed is an Open Back Model H-011 H-003 A. Lay the Left Pier on the floor as shown. B. Screw the H-011 Minifix Pins into the small holes.
- Page 17 STEP 4 CLOSED BACK: Prepare Left Pier Use this version of Step 4 if your Sofa-WallBed is a Closed Back Model H-011 A. Lay the Left Pier on the floor as shown. H-003 B. Screw the H-011 Minifix Pins into the small holes.
- Page 18 STEP 5 OPEN BACK: Attach Left Pier to the Cabinet Assembly Use this version of Step 5 if your Sofa-WallBed is an Open Back Model Pier, Left Cabinet Back A. Make sure all the Minifix Cams have their Cabinet Top arrows pointing to the nearest edge of the panels.
- Page 19 STEP 5 CLOSED BACK: Attach Left Pier to the Cabinet Assembly Use this version of Step 5 if your Sofa-WallBed is a Closed Back Model Pier, Left A. Make sure all the Minifix Cams have their Cabinet Top arrows pointing to the nearest edge of the panels.
- Page 20 STEP 6: Attach Baseplate Assembly to Cabinet Base Plate, Left Cabinet Bottom A. Carefully lay the Cabinet over as shown using padding on the floor to protect the H-062 cabinet from being scratched. B. Locate the Cabinet Bottom and the Left and H-003 Right Baseplates.
- Page 21 STEP 7: Stand the Cabinet up and Attach Spreader H-162 Base Plate, Left A. With two people stand the Bed Cabinet up as shown. Spreader B. Locate and attach the Spreader to the Baseplate Assembly using H-162 30mm Panel Bolts making sure that the black edge is Base Plate, Right facing away from the Bed Cabinet.
- Page 22 STEP 8: Attach the Lift Mechanisms to the Bed Cabinet Mechanism Arm Mechanism Arm A. Pivot the mechanism arm until all three of the front holes are exposed. Insert a H-923 Hex Head Bolt through one of these front holes in the Left Spring Mechanism and align the bolt and mechanism with the mating hole in the Left Pier.
- Page 23 STEP 9: Attach the Sofa Arms to the Bed Cabinet A. Arrange the Left Sofa Arm on top of the Sofa Arm, Left Baseplate Assembly as shown. Using H-068 Panel Bolts, attach the Left Sofa Arm to the Baseplate Assembly and Bed Cabinet. Start each panel bolt by hand so as to not cross thread or push out the pre-installed threaded inserts inside the cabinet and on...
- Page 24 STEP 10: Prepare Left and Right Side Rails H-073 H-073 M-222_C A. Attach the M-222 Side Angles to the Left and Right Side Rails using H-073 Euro Screws, as shown. M-222_C Side Rail, Right Side Rail, Left...
- Page 26 STEP 11 PLAIN BED PANEL: Side Rails to Bed Panels Use this version of Step 11 if your Sofa-WallBed has a plain Bed Panel Side Rail, Left 4 Holes Notched End H-088 A. Carefully place the finished side of Bed Panels on the carpet or other padded surface.
- Page 27 STEP 11 RECESSED BED PANEL: Side Rails to Bed Panels Use this version of Step 11 if your Sofa-WallBed has a recessed Bed Panel Side Rail, Left 4 Holes Lower Bed Panel H-088 Notched End H-088 A. Carefully place the finished side of Left, Upper, Lower, and Right Bed Panels on the carpet or other padded surface.
- Page 28 STEP 12: Prepare Foot Rail M-19 H-073 A. Attach the M-19 Short bed Angle to the Foot Rail using H-073 Euro Screws, as shown. Foot Rail...
- Page 30 STEP 13 PLAIN BED PANEL: Attach Foot Rail to Bed Panels Use this version of Step 13 if your Sofa-WallBed has a plain Bed Panel Foot Rail Side Rail, Left H-088 Bed Panel, Left A. Align the holes of the Foot Rail Angle with...
- Page 31 STEP 13 RECESSED BED PANEL: Attach Foot Rail to Bed Panels Use this version of Step 13 if your Sofa-WallBed has a recessed Bed Panel Foot Rail Side Rail, Left H-088 Bed Panel, Left A. Align the holes of the Foot Rail Angle with...
- Page 32 STEP 14: Attach Side Rails to Foot Rail H-077 Foot Rail Side Rail, Left A. Attach the Foot Rail to each Side Rail by connecting the H-077 Wide Angle Brackets to each corner with H-107s Flat Head Euro H-107s Screws, as shown.
- Page 34 STEP 15 PLAIN BED PANEL: Attach Right and Left Bed Panels Use this version of Step 15 if your Sofa-WallBed has a plain Bed Panel Bed Panel, Left Bed Panel, Right A. Attach the Right and Left Bed Panels to each...
- Page 35 STEP 15 RECESSED BED PANEL: Attach Mirror Panel and Bed Panels Use this version of Step 15 if your Sofa-WallBed has a recessed Bed Panel Lower Bed Panel H-087 Mirror Panel H-085 Bed Panel, Left A. Lay the mirror Panel face down on the...
- Page 36 STEP 16 PLAIN BED PANEL: Prepare and Attach Head Rail to Bed Panels Use this version of Step 16 if your Sofa-WallBed has a plain Bed Panel Head Rail H-088 H-019 Head Rail M-19 Side Rail, Left A. Attach the M-19 Short bed Angle to the Head Rail using H-019 Screws, as shown.
- Page 37 STEP 16 RECESSED BED PANEL: Prepare and Attach Head Rail to Bed Panels Use this version of Step 16 if your Sofa-WallBed has a recessed Bed Panel Head Rail H-088 H-019 Head Rail M-19 Side Rail, Left A. Attach the M-19 Short bed Angle to the Head Rail using H-019 Screws, as shown.
- Page 38 STEP 17: Attach Mounting Hardware to the Side Rails Head Rail A. Insert a H-738 Bolt into the #1 hole from the outside of the Side Rail. Thread a H-086 5/16” nut on the end of the bolt just enough so that the end of the bolt protrudes from the nut.
- Page 39 STEP 18: Turn over the Bed Platform and Attach the Handles Handle H-425 A. Carefully turn over the entire Bed Platform over as shown. B. Carefully support the Bed Platform on its side. Attach the handles on each side of the Bed Panels using the H-425 Machine Screws.
- Page 40 STEP 19: Attach Linking Bars and Cheek Plates to Bed Platform Cheek Plate Flat edge towards Head Rail Orient bend away from Side Rail A. Using the H-924 Flathead Bolts, attach the Cheek Plate / Linking Bar assemblies to the Side Rails so that the bend in the Cheek Plate is oriented away from the Side Rail.
- Page 41 STEP 20: Attach Back Cushion Assembly to Bed Platform Drawer Slide H-766 Bed Panel, Right A. Carefully lay the Back Cushion Assembly on Drawer Slide top of the Bed Platform as shown. While the H-766 cushions will slide “downhill” take care that the the drawer slides do not scratch the Bed Back Cushion Assembly Platform.
- Page 42 STEP 21: Pull down the Mechanism Arm A. Slide the PVC pipe over the end of each tension arm and use it bring the arms outward against the initial tension of the PVC Pipe springs. When they are pulled near the angle shown, swivel the Arm Locks over to brace Hex Bolt 'A' against Hex Bolt ‘...
- Page 43 STEP 22: Walk the Bed Platform towards the Bed Cabinet Bed Platform Bed Cabinet A. Walk the Bed Platform towards the Cabinet and between the Sofa Arms as shown. Back Cushion Assembly Head Rail Sofa Arms...
- Page 44 STEP 23: Locate the Bed Platform in Bed Cabinet Side Rail A. Raise the Bed Platform to a height where the Hex Bolts in Hole #1 are a few inches above the Tension Arm Slots. Carefully fit the bed platform between the two Tension Arms so that the Hex Bolts in Hole #1 slide Bolt, Hole #1 into the Tension Arm Slots.
- Page 45 STEP 24: Mount Bed Platform in Bed Cabinet Side Rail H-738 Bolt, Hole #1 A. Insert the H-738 Hex Bolts into Hole #2 from the inside face of both Side Rails and into the Tension Arms. It may help to have a helper hold the bed in the position near 45°...
- Page 46 STEP 25: Install Seat Deck Slider Seat Deck A. Insert the Seat Deck in between the Sofa Arms and install the Slider at a slight angle into the Sliding Spaces, underneath the Sofa Arms. Sliding Space Back Cushion Assembly B. Rotate the Slider and Seat Deck into place to Slider at slight angle make it parallel to the Cabinet.
- Page 47 STEP 26: Connect the Back Cushion to the Sofa Arms Back Cushion Assembly Sofa Arm A. With the bed platform in the closed position, swing the Back Cushion linking bars into position so that the predrilled hole in the Sofa Arm is in line with the hole in the linking bar.
- Page 48 STEP 27: Complete the Sofa Seat Installation Bed Platform at 45° Upper Hole A. Open the bed platform around 45º. Front Support B. Locate the Front Support and its Upper and Lower Holes. Lower Hole C. Reaching around the side of the sofa seat, locate the linking bar and pivot it upwards so that it aligns with the upper mounting hole in the front support as.
- Page 49 STEP 28: Attach Skirt to Sofa H-143 H-087 Sofa Arm A. Keep the Bed Platform open around 45°. H-087 Using H-087 5/8” Screws, attach two H-143 Mending Plates to the inside face of each arm Back edge of Spreader so that the 4 holes of each Mending Plate fall on the Sofa Arm and the 4 holes are exposed for the Skirt attachment, as shown.
- Page 50 STEP 29: Put the Mattress in place & Attach the Headboard to the Head Rail H-014s Mattress A. At this point the mattress can be placed into the Bed Platform. Headboard B. Locate the Headboard so that the hinge holes align with the holes of the Head Rail.
- Page 51 STEP 30: Install Mechanism Covers H-087 Mechanism Cover H-210 Mechanism Cover A. Place the right and left Spring Mechanism covers down over the spring mechanisms lining up the tabs in the covers with the Mechanism spaces in the mechanisms. B. Secure the mechanism covers in place with an H-210 Angle Bracket and H-087 Screw.
- Page 52 STEP 31: Complete Sofa-WallBed Assembly A. Lift up the Bed Platform and install Sofa Seat Cushions on top of the Seat Deck. Seat Cushions...
-
Page 53: How It Works
HOW IT WORKS Sofa-Wallbed | ASSEMBLY MANUAL... - Page 54 Bed Cabinet (on the Bed Panels) for use to loaded and located inside face of each pier. lower the Bed. As the Sofa-WallBed is lowered down, TO RAISE THE SOFA-WALLBED: gravity is naturally starting to pull it down. At the corner of the bed platform, place The springs “kick in”...
- Page 55 HOW TO ADJUST TENSION: STEPS FOR ADJUSTMENT: To adjust the tension of the Sofa-WallBed: To adjust the number of springs, you will need to temporarily “walk” the cabinet and sofa forward until it is around two feet from the wall.
-
Page 57: Troubleshooting
TROUBLESHOOTING Sofa-WallBed | ASSEMBLY MANUAL... - Page 58 On the back of the Sides. At this point, the Bed can be lowered Headboard there are guide pins located on MY SOFA-WALLBED IS MAKING A down completely. To re-engage the pins, the left and right, with a cable stretched...
- Page 59 TROUBLESHOOTING (CONT.) them with a dry silicone-type lubricant, culprit, call Inova customer service for HOW DO I RETRIEVE SOMETHING available at most hardware stores. Although assistance in troubleshooting the issue. THAT FELL UNDERNEATH THE SEAT this type of lubricant should not damage the...
- Page 60 Care & Maintenance Take photos of broken part and Bed overall Tech support is readily available if needed PLEASE NOTE: Your Bed may look different Sofa-WallBed | ASSEMBLY MANUAL support@inovabed.com Email: than what is shown in the pictures and Phone: 866.528.2804...
- Page 61 866.528.2804. products and services. We hope you enjoy your Inova TableBed for many With great care, and through continuous years to come! improvement and learning, we have incorporated THANK YOU.