
Subscribe to Our Youtube Channel
Related Manuals for Multiplex FunRay


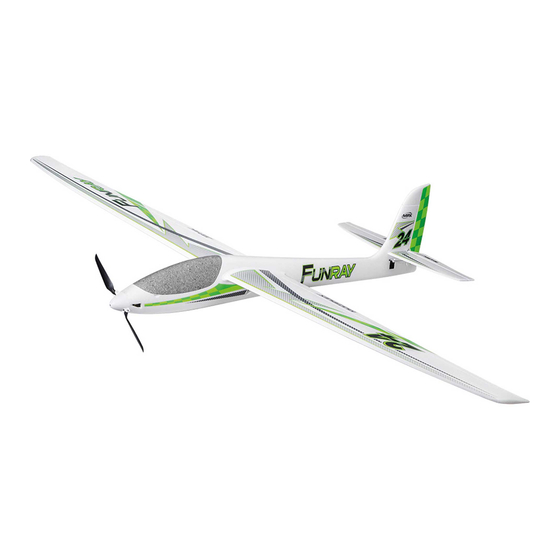
Summary of Contents for Multiplex FunRay
- Page 1 Erhältliche Varianten | Available versions Version disponible | Varianti disponibili # 21 4334 # 26 4334 Variantes disponibles © Copyright by MULTIPLEX Modellsport GmbH & Co. KG 2017...
- Page 2 Third-party liability insurance (powered model airplane) is therefore mandatory. If you are a member of a group or association, you might be Multiplex Modellsport GmbH & Co. KG is not liable for loss, damage able to take out the appropriate insurance there.
- Page 3 This model is not made of Styrofoam™! Therefore, adhesions using white glue, polyurethane or epoxy are not possible. These glues only stick MULTIPLEX model kits are subjected to constant material inspection superficially and may peel off in severe cases. Only use cyanoacrylate/ during production.
-
Page 4: Specifications
Order no. 11 2065 6x servo HS-65HB Carbonite (elevator+rudder+2x aileron+2x flap) (available individually) Order no. 1 -00112 1x cable set M6/UNI FunRay (complete) 2x servo extension cable 60 cm (for fuselage servos) Order no. 8 5032 Order no. 1 -00137 1x plug fuse UNI (SU 5 pcs.) -
Page 5: Building Instructions
Building instructions Important the locking tabs of the plug holder . From the back (cable side) with two hot glue points, fix the connector/cable unit to the plug holder and Remove image pages from the middle of the building instructions! press fully and straight into the recess until cool. - Page 6 Electric version with propeller / glider version caused during production. With the brushless propulsion set 'FunRay' # 1-00103, the electric Fig. 13 version of the model is ideally motorized.
- Page 7 Building instructions ㉔ Likewise, stick the right elevator unit reinforcement tube (120 mm) into brackets and secure the connection cable to the fuselage side with a the right elevator connector with the horn little hot glue. The cables are fed forward to the motor under the cross bar –...
- Page 8 Building instructions ㉖ struts can be securely inserted into the opposite fin when assembling inner holes of the rudder horns . When doing so, do not bend the the model. tabs further open than necessary. 30. Sticking the leading edges to the wings CAUTION: Observe installation direction! Aileron (QR) =>...
- Page 9 Building instructions servos into the recesses. If required, apply more glue into any remaining 46. Completing the transparent canopy slits on the flaps. Then cut off any protruding hot glue flush and lay the Optional construction kit order no. # 1-00138 servo cables.
- Page 10 Building instructions 51. Affixing the decals Hint: The center of gravity can be conveniently balanced using the center of gravity scale order no.: 69 3054 . The kit includes extensive decal sheets . The individual letterings and emblems have already been cut out and are affixed according to our 55.
- Page 11 Building instructions this, you will have many hours of operating pleasure with your model. particular during the landing approach. It is always better to land safely some distance away than to risk a crash by forcing the model back to For the 'spoiler' function, both ailerons are set upward and the flaps your feet.
- Page 12 (around 150 m) from a single battery We - the MULTIPLEX team - hope you have many hours of pleasure charge. At the slope you can also keep the electric power system as a building and flying your new model.
- Page 13 Parts list KIT FunRay # 21 4334 Seq. no. Qty. Name Material Dimensions Building instructions KIT Paper Complaints regarding models Paper Decal sheet Printed adhesive film 700 x 1000 mm Left fuselage half Foamed Elapor Finished component Right fuselage half...
- Page 14 Parts list KIT FunRay # 21 4334 Leading edge set Seq. no. Qty. Name Material Dimensions Inner left leading edge Injected plastic Finished component Inner right leading edge Injected plastic Finished component Outer left leading edge Injected plastic Finished component ...
- Page 15 Glider fuselage nose (for glider version) 1-00131 Small parts set 723470 Tow-release (for glider version) 1-00132 Plastic parts set, wings 1-00133 Plastic parts set, fuselage + tail For further information about the contents of the replacement parts, please visit www. multiplex-rc.de...
- Page 16 Abbildungen · Illustrations · Illustrazioni · Ilustraciónes...
- Page 17 Abbildungen · Illustrations · Illustrazioni · Ilustraciónes Abb. 1 # 1-00138 ⓬ # 224350 ⓫ ⓾ Abb. 2 ㉖ ㊷ # 1-00106 ㊸ ㉔ ㉞ ㉟ ㉓ ㉚ ㉛ ㉒ ㊻ ㊵ ㉜ ㉝ ㊿ ㊹ ㉘ ㉗ ㊱ ㊺ ㊶...
- Page 18 Abbildungen · Illustrations · Illustrazioni · Ilustraciónes Abb. 3 Abb. 4 (700 mm) (350 mm) (350 mm) Abb. 5 Abb. 5.1 ㉒ ㉒ Abb. 6 Abb. 7 ㉔ ㊲ ㉔ ㊲ Abb. 9 Abb. 8...
- Page 19 Abbildungen · Illustrations · Illustrazioni · Ilustraciónes Abb. 11 Abb. 10 (vgl. Abb. 9) Abb. 12 Abb. 13 ㊿ 18 mm ㊿ Abb. 14 Abb. 15 ㉟ Abb. 17 Abb. 16 (3x) ⓬ ⓫ ㉖ ㉗ (200 mm) ㉘...
- Page 20 Abbildungen · Illustrations · Illustrazioni · Ilustraciónes Abb. 19 Abb. 18 ㉝ (85 mm) Abb. 20 Abb. 21 # 1-00106 ( 1 Paar) Abb. 22 Abb. 23 ㊻ ㊻ (200 mm) (120 mm) Abb. 25 Abb. 24 ㊷ ㊸ ㊳ ㉜...
- Page 21 Abbildungen · Illustrations · Illustrazioni · Ilustraciónes Abb. 26 Abb. 27 (2x) ㊱ (2x) ㉞ (2x) Abb. 28 Abb. 29 ㉚ (50 mm) ㉛ (60 mm) (330 mm) ㉘ ㉘ ㉗ ㉗ ㉖ ㉖ (320 mm) Abb. 30 Abb. 31 Abb.
- Page 22 Abbildungen · Illustrations · Illustrazioni · Ilustraciónes Abb. 34 ㊲ Dekor · Decals · Décoration · Decal · Decoración...
- Page 23 Dekor · Decals · Décoration · Decal · Decoración...
- Page 24 MULTIPLEX Modellsport GmbH & Co.KG · Westliche Gewerbestrasse 1 · D-75015 Bretten-Gölshausen www.multiplex-rc.de...
Need help?
Do you have a question about the FunRay and is the answer not in the manual?
Questions and answers