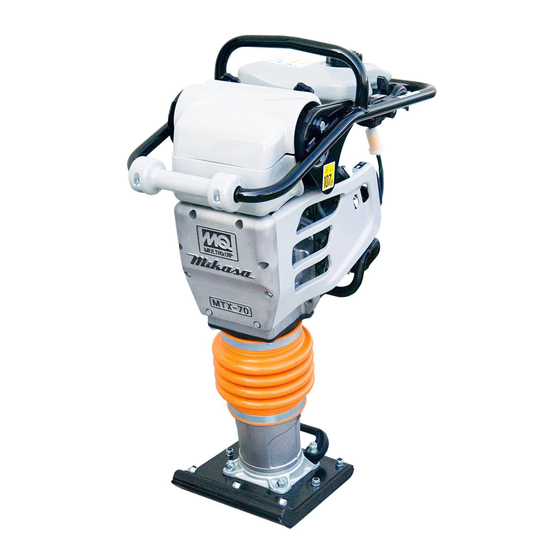
MULTIQUIP Mikasa Series Operation And Parts Manual

MULTIQUIP Mikasa Series Operation And Parts Manual

One-way plate compactor (honda gx160u1sm12 gasoline engine)
Hide thumbs Also See for Mikasa Series:

Advertisement

SAFETY AND OPERATIONS INSTRUCTIONS FROM:
PLEASE READ THIS INFORMATION CARFULLY PRIOR TO
OPERATING EQUIPMENT

Advertisement

Table of Contents
loading
Need help?

Need help?

Do you have a question about the Mikasa Series and is the answer not in the manual?

Questions and answers

Subscribe to Our Youtube Channel

Summary of Contents for MULTIQUIP Mikasa Series

  • Page 1 SAFETY AND OPERATIONS INSTRUCTIONS FROM: PLEASE READ THIS INFORMATION CARFULLY PRIOR TO OPERATING EQUIPMENT...
  • Page 2: Proposition 65 Warning

    PROPOSITION 65 WARNING PAGE 2 — MVC-82VH/VHW PLATE COMPACTOR • OPERATION AND PARTS MANUAL — REV. #1 (04/25/08)
  • Page 3: Hazard Symbols

    SAFETY HAZARD SYMBOLS FOR YOUR SAFETY AND SAFETY OF OTHERS! Potential hazards associated with the operation of this Safety precautions should be followed at all equipment will be referenced with Hazard Symbols which times when operating this equipment. Failure appear throughout this manual, and will be referenced in to read and understand the Safety Messages conjunction with Safety Message Alert Symbols.
  • Page 4 SAFETY CAUTION — Rotating Parts Hazards CAUTION — Overspeed Conditions NEVER operate equipment with covers or NEVER tamper with the factory setting of guards removed. Keep fingers, hands, hair the engine governor. Personal injury and and clothing away from all moving parts equipment damage can result if operating to prevent injury.
  • Page 5: Rules And Regulations

    NEVER use accessories or attachments that are not ALWAYS store the equipment in a clean, dry location recommended by Multiquip for this equipment. Damage out of the reach of children. to the equipment and/or injury to user may result.
  • Page 6: Loading And Unloading

    RULES AND REGULATIONS LOADING AND UNLOADING REFUELING Before lifting, make sure that equipment parts (hook and vibration insulator) are not damaged and screws are not loosened or lost. FUEL ALWAYS make sure crane or lifting device has been properly secured to the lifting bail (hook) of the equipment. NEVER lift the equipment while the engine is running.
  • Page 7 RULES AND REGULATIONS EMERGENCIES BATTERY SAFETY (FOR ELECTRIC START) ■ The battery contains acids that can cause ALWAYS know the location of the nearest fire extinguisher . injury to the eyes and skin. ALWAYS wear safety glasses to avoid eye irritation. ALWAYS know the location of the nearest ■...
  • Page 8: Specifications

    SPECIFICATIONS i f i o i t s l e r e t ) e l r t n u f i ( . f o i t r b i i t a i l e / . t f ) n i .
  • Page 9 DIMENSIONS r e f r e t i r c i t p n i ( u l c t i w ) e l n i ( u l c ) e l PAGE 12 — MVC-82VH/VHW PLATE COMPACTOR • OPERATION AND PARTS MANUAL — REV. #1 (04/25/08)
  • Page 10: General Information

    GENERAL INFORMATION DEFINITION OF PLATE COMPACTOR FREQUENCY/SPEED The Mikasa MVC-82VH/VHW is a walk-behind, one-way The compactor's vibrating plate has a frequency range of plate compactor designed for the compaction of sand, 5600 vpm (vibrations per minute). The travel speed of the mixed soils and asphalt.
  • Page 11 COMPONENTS (COMPACTOR) WATER TANK (MVC-82VHW ONLY) Figure 1. Plate Compactor Controls and Components Figure 1 shows the location of the basic controls and 6. Belt Cover – Remove this cover to gain access to the components of the MVC-80VH/VHW Plate Compactor. The V-belts.
  • Page 12: Engine Components

    COMPONENTS (ENGINE) Figure 2. Engine Controls & Components ENGINE COMPONENTS 6. Choke Lever – Used in the starting of a cold engine, The engine (Figure 2) must be checked for proper or in cold weather conditions. The choke enriches the lubrication and filled with fuel prior to operation.
  • Page 13: Before Starting

    INSPECTION BEFORE STARTING The Oil Alert System will automatically 1. Read safety instructions at the stop the engine before the engine falls beginning of manual. below safe limits. Always be sure to check 2. Clean the compactor, removing the engine oil level prior to starting the dirt and dust, particularly the engine.
  • Page 14 INSPECTION 2. The V-belt tension is proper if the V-belt bends 10 to V-BELT CHECK 15 mm (Figure 7) when depressed with finger midway CAUTION — V-Belt Check between the clutch and vibration pulley shafts. NEVER attempt to check the V-belt with the engine running.
  • Page 15: Operation

    OPERATION The CLOSED position of the choke lever CAUTION — Read Manual enriches the fuel mixture for starting a COLD engine. The OPEN position DO NOT attempt to run the compactor provides the correct fuel mixture for until the Safety and Initial Start-up sections normal operation after starting, and for have been read and understood.
  • Page 16: Stopping The Engine

    OPERATION 6. If the engine has started, slowly return the choke lever Remember the compactor does not work as efficiently (Figure 11) to the CLOSED position. If the engine has on clay or soils that have a high moisture content level. not started, repeat steps 1 through 5.
  • Page 17: Inspection And Maintenance

    MAINTENANCE CAUTION — Inspection and Service CAUTION — Inspection Intervals Inspection Inspection and other services should always be carried These inspection intervals are for operation under out on hard and level ground with the engine shutdown. normal conditions. Adjust your inspection intervals based on the number hours plate compactor is in use, and particular working conditions.
  • Page 18: Daily Service

    MAINTENANCE 3. Replace engine oil with recommended type oil as listed i t c in Table 4. For engine oil capacity, see Table 2 (engine specifications). DO NOT overfill. e t I i t a 4. Reinstall drain bolt with sealing washer and tighten i t r securely.
  • Page 19: Spark Plug

    MAINTENANCE SPARK PLUG Checking Clutch 1. Remove and clean the spark plug (Figure 16). Check the clutch simultaneously with V-belt checking. With belt removed, check outer drum of the clutch for seizure 2. Adjust the spark gap to 0.028 ~0.031 inch (0.6~0.7 mm). and "V"...
  • Page 20: Troubleshooting

    If the problem cannot be remedied, please leave the unit handling and maintenance inspections, but in the event of as is and consult Multiquip's service department. a breakdown, please take remedial action following the diagnosis based on the following troubleshooting tables.
  • Page 21 TROUBLESHOOTING i t o n i t i t u r i A r i a e l c " " r e l e v o l f s u j , t n - e r d l i .

This manual is also suitable for:

Mvc-82vhMvc-82vhw

Table of Contents