Table of Contents
Advertisement
CUB and CUB
Instrument User Manual V2.4
Unrivalled Gas
Detection.
TAC
Work with Confidence
Distributed by:
Air-Met Scientific Pty Ltd
Air-Met Sales/Service
Air-Met Rental
P: 1800 000 744
P: 1300 137 067
F: 1800 000 774
E: hire@airmet.com.au
E: sales@airmet.com.au
W: www.airmet.com.au
Register
your instrument
online to receive your
extended Warranty.
ionscience.com
Advertisement
Table of Contents

Subscribe to Our Youtube Channel
Related Manuals for ION CUB

Summary of Contents for ION CUB
- Page 1 CUB and CUB Distributed by: Air-Met Scientific Pty Ltd Air-Met Sales/Service Air-Met Rental P: 1800 000 744 P: 1300 137 067 Instrument User Manual V2.4 F: 1800 000 774 E: hire@airmet.com.au E: sales@airmet.com.au W: www.airmet.com.au Work with Confidence Register your instrument online to receive your extended Warranty.
- Page 2 Register your instrument online for extended warranty Thank you for purchasing your ION Science instrument. The standard warranty of your instrument can be extended to two years. To receive your extended warranty, you must register your instrument online within one month of purchase (terms and conditions apply.) Visit ionscience.com/instrument-registration.
-
Page 3: Table Of Contents
Recharging your Cub.........................12 Switching on your Cub ........................13 Switching your Cub off ........................13 The Cub Display - Overview ......................14 Display Screens ..........................14 4. What do the alerts and alarms mean?..................16 5. Using the CubPC Software and Downloading Data ..............17 Overview ............................17... - Page 4 Send to Instrument ...........................30 7. Calibration ..........................31 Calibration Facility ..........................31 Calibration Overview ........................31 Cub Calibration Settings ........................31 Calibration Using a Cub Doc ......................32 Cub Doc Calibration Settings ......................32 Cub Doc Calibration Procedure .....................32 Remote Calibration ...........................33 Remote Calibration Procedure ......................34 Unrivalled Gas Detection.
- Page 5 Diagnostics ............................41 10. Appendix and Supporting Documents ..................42 EU Declaration of Conformity......................42 Technical Specifications ........................44 Cub Specifications ..........................44 Cub Doc Power Supply Requirements ...................45 Warranty ............................45 ION Science Contact Details ......................46 UK and Head Office ........................46 USA Office ............................46 German Office ..........................46...
-
Page 6: Safety
• To the extent permitted by law, ION Science shall not be liable to any person or entity for any loss or damage which may arise from the use of this manual. •... - Page 7 Li-Ion Batteries can be damaged if left in a discharged state. Please recharge Cub if battery indicator is showing empty. Please note also that if Cub is left for one year unused, the instrument needs to be charged fully before it can continue to be kept in storage.
- Page 8 Important note: The delete function deletes all logged data from a Cub. Ensure any data you need to edit is exported in CSV format before selecting this option. Upgrading the firmware of a Cub will result in all logged data on that Cub being deleted.
-
Page 9: Disposal
With the option for parts-per-billion (ppb) sensitivity, Cub sits within the breathing zone and is comfortable and unobtrusive to wear. The Cub has a dynamic range of 0 to 5000 ppm, and can measure 480 selectable compounds. -
Page 10: Cub Doc Docking Stations
The Cub is used with Cub Doc Docking Stations. These are used to recharge your Cub. Depending on which model of Docking Station you use, they can also be used to download data from your Cub, and to calibrate it. - Page 11 Cub Instrument User Manual V2.4 Cub dock. 12V DC socket. Diagnostic LED. USB socket (not on Charge Dock). USB LED. Socket for “daisy chaining” (see next page). Charge LED. Fuse socket. Flying socket for mains power 10 Gas calibration ports (Calibration Dock connection.
-
Page 12: How Do I Use The Device
3-core power supply lead. Docking Stations “daisy chained”. To charge your Cub, place it on a Cub Doc which is connected to mains power. The Charge LED of the Docking Station will indicate green if power is available. The Cub will then begin to charge. While the Cub is charging, the screen will be illuminated with a yellow light. -
Page 13: Switching On Your Cub
Battery fully charged Switching on your Cub To switch on your Cub, hold down the rubber multi-function button on top of the device for 3 seconds. An alarm will sound and the LEDs on front of the devices will light-up red. A progress bar will be displayed in its bottom-left corner, with segments being added from the bar from right to left. -
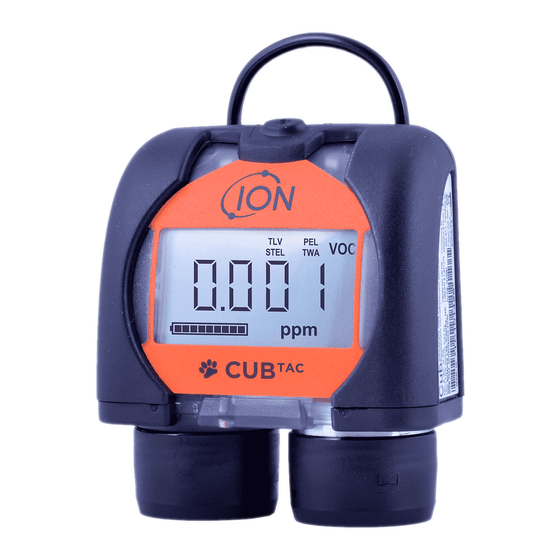
Page 14: The Cub Display - Overview
ENVIRONMENT AND ACT IN ACCORDANCE WITH NATIONAL SAFETY REGULATIONS. The Cub can display a number of different data screens. To cycle through these screens, press the multi-function button on top of the Cub. When a new screen is accessed the display is illuminated with a different coloured light, which will turn off after a few moments. - Page 15 This screen is used when calibrating the Cub remotely, i.e. without the use of a Cub Doc. Refer to Calibration for details. Note that a Cub can be configured to only display specific screens (see the Device Configuration section for details. Unrivalled Gas Detection.
-
Page 16: What Do The Alerts And Alarms Mean
The low level alarm symbol will be displayed on the screen. Depending on how the Cub was set up, an alarm may also sound and the unit may vibrate. If the alarm latch is set, these alarm indications cannot be switched off until the gas level has dropped below the alarm threshold. -
Page 17: Using The Cubpc Software And Downloading Data
Connecting Docking Stations and Cubs to a PC Connect your PC to either a Cub Doc Data Dock or Calibration Dock using the provided USB cable as shown below: The Cub Doc must be powered on (the Charge LED should be green) for a USB connection to be made. -
Page 18: Starting The Cubpc Software
Cubs page displayed. Downloading Data Logged Readings When you connect your Cub to a PC as described previously, any fresh data logged readings will be automatically downloaded as the software ‘reads’ your Cub. While this is happening, the PC LED on the Docking Station will change to yellow. -
Page 19: The Cubs Page
In order to identify a unit, click in one of the Status fields. The Charge and Diagnostic LEDs on that Docking Station will flash purple for a few seconds If a Cub is connected to a Cub Doc Docking Station, this is indicated by its picture under the Status heading: No Cub connected. -
Page 20: Viewing Download Records
Update the Cub firmware. Additional data and facilities for a Cub can be displayed or hidden by clicking the + / - symbols next to the serial number of that Cub. The additional details are then displayed: Minimum, maximum, STEL and TWA + / - control. -
Page 21: Viewing Details Of Logged Data
To view details of a data log, press this button in the Datalog column: To view details of the most recent data log recorded by a Cub, press the same button on the Cubs page for that Cub. The number on the button indicates how many files are stored within the Cub. -
Page 22: Saving Logged Data To A Csv File
To archive Cub data and remove it from the list of connected Cubs, tick its Archive checkbox and click this button: The Cub data is then archived to the Instruments folder on the C: drive of the PC. The Cub is removed from the Cubs page list (unless connected to CubPC again). -
Page 23: Upgrading Firmware And Software
Cubs page under the Firmware heading: Upgrading the firmware of a Cub will result in all logged data on that Cub being deleted. If the firmware is up to date, nothing will happen. If a newer version is available, a progress indicator will be displayed in the Firmware field while the upgrade is in progress. -
Page 24: Upgrading The Software
Cub Instrument User Manual V2.4 To access the ION Science Support web page, click the Web Support button. Upgrading the Software If a newer version of the software is available, this is stated in the lower-left section of the page. To install the newest version, click Install Upgrade. -
Page 25: Actions On Dock
Cub Instrument User Manual V2.4 Actions on Dock When you place a Cub in a Cub Doc Docking Station, logged data is automatically copied to the connected PC. Other actions may also take place, as specified by ticking the checkboxes in this section, in the order they are listed on the page. -
Page 26: Cubpc Lock
0000. The password can be changed using the Reset Password button. If you have forgotten your password please contact Ion Science so that we can issue you with a master password. Master passwords are generated daily and are only valid on the day of generation. -
Page 27: Device Configuration
The units of measurement may be chosen as parts per million (ppm) or milligrams per cubic metre (mg/m Auto Start Tick the checkbox if the Cub is to start automatically when removed from the Docking Station. Clock Set the time and date and tick the checkbox to the right of these fields to set the time on your Cub. -
Page 28: Data Log
Maximum: the maximum concentration between readings, taken over the selected time frequency Cub can also be configured to start data logging once concentration levels reach a pre-defined level. Data logging will stop once values drop below this concentration. Recorded data will be displayed as one data session until the device is restarted. -
Page 29: Sound
The alarm activates again when the signal goes above the alarm level again. Vibrate Select the first radio button to set the Cub to not vibrate when there is an alarm. Select the second radio button to set the Cub to vibrate when there is an alarm. -
Page 30: Alarms
Send to Instrument When you have entered the required configuration, send it to your Cub by clicking on the Send to Instrument button. It is possible to send the same configuration file to multiple docked Cubs simultaneously by selecting the Send to all docked Cubs checkbox and then clicking on the Send to Instrument button. -
Page 31: Calibration
Cub Instrument User Manual V2.4 • If your PC still fails to write to your Cub seek advice from your distributor or from Ion Science Ltd. To save a configuration file for future use, select the Save To File button. Please note that the instrument name and time and date settings are not saved. -
Page 32: Calibration Using A Cub Doc
Gas are to be sent to a connected Cub when it is being calibrated. To set a reminder to flag to user that a calibration is due for a Cub, enter the number of days that calibrations are valid in the bottom field. When a Cub is docked and read by CubPC, the Diagnostic LED on the Cub Doc will indicate as follows: red if there is no valid calibration, yellow if the calibration is out of date, and green if the calibration is current. -
Page 33: Remote Calibration
If calibration fails, readings will appear in red and a message will be displayed giving the reason for the failure: o Invalid: when the Cub is initially connected to the Docking Station this message will appear to advise the user that the Cub does not have a valid calibration. -
Page 34: Remote Calibration Procedure
Remote Calibration Procedure Access the Cub’s remote calibration screen. Press and hold the multi-function button until the Cub beeps then release it quickly to avoid switching it off. This initiates the Zero stage of the procedure. The screen will display a ‘0’. -
Page 35: Maintenance
If this occurs, the previous valid calibration levels will be used. At the end of the calibration sequence the Cub will revert to the general VOC / normal running. Important note: Always check the calibration in normal running before use by carrying out a bump test. -
Page 36: Water Ingress
With the Filter Disc and O Rings removed, the IP rating drops to IP64. Water Ingress If the portable Cub has been immersed or splashed with water, take the MiniPID 2 Sensor out to dry and replace the Filter Disc as described previously. -
Page 37: When To Replace The Electrode Stack
Cub Instrument User Manual V2.4 When to Replace the Electrode Stack When using your Cub in conditions of high ambient humidity, it may show unexpected and increasing readings. This is due to dust or other small particles within the detector becoming hydrated which causes these particles to conduct a signal between the electrodes. -
Page 38: Lamp Removal And Examination
Lamp Removal and Examination The Cub is a sensitive detector. Internal components must be handled with clean hands and clean tools. The Cub Lamp is fragile. Handle with great care. Never touch the window and do not drop. Following removal of the Electrode Stack as described previously, the Lamp may now be carefully removed: •... -
Page 39: Replacing A Lamp
Cub Instrument User Manual V2.4 A full material safety data sheet MSDS is available on request from ION Science Ltd. The key issues are listed below. Handling: • Do not breathe vapor/dust. Avoid contact with skin, eyes and clothing. •... -
Page 40: Bump Testing
The instrument MUST now be re-calibrated. Bump Testing Bump tests should regularly be carried out on your Cub to test that the instrument responds correctly and that the alarm indicators are triggered correctly when gas is detected at the alarm levels specified in the Cub’s... -
Page 41: Troubleshooting
Contact distributor ADC range error Contact distributor Internal temperature of the The Cub will stop charging until the temperature is cub is too high less than 45°C. Leave device to cool in the dock, or move to a cooler ambient environment PID sensor connection 1. -
Page 42: Appendix And Supporting Documents
BS EN 80079-34 :2011 Potentially Explosive Atmospheres – Application of Quality Systems Ion Science Ltd has sole responsibility, on the date this product accompanied by this declaration is placed on the market, the product conforms to all technical and regulatory requirements of the above listed directives. - Page 43 Cub Instrument User Manual V2.4 Signature: Date: 19 September 2019 Issued by Ion Science Ltd of the above address on the 19/09/2019 Unrivalled Gas Detection. ionscience.com Page 43 of 46...
-
Page 44: Technical Specifications
Cub Instrument User Manual V2.4 Technical Specifications Cub Specifications T90 < 13 second Response time: Detectable ranges: ppm: 0 to 5,000 ppm (0.1 ppm sensitivity) ppb: 0 to 5,000 ppm (0.001 ppm sensitivity) TAC: 0 to 5,000 ppm (0.01 ppm sensitivity) Depends on the model (see Detection range, above.) -
Page 45: Cub Doc Power Supply Requirements
• Through the rear DC socket connected to a 12V car auxiliary/ (cigarette lighter) outlet. Warranty Standard Warranty can be extended to up to 2 years on the Cub when registering your instrument via our website: http://ionscience.com/instrument-registration. To receive your Extended Warranty, you need to register within one month of purchase (Terms and Conditions apply). -
Page 46: Ion Science Contact Details
Cub Instrument User Manual V2.4 ION Science Contact Details UK and Head Office USA Office ION Science Ltd ION Science Inc The Way, Fowlmere 4153 Bluebonnet Drive Cambridge Stafford SG8 7UJ TX 77477 Tel: +44 (0)1763 208503 Tel: +1 877 864 7710...
Need help?
Do you have a question about the CUB and is the answer not in the manual?
Questions and answers