WAGNER Smart Power Roller Owner's Manual
Hide thumbs
Also See for Smart Power Roller:
- Quick start manual (21 pages) ,
- Owner's manual (25 pages)
Table of Contents
Advertisement
Quick Links
Owner's Manual (page 2)
Read this manual for complete instructions
Manuel de l'utilisateur (page 12)
Lire ce manuel pour obtenir des directives complètes
Manual del usario (página 22)
Lea este manual para obtener las instrucciones completas
•
Form No. 0530803D
1112
Quick Start Guide • Guide de démarrage rapide • Guía rápida para comenzar
Setup • Montage • Disposición
1
Read all warnings
Lisez tous les avertissements
Lea todas las advertencias
4
Secure the paint can
Fixer le contenant
Seguro de recipiente
7
PAINT
Plug in, switch to "PAINT"
Branchez, mettre l'interrupteur à la
position "PAINT"
Conecte, cambie el interruptor a la
posición "PAINT"
2
Prepare material
Préparez la peinture
Prepare el material
5
Insert the suction tube
Insérer le tube d'aspiration
Inserte el tubo de succión
8
=
=
1
Adjust speed control
Réglez le contrôle de vitesse
Ajuste el control de velocidad
Español
Français
1
3
Attach paint can lid
Installer le couvercle de peinture
Monte la tapa de pintura
6
or
Attach roller arm
Fixer le bras du rouleau
Acople el brazo del rodillo
9
Press and release to start
Appuyer et lâcher pour démarrer
Presione y suelte para arrancar
English
Advertisement
Table of Contents

Related Manuals for WAGNER Smart Power Roller


Summary of Contents for WAGNER Smart Power Roller
- Page 1 Quick Start Guide • Guide de démarrage rapide • Guía rápida para comenzar Setup • Montage • Disposición Read all warnings Prepare material Attach paint can lid Préparez la peinture Lisez tous les avertissements Installer le couvercle de peinture Prepare el material Lea todas las advertencias Monte la tapa de pintura Attach roller arm...
- Page 2 If repair or replacement of the cord or plug is necessary, Important Safety HAZARD: HAZARDOUS VAPORS do not connect the green grounding wire to either Safety Safety Paints, solvents, insecticides, and other flat blade terminal. The wire with insulation having a materials may be harmful if inhaled, green outer surface with or without yellow stripes is the causing severe nausea, fainting, or...
-
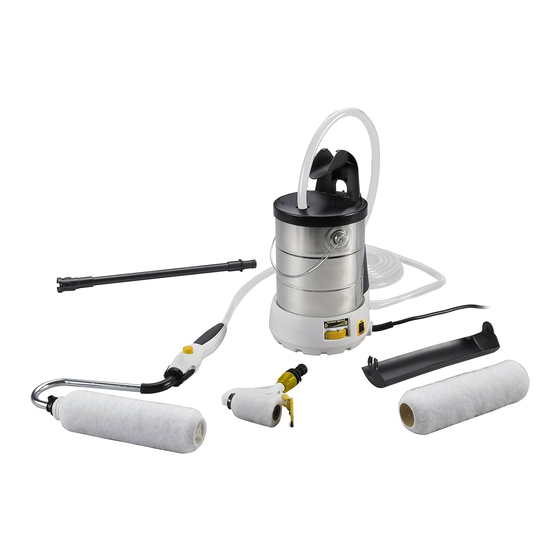
Page 3: Parts And Components
100° F (38°C). Questions? Item Description Item Description Item Description Call Wagner Technical Service at: Roller rest area 9” Roller assembly Roller handle 1-800-760-3844 Can lid h1 - 3/8” nap roller cover... -
Page 4: Material Preparation
Setup Start Material Preparation: Make sure the material you plan on using is thoroughly stirred and free from debris. Strain if necessary. Any impurities in the material can cause clogs in the pump system or roller assembly. Note: If you plan to use material that is 1. - Page 5 Practice / Usage 9” 3” Start IMPORTANT: Make sure your floors and furnishings are covered with drop cloths during usage. Handle Button: When the handle button is pressed and released, the pump motor will switch on and material will begin flowing into the paint hose. 1.
-
Page 6: Changing Accessories
9” Roller Selection Roller Walls: Roller Your Smart Power Roller comes equipped with two 9” roller Trim brush • Use the Smart Edge Roller for any edges that need covers. Trim... -
Page 7: Paint Hose
Turn the variable speed dial to 9. motor on. into the paint can. When cleaning the Smart Power Roller, make Switch paint flow directional sure to use the appropriate cleaning solution When finished, fully press and switch to “REvERSE”. -
Page 8: Cleaning The Unit
Cleanup - Cleaning the Unit ROLLER and Components UNIT Start You will need: • A waste container CLEANING • A minimum of one gallon of warm, soapy SOLUTION water if you used latex paints • A minimum of one quart of mineral spirits if you used oil-based paints Note: Cleaning time and the amount of 1. -
Page 9: Storage & Maintenance
Maintenance Storage / IMPORTANT: Do not submerge roller handle. The areas on the roller handle and the extension indicated below must be cleaned thoroughly and In addition to thoroughly cleaning your unit after every lubricated after each use. use, you must clean and lubricate the areas on the Maintenance ALL paint should be removed from the areas highlighted roller arm, extension, and the Smart Edge Roller arm... -
Page 10: Troubleshooting
This unit contains no serviceable Troubleshooting electrical parts. Do not attempt to service the unit yourself. Problem A: The pump will not run. Cause Solution The power cord is unplugged, or no power in outlet. Plug the power cord into 120V outlet The variable speed dial is turned to 0 (OFF) and handle button has not been pressed. - Page 11 ACCESSORIES. If any product is defective in material and/or workmanship during the applicable warranty period, return it with proof of purchase, transportation prepaid, to any Wagner Authorized Service Center. Call the Wagner Technical Service at 1-800-760-3844 Monday through Friday between 8:00 AM and 4:30 PM Central time.
- Page 12 Parts List • Liste de pièces • Lista de piezas Optional Accessories • Accessoires Optional • Accesorios Opciónal Part No. English Français Español Nº de piéce Description Description Descripción Pieza No. 0155206 3/8” nap roller cover (9”) Manchon de rouleau à grain Cubierta del rodillo con de 3/8 po (22 cm) lanilla de 3/8”...
Need help?
Do you have a question about the Smart Power Roller and is the answer not in the manual?
Questions and answers