
Related Manuals for Sencor SCT 9411BMR


Summary of Contents for Sencor SCT 9411BMR
- Page 1 CAR RADIO WITH A MULTIMEDIA PLAYER AND RDS RADIO WITH BLUETOOTH USER'S MANUAL SCT 9411BMR...
-
Page 3: Table Of Contents
Installation instructions IF YOU WANT TO USE THIS PRODUCT CORRECTLY, CAREFULLY READ THIS USER'S MANUAL AND STORE IT FOR FUTURE REFERENCE. IF YOU GIVE (SELL) THE APPLIANCE TO SOMEBODY, PLEASE ALSO INCLUDE ALL THE DOCUMENTATION TOGETHER WITH THIS APPLIANCE, INCLUDING THIS INSTRUCTION MANUAL. -
Page 4: Installation Instructions
Installation instructions 1. Installation instructions • The device is designed to be powered by 12 V direct current. Before installing the unit, check that your vehicle has a 12 V power supply with the negative pole going to ground. • The negative pole of the battery must be disconnected before the device is connected. -
Page 5: Installation
Installation Installation Installation 2. Installation 2. Installation 2. Installation The following accessories are included with the device The following accessories are included with the device The following accessories are included with the device Main unit and front panel (with a sleeve) Remote control ISO standard connector Trim plate... - Page 6 After detaching the front panel from the main unit, store it in a protective case (if available). Revision 05/2016 T 5017BMR Sencor EN CZ SK HU PL.indb 4 2.5.2016 12:15:44 4 EN Copyright © 2018, Fast ČR, a. s.
-
Page 7: Electronic Connection
Installation 2.2. Electronic connection ATTENTION: We recommend that the connections are made by a professional. This will prevent your unit from malfunction, protect your unit and other objects from damaging and ensure safe and trouble-free operation! EN 5 Copyright © 2018, Fast ČR, a. s. Revision 04/2018... -
Page 8: Connecting Leads
Installation 2.3. Connecting leads Use the adaptor bundle connected to the device’s multiconnector and the relevant inputs and outputs on the other side. Ensure that the connections are properly made and the insulation of both connected a disconnected leads is good! Connector/Object Connect to Parking brake Parking brake (-) - Page 9 Installation Note: Watching the video without the parking brake being set is locked, showing a screen message. Video blocking applies to the main screen only, rear screen RCA output is not locked. CONNECTOR A MEMORY +12 V VEHICLE ANTENNA OUTPUT +12 V (TO IGNITION) GROUNDING Note: (connector A no.7) must be connected by means of a key to the vehicle's ignition so that the...
-
Page 10: Control Panel And The Remote Control
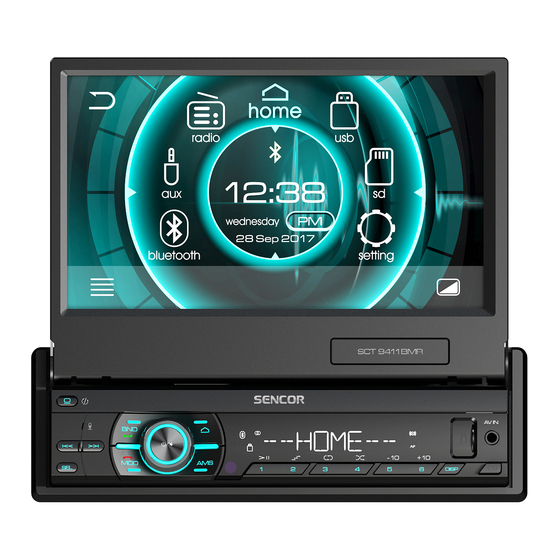
Control panel and the remote control 3. Control panel and the remote control The following pictures show the control panel and the remote control. The display and symbols shown on the picture above may differ from the actual control panel and of the remote control. -
Page 11: Description Of The Remote Control
Control panel and the remote control 11. DISP 8. AMS • To switch clock/device status • Automatic scanning and storing available stations (long press) or display (radio frequency etc.) browsing through previously stored stations (short press). • To release the front pane lock to 9. -
Page 12: Remote Control And Batteries
Control panel and the remote control 3. 1.1. Changing the batteries If the range of the remote control is reduced or the device does not respond to any functions during operation, replace the battery with a new one. Ensure that you maintain the correct polarity when inserting the battery into the remote control. -
Page 13: Control And Operation
Control and operation 4. Control and operation 4.1. General controls Turn the device on / off, mute volume Press button to turn the power on. In any mode, hold it down to turn the power off. In any mode, press button to activate or deactivate mute. -
Page 14: Radio
Control and operation 4.4. Radio Selecting a mode During operation, repeatedly press the MOD button and select the radio mode. Selecting a broadcast band width MU: Press the BND button repeatedly to select the desired band. RC: Press the BND button repeatedly to select the desired band. -
Page 15: Controlling The Rds
Control and operation 4.5. Controlling the RDS 4.5.1. Overview of RDS functions The Radio Data System (RDS) is a service, which makes it possible for FM stations to broadcast other digital information together with the standard program signal. Some of them are listed below. It depends on the specific station, which data is used for transmission and when. - Page 16 Control and operation 4.5.2. Setting up the RDS mode In the Radio mode screen, touch to select AF (Alternative frequencies) and TA (Traffic announcement) on/off and select PTY (Program type); confirm the selection using the “Confirm” symbol and make the settings. 4.5.3.
-
Page 17: Usb / Sd
LCD display. In the stop mode, press the button to start playback from the beginning. SCT 5017BMR Sencor EN CZ SK HU PL.indb 4 2.5.2016 12:15:44 FAST FORWARD / FAST REWIND MU: Press and hold the buttons to fast forward / rewind. - Page 18 Control and operation Audio During playback, press to open the file list. By pressing the symbol at the bottom of the list, you can select by file type (music/photo/video) Video : selection shortcut (touch the message window to switch) : File and folder list : skip to previous/next title, chapter, track, file (according to the file type)
-
Page 19: Bluetooth Controls
Activate the Bluetooth feature in your mobile telephone. On your telephone, start a scan for new devices for pairing After the scan is complete select "SCT 9411BMR" from the list and confirm the pairing. The entry code, which you may be asked for is "0000" and confirm. -
Page 20: External Input Mode (Aux-In)/Av Input (Av-In)
Control and operation Receiving a call The phone number of the caller will appear on the display when a call is being received (depending on the type of mobile telephone). Press the BND button on the main unit or the "ANSWER" button on the remote control. Dialling in Bluetooth mode Enter the number on the mobile phone as usual, once the number starts being dialled, "CALLING"... -
Page 21: Settings
Troubleshooting 4.9. Settings Press the button to go to the home page, turn the volume control knob to select Setting and then press the volume control knob to open the Setting menu. Turn the volume control knob to select a setting, press the volume control knob to confirm and then turn the volume control knob to change the value and again press the volume control knob to return to the settings selection mode. - Page 22 Troubleshooting Weak reception or unavailable radio signal – Check whether the antenna is connected and the quality connection cable is not interrupted. – The antenna is not long enough. Extend the length of the antenna. – The antenna is not thoroughly grounded. Thoroughly ground the antenna. No stereo signal reception –...
-
Page 23: Technical Specifications
The CE symbol displayed on the unit, the user's manual and on the packaging shows that the unit meets the basic requirements of the R&TTE directive, 1995/5/EC, and the Low voltage directive 73/23/EEC. The declaration of conformity can be found at www.sencor.cz. EN 21 Copyright © 2018, Fast ČR, a. s. - Page 24 FAST ČR, a.s. hereby declares that the radio device type SCT 9411BMR conforms to the 2014/53/EU directive. For full version of the EU declaration of conformity, please refer to www.sencor.eu website.
- Page 25 Cases when the claiming product cannot be indentified according to the presented documents (e.g. the serial number or the warranty seal has been damaged). Authorized service centers Visit www.sencor.eu for detailed information about authorized service centers. EN 23 Copyright © 2018, Fast ČR, a. s.
- Page 26 Designed in Europe by Sencor , Made in China ®...
Need help?
Do you have a question about the SCT 9411BMR and is the answer not in the manual?
Questions and answers