Table of Contents
Advertisement
Quick Links
ASSEMBLY AND INSTALLATION
T0172
WARNING:
NOTES: 1. Before installing, consult local electrical codes for wiring and grounding requirements.
2. READ AND SAVE THESE INSTRUCTIONS.
Hardware Package (included):
Mounting Screw X2
Mounting Screw X2
#8/32X1/2 in
#6/32 X1/2 in
Important to Know:
1. If you are not familiar with state and local electrical
codes, it is recommended that you consult with a
qualified electrician.
2. This fixture requires a 120 VAC, 60 Hz power
source.
3. For general safety and to avoid any possible
damage to the sensor, be sure the power is
switched "off" before adjustment.
Maximum Wattage: 25 W
Working Temperature Range: -
Note: Fixture can be wall mounted or eave mounted.
Wall Mounted
Read notes section on page 3-4 for addictional information about mounting location of fixture.
Light fixture and sensor should be mounted as shown above when installed (depending upon type of installation)
Before installing the light fixture under an eave, the sensor head must be rotated as shown in the next two steps for
proper operation and to avoid the risk of electrical shock.
For eave mounted only:
Swing the sensor head towards the mounting bracket.
INSTRUCTIONS
TO AVOID RISK OF ELECTRICAL SHOCK, BE SURE TO SHUT OFF
POWER BEFORE INSTALLING OR SERVICING THIS FIXTURE.
Mounting Screw X2
Mounting Bracket Screw
#10/24 X1/4 in
4°F ~ 113°F
Mounting Bracket
Controls
Page 1 / 16
Mounting Strap
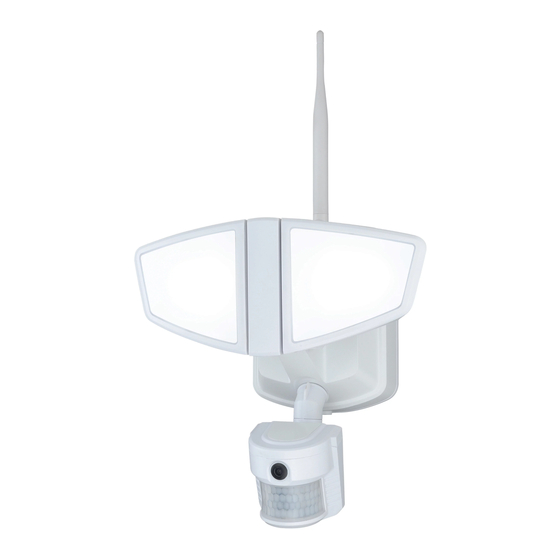
Features:
1. Energy saving LED fixture.
2. Motion sensor: turns light ON automatically when
motion is detected and turns light OFF automatically
when motion stops.
3. Photocell keeps the light OFF during daylight hours.
4. WIFI Camera operation with built-in camera, speaker
& microphone, cloud connectivity, IOS & Android
compatible. (please refer to page 5 to 16)
Eave Mounted
Rotate the sensor head clockwise 180˚ so the controls face down.
Fixture Mounting Screw
Wire Nut X3
Wi Security
Controls
Controls
150616
Advertisement
Table of Contents

Related Manuals for Vaxcel T0172


Summary of Contents for Vaxcel T0172
- Page 1 ASSEMBLY AND INSTALLATION INSTRUCTIONS T0172 WARNING: TO AVOID RISK OF ELECTRICAL SHOCK, BE SURE TO SHUT OFF POWER BEFORE INSTALLING OR SERVICING THIS FIXTURE. NOTES: 1. Before installing, consult local electrical codes for wiring and grounding requirements. 2. READ AND SAVE THESE INSTRUCTIONS.
-
Page 2: Installation Steps
Mounting Bracket Mounting Bracket Screw Back Plate FRONT Wire Nut Light Head Outlet Box Mounting Strap Sensor Installation Steps Turn off the power at fuse or circuit box. Fig. 1 1. The fixture mounting bracket is pre-assembled on the light fixture. Unscrew the fixture mounting screw in order to remove the mounting bracket. - Page 3 Adjusting the Motion Sensor Detection Zone: Fig. 3 1. Perform a “walk test”: walk in an arc across the front of the motion sensor.(See Fig.3) 2. The light will come on and the red LED will flash indicating motion has been detected. 3.
-
Page 4: Troubleshooting
Fig. 8 4. The sensor will be more sensitive to motion across its detection path than motion directly towards it. (See Fig.8) Motion Motion 5. To reduce possible nuisances, do not mount the fixture near a heat source like an air conditioner, vent or furnace exhaust, or in a direction facing any reflective object or other nearby light source. -
Page 5: Software Setting
Software Setting Brief Introduction of Wifi Security Light Introduction of Wifi Security Light. 1. The Wifi Security Light combines an LED security floodlight with an intergrated wireless camera device. 2. The basic function of an wifi camera is to transmit remote video data through a computer network. Using the H.264 hardware compression technigue, the transmission speed of high quality video images across the network &... - Page 6 Fig. 9 Operating Methods of Buttons TIME Ambient Light Time Setting Induction Setting Phone Phone 10Min Phone Router Moden Internel SD Card RESET WPS Wifi Security Light Reset ■ The connection between Wifi Security Light and other devices is through WIFI. ■...
- Page 7 Configuration Method of WPS: ■ The password should be empty, tap on password Press the WPS button in the panel of Wifi Security Light held and select “Next” . for 5 seconds. The blue indicator will flash rapidly after entering into the WPS mode. Then press the WPS button on the router which you would like to connect to Wifi Security Light (refer to router manual for instructions on WPS mode operarion).
- Page 8 ■ Settings interface ■ The camera has been successfully added if the following interface appears. LCAM-000839-CJCEM ■ User Setting interface The admin user has the highest administrative authority, can set the IPCAM password here. Explanations of menu in the main interface. IPCAM setting other guests access Camera Name...
- Page 9 ■ User Setting interface Audio Recording Intercom Stop Take Photo Video Screen Settings Video Format Settings ■ Surveil the video interface Record Video 3.1 The Method of Configuring Wifi Security Light through PC ■ Install the “Wifi Security” software in PC. (Please refer to the CD provided) ■...
- Page 10 ■ Select “ Device Management” in the prompt box below. ■ First select “wireless setting” in the following prompt box and select “search” on the right. Then the avialable nearby WIFI hot spots will appear. Select the user’s router and in the shared password box input the WIFI password. Click “set”...
-
Page 11: Basic Setting
■ Basic status of the device Serial Name Explanation There are the live video and device management swift menus at the top Menu bar left corner of the main interface 2nd,August.2014 Saturday The live video of the camera can view 9 channels Switch of 2nd,August.2014 Saturday at the same time at most... -
Page 12: Wireless Settings
■ Setting requirements of username and password, the Http Port Settings username, being a required filed, can not be“admin”. For the group of adminstrators, the password should have six characters at least and include figures and letters. ■ Setting allows access: ■... -
Page 13: Alarm Settings
Alarm Settings The setting page of mailbox ■ Alarm Settings: Set enable alarm schedule, three alarm methods can be enabled, namely, motion detect, trigger detec and sound detec, it can also set the sensitivity. Alarm Action Settings: ■ Configure the e-mail sent and received. When there is an alarm or the IP address of the device changes, the receiver will receive the e-mail of the sender. -
Page 14: Security Settings
Record Settings, Edit Schedule ■ Set the date and time of camera access and the IP access permission. Dictionary attack settings Record Settings and Record File Management Tools 2nd August 2014 Sat 2nd August 2014 Sat 2nd August 2014 Sat 2nd August 2014 Sat SD memory Card Record File Management. - Page 15 ■ Main control interface ■ P2P Settings Alarm record bar Camera information Language selection ■ Management window Select add camera here ■ Control window Camera information added Select add camera here Advance Setting to WEB FAQ Changing the connected router There are two methods to change the connected router: 1.
- Page 16 Network Problem Network Connection Problem Mke sure that your HTTP server software is configured correctly and runs well. If you have used any firewall software, make sure that the 80 port can be accessed externally. If you are using shared ADSL router, please ensure that the suitable port forwarding is set.
Need help?
Do you have a question about the T0172 and is the answer not in the manual?
Questions and answers