Table of Contents
Advertisement
Available languages
Available languages
Advertisement
Chapters
Table of Contents

Subscribe to Our Youtube Channel
Related Manuals for asmodus Colossal 80w


Summary of Contents for asmodus Colossal 80w
- Page 1 BEDIENUNGSANLEITUNG MANUEL D‘UTILISATION USER MANUAL...
- Page 2 SPRACHEN / LANGUES / LANGUAGES Deutsch � � � � � � � � � � � � � � � � � � � � � � � � � � � � � � � � � � � � � � � � � � � � � � � � � � � � � � � � � � � 01 Français �...
- Page 3 ASMODUS Colossal Akkuträger Nutzerinformationen Vielen Dank, dass Sie sich für dieses E-Zigaretten-Produkt von ASMODUS entschieden haben! Bei unserem gesamten Sortiment legen wir großen Wert auf hohe Qualitäts- und Sicherheitsansprüche. Wir wünschen Ihnen viel Spaß beim Dampfen mit Ihrem neuen E-Zigaretten-Produkt! Bitte lesen Sie die Bedienungsanleitung vor Gebrauch sorgsam durch, um eine korrekte Nutzung des Geräts zu gewährleisten.
-
Page 4: Table Of Contents
Inhaltsverzeichnis Hinweise & Vorsichtsmaßnahmen........03 Lieferumfang | Aufbau des Geräts . -
Page 5: Hinweise & Vorsichtsmaßnahmen
Hinweise & Vorsichtsmaßnahmen Personen unter 18 Jahren, Schwangere, stillende Mütter und Menschen mit Herz-Kreis- lauf-Erkrankungen dürfen dieses Produkt nicht verwenden. Nicht empfohlen für Nichtraucher. Das E-Zigaretten-Produkt darf nicht in die Hände von Kindern und Jugendlichen gelangen. Dieses Produkt entspricht den innerhalb der EU Dieses Produkt darf gültigen Bestimmungen für technische Geräte und nicht von Minderjährigen... - Page 6 Hinweise & Vorsichtsmaßnahmen Benutzerhinweise 1. Sollte Ihnen das Gerät heruntergefallen sein, überprüfen Sie bitte, ob sich keine Komponenten gelockert haben, ob kein Liquid austritt und ob kein Defekt an Ihrem Mundstück vorliegt. Sofern nach visueller Prüfung des Produkts keine Anzeichen einer Beschädigung vorliegen, können Sie das Gerät weiterbenutzen.
- Page 7 Hinweise & Vorsichtsmaßnahmen 4. Lagern Sie das Gerät nie in Räumen mit sehr hohen Temperaturen oder mit besonders hoher Luftfeuchtigkeit. Vermeiden Sie längere direkte Sonneneinstrahlung. 5. Die geeignete Temperatur für das Auaden des Akkus liegt bei 5°C bis 45°C und für den Gebrauch bei -10°C bis 60°C.
- Page 8 Hinweise & Vorsichtsmaßnahmen 8. Das Inhalieren nikotinhaltigen Liquids kann die Herzfrequenz und/oder den Blutdruck erhöhen. Nikotin kann Übelkeit, Schwindel und/oder Magenschmerzen verursachen. Wenn Sie an sich oder Menschen in Ihrer Umgebung unerwünschte Wirkungen fest- stellen, verwenden Sie dieses Produkt bitte nicht weiter und konsultieren Sie einen Arzt. 9.
-
Page 9: Lieferumfang | Aufbau Des Geräts
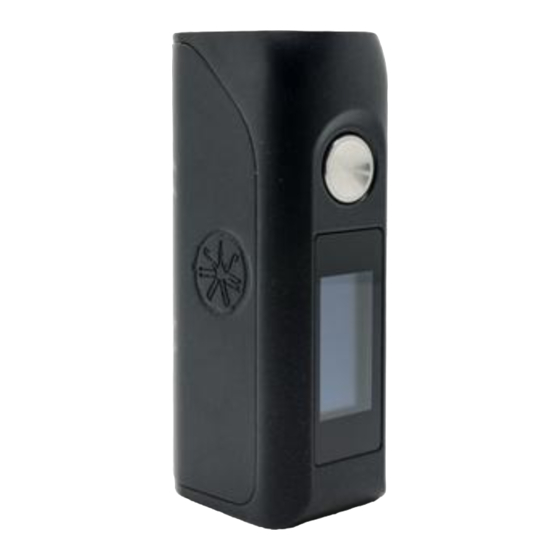
Lieferumfang | Aufbau des Geräts Lieferumfang 510er Anschluss 1x Colossal 80W Akkuträger (ohne 18650er Akku) Akku-Abdeckung 1x Micro-USB-Kabel 1x Bedienungsanleitung Feuertaste Betriebsmodus Micro-USB- Ausgangsleistung Anschluss Ausgangsspannung Head-Widerstand Dampfzeit Anzahl der Züge Akku-Ladestand Display-Sperre Touchscreen... -
Page 10: Eckdaten & Leistungsmerkmale
Eckdaten & Leistungsmerkmale Ausgabemodi POWER | TEMP (COIL: SS304, SS316, SS317, Ti, Ni200) | TCR | TFR | CURVE Ausgangsleistung 5 bis 80 Watt im VW-Modus 5 bis 60 Watt im TC-Modus Widerstandsbereich 0,1 Ohm bis 3 Ohm Temperaturbereich 100°C bis 300°C | 212°F bis 572°F Eingangsspannung 3,2 Volt bis 4,2 Volt Ausgangsspannung... - Page 11 Eckdaten & Leistungsmerkmale Das Gerät ist mit einem wiederaufladbaren 18650er Hochstrom-Akku auszustatten. Verwenden Sie zum Laden des Akkus bitte ein externes Ladegerät. Sicherheitsfunktionen • Akku-Verpolungsschutz • Akku-Unterdruckschutz • Akku-Überspannungsschutz • Schutz vor zu geringem und zu hohem Widerstand • Überhitzungsschutz...
-
Page 12: Bedienung Des Geräts
Bedienung des Geräts Hinweise zur Inbetriebnahme Bitte laden Sie den wechselbaren 18650er Akku vor der ersten Inbetriebnahme vollständig auf. Bitte beachten Sie die Kennzeichnung der Plus- und Minus-Pole im Akkufach. Achten Sie unbedingt darauf, dass die Oberfläche der Akku-Zelle keine Beschädigung aufweist. Das Gerät verfügt über einen gefederten 510er Anschluss, wodurch er zu einer Vielzahl an subohm-fähigen Clearomizern passt. - Page 13 Betätigen Sie die Feuertaste fünf Mal schnell hintereinander (innerhalb von 3 Sekunden), um das Gerät einzuschalten und fünf Mal, um es wieder auszuschalten. Beim Einschalten erscheint das ASMODUS-Lo- go auf dem Display. Beim Ausschalten erscheint ein LOGOUT-Symbol. Drücken Sie darauf, bis Ihnen die aktuelle Systemversion angezeigt wird.
- Page 14 Bedienung des Geräts Bildschirm entsperren Während sich das Gerät im Standby-Modus mit erloschenem Bildschirm befindet, drücken Sie die Feuertaste. Auf dem Bildschirm werden Ihnen Ihre aktuellen Vaping-Einstellungen angezeigt. Um den Bildschirm zu entsperren, wischen Sie in Pfeilrichtung entlang des Bildschirms, sodass im unteren rechten Teil ein offenes Schloss-Symbol erscheint.
- Page 15 Bedienung des Geräts Auswählen des Betriebsmodus Während der Bildschirm entsperrt ist, wischen Sie im oberen Teil, wo Ihnen der aktuelle Betriebsmodus angezeigt wird (POWER/TEMP/CURVE/TCR/TFR) nach links oder rechts, um den Betriebsmodus zu wechseln. Einstellungen im POWER-Modus (Variable Wattage) Leistungsregelung: Während der Bildschirm entsperrt ist, drücken Sie länger auf den aktuell angezeigten Leistungswert in Watt, um ihn zu verändern.
- Page 16 Bedienung des Geräts Einstellungen im TEMP-Modus (Variable Temperature) Drahtart im TEMP-Modus auswählen: Während der Bildschirm im TEMP-Modus entsperrt ist, drücken Sie länger auf die TEMP-Anzeige. Drücken Sie auf “+” oder “-”, um die Wicklungsart des Verdampferkopfes auszuwählen. Betätigen Sie die Feuertaste, um Ihre Einstellung zu bestätigen und den Vorgang zu beenden.
- Page 17 Bedienung des Geräts Einstellungen im CURVE-Modus (Vorheizfunktion) Leistungspunkt (P1 – P5) auswählen: Während der Bildschirm im CURVE-Modus entsperrt ist, wischen Sie nach oben oder nach unten entlang des Bildschirms, um zwischen den Leistungspunkten P1 bis P5 zu wechseln. Wechseln zwischen Leistungs- und Zeiteinstellung für einen Leistungspunkt: Während der Bildschirm im CURVE-Modus entsperrt ist, drücken Sie auf den aktuell ange- zeigten Leistungs- oder Zeitwert, um zum jeweils anderen Wert zu wechseln.
- Page 18 Bedienung des Geräts Einstellungen im TCR-Modus (Temperature Coefficient of Resistance) TCR-Speicherplatz (M1 – M5) auswählen: Während der Bildschirm im TCR-Modus entsperrt ist, wischen Sie nach oben oder nach un- ten entlang des Bildschirms, um zwischen den TCR-Speicherplatz M1 bis M5 zu wechseln. TCR-Wert einstellen: Während der Bildschirm im TCR-Modus entsperrt ist, drücken Sie länger auf die TCR-An- zeige.
- Page 19 Bedienung des Geräts Einstellungen im TFR-Modus (Temperature Factor of Resistance) TFR-Speicherplatz (M1 – M5) auswählen: Während der Bildschirm im TFR-Modus entsperrt ist, wischen Sie nach oben oder nach un- ten entlang des Bildschirms, um zwischen den TFR-Speicherplatz M1 bis M5 zu wechseln. TFR-Wert einstellen: Während der Bildschirm im TFR-Modus entsperrt ist, drücken Sie länger auf die TFR-An- zeige.
- Page 20 Bedienung des Geräts System ausschalten/herunterfahren Drücken Sie länger auf das LOGOUT-Symbol, um das System herunterzufah- ren. Auf dem Display wird Ihnen die aktuelle Systemversion angezeigt, bevor die Anzeige erlischt. Zuganzahl verwalten Drücken Sie länger auf das VERWALTUNGS-Symbol, um die Zuganzahl zu verwalten.
- Page 21 Geräts vorzunehmen. Auf dem Display erscheint “Upgrade?”. Bestätigen Sie die Frage, indem Sie auf “YES” tippen und halten Sie anschließend die Feuertaste so lange gedrückt, bis auf dem Display “Download Mode” erscheint. Laden Sie die aktuelle Firmware-Version bei www.asmodus.com herunter.
- Page 22 Bedienung des Geräts Helligkeit einstellen Drücken Sie länger auf das HELLIGKEITS-Symbol, um die Display-Helligkeit einzustellen. Drücken Sie auf “+” oder “-”, um den gewünschten Wert einzustel- len. Betätigen Sie die Feuertaste, um Ihre Einstellung zu bestätigen und den Vorgang zu beenden. Systemversion anzeigen Drücken Sie länger auf das V-Symbol, um sich die aktuelle Systemversion an- zeigen zu lassen.
- Page 23 Bedienung des Geräts Widerstand prüfen/einstellen Drücken Sie länger auf das OHM-Symbol, um den Widerstand des Verdamp- ferkopfes zu prüfen/einzustellen. Auf dem Display wird Ihnen der von dem Gerät automatisch gelesene Widerstand angezeigt. Um den Widerstandswert zu ändern, tippen Sie auf “ADJ”. Drücken Sie auf “+” oder “-”, um den ge- wünschten Wert einzustellen.
- Page 24 Sie die Upgrade-Software auf Ihrem PC und klicken Sie auf “UPGRADE”, um das Gerät entsprechend zu aktualisieren. Hinweis: Laden Sie Software und Softwarepakete bitte von unserer offiziellen Website www.asmodus.com herunter. Laden des Akkus Die 18650er Akkuzelle kann über Micro-USB aufgeladen werden. Stellen Sie bei Verwendung eines Adapters sicher, dass er für das Laden mit 5V/1A geeignet ist.
-
Page 25: Fehlermeldungen
Fehlermeldungen Fehlermeldungen “HIGH ATOMIZER”: Der Widerstand des Verdampferkopfes ist zu hoch. “LOW ATOMIZER”: Der Widerstand des Verdampferkopfes ist zu gering. “ATOMIZER REMOVE”: Es kann kein Widerstand erkannt werden. “CHECK ATOMIZER”: Es kann kein Verdampferkopf erkannt werden. “ATOMIZER SHORT”: Es ist ein Kurzschluss aufgetreten. “HIGH BATTERY”: Die Akkuspannung ist zu hoch. -
Page 26: Gewährleistung & Service
Gewährleistung & Service Gewährleistungskonditionen der InnoCigs GmbH & Co. KG Das von Ihnen erworbene ASMODUS-Produkt wurde für Sie von der InnoCigs GmbH & Co. KG importiert. Sollte das Produkt nicht funktionieren oder in irgendeiner Weise defekt sein, so wenden Sie sich bitte direkt an den Fachhändler, von dem Sie das Produkt erworben haben. Bei Fragen rund um die Bedienung und Verwendung wenden Sie sich gerne an unseren Kundenservice. -
Page 27: Kontakt
Kontakt zu InnoCigs Kontakt zu Ihrem ASMODUS-Importeur InnoCigs GmbH & Co. KG Stahltwiete 23 22761 Hamburg | GERMANY Telefon: +49 (0) 40 – 22 86 729 0 Fax. +49 (0) 40 – 22 86 729 99 E-Mail: service@innocigs.com... - Page 28 En combinaison avec ce produit, utilisez exclusivement des produits originaux et recommandés. En tant qu‘importateur officiel de ce produit ASMODUS, InnoCigs GmbH & Co. KG ne garantit aucun service après-vente et aucune garantie en cas d‘utilisation de produits non recommandés.
- Page 29 Table des matières Indications et mesures de précaution ........28 Contenu de la livraison | Structure de l‘appareil .
-
Page 30: Indications Et Mesures De Précaution
Indications et mesures de précaution Les personnes âgées de moins de 18 ans, les femmes enceintes, les mères allaitantes et les person- nes souffrant de maladies cardiovasculaires ne doivent pas utiliser ce produit. Déconseillé aux non-fu- meurs. Tenir cet accessoire pour cigarette électronique hors de portée des enfants et des adolescents. Ce produit répond aux dispositions applicables au Ce produit ne doit pas être sein de l‘Union Européenne concernant les appareils... - Page 31 Indications et mesures de précaution Recommandations d‘utilisation 1. Si vous avez fait tomber votre appareil, veuillez vérifier qu‘aucun composant ne se soit desserré, qu‘aucun liquide ne s‘écoule et que votre embout ne présente aucun défaut. Dans la mesure où, après un contrôle visuel, le produit ne présente aucun dommage, vous pouvez continuer de l‘utiliser.
- Page 32 Indications et mesures de précaution 4. Ne rangez jamais l‘appareil dans une pièce à une température élevée ou présentant une humidité de l‘air particulièrement forte. Évitez de l‘exposer aux rayons du soleil de manière prolongée. 5. La température adaptée va de 5 ºC à 45 ºC pour la recharge des batteries, et de - 10 ºC à...
- Page 33 Indications et mesures de précaution 8. Inhaler des produits contenant de la nicotine peut augmenter la fréquence cardiaque et/ou la pression sanguine. La nicotine peut entraîner des nausées, des vertiges et/ ou des maux d‘estomac. Si vous constatez des effets indésirables sur vous-même ou sur des personnes de votre entourage, veuillez ne plus utiliser ce produit et consulter un médecin.
-
Page 34: Contenu De La Livraison | Structure De L'appareil
Contenu de la livraison | Structure de l‘appareil Contenu de la livraison Connectique 510 à ressort 1x Box Colossal 80W (sans accu 18650) Compartiment 1x Câble micro-USB de l’accu 1x Manuel d‘utilisation Bouton fire Mode de fonctionnement Port micro Puissance de sortie Tension de sortie Résistance de... -
Page 35: Données Clés Et Caractéristiques De Performance
Données clés et caractéristiques de performance Modes de sortie POWER | TEMP (COIL: SS304, SS316, SS317, Ti, Ni200) | TCR | TFR | CURVE Puissance de sortie de 5 à 80 watts en mode POWER de 5 à 60 watts en mode TEMP Plage de résistance de 0,1 à... - Page 36 Données clés et caractéristiques de performance L‘appareil doit être doté d’un accu 18650 rechargeables identiques, résistant aux courants de forte intensité. Utilisez un chargeur externe pour recharger l’accu. Fonctions de sécurité • Protection contre l‘inversion de polarité • Protection contre pression négative •...
-
Page 37: Utilisation De L'appareil
Utilisation de l‘appareil Instructions de mise en marche Chargez complètement l’accu 18650 échangeable requis avant de procéder à la mise en service initiale. Veuillez tenir compte du marquage des pôles Plus et Moins dans le logement à accu. Veillez absolument à ce que la surface d’accu ne présente aucune trace de détérioration. - Page 38 Appuyez rapidement cinq fois de suite sur la touche d‘allumage (en l‘espace de 3 secondes) pour mettre en marche l‘appareil, et cinq fois pour l‘éteindre à nouveau. Lors du démarrage, le logo « ASMODUS » s‘affiche sur l‘écran. Lorsque vous éteignez l‘appareil, l‘icône de DÉCONNEXION apparaît.
- Page 39 Utilisation de l‘appareil Déverrouiller l‘écran Lorsque l‘appareil est en mode veille avec l‘écran éteint, appuyez sur la touche d‘allumage. L‘écran affiche alors vos paramètres de vapotage actuels. Pour déverrouiller l‘écran, balayez-le du doigt en suivant le sens de la flèche, une icône représentant un cadenas ouvert apparaîtra alors dans la partie inférieure droite.
- Page 40 Utilisation de l‘appareil Sélection du mode de fonctionnement Quand l‘écran est déverrouillé, effectuez un balayage vers la gauche ou la droite sur la partie supérieure de l‘écran où le mode de fonctionnement actuel est affiché (POWER/ TEMP/CURVE/TCR/TFR) pour changer le mode de fonctionnement. Réglages en mode Power (Variable Wattage) Réglage de la puissance : Quand l‘écran est déverrouillé, appuyez plus longtemps sur la valeur actuelle en watts de la puissance pour la changer.
- Page 41 Utilisation de l‘appareil Réglages en mode TEMP (Variable Temperature) Sélectionner la nature de fil en mode TEMP : Quand l‘écran est déverrouillé en mode TEMP, appuyez plus longtemps sur l‘indicateur TEMP. Appuyez sur « + » ou « - » pour sélectionner le type de bobine de la tête d’atomiseur. Appuyez sur la touche d‘allumage pour confirmer votre réglage et terminer l‘opération.
- Page 42 Utilisation de l‘appareil Réglages en mode CURVE (Fonction de préchauffage) Sélectionner le point de puissance (P1 – P5) : Quand l‘écran est déverrouillé en mode CURVE, balayez l‘écran du doigt vers le haut ou vers le bas pour choisir entre les points de puissance allant de P1 à P5. Choisir entre le réglage de la puissance et du temps pour un point de puissance : Quand l‘écran est déverrouillé...
- Page 43 Utilisation de l‘appareil Réglages en mode TCR (Temperature Coefficient of Resistance) Sélectionner l‘espace de mémoire TCR (M1 – M5) : Quand l‘écran est déverrouillé en mode TCR, balayez l‘écran du doigt vers le haut ou vers le bas pour choisir entre les espaces de stockage TCR allant de M1 à M5. Régler la valeur TCR : Quand l‘écran est déverrouillé...
- Page 44 Utilisation de l‘appareil Réglages en mode TFR (Temperature Factor of Resistance) Sélectionner l‘espace de mémoire TFR (M1 – M5) : Quand l‘écran est déverrouillé en mode TFR, balayez l‘écran du doigt vers le haut ou vers le bas pour choisir entre les espaces de stockage TFR allant de M1 à M5. Régler la valeur TFR : Quand l‘écran est déverrouillé...
- Page 45 Utilisation de l‘appareil Éteindre / arrêter le système Appuyez plus longtemps sur l‘icône de DÉCONNEXION pour arrêter le système. L‘actuelle version du système apparaît alors sur l‘écran avant que l‘affichage ne s‘éteigne. Gestion du nombre de bouffées Appuyez plus longtemps sur l‘icône de GESTION pour gérer le nombre de bouf- fées.
- Page 46 UPGRADE. Le message « Upgrade? » s’affiche à l’écran. Confirmez votre réponse à la question en tapant sur « YES », et appuyez sur le bouton d‘allumage jusqu‘à ce que « Download Mode » apparaisse à l‘écran. Téléchar- gez la version actuelle du firmware (micrologiciel) sur www.asmodus.com.
- Page 47 Utilisation de l‘appareil Régler la luminosité Appuyez plus longtemps sur l‘icône de LUMINOSITÉ pour régler la lumi- nosité de l‘affichage. Appuyez sur « + » ou « - » pour déterminer la valeur souhaitée. Appuyez sur la touche d‘allumage pour confirmer votre réglage et terminer l‘opération.
- Page 48 Utilisation de l‘appareil Vérifier/régler la résistance Appuyez plus longtemps sur l‘icône de l‘OHM afin de vérifier/régler la résistance de la tête d’atomiseur. La valeur de la résistance automatiquement reconnue par l‘appareil s‘affichera alors sur votre écran. Pour modifier la valeur de la résistance, tapez sur «...
- Page 49 à jour sur votre PC et cliquez sur « UPGRADE » pour effectuer l‘actualisation correspon- dante de l‘appareil. Remarque : Merci de télécharger les logiciels et les progiciels sur notre site officiel www.asmodus.com. Recharge de la batterie L‘unité de batterie 18650 peut être rechargée via le micro câble USB. Si vous utilisez un adaptateur, assurez-vous qu‘il convient pour recharger en 5 V/1 A.
-
Page 50: Messages D'erreur
Messages d‘erreur Messages d‘erreur “HIGH ATOMIZER”: La résistance de la tête d‘atomiseur est trop élevée. “LOW ATOMIZER”: La résistance de la tête d‘atomiseur est trop basse. “ATOMIZER REMOVE”: Aucune résistance n‘est détectée. “CHECK ATOMIZER”: Aucune tête d’atomiseur n‘est détectée.. “ATOMIZER SHORT”: Il y a eu un court-circuit. “HIGH BATTERY”: La tension des batteries est trop élevée. -
Page 51: Garantie Et Service Après-Vente
Garantie et service Conditions de garantie d‘InnoCigs GmbH & Co. KG Le produit ASMODUS que vous avez acheté a été importé pour vous par InnoCigs GmbH & Co. KG. Si le produit ne fonctionne pas ou est défectueux, veuillez contacter le revendeur spécialisé... -
Page 52: Contact
Contact d’InnoCigs Contactez votre importateur d’ASMODUS InnoCigs GmbH & Co. KG Stahltwiete 23 22761 Hambourg | ALLEMAGNE Téléphone: +49 (0) 40 – 22 86 729 0 Fax. +49 (0) 40 – 22 86 729 99 E-Mail: service@innocigs.com... - Page 53 Use only original and/or recommended products in combination with this product. The InnoCigs GmbH & Co. KG, as the official importer of this ASMODUS product, does not provide any service and / or warranty when non-recommended products are used together with this product.
-
Page 54: Table Of Contents
Table of Contents Notes & Precautions ..........53 Contents | Design of the Device . -
Page 55: Notes & Precautions
Notes & Precautions Persons under 18 years, pregnant women, nursing mothers and people with cardiovascu- lar disease should not use this product. Not recommended for non-smokers. Please keep out of reach of children and minors. This product complies with EU requirements on This product must not technical goods and may be sold throughout the be used by minors. - Page 56 Notes & Precautions User Instructions 1. If the device is dropped, you should check that there are no loose components, that there is no leakage of e-liquid, and that your mouthpiece is not damaged. If there are no signs of damage upon visual inspection of the product, you can continue using the device.
- Page 57 Notes & Precautions 4. Never store the device in rooms with extremely high temperatures or in rooms with extremely high humidity. Avoid long periods of direct sunlight. 5. The recommended temperature range for charging the device is 0°C to 45°C and -10°C to 60°C for the use.
- Page 58 Notes & Precautions 8. Nicotine can increase the heart rate and / or blood pressure and cause nausea, dizziness, and / or abdominal pain. If you notice any undesirable effects, disconti- nue use and consult a physician. 9. Please comply with all local laws when using this e-cigarette product. 10.
-
Page 59: Contents | Design Of The Device
Contents | Design of the Device Contents 510 Connector 1x Colossal 80W Box Mod (without 18650 battery) Battery Cover 1x Micro USB Cable 1x User Manual Fire Button Operation Mode Micro USB Output Power Port Output Voltage Head Resistance Vaping Time... -
Page 60: Main Features & Performance
Main Features & Performance Output Modes POWER | TEMP (COIL: SS304, SS316, SS317, Ti, Ni200) | TCR | TFR | CURVE Power Output 5 to 80 Watts in POWER Mode 5 to 60 Watts in TEMP Mode Resistance Range 0.1 to 3.0 Ohm Temperature Range 100°C to 300°C | 200°F to 570°F Input Voltage... - Page 61 Main Features & Performance This device operates with a single rechargeable 18650 high drain battery. Use an external charger to charge the battery. Safety Functions • Battery reverse polarity protection • Battery vacuum protection • Battery overvoltage protection • Protection against low and high resistance •...
-
Page 62: Using The Device
Using the Device Notes for Commissioning Fully charge the one necessary and replaceable 18650 battery before first use. Please take note of the positive and negative poles in the battery compartment. Ensure that there is no visible damage to the surface of the battery cell. The device has a 510 connection, making it suitable for a variety of sub-ohm-capable clearomizers. - Page 63 When the power is turned on, the ASMODUS logo appears on the display. When the power is turned off, a LOGOUT symbol appears. Press and hold it until the current system version appears.
- Page 64 Using the Device Unlocking the Screen When the unit is in standby mode with the screen turned off, press the Fire button. Your current Vaping settings are displayed on the screen. To unlock the screen, swipe in the direction of the arrow along the screen until an open lock symbol appears in the lower right-hand area.
- Page 65 Using the Device Selecting the Operation Mode To change the operation mode, swipe left or right in the upper part of the screen while it is un- locked, where the current operation mode is displayed (POWER/TEMP/CURVE/TCR/TFR). Settings in Power Mode (Variable Wattage) Power control: When the screen is unlocked, press and hold the currently displayed power value in watts to change it.
- Page 66 Using the Device Settings in TEMP mode (Variable Temperature) Selecting the Wire Type in TEMP Mode: When the screen is unlocked in TEMP mode, press and hold the TEMP display. Then press „+“ or „-“ to select the winding type for the head. Press the Fire button to confirm your setting and end the process.
- Page 67 Using the Device Settings in CURVE Mode (Preheat Function) Selecting the Power Point (P1 – P5): When the screen is unlocked in CURVE mode, swipe up or down the screen to switch between the power points (P1 – P5). Changing between the Power and Time Setting for one Power Point: When the screen is unlocked in CURVE mode, press the currently displayed power or time value to change to the other value.
- Page 68 Using the Device Settings in TCR Mode (Temperature Coefficient of Resistance) Selecting the TCR Memory Cell (M1 – M5): When the screen is unlocked in TCR mode, swipe up or down the screen to switch between the TCR memory cells (M1 – M5). Setting TCR Value: When the screen is unlocked in TCR mode, press and hold the TCR display.
- Page 69 Using the Device Settings in TFR Mode (Temperature Factor of Resistance) Selecting the TFR Memory Cell (M1 – M5): When the screen is unlocked in TFR mode, swipe up or down the screen to switch between the TFR memory cells (M1 – M5). Setting TFR Value: When the screen is unlocked in TFR mode, press and hold the TFR display.
- Page 70 Using the Device Turning the System off / powering down Press and hold the LOGOUT symbol to power down the system. The display will show the current system version before the display turns off. Managing Number of Puffs Press and hold the MANAGE symbol to manage the number of puffs. Then press „+“...
- Page 71 Press and hold the UPGRADE symbol to update the device. “Upgrade?” will appear on the display. Confirm the query by tapping “YES” and then press and hold the Fire button until “Download Mode” appears on the display. Download the current firmware version at www.asmodus.com.
- Page 72 Using the Device Setting Brightness Press and hold the BRIGHTNESS symbol to set the display brightness. Then press „+“ or „-“ to set the desired value. Press the Fire button to confirm your setting and end the process. Displaying System Version Press and hold the V symbol to display the current system version.
- Page 73 Using the Device Checking / Setting Resistance Press and hold the OHM symbol to check or set the resistance of the head. The display will show the resistance as automatically read by the device. To change the resistance value, tap “ADJ”. Then press „+“ or „-“ to set the desired value.
- Page 74 “UPGRADE” to update the device accordingly. Note: Please download software and software packages from our official website www.asmodus.com. Charging the Battery The 18650 battery can be charged via a micro USB cable. If using an adapter, make sure it is suitable for charging with 5V/1A.
-
Page 75: Error Messages
Error Messages Error Messages “HIGH ATOMIZER”: The resistance of the atomizer head is too high. “LOW ATOMIZER”: The resistance of the atomizer head is too low. “ATOMIZER REMOVE”: No resistance can be detected. “CHECK ATOMIZER”: No atomizer head can be detected. “ATOMIZER SHORT”: A short circuit has occurred. -
Page 76: Warranty & Service
Please do not use accessories from other manufacturers in combination with your ASMODUS e-cigarette product. If this does result in damage, it is not covered by the InnoCigs warranty and your warranty will be void. -
Page 77: Contact
Contact to InnoCigs Contact to your ASMODUS Importer InnoCigs GmbH & Co. KG Stahltwiete 23 22761 Hamburg | GERMANY Phone: +49 (0) 40 – 22 86 729 0 Fax: +49 (0) 40 – 22 86 729 99 E-Mail: service@innocigs.com... - Page 78 Imported by: InnoCigs GmbH & Co. KG Stahltwiete 23 22761 Hamburg | GERMANY E-Mail: service@innocigs.com Phone: +49 (0) 40 - 22 86 729 0 Web: www.innocigs.com www.asmodus.com | Made in China...
Need help?
Do you have a question about the Colossal 80w and is the answer not in the manual?
Questions and answers