Advertisement
Table of Contents
- 1 Important Safety Notice
- 2 Installation
- 3 Maintenance
- 4 Special Tools
- 5 Power Take-Off
- 6 Cooling System
- 7 Lubrication System
- 8 Service Tools
- 9 Engine Air Cleaner
- 10 Air Cleaner Assembly
- 11 Primary Element
- 12 Secondary Element
- 13 Description and Operation
- 14 Oil Level Check
- 15 Drain and Refill
- Download this manual
See also:
Operating Manual
Advertisement
Table of Contents

Subscribe to Our Youtube Channel
Related Manuals for Terex TR100


Summary of Contents for Terex TR100
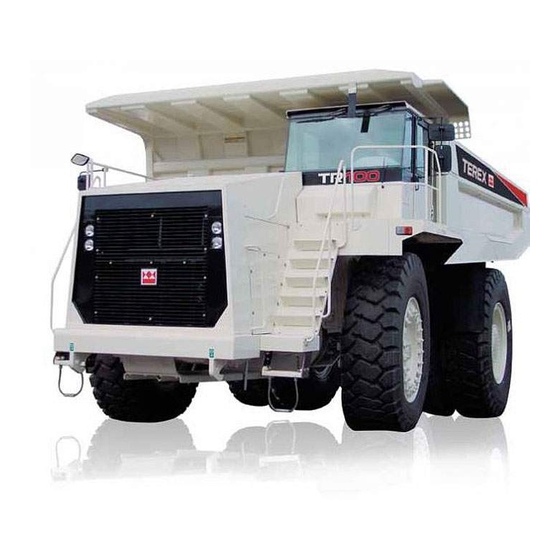
- Page 1 TR100 Mining Truck Maintenance Manual TECHNICAL PUBLICATIONS DEPARTMENT TEREX EQUIPMENT LIMITED, MOTHERWELL, SCOTLAND, ML1 5RY REF. NO. SM755/783 SM 1616 Rev 1 11-00...
- Page 2 THIS PAGE IS INTENTIONALLY LEFT BLANK Find manuals at http://best-manuals.com/search?&s=TEREX-SM1616.PDF...
-
Page 3: Important Safety Notice
WARNING Never use parts which are altered, modified, or weakened in operation. This can seriously jeopardize the integrity of the machine and could result in property damage or serious personal injury. SM 222 Rev 1 9-93 Find manuals at http://best-manuals.com/search?&s=TEREX-SM1616.PDF... - Page 4 THIS PAGE IS INTENTIONALLY LEFT BLANK Find manuals at http://best-manuals.com/search?&s=TEREX-SM1616.PDF...
- Page 5 TEREX SERVICE DEPARTMENT TEREX Equipment Limited, Motherwell, Scotland ML1 5RY Tel. (0698) 732121 Tlx. 77141 Fax. (0698) 734046 TEREX Division, Tulsa, Oklahoma, 74107 USA Tel. (918) 446-5581 Fax. (918) 446-9752 Find manuals at http://best-manuals.com/search?&s=TEREX-SM1616.PDF...
- Page 6 THIS PAGE IS INTENTIONALLY LEFT BLANK Find manuals at http://best-manuals.com/search?&s=TEREX-SM1616.PDF...
- Page 7 TABLE OF CONTENTS Section No. Description SM No. GENERAL INFORMATION 0000 TR100 Off-Highway Truck 1618 Rev 1 CHASSIS 0010 Chassis, Hood and Fenders - Pre January 2000 Production 1622 0010 Chassis, Hood and Fenders - From January 2000 Production 1898...
- Page 8 Body and Mounting 1653 Rev 1 MISCELLANEOUS 0020 Lubrication System 1654 Rev 1 0070 Service Tools 1662 Rev 1 0080 Standard Bolt and Nut Torque Specifications 1238 0090 Unit Storage 1239 SM 1617 Rev 1 11-00 Find manuals at http://best-manuals.com/search?&s=TEREX-SM1616.PDF...
- Page 9 GENERAL INFORMATION - TR100 Mining Truck Section 000-0000 SM - 2034 1 635 Body (5-4) Depth 5 150 (16-11) 4 730 (15-6) 1 220 (4-0) (2-7) 1 755 (5-9) 8 960 Vehicle Clearance Diameter (SAE) 24.5 m (80 ft) 3 420 (11-3)
- Page 10 General Information - TR100 Mining Truck Section 000-0000 Parking DRIVE AXLE Application of rear brakes by springs in brake disc pack. Heavy duty axle with full floating axle shafts, single reduction spiral bevel gear differential and planetary Hydraulically released. reduction at each wheel.
- Page 11 General Information - TR100 Mining Truck Section 000-0000 BODY SERVICE CAPACITIES Longitudinal 'V' type floor with integral transverse box- Engine Crankcase and Filters ..134 litres (35.4 US gal) section stiffeners. The body is exhaust heated and rests on Transmission and Filters ..... 100 litres (26 US gal) resilient impact absorption pads.
- Page 12 THIS PAGE IS INTENTIONALLY LEFT BLANK Find manuals at http://best-manuals.com/search?&s=TEREX-SM1616.PDF...
-
Page 13: Installation
Using a suitable lifting device, align the component to pressure in the steering circuit. Block all road wheels. be installed in position on the chassis. Secure the component securely to the chassis with mounting hardware removed during removal. SM 1622 12-98 Find manuals at http://best-manuals.com/search?&s=TEREX-SM1616.PDF... -
Page 14: Maintenance
As a general rule however, if parts are twisted, bent or pulled apart, or After welding, reconnect all of the above in the a frame is bent or twisted, no welding should be done reverse order. SM 1622 12-98 Find manuals at http://best-manuals.com/search?&s=TEREX-SM1616.PDF... -
Page 15: Special Tools
SERVICE TOOLS for part numbers of general service tools required. These tools are available from your dealer. If painting of the actual frame of the unit is required, SM 1622 12-98 Find manuals at http://best-manuals.com/search?&s=TEREX-SM1616.PDF... - Page 16 20 - Panel Assembly - LH 28 - Nut 6 - Nut 14 - Step Assembly 21 - Panel Assembly - RH 29 - Hardened Washer 7 - Locknut Fig. 4 - Exploded View of Ladders and Handrails SM 1622 12-98 Find manuals at http://best-manuals.com/search?&s=TEREX-SM1616.PDF...
- Page 17 8 - Bolt 10 - Bolt 3 - Grille - Top 6 - Button Plug 11 - Hardened Washer 9 - Hardened Washer Fig. 5 - Exploded View of Radiator Guard and Mounting SM 1622 12-98 Find manuals at http://best-manuals.com/search?&s=TEREX-SM1616.PDF...
- Page 18 13 - Mudguard 3 - Bar 7 - Nut 11 - Angle Support 14 - Bracket 4 - Bar 8 - Flap 12 - Bar 15 - Hardened Washer Fig. 6 - Mudguards SM 1622 12-98 Find manuals at http://best-manuals.com/search?&s=TEREX-SM1616.PDF...
- Page 19 Block all road Using a suitable lifting device, align the component to wheels. be installed in position on the chassis. Secure the component securely to the chassis with mounting hardware removed during removal. SM 1898 11-00 Find manuals at http://best-manuals.com/search?&s=TEREX-SM1616.PDF...
- Page 20 As a general rule however, if parts are twisted, bent or pulled apart, or After welding, reconnect all of the above in the a frame is bent or twisted, no welding should be done reverse order. SM 1898 11-00 Find manuals at http://best-manuals.com/search?&s=TEREX-SM1616.PDF...
- Page 21 SERVICE TOOLS for part numbers of general necessary. service tools required. These tools are available from your dealer. If painting of the actual frame of the unit is required, SM 1898 11-00 Find manuals at http://best-manuals.com/search?&s=TEREX-SM1616.PDF...
- Page 22 17 - Step Assembly - RH 26 - 'U' Bolt & Nut 9 - Step Assembly 18 - Hoodside - LH 37 - Hardened Washer 27 - Bolt Fig. 4 - Exploded View of Ladders and Handrails SM 1898 11-00 Find manuals at http://best-manuals.com/search?&s=TEREX-SM1616.PDF...
- Page 23 8 - Bolt 10 - Bolt 3 - Grille - Top 6 - Button Plug 11 - Hardened Washer 9 - Hardened Washer Fig. 5 - Exploded View of Radiator Guard and Mounting SM 1898 11-00 Find manuals at http://best-manuals.com/search?&s=TEREX-SM1616.PDF...
- Page 24 4 - Bolt 13 - Mudflap - RH 9 - Mudflap - LH 17 - Flap 5 - Bolt 14 - Angle Support 10 - Angle Support 18 - Flap Fig. 6 - Mudguards SM 1898 11-00 Find manuals at http://best-manuals.com/search?&s=TEREX-SM1616.PDF...
- Page 25 There are two starter motors mounted at the rear right engine manufacturers service manual. hand side of the engine, one of which is a prelube starter motor. SM 1655 Rev 1 11-00 Find manuals at http://best-manuals.com/search?&s=TEREX-SM1616.PDF...
- Page 26 (39). Tie hose assemblies (36 & 37) and it can cause serious damage to the skin away from engine (1) to prevent fouling during engine removal. and eyes. SM 1655 Rev 1 11-00 Find manuals at http://best-manuals.com/search?&s=TEREX-SM1616.PDF...
-
Page 27: Power Take-Off
Support (5) assembly can be removed by removing 'Maintenance'. bolts (4). 5. Refer to the Engine Service Manual for additional 27. If it is necessary to remove crossmember (6) from engine disassembly/assembly, repair, adjustment and tune-up procedures. SM 1655 Rev 1 11-00 Find manuals at http://best-manuals.com/search?&s=TEREX-SM1616.PDF... - Page 28 (1) assembly in 6. Secure support (5) assembly to engine (1) with bolts the frame. (4). Secure rear mounts (15) to engine (1) with bolts (14 & 23) and hardened washers (12). SM 1655 Rev 1 11-00 Find manuals at http://best-manuals.com/search?&s=TEREX-SM1616.PDF...
-
Page 29: Cooling System
Tighten mounting clamps securely. 33. Ensure the parking brake is applied and remove wheel blocks from road wheels. 22. Install exhaust tubes on the engine turbochargers and tighten mounting clamps securely. SM 1655 Rev 1 11-00 Find manuals at http://best-manuals.com/search?&s=TEREX-SM1616.PDF... -
Page 30: Lubrication System
The lack of lubrication during the delay until the filters are pumped full of oil is harmful to the Install new fuel filters (28) on the filter head and tighten engine. SM 1655 Rev 1 11-00 Find manuals at http://best-manuals.com/search?&s=TEREX-SM1616.PDF... -
Page 31: Service Tools
These tools are Add oil as necessary to bring the level to the high (H) available from your dealer. mark on dipstick (44). SM 1655 Rev 1 11-00 Find manuals at http://best-manuals.com/search?&s=TEREX-SM1616.PDF... - Page 32 THIS PAGE IS INTENTIONALLY LEFT BLANK Find manuals at http://best-manuals.com/search?&s=TEREX-SM1616.PDF...
-
Page 33: Engine Air Cleaner
Refer to allowable limit. When air restriction levels are reached, SM 1246 2-98 Find manuals at http://best-manuals.com/search?&s=TEREX-SM1616.PDF... - Page 34 (4) is not broken. If vacuator valve (6) is lost or damaged, WARNING replace it to maintain pre-cleaner efficiency and normal Always shutdown the engine before servicing filter element service life. air cleaner. SM 1246 2-98 Find manuals at http://best-manuals.com/search?&s=TEREX-SM1616.PDF...
-
Page 35: Air Cleaner Assembly
Mark each first one or two cleanings. After that, the life of the cleaned element to show total cleanings to date. element will gradually decrease with each cleaning; SM 1246 2-98 Find manuals at http://best-manuals.com/search?&s=TEREX-SM1616.PDF... -
Page 36: Secondary Element
3. Keep new or cleaned filter elements on hand for numbers of service tools referenced in this section and replacement to prevent unnecessary downtime of the general service tools required. These tools are vehicle. available from your dealer. SM 1246 2-98 Find manuals at http://best-manuals.com/search?&s=TEREX-SM1616.PDF... -
Page 37: Description And Operation
Block all road wheels. 8. With suitable blocking or lifting equipment, support 3. Disconnect driveline from yoke (5) at PTO the tandem pump before loosening attaching nuts. SM 1656 1-99 Find manuals at http://best-manuals.com/search?&s=TEREX-SM1616.PDF... - Page 38 (1) with a suitable bearing puller. (6, Fig. 2) from driveshaft (15). Pull yoke (5, Fig. 2) from driveshaft (15). 8. If required, note locations and remove dowel pins (2) from flywheel cover case (1). SM 1656 1-99 Find manuals at http://best-manuals.com/search?&s=TEREX-SM1616.PDF...
- Page 39 4. Inspect flywheel cover case (1) and PTO cover (6) secured and of adequate capacity to do the job for cracks. If either flywheel cover case (1) or PTO safely. cover (6) are damaged, both parts must be replaced as an assembly. SM 1656 1-99 Find manuals at http://best-manuals.com/search?&s=TEREX-SM1616.PDF...
-
Page 40: Oil Level Check
(1, Fig. 1) and drain oil into a suitable match marks inscribed during disassembly. container. Reinstall drain plug (14) securely when draining is complete. Note: Tighten all fasteners to standard torques listed in Section 300-0080, STANDARD BOLT AND NUT TORQUE SPECIFICATIONS. SM 1656 1-99 Find manuals at http://best-manuals.com/search?&s=TEREX-SM1616.PDF... - Page 41 This as a preview PDF file from best-manuals.com Download full PDF manual at best-manuals.com...
Need help?
Do you have a question about the TR100 and is the answer not in the manual?
Questions and answers