Advertisement
Step 2. Install scribe rails to
filler pull-outs using small
finish nails or brads. See fig 2
Note: align scribe rails with
front edge of filler pull-out.
Align scribe rail to upper
section of base cabinet lower
mounting strap or lower
section of wall cabinet lower
mounting strap. See figs. 3a–b
Figure 2
I-432
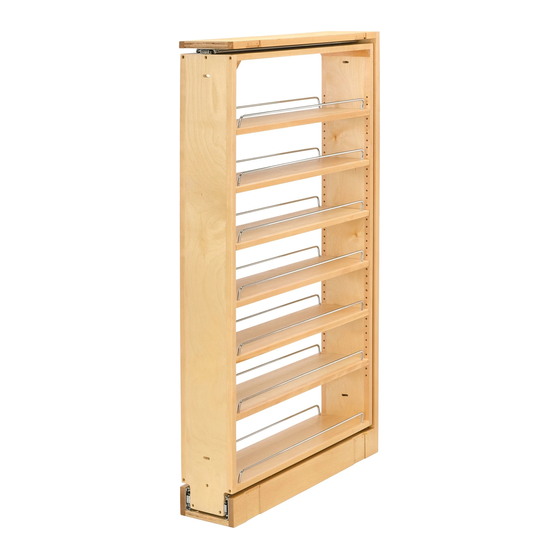
432 Series Filler
Pull-Out Instructions
Figure 1
Step 1. Measure scribe rail thickness and length
per your specific cabinetry. See fig 1
Top Scribe Rail is nailed to
bottom edge of top section
Bottom Scribe Rail is nailed
to edge of bottom section
Figure 3a
Wall Cabinet
Top Scribe Rail is
nailed to edge of top
section
Figure 3b
Base Cabinet
Bottom Scribe Rail is
nailed to edge of
bottom section
6-05
Advertisement
Table of Contents

Subscribe to Our Youtube Channel
Related Manuals for Rev-A-Shelf 432 Series


Summary of Contents for Rev-A-Shelf 432 Series
- Page 1 432 Series Filler Pull-Out Instructions Figure 1 Step 1. Measure scribe rail thickness and length per your specific cabinetry. See fig 1 Top Scribe Rail is nailed to bottom edge of top section Figure 3a Wall Cabinet Step 2. Install scribe rails to...
- Page 2 See Fig 7a–b Figure 6 “Changing the way you think about cabinet organization!” Questions about installation visit www.rev-a-shelf.com Figure 8 Figure 9 or call customer service at Step 7. Attach face frame and onlays (not provided) See Fig. 8–9...
Need help?
Do you have a question about the 432 Series and is the answer not in the manual?
Questions and answers
How to install shelf to upper wall cabinet
To install the Rev-A-Shelf 432 Series shelf to an upper wall cabinet:
1. Drill 3/16-inch holes 3/8 inch down from the top of the adjacent cabinet and also 27-3/4 inches down from the top of the wall cabinet. Repeat for the other adjacent cabinet.
2. Screw the top of the 432 cabinet from inside the adjacent cabinet above.
3. Screw the bottom of the 432 cabinet from inside and above the adjacent cabinet floor.
4. Mount the filler cabinet pull-out to adjacent cabinet 1 (see Fig. 5a–b).
5. Mount the filler cabinet pull-out to adjacent cabinet 2 (see Fig. 6).
6. Remove the front mounting strap (see Fig. 7a–b).
7. Attach the face frame and onlays (not provided) (see Fig. 8–9).
This answer is automatically generated