Table of Contents
Advertisement
Quick Links
Advertisement
Table of Contents

Related Manuals for Nokia WiFi


Summary of Contents for Nokia WiFi
- Page 1 Nokia WiFi user guide...
-
Page 2: Table Of Contents
Nokia WiFi Beacons Understanding the LED colors Download the Nokia WiFi app Setup your Nokia WiFi | Enter network credentials via QR code Setup your Nokia WiFi | Enter network credentials manually Expand your Nokia WiFi | Add a Beacon... -
Page 3: Nokia Wifi Gateway
Beacon not found Unable to access the Internet Use Ethernet to increase reliability of Nokia WiFi connections Factory reset a Nokia WiFi device Technical specifications Beacon 3 specs Manufacturer information Warranties and repair of Nokia WiFi devices... -
Page 4: Welcome
Thank you for purchasing Nokia WiFi, and welcome to the world of self-healing, self-optimizing network coverage—where problems are solved before they're even detected. Nokia WiFi is a true mesh solution, which means your network devices know about one another, are interconnected, and are always communicating. -
Page 5: Get To Know Your Nokia Wifi Components
NOTE You do not need a Gateway 3 to install Nokia WiFi. The majority of Nokia WiFi networks will be built using only Beacon devices, which are discussed on the next... -
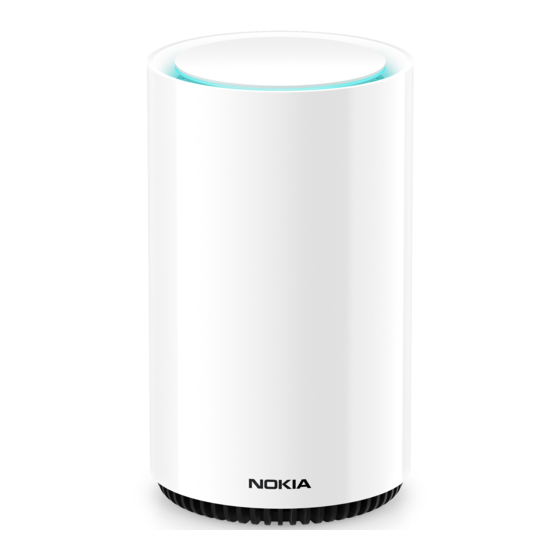
Page 6: Nokia Wifi Beacons
Nokia WiFi Beacons The Nokia WiFi Beacon is available in two form factors: Beacon and Beacon 3. Both extend internet coverage throughout your residence, ensuring you have ready access to the applications and services you need most. The Beacons can be purchased through select online retailers and are installed by customers (that's you!), using the Nokia WiFi app. -
Page 7: Understanding The Led Colors
*Wi-Fi Protected Setup (WPS) is a network security standard that creates a secure wireless home network. Nokia WiFi devices used to depend on this method for paring with one another and forming mesh links, and some of the enclosures still has a WPS button. However, the devices no longer use this... - Page 8 *Wi-Fi Protected Setup (WPS) is a network security standard that creates a secure wireless home network. Nokia WiFi devices used to depend on this method for paring with one another and forming mesh links, and some of the enclosures still have a WPS button. However, the devices no longer use this...
-
Page 9: Download The Nokia Wifi App
Download the Nokia WiFi app PREREQUISITE Smartphone that's running Android 7 / iOS 11 or greater From either the Play Store (Android) or the Nokia WiFi App Store (iOS), install the... -
Page 10: Setup Your Nokia Wifi | Enter Network Credentials Via Qr Code
Existing wireless network provided by internet-connected modem or router • 1 Nokia Beacon or Beacon 3, plus its power and Ethernet cables • 1 smartphone running the Nokia WiFi app that also is connected to your existing wireless network Welcome •... - Page 11 You are instructed to scan the QR code on the bottom of the Beacon using your Scan Code phone's camera; tap • You are prompted to allow Nokia WiFi access to take pictures/record video; tap Allow • This opens the camera app and a frame,...
- Page 12 Beacon. • If you want to learn more about modems and routers, from the Next we'll setup More about your home for WiFi screen, tap modems and routers < • When you are finished, tap Next •...
- Page 13 Connect Ethernet • Plug one end of the provided Ethernet cable into the blue port on your Beacon • Plug the other end of the cable into a LAN port on your modem Next • Connect Power • Connect your Beacon to power by plugging it into a wall outlet •...
- Page 14 Power on the Beacon • On the Beacon's back panel, press the Power button Next • Found your Beacon 3 Once your Beacon is found, you are • prompted to establish an internet connection Next •...
- Page 15 Looking for your internet connection The Nokia WiFi app begins confirming the presence of an internet connection Internet found! • Once your internet connection is Internet confirmed, you see the message found! • Now you configure the Beacon for your...
- Page 16 15 characters, and the first and last characters cannot be spaces Next • Set WiFi name Now you provide a custom name for your Nokia WiFi network. The default value is NOKIA-DC10. displayed; for example Wi-Fi Name • Tap the text field;...
- Page 17 Set WiFi password Now you set a password for your Nokia WiFi network. The default value is not displayed; to show it, tap the eye symbol. Password • Tap the text field; this enables the keyboard • Using 8–63 alphanumeric or special characters—the first and last characters...
- Page 18 Configuring your Beacon 3 Your Beacon is configured to act as the gateway on your new Nokia WiFi network Setup complete! When your Beacon is configured and setup is complete, you are prompted to create an account Create Account On the Account Creation screen, you are prompted to enter the following: •...
- Page 19 Email address requirements • The first and last characters cannot be spaces • Value also must follow standard email address conventions: @ occurs after 1 or more characters, and period occurs after 1 or more characters after @ Password requirements Must use between 8–24 alphanumeric characters •...
- Page 20 If you choose to add a Beacon, go to "Expand your Nokia WiFi | Add a Beacon." If you are Done and would like to interact with your Nokia WiFi, go to "Client devices on your network"...
-
Page 21: Setup Your Nokia Wifi | Enter Network Credentials Manually
Existing wireless network provided by internet-connected modem or router • 1 Nokia Beacon or Beacon 3, plus its power and Ethernet cables • 1 smartphone running the Nokia WiFi app that also is connected to the existing wireless network Welcome •... - Page 22 You are instructed to scan the QR code on the bottom of the Beacon using your phone's camera. If you do not wish to give Nokia WiFi access to your camera, you may enter the default network credentials manually Enter manually...
- Page 23 Connect Power • Connect your Beacon to power by plugging it into a wall outlet • Ensure your modem or router is also connected to power • If you have wired client devices, you may connect them to the Beacon's LAN ports Next •...
- Page 24 Power on the Beacon • On the Beacon's back panel, press the Power button Next • Find the SSID and WiFi Key • You are instructed to find the sticker on the bottom of your Beacon Next • SSID WiFi Key •...
- Page 25 SSID on the bottom of your Beacon; NOKIA-DC10 for example, • You are prompted for a password; enter WiFi Key from the bottom of your Beacon Connect • Found your Beacon 3 Once your Beacon is found, you are •...
- Page 26 Enter the value from the Beacons's sticker; admin for example, Password • Tap the text field Enter the value from the Beacon's sticker; Pszv6ri4ei for example, Next • Looking for your internet connection The Nokia WiFi app begins confirming the presence of an internet connection...
- Page 27 Note The maximum length for a custom room name is 15 characters, and the first and last characters cannot be spaces Next • You are prompted to allow Nokia WiFi to access this device's location Always Allow •...
- Page 28 PantherNet name; for example, Create • Set WiFi password Now you set a password for your Nokia WiFi network. The default value is not displayed; to show it, tap the eye symbol. Password • Tap the text field;...
- Page 29 Configuring your Beacon 3 Your Beacon is configured to act as the gateway on your new Nokia WiFi network. Setup complete! When your Beacon is configured and setup is complete, you are prompted to create an account Create Account On the Account Creation screen, you are prompted to enter the following: •...
- Page 30 Email address requirements • The first and last characters cannot be spaces • Value also must follow standard email address conventions: @ occurs after 1 or more characters, and period occurs after 1 or more characters after @ Password requirements Must use between 8–24 alphanumeric characters •...
- Page 31 If you choose to add a Beacon, go to "Expand your Nokia WiFi | Add a Beacon." If you are Done and would like to interact with your Nokia WiFi, go to "Client devices on your network"...
-
Page 32: Expand Your Nokia Wifi | Add A Beacon
• Existing Nokia WiFi network; refer to the section "Setup your Nokia WiFi" • Smartphone loaded with the Nokia WiFi app that also is connected to your Nokia WiFi network • 1–2 Nokia WiFi Beacons (either Beacon or Beacon 3 models) Add a Beacon •... - Page 33 Find the Sticker • You are instructed to find the sticker on the bottom of your Beacon Next • Scan the QR code • You are instructed to scan the QR code on the bottom of the Beacon using your phone's Scan Code camera;...
- Page 34 Place Beacon • Place your Beacon in an open space no more than two rooms away from the Beacon that serves as your gateway Next • Connect Power • Connect your Beacon to power by plugging it into a wall outlet Next •...
- Page 35 Power on the Beacon • On the Beacon's panel, press the Power button Next • Connection successful Once your Beacon is found and its network • connection established, you test the quality of that connection Next •...
- Page 36 Connection strength You see a message regarding the quality of the connection between the two Nokia WiFi devices currently on your network. If the connection is optimal, you see the Your WiFi is fantastic! message If the connection is not optimal, you see...
- Page 37 If you choose to add a Beacon, proceed to the beginning of this section If you are Done and would like to interact with your Nokia WiFi, proceed to the section "Client devices on your network"...
-
Page 38: Client Devices On Your Network
Nokia WiFi device. To the right of each client device in the list view, you see a WiFi icon that also represents the client's connection strength. Client names When a client device first joins the network, it displays its default name value;... -
Page 39: View Client Device Details
Connected to Which Nokia WiFi device your client device is connected to. Connection The type of connection between your client and the Nokia WiFi device; options Wireless 5 GHz Wireless 2.4 GHz include , and Wired... -
Page 40: Change A Client Device's Name
CLIENT DEVICE DETAILS Client device details include: • MAC Address • IP Address (as assigned by your Nokia WiFi network) Change a client device's name • From the client device details view, tap the edit icon • You see the Edit Device Name screen The name shown is what you see when looking at the list of client devices in the app. -
Page 41: Nokia Wifi Devices On Your Network
Below the tree view, there also is a list view that shows connected Nokia WiFi devices. View Nokia WiFi device details From the Nokia WiFi device list, tap the device you wish to view. At top of the screen, you see the device name. -
Page 42: Enable A Guest Network
Enable a guest network Your guest network is not enabled by default. Once you enable it, your guests can reach the internet without accessing your primary Nokia WiFi network. The access type of your guest network can be either: Password •... -
Page 43: Enable An Open Guest Network
Network Name • Tap the text field; this enables the keyboard You can either accept the default—which is based on the name of your Nokia WiFi network—or provide a custom name Network Password • Tap the text field You can either accept the default value... -
Page 44: Share A Guest Network
Save • Saved successfully • You see the message Share a guest network Share • From the Guest Access screen, tap You are presented with supported mediums on your client device that will allow you to share access credentials; for example, text message, email, and Bluetooth •... -
Page 45: Settings
Nokia WiFi network Network • From the portion of the Settings Change WiFi screen, tap You see the values you chose during Nokia WiFi setup WiFi Name • Tap the field; this enables the keyboard Enter the new WiFi name WiFi Password •... -
Page 46: Network | Wan
Network | WAN You can specify the WAN type of your Nokia WiFi network, which affects how it connects to the internet. Your WAN connection type generally is determined by your Internet Service Provider (ISP). Network From the portion of the Settings... -
Page 47: Parental Controls | Device Access
From the menu, tap the Access pane You see the client devices connected to your Nokia WiFi, and they are all afforded access by default • To deny a client device access, tap the radio button next to its name... -
Page 48: Firmware Updates
Firmware Updates Nokia WiFi performs firmware updates (when they are available) at a time that you specify. The default value is 3:00 AM. • To change the default value, from the Settings Scheduled Time menu, tap the pane You are presented with a time selection... - Page 49 Continue • Password Changed! • You see the message and are prompted to log into your network Log In • • Enter your email address and new password Login • You see the Home screen...
-
Page 50: Troubleshoot Your Nokia Wifi
When using the mobile app to configure your network, you must be connected to your Nokia WiFi. • If you have already setup a Nokia WiFi network and you see this message, your device may not be connected to a Nokia WiFi SSID. -
Page 51: Beacon Not Found
During setup of Nokia WiFi, when looking for your internet connection, you may encounter Unable to access the internet message. This means the Nokia WiFi app was unable to verify the existence of a live internet connection. • Check all cable connections and ensure... -
Page 52: Use Ethernet To Increase Reliability Of Nokia Wifi Connections
3. The LED flashes yellow, which indicates the Beacon has been factory reset and is ready for configuration. 4. Once all Beacons are factory reset, refer to one of the "Setup your Nokia WiFi" sections and setup your Nokia WiFi from scratch. -
Page 53: Technical Specifications
Technical specifications Beacon 1 Beacon dimensions 150 mm (5.9 in) x 115mm (4.5 in) x 42 mm (1.6 in) Software Nokia WiFi Intelligent Mesh AC3000 WiFi connectivity Supports 2x2 802.11b/g/n 2.4 GHz WLAN Supports 2x2 802.11n/ac 5 GHz WLAN 1x Gigabit Ethernet WAN port... -
Page 54: Warranties And Repair Of Nokia Wifi Devices
Warranties and repair of Nokia WiFi devices For information on the hardware Limited Warranty and/or repair, or replacement of the produce, please go to www.nokia.com/wifi/legal/warranty...
Need help?
Do you have a question about the WiFi and is the answer not in the manual?
Questions and answers