Table of Contents
Advertisement
Owner's Manual
Premium AVX
Basic AVX
PC601-00026
Thank you for your purchase of the TOYOTA Genuine Car Multimedia System.
Please note that this manual explains all functions and equipment, including options.
Therefore, you may find some explanations on features or equipment not included in your Car Multimedia System.
TOYOTA DAIHATSU ENGINEERING & MANUFACTURING CO., LTD.
Advertisement
Table of Contents

Related Manuals for Toyota Premium AVX


Summary of Contents for Toyota Premium AVX
- Page 1 Basic AVX PC601-00026 Thank you for your purchase of the TOYOTA Genuine Car Multimedia System. Please note that this manual explains all functions and equipment, including options. Therefore, you may find some explanations on features or equipment not included in your Car Multimedia System.
-
Page 2: Table Of Contents
Bluetooth Setup ............17 External audio players (AUX) ........42 Playing the Bluetooth Audio Device ....19 M-Toyota Using the Hands-Free Unit ........21 Phone Setup ...............25 Emergency Calling ...........43 Toyota Dealer Search ..........43 T-Link Preparation ..............26 Connecting a smartphone ........26 Mirroring Operation ..........26... - Page 3 Remote control • Please read all materials, TOYOTA will not be responsible for unsatisfactory product Using the Remote control ........56 performance due to failure to follow these Functions of the Remote control Buttons ..57...
-
Page 4: Important Safety Information
• Do not attempt to install or service this LCD screen, turn off the power immediately product by yourself. Installation or servicing and consult your dealer or the nearest Toyota of this product by persons without proper Service Station. Using this product in this... -
Page 5: Before Use
This condensation on the lens (also called lens Should this product fail to operate properly, fogging) may not allow discs to play. In such a contact your dealer or nearest authorized Toyota situation, remove the disc and wait for the dew to evaporate. -
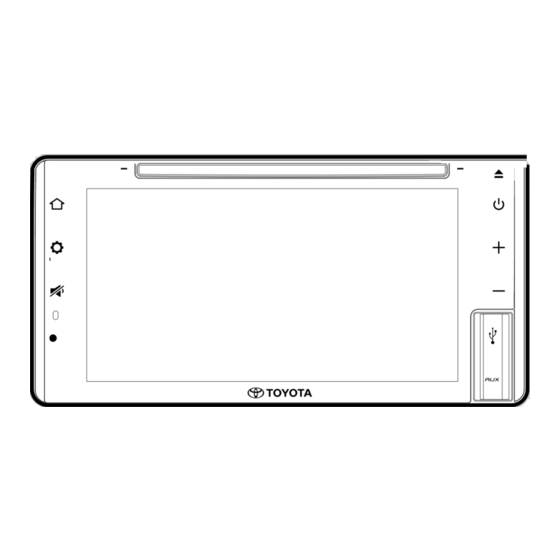
Page 6: Basic Operations
Basic Operations Basic Operations Front Panel Button Functions NOTE • The panels shown in this guide are examples used to provide a clear explanation of operations. For this reason, they may be different from the actual panels. Number Name Function Disc-loading •... -
Page 7: Turning On The Unit
Basic Operations Turning on the Unit Regional Setup This unit is turned on when the ignition switch Press [ ] button. is set to ACC or ON position, and turned off when the ignition switch is set to OFF position. Set the ignition switch to ACC or ON position. -
Page 8: Adjusting The Volume
Basic Operations Adjusting the volume [Time Format] ■ Select the time display format. [12-Hour] (Default)/ [24-Hour] You can adjust the volume (0 to 40). Press [ ] to increase, and press [ ] to [Clock Adjust] ■ decrease. Adjust the date and time manually. (P.8) Holding [ ] increases the volume Adjusting date and time... -
Page 9: Touch Screen Operations
/ Bluetooth Audio. Would on the screen to scroll the you like to switch to T-Link?” will be displayed. screen. For Premium AVX, this menu is available when a T-Link source screen is displayed. Simple Display Mode Popup menu... -
Page 10: Home Screen Descriptions
Basic Operations HOME screen descriptions Display the HOME screen Most functions can be performed from the Press [ ] button. HOME screen. h HOME screen appears. • Displays the source selection screen. (P.11) • Current source information. • Touch to display the control screen of the current source. -
Page 11: Source Selection Screen Description
• Plays files on a USB device. (P.34) • Plays an iPod/iPhone. (P.37) • Switches to the camera image screen. (P.41) • Turns off the AV source. (P.12) • Switches to the M-Toyota screen. (P.43) • Displays the Voice Recognition screen. (P.22) Premium AVX only. - Page 12 Basic Operations Customize Short-cut buttons on To select the playback source on the HOME screen HOME screen You can arrange the positions of the source icons as you like. Press [ ] button. h HOME screen appears. Touch [ Touch and hold the icon which you want to move in the customizing mode.
-
Page 13: Source Control Screen Descriptions
Basic Operations Source control screen List screen descriptions There are some common function keys in the list screens of most sources. There are some functions which can be performed from most screens. Indicators Return Returns to the previous screen. Sub-control panel Displays the list type selection window. -
Page 14: Connection
Connection Connection Ñ Connecting an Android Wired Connection smartphone This unit can be connected to external devices. Open the front port cover and connect the external device via the following accessory. Micro USB to USB cable Android smartphone Sold separately Ñ... -
Page 15: Bluetooth Control
Bluetooth Control Bluetooth Control Ñ Using the Bluetooth function allows you to use About the mobile phone and various functions such as listening to the audio Bluetooth audio player file and making/receiving a call. This unit conforms to the following Bluetooth specifications: Information for using Bluetooth®... -
Page 16: Register The Bluetooth Device
Bluetooth Control Register the Bluetooth device [T-Link] (Premium AVX only) ■ Put checkmark check to use T-Link. It is necessary to register the Bluetooth audio Touch [Yes]. player or mobile phone in this unit before When data transmission and connection using the Bluetooth function. -
Page 17: Bluetooth Setup
1 or 2. ■ Displays the media access control address. [Bluetooth Audio] ■ Select to use as an audio player. [T-Link] (Premium AVX only) ■ Select to use as the T-Link source. Touch [Close]. English... - Page 18 Bluetooth Control Ñ Change the device name To delete the registered Bluetooth device Touch [Device Name] on the Connectivity Touch [Delete]. screen. h Change Device Name screen appears. Touch and hold [ Input the device name. Touch the device name to check. Touch [Enter].
-
Page 19: Playing The Bluetooth Audio Device
Bluetooth Control Playing the Bluetooth Audio Playing time Device For confirmation of current playing position. Most functions can be controlled from the source control screen. To select Bluetooth source, touch [Audio] icon Bluetooth audio devices can be switched easily on the source selection screen. (P.11) to play music. - Page 20 Bluetooth Control Ñ Bluetooth Audio Device Change NOTE Up to five Bluetooth audio device can be • If a connected Bluetooth audio device is operated to play music, connections are switched. connected and switched easily to play music. • When a Bluetooth source is switched to another one, its settings are deleted and the connection Touch [ is restored to the connection before source...
-
Page 21: Using The Hands-Free Unit
Bluetooth Control Using the Hands-Free Unit NOTE • Bluetooth hands free sound quality and You can use the telephone function by performance also depend on mobile phones and connecting the Bluetooth telephone to this carrier conditions. unit. • Status icons such as battery and antenna icons may differ from those displayed on the mobile Ñ... - Page 22 Bluetooth Control Call by entering a phone number • Accented first characters of each name entry can be searched using the equivalent normal character of that letter. Touch [ i.e. Ñ can be searched as N Enter a phone number with number keys. •...
- Page 23 Bluetooth Control Ñ Receive a call ● Adjust the receiver volume Press the [–] or [+] button. Touch [ ] to answer a phone call or ] to reject an incoming call. ● Mute your voice Touch [ ] to mute or not to mute your voice. ●...
- Page 24 Bluetooth Control Ñ Phonebook transfer Phonebook deletion You can transfer phonebook data from your Touch [ Bluetooth phone using PBAP. Touch the name to check. Touch [ Touch [ ■ Checks all boxes. h Phonebook data transfer starts. ■ Clears all check marks. NOTE •...
-
Page 25: Phone Setup
Bluetooth Control Phone Setup [Auto Response]* ■ Set the automatic response time to pick-up an incoming call. You can make various settings for the Hands- [OFF ](Default): Turns off the Automatic Free function. response function. Press [ ] button. [1]/ [5]/ [10]/ [15]/ [20]/ [25]/ [30]: Sets the h HOME screen appears. -
Page 26: T-Link
T-Link T-Link (Premium AVX) You can display the same screen of the Connect your iPhone with AVX via Lightning to USB cable. (P.14) smartphone on the monitor of the unit using the T-Link source. Ñ Connecting an Android device Preparation Connect your Android Smartphone via USB cable. - Page 27 T-Link [T-Link Device Connect] ■ NOTE Select the desired smartphone to use as • T-Link is discontinued when you switch to T-Link from the registered device list. another source screen. However, while displaying the current screen, you can switch to another source by using the steering wheel switches or “AV Source Select”...
-
Page 28: Disc
Disc Disc # WARNING DVD/ Video-CD Basic Operation • Any video won't be played while driving to prevent driver's eyes from fixing on the unit's display. Stop the vehicle in a safe place and Most functions can be controlled from the apply the parking brake before performing source control screen and playback screen. - Page 29 Disc • [Hide]: Hides the control screen. –[1chRR/2chRR]: Identifies the right audio output of channel 1 or 2. Operation keys –[1chST/2chST]: Identifies the stereo audio • [ ] : Repeats the current content. Each time output of channel 1 or 2. you touch the key, repeat modes are switched –[LL]: Identifies the left audio output.
-
Page 30: Music Cd/ Disc Media Basic Operation
Sub-control panel [Hide] (Video file only) Hides the control screen. CODEC (Premium AVX) Video screen When a high-resolution source is played, its format information is displayed. (Disc media only) Track information Displays the information of the current track/ file. -
Page 31: Search Operation
Disc Search Operation DVD Disc Menu Operation (Music CD/ Disc media only) You can set up some functions using the DVD- VIDEO disc menu. You can search for a track/file. Touch the display during playback. NOTE • For operations in the list screen, see List screen (P.13). -
Page 32: Dvd Setup
Disc DVD Setup To switch among picture angles ■ Touch [Angle]. Each time you touch this key, picture angles are switched. You can set up the DVD playback functions. To close the Menu Control screen ■ Touch the display during playback. Touch [Hide]. - Page 33 Disc [Screen Ratio] ■ Sets the screen display mode. [16:9 ](Default): Displays wide pictures. [4:3 LB]: Displays wide pictures in the Letter Box format (having black stripes at the top and bottom of screen). [4:3 PS]: Displays wide pictures in the Pan & Scan format (showing pictures cut at the right and left ends).
-
Page 34: Usb
Sub-control panel • FAT16 • FAT32 • exFAT • NTFS CODEC (Premium AVX) When a high-resolution source is played, its format information is displayed. (Music file only) Track information Displays the information on the current file. Only a file name and a folder name are displayed... -
Page 35: Search Operation
Search Operation Operation keys • [[ ] : Searches track/file. For details on search You can search music or video files by the operation, see Search Operation (P.35). following operations. • E] [F] : Searches the previous/next track/ file. Touch [ ] on the USB control screen. - Page 36 Ñ Folder search You can search for a file according to hierarchy. Touch [Folder List]. Touch the desired folder. When you touch a folder its contents are displayed. Touch to select your desired item in the list. Repeat this step until you find the desired file.
-
Page 37: Ipod/Iphone
NOTICE Detach the iPod/iPhone. • Toyota accepts no responsibility for data lost from an iPod, even if that data is lost while using this product. Please back up your iPod data regularly. • Do not leave the iPod in direct sunlight for extended amounts of time. -
Page 38: Ipod/Iphone Basic Operation
iPod/iPhone iPod/iPhone Basic Operation Search Operation You can search music files by the following operation. NOTE • For operations on the list screen, see List screen (P.13). Touch [ ] on the iPod/iPhone control screen. Track information Displays the information on the current file. Touch the desired category. -
Page 39: Radio
Radio Radio Radio Basic Operation Memory Operation Ñ Most functions can be controlled from the Auto preset memory source control screen. You can store stations in memory To enter Radio source, touch [Radio] icon in automatically. the source selection screen. (P.11) Touch [AUTO.P]. -
Page 40: Selecting Operation
Radio Selecting Operation Ñ Preset select You can select memorized station. Touch desired preset station. -
Page 41: Other External Components
Other External Components Other External Components Using the back camera • Object located higher than the back camera may not be displayed on the screen. • The back camera view is closed automatically if Ñ Back camera view the gear stick is aligned to the positions other than the REVERSE (R) position. -
Page 42: External Audio Players (Aux)
Other External Components Ñ Camera Setup Press [ ] button. h Popup menu appears. Touch [ h System screen appears. Touch [Camera]. h Camera screen appears. Set each item as follows. [Camera Connection] ■ Set whether to use the rear view camera. ■... -
Page 43: M-Toyota
Toyota Dealer Search emergency call and search a Toyota dealer. To enter M-Toyota source, touch [M-Toyota] You can search a Toyota dealer list and confirm icon in the source selection screen. (P.11) the dealer information. Touch [Toyota Dealer] on the M-Toyota screen. -
Page 44: Setup
Setup Setup Display Adjust Picture Adjust You can adjust the image quality of video, Press [ ] button. menu screen, etc. h Popup menu appears. Press [ ] button. Touch [ h Popup menu appears. Touch [ h Display control screen appears. Adjust each setting as follows. -
Page 45: System Setup
Touch [Restore Factory Default] and then (P.49) • Advanced Features systems* touch [Yes] to set all the settings to the initial default settings. Premium AVX only Ñ Software Information You can confirm the software version of this unit. Touch [Software Information] in the General screen. -
Page 46: User Interface Systems
Setup Ñ User Interface Systems Change the background image Touch [Background] on the User Interface Press [ ] button. screen. h Popup menu appears. Select an image. Touch [ h System screen appears. Touch [User Interface]. Register an original image in advance. To register an original image You can load an image from the connected h User Interface screen appears. - Page 47 Setup Ñ Change the key color Touch [Enter]. Touch [Key Color] on the User Interface screen. Select a key color. h The selected image is loaded and the display returns to the Background screen. NOTE • Touching [ ] rotates the image counter- Touch [ clockwise.
-
Page 48: Dual Zone Systems
– Fader (P.50) – Equalizer Control/ Sound Effect/ Listening Position/DTA (P.51, 52, 53) h Dual Zone screen appears. – High-resolution Sound Source File Playback (Premium AVX only) Touch [Zone Select]. Selectable combinations Front Source Rear Source T-Link... -
Page 49: Advanced Features
Setup Advanced Features (Premium AVX only) You can set the Advanced Features system parameters, such as door lock alarm and auto folding mirror functions. Press [ ] button. h Popup menu appears. Touch [ h System screen appears. Touch [Advanced Features]. -
Page 50: Controlling Audio
Controlling Audio Controlling Audio You can adjust various settings such as audio Controlling General Audio balance. Press [ ] button. Press [ ] button. h Popup menu appears. h Popup menu appears. Touch [ Touch [ h Audio screen appears. Touch [Fader/Balance]. -
Page 51: Equalizer Control
Controlling Audio Equalizer Control [ON]/[OFF] (Bass Extend Settings) ■ When turned on, the frequencies lower than 62.5 Hz is set to the same gain level (62.5 Hz). You can adjust equalizer by selecting the optimized setting for each category. Ñ Recall the EQ curve Press [ ] button. -
Page 52: Volume Offset
Controlling Audio Volume Offset Sound Effect Finely adjust the volume of the current source You can set sound effects. to minimize the difference in volume between Press [ ] button. different sources. h Popup menu appears. Press [ ] button. Touch [ h Popup menu appears. -
Page 53: Listening Position/ Dta
Controlling Audio Ñ Listening Position [K2 Technology] ■ Turn ON/OFF the K2 function. Adjust the sound delay time so that the Technology to extrapolate and supplement sounds from different speakers arrive at the with proprietary algorithm, the high- listener sitting on the selected seat at the frequency range that is cut off when same time. - Page 54 Controlling Audio Front Focus fine adjustment Touch [ ] or [ ] to adjust the sound level of the selected speaker. Touch [Adjust]. Touch [Delay]. Set each parameter as follows. NOTE • To initialize the Delay and Level settings, touch [Initialize] and [Yes] on the confirmation screen.
-
Page 55: Steering Wheel Control
Steering Wheel Control Steering Wheel Control This unit can be operated using the switches on the steering wheel. NOTE • Steering wheel control function is varied depends on vehicle and vehicle grade. Operations using the steering switch Key Name Press Press and Hold Volume up Volume up continuously... -
Page 56: Remote Control
Remote control Remote control This unit can be operated using the remote Using the Remote control control. Point the remote control in the direction of the # WARNING front panel to operate. • The remote control may not function properly •... -
Page 57: Functions Of The Remote Control Buttons
Remote control Functions of the Remote Function control Buttons Name MODE • Selects the source. (Press) • Turns off the power. (Hold) VOL 3 2 Adjusts the volume. ASPECT Changes the aspect ratio. • To confirm the current aspect ratio setting, operate on the touch panel. - Page 58 Remote control Ñ Direct search mode Using the remote control, you can jump directly to the desired file, track chapter, etc. by entering the number corresponding to the content. NOTE • This operation cannot be performed for the USB device and iPod. Press the [MODE] button several times until the desired source appears.
-
Page 59: Troubleshooting
If a solution to your T-Link.) problem cannot be found here, contact your dealer or your nearest Toyota Service Center. iPod or Bluetooth source does not sound. h If you used T-Link source before, verify that the NOTE iPhone’s screen recording function is stopped. - Page 60 Troubleshooting Region Code Error The disc you wanted to play has a region code that cannot be played with this unit. h See Region Codes in the World (P.63) or try another disc. Error 07–67 The unit is not operating correctly due to some reason or other.
-
Page 61: Appendix
Appendix Appendix Playable Media and Files You can play various kinds of media and files on this unit. Ñ List of playable discs Disc types / Standard Support Remark DVD Video DVD Audio × DVD-VR × DVD-R* • MP3/ WMA/ AAC/ WAV/ FLAC/ Vorbis/ MPEG1/ MPEG2/ MPEG4/ H.264/ WMV/ MKV playback •... - Page 62 It is recommended that a car audio system should be configured with all High-Resolution Audio compatible products from player to speaker to enjoy its high quality sound. * DSD is available for Premium AVX only. ■ Acceptable Video files Profile Max.
-
Page 63: Region Codes In The World
Appendix Region Codes in the World The DVD players are given a region code according to the country or area it is marketed, as shown in the following map. ■ DVD disc marks ■ Operation regulatory marks With this DVD, some functions of this unit such as the play function may be restricted depending on the location where the DVD is Indicates a region number. -
Page 64: Dvd Language Codes
Appendix DVD Language Codes Code Language Code Language Code Language Afar Interlingua Kirundi Abkhazian Interlingue Romanian Afrikaans Inupiak Russian Amharic Indonesian Kinyarwanda Arabic Icelandic Sanskrit Assamese Italian Sindhi Aymara Japanese Sangho Azerbaijani Javanese Serbo-Croatian Bashkir Georgian Singhalese Byelorussian Kazakh Slovak Bulgarian Greenlandic Slovenian... -
Page 65: Specifications
: TFT active matrix system Audio Decoder : MP3/ WMA/ AAC/ WAV/ FLAC/ Vorbis/ DSD* Number of Pixels * DSD is available for Premium AVX only. : 1,152,000 (800H x 480V x RGB) Video Decoder Effective Pixels : MPEG1/ MPEG2/ MPEG4/ WMV/ H.264/ MKV : 99.99 %... - Page 66 Appendix ■ AM tuner section ■ General Frequency Range (step) Operating Voltage : 531 kHz – 1602 kHz (9 kHz) : 14.4 V (10.5 – 16 V allowable) Usable Sensitivity Maximum Current Consumption : 28 dBμ (25 μV) : 15 A Dimensions (W ×...
-
Page 67: About This Unit
Appendix About this Unit • This product includes FontAvenue® fonts licenced by NEC Corporation.FontAvenue is a registered trademark of NEC Corporation. ■ Trademarks and licenses • This product includes "Ubiquitous QuickBoot TM" technology developed by Ubiquitous Corp. Ubiquitous QuickBoot TM is a trademark of Ubiquitous Corp. - Page 68 Appendix – Redistributions of source code must retain the WHETHER IN CONTRACT, STRICT LIABILITY, OR TORT above copyright notice, this list of conditions and (INCLUDING NEGLIGENCE OR OTHERWISE) ARISING the following disclaimer. IN ANY WAY OUT OF THE USE OF THIS SOFTWARE, –...
- Page 69 Appendix ■ FCC WARNING This equipment may generate or use radio frequency energy. Changes or modifications to this equipment may cause harmful interference unless the modifications are expressly approved in the Declaration of Conformity with regard to the instruction manual. The user could lose the authority to RE Directive 2014/53/EU operate this equipment if an unauthorized change or Declaration of Conformity with regard to the...
-
Page 70: For Further Information
● How to confirm the serial number of this unit. 1 Press [ ] button. 2 Touch [ 3 Touch [General]. 4 Touch [Software Information]. 5 Confirm the Serial Number. Serial Number Manufacturer Model Name Premium AVX [DDXGT700R] Basic AVX [DDXGT500R]... - Page 71 • IOS is a trademark or registered trademark of • Wi-Fi® is a registered trademark of Wi-Fi Cisco in the U.S. and other countries and is Cisco in the U.S. and other countries and is Alliance®. used under license. used under license. Premium AVX/Basic AVX...
Need help?
Do you have a question about the Premium AVX and is the answer not in the manual?
Questions and answers