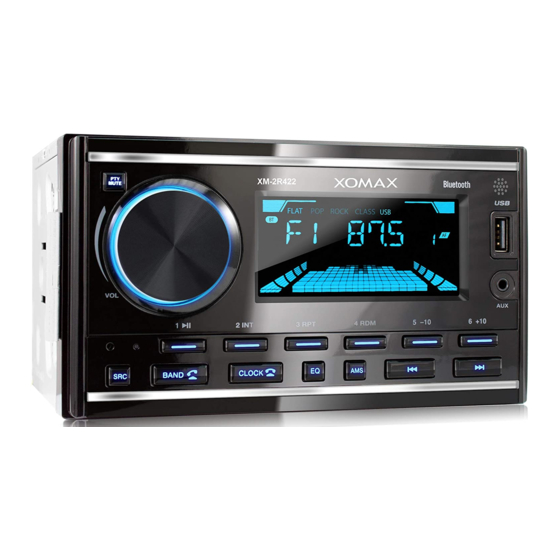
Summary of Contents for Xomax XM-2R422
- Page 1 2 Din Car RDS/FM/AM Radio, MP3 Player with USB I nputs Model No.:XM-2R422 USER’S MANUAL...
-
Page 2: Table Of Contents
CONTENTS Precautions........................1 Precautions & Warnings....................1 Lithium Battery Cell Warnings..................1 Drivers and Connections.....................1 Other Warnings......................1 Installation........................2 Installation Procedures....................2 Important........................2 To Install the Car Radio....................2-3 Wiring Connections....................3 Removal of the Main Unit ....................3 Control Panel Button Locations..................4 General Operation......................5 Turn Unit On/Off......................5 Adjust Volume (VOL)....................5 Adjust Menu Options (SEL)..................5-6 Set the Clock (CLOCK)............. -
Page 3: Precautions
PRECAUTIONS Precautions & Warnings educ isk o i e lec i hock n e fe -ence o no ep i hi ou self e vic qu lifie echnici n. P3/W A file olum e son iving olum evel ifficul oncen ondi ion iving. -
Page 4: Installation
INSTALLATION Installation Procedures First complete the electrical connections and then check for correctness. Installation Opening This unit can be installed in any dashboard Having an opening as shown the right figure. 103 mm 182 mm To Install the Car Radio Be sure you test all connections first, and then follow these steps to install this unit. -
Page 5: Wiring Connections
INSTALLATION(CONT.) INSTALLATION DIAGRAM - Only use speakers with 4 ohms impedance. - The maximum current of the auto antenna is 200mA. Wiring Connections WIRING DIAGRAM CAUTION +12V DC NEGATIVE GROUND Removal of the Main Unit Remove the metal strap from the main unit. Remove the plastic trim out from the main unit. -
Page 6: Control Panel Button Locations
CONTROL PANEL BUTTON LOCATIONS (power)/Volume knob and SEL (select/menu) button 2. SRC (source) button 3. BAND(band) button, (answer call) button 4. AMS (automatic store / preset station scan, automatic music search) button (pause/play), Preset station1 button 6. INT (intro), Preset station 2 button 7. -
Page 7: General Operation
GENERAL OPERATION Turn Unit On/Off Press any button on the front panel or remote control to turn on the unit. ress and hold the power button (VOL knob) or POWER( ) button on the remote control to turn the unit off. Adjust Volume (VOL) Rotate the VOL knob on the front panel or press the VOL+ /VOL-... -
Page 8: Set The Clock (Clock)
GENERAL OPERATION (CONT.) Set the Clock (CLOCK) 1. To display clock time, press the CLOCK button. 2. To set clock time, press and hold the CLOCK button and the hour will flash. 3. Press the button on the front panel or on the remote control to adjust the hour. 4. -
Page 9: Radio Operation
RADIO OPERATION Change Bands (BAND) Press the BAND button to switch between the FM1, FM2, FM3, AM1 and AM2. Each band stores up to six preset stations. Manual Tuning ( Press and hold the button on the front panel or on the remote control to enter manual tuning mode. -
Page 10: Af On/Off
RADIO OPERATION Numeric key Speech PTY Group Music PTY Group NEWS, AFFAIRS, INFO POP M, ROCK M SPORT, EDUCATE, DRAMA EASY M, LIGHT M CULTURE, SCIENCE, VARIED CLASSICS, OTHER M WEATHER, FINANCE, CHILDREN JAZZ, COUNTRY NATION(national), OLDIES SOCIAL, RELIGION, PHONE IN TRAVEL,LEISURE, DOCUMENT FOLK M When you select a program type, the... -
Page 11: Usb Operation
USB OPERATION To insert USB evice, inser h laybac utomatically Eject USB evice utto layback he emov evice Play/Pause lay/ ause utto esum layback Next/Previous Track ex rack button reviou rack utton Fast Forward/Backward as or ar utton ack ar button Introduction Scan h INT utto... -
Page 13: Bluetooth Operation
2. When the phone finds the car audio system,the XM-2R422 n ame will be displayed. 3. Choose the XM-2R422 f rom the device list to pair and connect with the car audio systems. Upon confirming, the BT logo will stop flashing. -
Page 15: Specifications
SPECIFICATIONS General Chassis Dimensions.............178(W) x 125(D) x 100(H) mm Power Supply Requirement ..................DC 12V Current Consumption ..................15A (max.) Maximum Power Output ..................60W x 4CH Radio Frequency Range...............87.5 - 108.0 MHz (50KHz/Step) Usable Sensitivity ....................30 dBu I.F. Frequency ....................10.7 MHz Frequency Range.... -
Page 16: Tr O U B L E S H O O T I N
TROUBLESHOOTING If you suspect something is wrong, immediately switch power off. Do not use the unit in abnormal condition, for example without sound, or with smoke or foul smell, can cause fire or electric shock. Immediately stop using it and call the store where you purchased it.


Need help?
Do you have a question about the XM-2R422 and is the answer not in the manual?
Questions and answers