Table of Contents
Advertisement
Quick Links
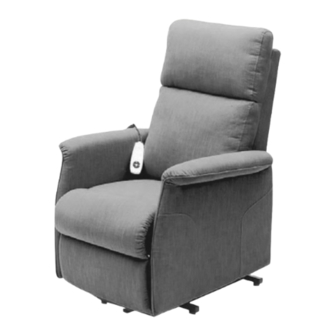
POLTRONA ELEVABILE ARIANNA
ARIANNA LIFT ARMCHAIR
FAUTEUIL ÉLÉVATEUR ARIANNA
SILLÓN DE ELEVACIÓN ARIANNA
Manuale d'uso - User manual
Notice d'utilisation - Manual del usuario
ATTENZIONE: Gli operatori devono leggere
e capire completamente questo manuale
prima di utilizzare il prodotto.
ATTENTION: The operators must carefully
read and completely understand the
present manual
before using the product.
AVIS: Les opérateurs doivent lire
et bien comprendre ce manuel avant
d'utiliser le produit.
ATENCIÓN: Los operadores tienen que
leer y entender completamente este
manual antes de utilizar el producto.
45170 - 45173 - 45175 - 45176 - 45177 - 45178
Importato da/Imported by/Importé par/Importado por:
GIMA S.p.A. - Via Marconi, 1 - 20060 Gessate (MI) - Italy
Made in China - www.gimaitaly.com
Gima S.p.A. - Via Marconi, 1 - 20060 Gessate (MI) Italy
gima@gimaitaly.com - export@gimaitaly.com
www.gimaitaly.com
Advertisement
Table of Contents

Summary of Contents for Gima ARIANNA
- Page 1 45170 - 45173 - 45175 - 45176 - 45177 - 45178 Importato da/Imported by/Importé par/Importado por: GIMA S.p.A. - Via Marconi, 1 - 20060 Gessate (MI) - Italy Made in China - www.gimaitaly.com...
-
Page 2: Table Of Contents
ENGLISH Introduction: This is an electrical Lift recliner chair designed to help people to rise easily from the chair as well as to relax both the body and mind. Please read the operation manual thoroughly for the correct methods of usage, especially the notes on Safety. -
Page 3: Safety
ENGLISH Safety: 1. Warning - The chair must be assembled correctly according to the Assembly instruction enclosed. The manufacturer of the chair, their agents and distributors are not liable for any damages caused by improper assembly of the chair. - The chair must be placed on a fl at fl oor level. - Do not use your Chair in humid or dusty environment, as it may cause electrical shock or machine trouble. -
Page 4: Specifi Cations
ENGLISH Note: All repairing must be done by qualifi ed technician or the After Sales Service. Caution: Should you use the Chair in a cold room, do not increase the room temperature abruptly. It is recommended that you increase temperature gradually to a normal level. -
Page 5: Assembly
ENGLISH Assembly: The chair is packed in semi knock down form consisting of the back and the seat. Assemble the chair according to the instructions given in the Assembly Instruction section. Assembly Instruction: Note: DO NOT assemble the chair if any of the parts of the chair are damaged. Check all parts carefully before assembling the chair. - Page 6 ENGLISH Step 3: Put the chair back on top of chair base. (Figure 7) Make sure the metal bracket slips into the metal bracket of the chair base. (Figure 8) Press the metal brackets until you can hear the “click” sound when the metal bracket is installed properly.
-
Page 7: Usage
ENGLISH Note: Make sure all the wires are properly connected, if not the chair will not function properly. If the external transformer or hand control is damaged, immediately place it in a plastic bag and call your authorized dealer for instructions on disposal. Recycling is always recommended. -
Page 8: Placing Of The Chair
ENGLISH Placing of the Chair: 41 cm/ 52 cm 32 cm/ 49 cm - Allow suffi cient space in front of and behind the chair for reclining purpose. - Make sure there is an allowance of more than 41cm (one motor) or 52cm (two motor) behind the Chair and more than 32cm (one motor) or 49cm (two motor) in front of the Chair. - Page 9 ENGLISH 2. Self-maintenance - Before cleaning, ensure that the Main Switch is turned off and AC plug is removed for the electrical outlet. 3. Main Body - Synthetic and very mild soap can be used to clean the plastic, pipe and upholstery of the Chair.
-
Page 10: Step
ENGLISH Pressing the button 1 raises the backrest from the “relax” position. Pressing the button 2 raises the chair to the “stand up” position from the sitting position. By pressing button 3 from the “sitting” position, the backrest is lowered. By pressing button 4 from the “stand up”... -
Page 11: English
Congratulations for purchasing a GIMA product. This product meets high qualitative standards both as regards the material and the production. The warranty is valid for 12 months from the date of supply of GIMA. During the period of validity of the warranty, GIMA will repair and/or replace free of charge all the defected parts due to production reasons.


Need help?
Do you have a question about the ARIANNA and is the answer not in the manual?
Questions and answers