
Subscribe to Our Youtube Channel
Related Manuals for Kramer RC-308


Summary of Contents for Kramer RC-308
- Page 1 USER MANUAL MODELS: RC-308, RC-306, RC-208, RC-206 Ethernet and K-NET Control Keypad P/N: 2900-301203 Rev 1 www.kramerAV.com...
-
Page 2: Table Of Contents
Kramer Electronics Ltd. Contents Introduction Getting Started Overview Typical Applications Defining the Ethernet and K-NET Control Keypad Preparing the RC-308 Configuring the RC-308 Inserting Button Labels Replacing a Button Label Installing the RC-308 Installing the Junction Box Connecting the RC-308... -
Page 3: Introduction
Kramer Electronics Ltd. Introduction Welcome to Kramer Electronics! Since 1981, Kramer Electronics has been providing a world of unique, creative, and affordable solutions to the vast range of problems that confront the video, audio, presentation, and broadcasting professional on a daily basis. In recent years, we... -
Page 4: Overview
European and UK standard 1 Gang wall junction boxes. Easy to deploy, it fits decoratively within a room design. It is perfectly suited for use as a user interface keypad within a Kramer Control system. Using K-Config, tap into the rich, built-in I/O interfaces that enable this keypad to be used as a flexible, standalone room controller. -
Page 5: Typical Applications
• Simple Control Programming – Using K-Config software. Leverage the power of Kramer’s highly customizable, flexible and user-friendly software, to easily program complex control scenarios of Pro-AV, Lighting, and other room and facility-controlled devices. -
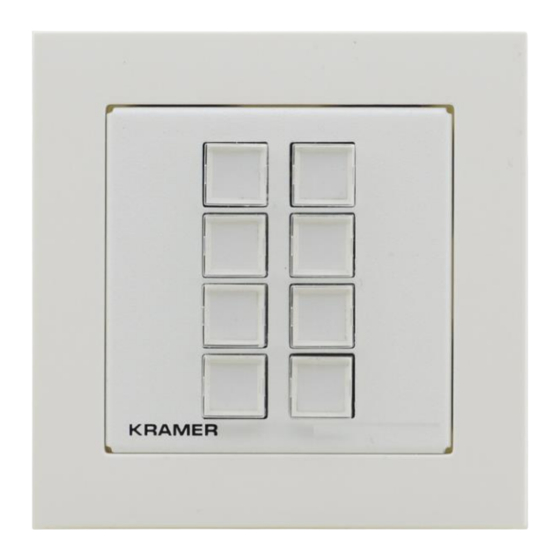
Page 6: Defining The Ethernet And K-Net Control Keypad
RC-206. US-D Version EU/UK Version Front Rear Front Rear Figure 1: RC-308 and RC-208 Ethernet and K-NET Control Keypad Front Panel US-D Version EU/UK Version Front Rear Front Rear Figure 2: RC-306 and RC-206 Ethernet and K-NET Control Keypad Front Panel... - Page 7 Kramer Electronics Ltd. Feature Function DIP-Switches For K-NET: The last physical device on a K-NET bus must be terminated. For RS-485: The first and the last units on the RS-485 line should be terminated. Other units should remain unterminated. DIP-switch 1 (to the left)
- Page 8 Kramer Electronics Ltd. Feature Function Mini USB Type B Port Connect to your PC for firmware upgrade or for uploading the configuration. To access the USB port, you need to remove the Button Faceplate. IR Sensor For learning commands from an IR remote control transmitter.
-
Page 9: Preparing The Rc-308
7. • RC-308 as a Control Interface on page 7. RC-308 as a Master Controller Before connecting to the devices and mounting the RC-308, you need to configure the buttons via K-Config. To configure the RC-308 buttons: 1. Download K-Config onto your PC, see www.kramerav.com/product/RC-308... -
Page 10: Inserting Button Labels
1. Using the supplied tweezers, grip the button cap via the horizontal or vertical ledges and remove the cap. Figure 6: Removing the Button Cap 2. Replace the label and cover the button with the button cap (see Inserting Button Labels on page 8). Ethernet and K-NET Control Keypad – Preparing the RC-308... -
Page 11: Installing The Rc-308
The box is installed, and the wiring is ready for connection. Connecting the RC-308 Always switch off the power to each device before connecting it to your RC-308. After connecting your RC-308, connect its power and then switch on the power to each device. - Page 12 RC-308 power socket and to the mains electricity. RC-308 RC-306 only, you can also power the unit via a PoE provider, so you do not need to connect the power adapter. Ethernet and K-NET Control Keypad – Installing the RC-308...
- Page 13 Kramer Electronics Ltd. Figure 7: Connecting to the RC-308 Rear Panel Connecting RS-232 Devices You can connect a device to the RC-308, via the RS-232 terminal block on the rear panel of the RC-308, as follows (see Figure • TX pin to Pin 2.
- Page 14 To leave K-NET unterminated, keep DIP-switch 2 up (off, the default). Connecting RS-485 Devices You can control up to one AV device by connecting it to the RC-308 via its RS-485 connection. To connect a device to the RC-308 via RS-485: •...
- Page 15 By typing the host name on any browser, which includes the name of the device, “-“ and the last 4 digits of the device serial number (found on the device). For example, if the serial number is xxxxxxxxx0015 the host name is RC-308-0015. Ethernet and K-NET Control Keypad – Installing the RC-308...
-
Page 16: Mounting The Rc-308
RC-308 EU/UK version: Figure 11: Installing the RC-308 EU/UK Version For BS EN 60670-1, attach the spacers (supplied) before inserting the device. Figure 12: Using Spacers for BS-EN 60670-1 Junction Box Ethernet and K-NET Control Keypad – Mounting the RC-308... -
Page 17: Us-D Version
Kramer Electronics Ltd. US-D Version Figure 13 shows how to install the US-D version: Figure 13: Installing the US-D Version Ethernet and K-NET Control Keypad – Mounting the RC-308... -
Page 18: Operating The Rc-308
Kramer Electronics Ltd. Operating the RC-308 To operate RC-308, simply press a button to activate a sequence of configured actions. Ethernet and K-NET Control Keypad – Operating the RC-308... -
Page 19: Technical Specifications
European version: 1 EU white frame, 1 UK white frame, 1 EU/UK white faceplate Optional For optimum range and performance use the recommended USB, Ethernet, serial and IR Kramer cables available at www.kramerav.com/product/RC-308 Specifications are subject to change without notice at www.kramerav.com... -
Page 20: Default Communication Parameters
Kramer Electronics Ltd. Default Communication Parameters RS-232 over Micro USB Baud Rate: 115200 Data Bits: Stop Bits: Parity: None Ethernet DHCP is enabled by factory default, the following are the default addresses if no DHCP server is found. IP Address: 192.168.1.39... - Page 21 Electronics products, this product must be insured during shipment, with the insurance and shipping charges prepaid by you. If this product is returned uninsured, you assume all risks of loss or damage during shipment. Kramer Electronics will not be responsible for any costs related to the removal or re- installation of this product from or into any installation.
- Page 22 SAFETY WARNING Disconnect the unit from the power supply before opening and servicing For the latest information on our products and a list of Kramer distributors, visit our Web site where updates to this user manual may be found. We welcome your questions, comments, and feedback.
Need help?
Do you have a question about the RC-308 and is the answer not in the manual?
Questions and answers