Table of Contents
Advertisement
Quick Links
Generators
GENERATOR
®
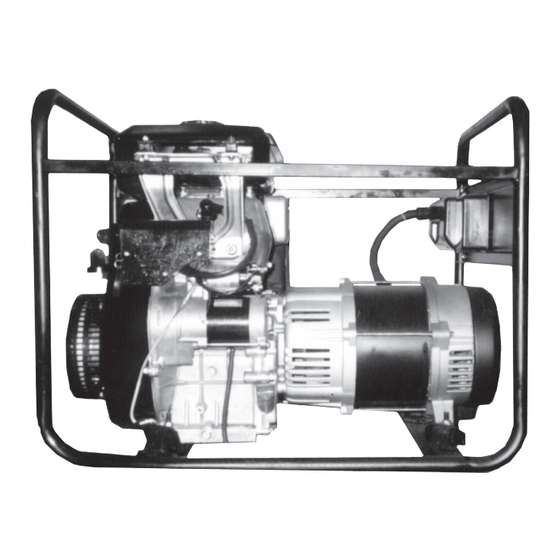
11 HP KUBOTA ELECTRIC START
Model 54516
OPERATING INSTRUCTIONS
®
3491 Mission Oaks Blvd., Camarillo, CA 93011
Visit our Web site at: http://www.harborfreight.com
©
®
Copyright 2004 by Harbor Freight Tools
. All rights reserved. No portion of this
manual or any artwork contained herein may be reproduced in any shape or form
without the express written consent of Harbor Freight Tools.
For technical questions, please call 1-800-444-3353.
Advertisement
Table of Contents

Summary of Contents for Chicago Electric 54516
- Page 1 Generators GENERATOR ® 11 HP KUBOTA ELECTRIC START Model 54516 OPERATING INSTRUCTIONS ® 3491 Mission Oaks Blvd., Camarillo, CA 93011 Visit our Web site at: http://www.harborfreight.com © ® Copyright 2004 by Harbor Freight Tools . All rights reserved. No portion of this manual or any artwork contained herein may be reproduced in any shape or form without the express written consent of Harbor Freight Tools.
-
Page 2: Product Specifications
Keep your invoice with this manual. Write the invoice number on the inside of the front cover. Keep this manual and invoice in a safe and dry place for future reference. SKU 54516 PAGE 2... -
Page 3: General Safety Rules
Check with a qualified electrician if you are in doubt as to whether the outlet is properly grounded. If the tools should electrically malfunction or break down, grounding provides a low resistance path to carry electricity away from the user. SKU 54516 PAGE 3... -
Page 4: Personal Safety
Disconnect the spark plug wire, and remove the Key from the Ignition. Remove adjusting keys or wrenches before turning the generator on. A wrench or a key that is left attached to a rotating part of the generator may result in personal injury. SKU 54516 PAGE 4... - Page 5 Many accidents are caused by poorly maintained generators. Use only accessories that are recommended by the manufacturer for your model. Accessories that may be suitable for one generator may become hazard- ous when used on another generator. SKU 54516 PAGE 5...
-
Page 6: Specific Product Warnings And Precautions
The operator must understand that common sense and caution are factors, which cannot be built into this product, but must be supplied by the operator. SKU 54516 PAGE 6... - Page 7 The supporting ground surface should be level, and strong enough to safely hold the weight of the Generator. If not level, strong cross members should be placed under the full length of the Generator Frame at its low side. SKU 54516 PAGE 7...
- Page 8 Use only engine manufacturer recommended fuel and oil. Mechanical Precautions: ALWAYS turn off the Engine when done using Generator. Allow the Engine to completely cool, disconnect the negative battery cable from the battery, and remove the Ignition Key before carrying out maintenance. SKU 54516 PAGE 8...
- Page 9 Noise Precautions: Prolonged exposure to noise levels above 85 dBA is hazardous to hearing. Always wear ANSI approved ear protection when operating or working around the Generator when it is running. SKU 54516 PAGE 9...
- Page 10 8.1 - 12 12.1 - 15 15.1 - 20 FIGURE A REQUIRED MINIMUM EXTENSION CORD GAUGE – 240 VOLT NAMEPLATE EXTENSION CORD LENGTH _______________________________________________ AMPERES (At Full Load) 0-25 Feet 25-50 Feet 50-100 Feet 100-150 Feet FIGURE B SKU 54516 PAGE 10...
-
Page 11: Installation
WARNING! The Generator weighs 167 pounds. Use care and the proper lifting or hoisting equipment when moving it to the installation location. Always connect hoist lines to the Frame (21) of the Generator. It is recommended that 2 or more people assist when moving the Generator. SKU 54516 PAGE 11... -
Page 12: General Location
Ground Connector (34) to a grounding rod (not included) that has been driven at least 24 inches deep into the earth. The grounding rod must be an earth-driven copper or brass rod (electrode) which can adequately ground the Generator. (See Figure C, next page.) SKU 54516 PAGE 12... - Page 13 RED (+ POSITIVE) terminal to the (+ POSITIVE) terminal on the battery. Connect the cable with the BLACK (- NEGATIVE) terminal to the (- NEGATIVE) terminal on the battery. (See Figure D.) SKU 54516 PAGE 13...
- Page 14 Thereafter, check the Fuel Gauge for the amount of unleaded gasoline in the Fuel Tank. If necessary, remove the Fuel Tank Cap and refill the Fuel Tank with unleaded gasoline. Then, replace the Fuel Tank Cap. (See Figure E.) SKU 54516 PAGE 14...
- Page 15 Move the Engine’s Fuel Choke all the way to the right to its “START” position. FUEL TANK (32) (See Figure F.) Turn the Engine’s “ON/OFF” Switch to its “ON” position. (See Figure F.) ON/OFF SWITCH IGNITION SWITCH FUEL CHOKE FUEL VALVE FIGURE F SKU 54516 PAGE 15...
- Page 16 After the Engine and Generator have completely cooled, store the Generator in a safe, clean, dry location (if not already installed in one). CIRCUIT BREAKER (32) REAR PANEL 240V VIEW TWIST LOCK OUTLET (30) FIGURE F 120 VOLT DUAL OUTLET (31) SKU 54516 PAGE 16...
-
Page 17: Inspection, Maintenance, And Cleaning
AND NOT BY THE BUYER. THE BUYER ASSUMES ALL RISK AND LIABILITY ARIS- ING OUT OF HIS OR HER REPAIRS TO THE ORIGINAL PRODUCT OR REPLACE- MENT PARTS THERETO, OR ARISING OUT OF HIS OR HER INSTALLATION OF RE- PLACEMENT PARTS THERETO. SKU 54516 PAGE 17... -
Page 18: Parts List
Hex Bolt (3/8” x 30) Battery Holding Plate Fan Blade Motor Front Cover Battery Support Stud Bolt (M5 x 12) NOTE: Some parts are listed and shown for illustration purposes only, and are not available individually as replacement parts. SKU 54516 PAGE 18... - Page 19 ASSEMBLY DIAGRAM & ELECTRICAL SCHEMATIC NOTE: Some parts are listed and shown for illustration purposes only, and are not available as replacement parts. SKU 54516 PAGE 19...


Need help?
Do you have a question about the 54516 and is the answer not in the manual?
Questions and answers