Table of Contents

Subscribe to Our Youtube Channel
Related Manuals for Gentex TBH IIIA Series


Summary of Contents for Gentex TBH IIIA Series
- Page 1 OPERATOR’S MANUAL TACTICAL BALLISTIC HELMET IIIA (TBH IIIA) CLEAN • MISSION-CONFIGURED © 2016 GENTEX CORPORATION TP0399 Low-Cut Low-Cut Mid-Cut Mid-Cut High-Cut High-Cut TBH IIIA LOW-CUT • TBH IIIA MID-CUT • TBH IIIA HIGH-CUT...
- Page 2 This page has been left blank intentionally.
-
Page 3: Table Of Contents
TABLE OF CONTENTS COMPONENT DESCRIPTION OVERVIEW HELMET SHELL RETENTION (CHIN STRAP) ASSEMBLY SUSPENSION (PAD/LINER) SYSTEM COMPONENTS FOR MISSION-CONFIGURED HELMETS HELMET PREPARATION DETERMINING HELMET SIZE CHECKING SUSPENSION (PAD/LINER) FIT — TEAM WENDY CHECKING SUSPENSION (PAD/LINER) FIT — ADJUSTABLE CHECKING SUSPENSION (PAD/LINER) FIT — 360° LINER ADJUSTING RETENTION (CHIN STRAP) INSTALLING WING-LOC ADAPTER INSTALLING PICATINNY ADAPTER... - Page 4 TABLE OF CONTENTS PART NUMBERS HELMET PART NUMBERS — T BH IIIA HELMET VARIATIONS COMPONENT PART NUMBERS (SPARE PARTS) WARRANTY WARRANTY INFORMATION...
-
Page 5: Component Description
COMPONENT DESCRIPTION OVERVIEW The TBH-IIIA is available in four sizes: Small (SM), Medium (MD), Large (LG), and Extra Large (XL). The TBH-IIIA is available in two configurations: Mission- Configured Clean The TBH-IIIA is available in three cuts: Low-Cut Mid-Cut High-Cut The TBH-IIIA is available in three suspension (pad/liner) options: 360°... -
Page 6: Helmet Shell
COMPONENT DESCRIPTION HELMET SHELL Trim Options The helmet shell is available in three trim (cut ) options: Low-Cut, Mid-Cut, and High-Cut. These options provide a balance between side coverage and integration with communication equipment. Low-Cut • Provides greatest degree of side protection •... -
Page 7: Retention (Chin Strap) Assembly
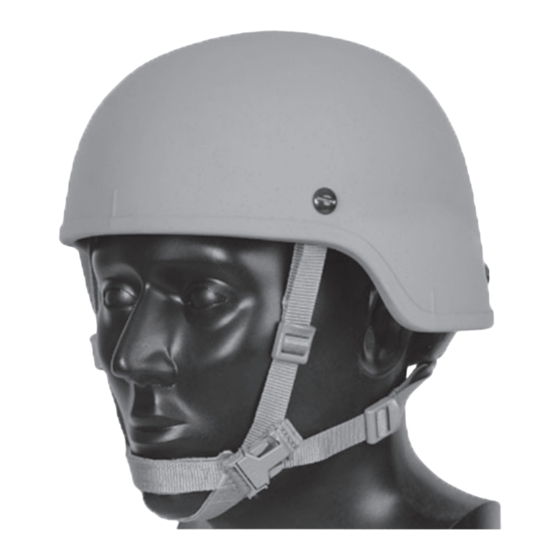
COMPONENT DESCRIPTION RETENTION (CHIN STRAP) ASSEMBLY Two retention (chin strap) options are available: H-Nape Head-Loc and X-Nape Head-Loc. Both options are available in Right Eye Dominate (RED) or Left Eye Dominate (LED) versions. Both options feature a patented design that secures the helmet to the wearer’s head with four points of contact (secured with ballistic bolts and T-nuts) to the helmet and direct lines from the helmet to the chin cup. -
Page 8: Suspension (Pad/Liner) System
Three suspension (pad/liner) system options are available: the Team Wendy 7-Pad Kit, the Gentex Adjustable 8-Pad Kit, and the Gentex 360° Liner Kit. Each option is designed to secure the helmet on the wearer’s head. All options (except Team Wendy) allow the movement of the pads for the integration of communication systems with a low-profile headband. -
Page 9: Components For Mission-Configured Helmets
COMPONENT DESCRIPTION COMPONENTS FOR MISSION-CONFIGURED HELMETS Standard components for the Mission-Configured TBH-IIIA include the Skeleton Shroud, Skeleton Rails, Carabiner Bungees, Hook Bungees, the Exterior Velcro Kit, two Picatinny Adapters, and two Wing-Loc Adapters. Optional styles of shrouds and rails are also available. STANDARD COMPONENTS Picatinny Adapters Wing-Loc Adapters... -
Page 10: Helmet Preparation
HELMET PREPARATION Helmet preparation includes determining helmet size, checking the fit of the pad suspension, and adjusting the chin strap. DETERMINING HELMET SIZE Helmet sizes are Small, Medium, Large, and X-Large. To determine size, you must (1) measure and record the wearer’s head length, (2) measure and record the wearer’s head breadth, (3) measure and record the wearer’s head circumference, and (4) select the helmet size based upon the parameters in the tables on Page 7. - Page 11 HELMET PREPARATION MEASURE HEAD CIRCUMFERENCE HEAD CIRCUMFERENCE Use a tape measure to determine the maximum head 1/16 circumference (to the nearest inch) above the ears. Ensure that the caliper touches the skin lightly and does not indent the skin. Record the measurement. Tape measure SELECT HELMET SIZE Referring to the tables below (for inches or millimeters), select the helmet size based on head length,...
-
Page 12: Checking Suspension (Pad/Liner) Fit - Team Wendy
HELMET PREPARATION CHECKING SUSPENSION (PAD/LINER) FIT — TEAM WENDY Ensure the helmet is properly adjusted for a snug, secure fit at all times when the helmet is worn. Failure to do so can result in an unstable helmet that will not protect the wearer. PLACE THE HELMET ON THE HEAD. -
Page 13: Checking Suspension (Pad/Liner) Fit - Adjustable
HELMET PREPARATION CHECKING SUSPENSION (PAD/LINER) FIT — ADJUSTABLE Ensure that the helmet is properly adjusted for a snug, secure fit at all times when the helmet is worn. Failure to do so can result in an unstable helmet that will not protect the wearer. Each pad contains one ½-inch-thick foam pad and two ¼-inch-thick foam pads inside the cover. - Page 14 HELMET PREPARATION CHECK THE OVERALL HELMET FIT Ensure that the helmet fit is snug and secure, yet comfortable. If the helmet is too tight, have the wearer remove the helmet, adjust the bottom pads as follows: • Remove the bottom pads from the helmet as needed, noting their position inside the helmet. •...
-
Page 15: Checking Suspension (Pad/Liner) Fit - 360° Liner
HELMET PREPARATION CHECKING SUSPENSION (PAD/LINER) FIT — 360° LINER Ensure the helmet is properly adjusted for a snug, secure fit at all times when the helmet is worn. Failure to do so can result in an unstable helmet that will not protect the wearer. PLACE THE HELMET ON THE HEAD. -
Page 16: Adjusting Retention (Chin Strap)
HELMET PREPARATION ADJUSTING RETENTION (CHIN STRAP) Ensure that all helmet adjustment mechanisms are properly adjusted for a snug, secure fit at all times when the helmet is worn. Failure to do so can result in an unstable helmet that will not protect the wearer. -
Page 17: Installing Wing-Loc Adapter
HELMET PREPARATION INSTALLING WING-LOC ADAPTER ATTACH THE ACCESSORY TO THE ADAPTER. Attach the desired accessory to the Wing-Loc adapter by inserting the screws through the adapter holes and tightening the screws into the accessory holes. Screws Wing-Loc Accessory Adapter INSTALL THE ADAPTER ONTO THE RAIL. Pinch the tabs, and slide the Wing-Loc adapter and slide the adapter (with accessory attached) to the preferred position on the rail. -
Page 18: Installing Picatinny Adapter
HELMET PREPARATION INSTALLING PICATINNY ADAPTER INSERT THE ADAPTER INTO THE RAILS Loosen the screw on the Picatinny adapter. Place the adapter within the grooves of the rail, and slide the adapter into the rail as far as possible. Loosen screw Slide adapter into rail POSITION THE ADAPTER WITHIN THE RAILS. -
Page 19: Maintenance
MAINTENANCE PREVENTIVE MAINTENANCE CHECKS Perform preventive maintenance tasks for each component as described in the table below. Examine for: Helmet is not ready if: Component • Gouges, scrapes, cracks, • Gouges, scrapes, cracks, Helmet Shell delamination or other damage delamination or other damage extending below the paint extends below the paint •... -
Page 20: Replacing Suspension (Pad/Liner) - Team Wendy
MAINTENANCE REPLACING SUSPENSION (PAD/LINER) — TEAM WENDY REMOVE THE EXISTING PADS. When removing the pads, note their position and orientation in the helmet. Also note the pad thickness: the Team Wendy version has ¾-inch-thick or 1-inch-thick pads. INSTALL THE REPLACEMENT PADS. Use the same pad thickness, and install the pads in the same position and orientation as the previous pads. -
Page 21: Replacing Suspension (Pad/Liner) - Adjustable
MAINTENANCE REPLACING SUSPENSION (PAD/LINER) — ADJUSTABLE Each pad contains one ½-inch-thick foam pad and two ¼-inch-thick foam pads inside the cover. For impact protection and helmet stability, you must keep all ½-inch-thick foam pads inside the covers and all pads properly installed in the helmet when the helmet is worn. Remove the ¼-inch-thick pads only where necessary to adjust the fit. -
Page 22: Replacing Suspension (Pad/Liner) - 360° Liner
MAINTENANCE REPLACING SUSPENSION (PAD/LINER) — 360° LINER COMFORT PADS ONLY: Remove and install pads REMOVE THE EXISTING PADS. Note the comfort pad position, orientation, and thickness. INSTALL THE REPLACEMENT PADS. Select the same pad thickness as previously installed. Install the replacement pads in the helmet in the same manner in which the previous pads were installed. -
Page 23: Replacing Retention (Chin Strap)
MAINTENANCE REPLACING RETENTION (CHIN STRAP) REMOVE THE EXISTING RETENTION If your helmet has the Team Wendy pad kit or the Adjustable pad kit, remove the four pads (shown below) to reach the interior attaching hardware, noting the position of the pads. If your helmet has the 360°... -
Page 24: Part Numbers
PART NUMBERS HELMET PART NUMBERS — T BH IIIA LOW-CUT MID-CUT HIGH-CUT LOW-CUT Hole Pattern No NVG Hole A14453-1* A14453-2* A14453-3* A14453-4* A14453-5* A14453-6* A14453-7* A14453-8* One NVG Hole A14453-9* A14453-10* A14453-11* A14453-12* Three NVG Holes MID-CUT Hole Pattern No NVG Hole A14454-1* A14454-2* A14454-3*... -
Page 25: Helmet Variations
PART NUMBERS HELMET VARIATIONS Each helmet part number is followed by four suffixes that denote the helmet variations shown below. Suffix 1 (A through N) denotes helmet shell color. Suffix 2 (99, 01 through 54) denotes retention (chin strap) color, size, and type. Suffix 3 (Z, A through K) denotes suspension (pad/liner) type and thickness. Suffix 4 (99, 01 through 60) denotes mission-configured components. - Page 26 PART NUMBERS HELMET SHELL COLOR Suffix 1 Color Black No. 37038 Green 383 Olive Drab No. 34088 CHP Blue UN Blue No. 15200 Tan No. 33446 Foliage Green Coyote Brown Metallic Blue Gray Fast/Urban Tan RETENTION (CHIN STRAP)COLOR , SIZE, AND TYPE LED = Left Eye Dominate RED = Right Eye Dominate Suffix 2...
- Page 27 PART NUMBERS RETENTION (CHIN STRAP)COLOR , SIZE, AND TYPE LED = Left Eye Dominate RED = Right Eye Dominate Suffix 2 Color Size Type SM/MD H-Nape (LED) LG/XL H-Nape (LED) Foliage Green SM/MD H-Nape (LED) Foliage Green LG/XL H-Nape (LED) Black SM/MD H-Nape (LED)
- Page 28 PART NUMBERS SUSPENSION (PAD/LINER) TYPE Suffix 3 Type Not Required ¾-inch Team Wendy 1-inch Team Wendy Adjustable 360° Liner, SM 360° Liner, MD 360° Liner, LG 360° Liner, XL MISSION-CONFIGURED COMPONENTS Suffix 4 Description NVG Hole Size Color None Skeleton Rails, Bungee Kit, 22mm Hardware, Skeleton Shroud, Exterior Velcro Skeleton Rails, Bungee Kit, 22mm Hardware, Foliage Green...
- Page 29 PART NUMBERS MISSION-CONFIGURED COMPONENTS Suffix 4 Description NVG Hole Size Color Skeleton Rails, Bungee Kit, 22mm Hardware, Skeleton Shroud, Exterior Velcro Skeleton Rails, Bungee Kit, 22mm Hardware, Foliage Green Skeleton Shroud, Exterior Velcro Skeleton Rails, Bungee Kit, 22mm Hardware, Black Skeleton Shroud, Exterior Velcro Skeleton Rails, Bungee Kit, 22mm Hardware, Skeleton Shroud, Exterior Velcro...
- Page 30 PART NUMBERS MISSION-CONFIGURED COMPONENTS Suffix 4 Description NVG Hole Size Color ARC Rails, Bungee Kit, 22mm Hardware, Black VAS Shroud, Exterior Velcro ARC Rails, Bungee Kit, 22mm Hardware, VAS Shroud, Exterior Velcro ARC Rails, Bungee Kit, 22mm Hardware, Foliage Green VAS Shroud, Exterior Velcro ARC Rails, Bungee Kit, 22mm Hardware, Black...
- Page 31 PART NUMBERS MISSION-CONFIGURED COMPONENTS Suffix 4 Description NVG Hole Size Color ARC Rails, Bungee Kit, 22mm Hardware, Universal Black VAS Shroud Skeleton Rails, Bungee Kit, 22mm Hardware, Universal Skeleton Shroud Skeleton Rails, Bungee Kit, 22mm Hardware, Universal Foliage Green Skeleton Shroud Skeleton Rails, Bungee Kit, 22mm Hardware, Universal Black...
-
Page 32: Component Part Numbers (Spare Parts)
PART NUMBERS COMPONENT PART NUMBERS (SPARE PARTS) Suspension (Pad/Liner) Retention (Chin Strap) Team Wendy Adjustable 360° Liner H-Nape X-Nape Mission-Configured Components Picatinny Adapters Skeleton One-Hole Shroud ARC Rails with Skeleton Rails with Bungees and Hardware Bungees and Hardware Wing-Loc Adapters VAS Shroud ARC Rails Skeleton Rails... - Page 33 PART NUMBERS SPARE PARTS — RETENTION (CHIN STRAP) RED = Right Eye Dominate LED = Left Eye Dominate Type Color Size Part Number H-Nape (RED) SM/MD 07-99-121 X-Nape (RED) SM/MD 09-99-121 H-Nape (RED) LG/XL 07-99-151 X-Nape (RED) LG/XL 09-99-151 H-Nape (RED) Foliage Green SM/MD 07-99-122...
- Page 34 PART NUMBERS SPARE PARTS — RETENTION (CHIN STRAP) RED = Right Eye Dominate LED = Left Eye Dominate Type Color Size Part Number H-Nape Repositionable (LED) SM/MD 07-98-221 H-Nape Repositionable (LED) Foliage Green SM/MD 07-98-222 H-Nape Repositionable (LED) Black SM/MD 07-98-223 H-Nape Repositionable (LED) LG/XL...
- Page 35 PART NUMBERS SPARE PARTS — MISSION-CONFIGURED COMPONENTS Type Color Size Part Number Skeleton Shroud Kit with Black One Size 34-99-103 Mounting Hardware ARC Rail Kit with Bungee and One Size 25-99-401 Hardware, Universal ARC Rail Kit with Bungee and Foliage Green One Size 25-99-402 Hardware, Universal...
- Page 36 PART NUMBERS SPARE PARTS — MISSION-CONFIGURED COMPONENTS Type Color Size Part Number Replacement Ballistic Hardware Kit, Black One Size 03-99-203 15mm, Pack of 100 Replacement Exterior Velcro Kit, 20-96-111 5 Shapes Replacement Exterior Velcro Kit, Foliage Green 20-96-112 5 Shapes Replacement Exterior Velcro Kit, Black 20-96-113...
-
Page 37: Warranty
Any defect corrected and found to be within this scope of the warranty will be repaired by Gentex and all charges for labor and material will be borne by Gentex. If it is determined that either no fault exists in Gentex, or the damage to be repaired was caused by negligence of the user, its agents, employees or customers, you agree to pay all charges associated with each such repair. - Page 38 This page has been left blank intentionally.
- Page 39 This page has been left blank intentionally.
- Page 40 www.gentexcorp.com MADE IN USA...
Need help?
Do you have a question about the TBH IIIA Series and is the answer not in the manual?
Questions and answers