Parkside PLEM 20 A1 Operation And Safety Notes
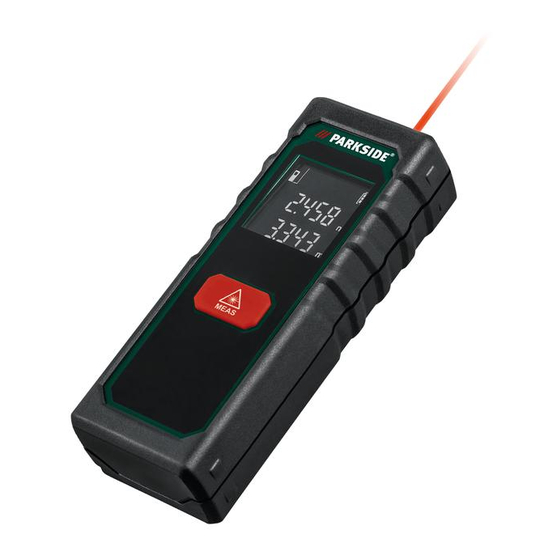
Laser distance measurer 20 m
Hide thumbs
Also See for PLEM 20 A1:
- Operation and safety notes (84 pages) ,
- Operation and safety notes (72 pages) ,
- Operation and safety notes (72 pages)
Table of Contents
Advertisement
Available languages
Available languages
MEDIDOR LÁSER DE DISTANCIAS
20 M PLEM 20 A1
MEDIDOR LÁSER DE
DISTANCIAS 20 M PLEM 20 A1
Instrucciones de utilización y de seguridad
LASER DISTANCE MEASURER
20 M PLEM 20 A1
Operation and Safety Notes
IAN 289679
MEDIDOR DE DISTÂNCIA A
LASER 20 M PLEM 20 A1
Instruções de utilização e de segurança
LASER-ENTFERNUNGS-
MESSER 20 M PLEM 20 A1
Bedienungs- und Sicherheitshinweise
Advertisement
Chapters
Table of Contents

Related Manuals for Parkside PLEM 20 A1


Summary of Contents for Parkside PLEM 20 A1
- Page 1 MEDIDOR LÁSER DE DISTANCIAS 20 M PLEM 20 A1 MEDIDOR LÁSER DE MEDIDOR DE DISTÂNCIA A DISTANCIAS 20 M PLEM 20 A1 LASER 20 M PLEM 20 A1 Instrucciones de utilización y de seguridad Instruções de utilização e de segurança...
- Page 2 Instrucciones de utilización y de seguridad Página Instruções de utilização e de segurança Página 19 GB / MT Operation and Safety Notes Page DE / AT / CH Bedienungs- und Sicherheitshinweise Seite...
-
Page 3: Meas
MEAS... -
Page 4: Table Of Contents
Leyenda de pictogramas utilizados ............. Página Introducción ............Página Uso adecuado ............Página Descripción de los componentes ......Página Contenido ..............Página Características técnicas .......... Página Indicaciones generales de seguridad ............ Página Indicaciones de seguridad sobre las pilas / baterías ........... Página 11 Antes de la puesta en funcionamiento .......... -
Page 5: Leyenda De Pictogramas Utilizados
¡Protéjase de la radiación láser! ¡No mire directamente al láser! Medidor láser de distancias 20 m PLEM 20 A1 Introducción Enhorabuena por la adquisición de su nuevo producto. Ha op- tado por un producto de alta calidad. El manual de instruccio- nes forma parte de este producto. -
Page 6: Uso Adecuado
Uso adecuado Este producto está diseñado para medir distancias, longitudes y alturas. Cualquier otro uso o modificación del producto se considerará inadecuado y conllevará considerables peligros de accidente. El fabricante no asume responsabilidad alguna por los daños provocados debido al uso indebido del pro- ducto. -
Page 7: Contenido
Nota: El primer (anterior) valor de medición se muestra en el centro una vez que el segundo (nuevo) valor de medición se ha emitido adecuadamente. Contenido 1 medidor de distancia láser 2 pilas 1,5 V tipo LR03 (AAA) 1 manual de instrucciones Características técnicas Rango de medición: 0,075–20 m*... -
Page 8: Indicaciones Generales De Seguridad
*) El alcance será mayor cuanto mejor devuelva la superficie final el haz de láser (disperso, no reflectante) y cuanto más claro sea el láser respecto a la claridad del ambiente (espa- cios interiores, crepúsculo). **) En caso de condiciones desfavorables, como radiación solar intensa o superficies poco reflectantes, la desviación máxima es de ±... - Page 9 Proteja el producto de la humedad y la exposición directa a la radiación solar. No exponga el aparato a temperaturas ni cambios de temperatura extremos. No lo deje, por ejemplo, en el co- che durante mucho tiempo. En caso de grandes cambios de temperatura, deje atemperar el producto antes de utili- zarlo.
-
Page 10: Indicaciones De Seguridad Sobre Las Pilas / Baterías
Indicaciones de seguridad sobre las pilas / baterías ¡PELIGRO DE MUERTE! Mantenga las pilas / baterías fuera del alcance de los niños. ¡En caso de ingestión, acuda inmediatamente a un médico! ¡PELIGRO DE EXPLOSIÓN! No recargue nunca pilas no recargables. No ponga las pi- las / baterías en cortocircuito ni tampoco las abra. -
Page 11: Antes De La Puesta En Funcionamiento
Riesgo de daño del producto ¡Utilice exclusivamente el tipo de pila / batería indicado! Introduzca las pilas / baterías teniendo en cuenta la polari- dad marcada con (+) y (-) tanto en las pilas / baterías como en el producto. ¡Limpie los contactos de las pilas / baterías y del comparti- mento para pilas antes de colocarlas! Retire inmediatamente las pilas / baterías agotadas del... -
Page 12: Puesta En Funcionamiento
Puesta en funcionamiento Encendido / apagado Para encender el producto pulse el botón MEAS . Al encender el producto se activa también el láser. Para apagar el producto mantenga pulsado el botón MEAS durante aprox. 5, hasta que la pantalla muestre la indicación "OFF". -
Page 13: Medir Longitudes
Medir longitudes Presione el botón MEAS brevemente de nuevo para activar el láser. En cuanto se enciende el láser, se muestra el símbolo en la esquina superior izquierda de la pantalla. Nota: una vez que el láser esté activado es posible sal- tarse el paso arriba mencionado. -
Page 14: Mantenimiento Y Limpieza
Fallo del dispositivo Si el símbolo sigue apareciendo des- pués de encender y apagar el producto varias veces, llévelo a un taller especiali- zado. Mantenimiento y limpieza El producto no requiere mantenimiento. ¡ATENCIÓN! Nunca sumerja el producto en agua o en otros líquidos. -
Page 15: Eliminación
Eliminación El embalaje está compuesto por materiales no con- taminantes que pueden ser desechados en el centro de reciclaje local. El punto verde no se aplica en Alemania. Tenga en cuenta el distintivo del embalaje para la separación de residuos. Está compuesto por abre- viaturas (a) y números (b) que significan lo si- guiente: 1–7: plásticos / 20–22: papel y cartón / 80–98: materiales compuestos. -
Page 16: Garantía
¡Daños en el medio ambiente por un recic- laje indebido de las pilas / baterías! Las pilas / baterías no deben eliminarse junto con los residuos domésticos. Estas pueden contener metales pesados tóxicos que deben tratarse conforme a la normativa aplicable a los re- siduos especiales. - Page 17 La garantía cubre defectos de materiales o de fabricación. Esta garantía no cubre aquellos componentes del producto so- metidos a un desgaste normal y que, por ello, puedan consi- derarse piezas de desgaste (por ej. las pilas). Tampoco cubre daños de componentes frágiles como, por ejemplo, los inter- ruptores, baterías y piezas de cristal.
-
Page 18: Página
Legenda dos pictogramas utilizados ............. Página 20 Introdução ............Página 20 Utilização correcta..........Página 21 Descrição das peças ..........Página 21 Material fornecido ..........Página 22 Dados técnicos ............Página 22 Indicações gerais de segurança ............Página 23 Indicações de segurança relativas às pilhas / baterias ........ -
Page 19: Legenda Dos Pictogramas Utilizados
Proteja-se dos raios laser! Não olhar diretamente para o raio laser! Medidor de distância a laser 20 m PLEM 20 A1 Introdução Damos-lhe os parabéns pela aquisição do seu novo produto. Acabou de adquirir um produto de grande qualidade. O ma- nual de instruções é... -
Page 20: Utilização Correcta
Utilização correcta O produto é adequado para medir distâncias, comprimentos, alturas, intervalos. Qualquer outra utilização ou alteração do produto vale como não de acordo com a finalidade e cria se- veros perigos de acidentes. O fabricante não assume qual- quer tipo de responsabilidade pelos danos resultantes de uma utilização inadequada. -
Page 21: Material Fornecido
Nota: o primeiro valor de medição (anterior) é exibido no meio, após o segundo (novo) valor medido ter sido determi- nado com sucesso. Material fornecido 1 Medidor de distâncias a laser 2 pilhas 1,5 V Tipo LR03 (AAA) 1 Manual de instruções Dados técnicos Área de medição: 0,075–20 m*... -
Page 22: Indicações Gerais De Segurança
Dimensões: 10 x 3,8 x 2,45 cm Grau de proteção: IP20 *) O alcance aumenta, quanto melhor a luz laser ressaltar da superfície do alvo (dispersão, não refletida) e quanto mais bri- lhante for o ponto do laser relativamente ao brilho ambiente (interiores, crepúsculo). - Page 23 Proteja o produto de humidade e raios solares diretos. Não exponha o produto a temperaturas elevadas ou a grandes variações de temperatura. Não o deixe, por ex., durante muito tempo no carro. Em caso de grandes varia- ções de temperatura, deixe o produto primeiro estabilizar, antes de o utilizar.
-
Page 24: Indicações De Segurança Relativas Às Pilhas / Baterias
Indicações de segurança relativas às pilhas / baterias PERIGO DE MORTE! Mantenha as pilhas e baterias fora do alcance das crianças. Se a pilha / bateria for inge- rida, contacte imediatamente um médico! PERIGO DE EXPLOSÃO! Nunca carregue pilhas não recarregáveis. Não faça ligação direta de pilhas ou baterias e / ou abra elas. -
Page 25: Antes Da Utilização
Remova as pilhas ou baterias, se o produto não foi utilizado durante um longo período. Perigo de dano ao produto Utilize apenas o tipo de pilha ou bateria indicado! Insira as pilhas / baterias de acordo com a especificação de polaridade (+) e (-) na pilha / bateria e produto. Limpe os contactos na pilha / bateria e no compartimento de baterias antes de colocar as baterias! Retire de imediato as pilhas ou baterias gastas do... -
Page 26: Colocação Em Funcionamento
Feche a tampa do compartimento de pilhas como ilustrado (Fig. A). Colocação em funcionamento Ligar/ desligar Para ligar o produto prima a tecla MEAS . Ao ligar o produto, o raio laser é ligado. Para desligar o produto, mantenha a tecla MEAS pressionada aprox. -
Page 27: Medir Comprimentos
Estão ao dispor as seguintes unidades de comprimento: m metros in polegadas pé ' " pé /polegada Medir comprimentos Pressione brevemente a tecla MEAS mais uma vez, para ativar o raio laser. Logo que o raio laser acenda é exibido o símbolo no canto superior esquerdo do vi- sor. -
Page 28: Resolução De Avarias, Falhas E Interferências
Resolução de avarias, falhas e interferências Causa Solução Pro- blema ----- Erro de cálculo Tenha em atenção a gama de medição permitida. Temperatura ambiente Tenha em atenção a insuficiente ou exces- temperatura am- siva biente permitida (0°–40°C). Falha do aparelho Se o símbolo ainda aparecer após ligar e desligar várias ve-... -
Page 29: Armazenamento
Nunca utilize gasolina, produtos de limpeza ou detergen- tes que agridam o plástico. Para efeitos de reparação, o produto só pode ser aberto por técnicos especializados. Para a limpeza da caixa utilize um pano seco. Limpe o produto regularmente e, sobretudo, após cada uti- lização. -
Page 30: Garantia
As possibilidades de reciclagem dos artigos utiliza- dos poderão ser averiguadas no seu Município ou Câmara Municipal. Não deposite o produto utilizado no lixo domés- tico, a favor da proteção do ambiente. Elimine-o de forma responsável. Pode informar-se no seu municí- pio sobre os locais de recolha adequados e o seu período de funcionamento. - Page 31 Este produto tem 3 anos de garantia a partir da data de com- pra. A validade da garantia inicia-se com a data de compra. Guarde o talão da caixa como comprovativo da compra. Esse documento é necessário para comprovar a compra. Caso num espaço de tempo de 3 anos a partir da data da com- pra deste producto surja um erro de material ou de fabrico, o producto será...
- Page 32 List of pictograms used ........Page 34 Introduction ............Page 34 Intended use ..............Page 35 Parts description ............Page 35 Scope of delivery ............Page 36 Technical data .............Page 36 General safety instructions ......Page 37 Safety instructions for batteries / rechargeable batteries..........Page 38 Before using ............Page 40 Inserting / replacing the batteries .......Page 40 Start-up...
-
Page 33: List Of Pictograms Used
Attention! Protect yourself from laser radiation! Do not stare into the laser beam! Laser distance measurer 20 m PLEM 20 A1 Introduction We congratulate you on the purchase of your new product. You have chosen a high quality product. The instructions for use are part of the product. -
Page 34: Intended Use
Intended use This product is suitable for measuring distances, lengths and heights in indoor spaces. Any other use or product modification shall be considered improper use and hold considerable safety hazards. The manufacturer assumes no liability for damages due to improper use. Not intended for commercial use. Parts description Receiver lens Laser beam output opening... -
Page 35: Scope Of Delivery
Scope of delivery 1 Laser distance measurer 2 1.5 V-batteries LR03 (AAA) 1 Instructions for use Technical data Measurement range: 0.075–20 m* (reference point top side) 0.175–20 m* (reference point bottom side) Measuring accuracy (typical): ± 3,0 mm Smallest display unit: 1 mm Operating temperature: 0 °–40 °C (For indoor use) -
Page 36: General Safety Instructions
General safety instructions Choking hazard! Packaging material (e. g. foils or polystyrol) are not to be toyed with. Keep children away from packaging material. The packaging material is not a toy. Do not use the product in locations where there is a risk of fi re or explosion, e.g. -
Page 37: Safety Instructions For Batteries / Rechargeable Batteries
EN 60825-1:2014 CAUTION LASER RADIATION! DO NOT STARE INTO BEAM! CLASS 2 LASER PRODUCT! Never look directly into the laser beam or into the opening from which it emerges. Looking at a laser beam through optical instruments (e.g. magnifying glasses etc.) can cause eye injuries. - Page 38 Do not exert mechanical loads to batteries / rechargeable batteries. Risk of leakage of batteries / rechargeable batteries Avoid extreme environmental conditions and temperatures, which could affect batteries / rechargeable batteries, e.g. radiators / direct sunlight. Avoid contact with the skin, eyes and mucous membranes. In the event of contact with battery acid, thoroughly flush the affected area with plenty of clean water and seek immediate medical attention.
-
Page 39: Before Using
Before using Check the consignment for completeness and for signs of visible damage. Remove all packaging material from the product. Inserting / replacing the batteries When the low battery icon appears in the display , you can still make measurements. As soon as the battery icon turns empty , however, you must replace the batteries. -
Page 40: Selecting The Unit Of Length
To Switch Measuring Reference point: Press and hold MEAS button 3 seconds to change measurement base from the top side of the product to its bottom side or vice versa. Selecting the unit of length During the OFF mode Press and hold the MEAS button until the number with unit is displayed. -
Page 41: Error, Faults & Troubleshooting
If needed to measure another distance, repeat above steps. Newly measured value will be shown on the bottom line of the display and the previous measured value will be shown in the middle of the display. Now, the laser beam will be turned off. -
Page 42: Storage
serious contamination, remove the dirt with a damp cotton swab. Do not exert any strong pressure! Never use petrol, solvents or cleaning agents that attack plastic. The product should only be opened by a qualified person for repairs. To clean the casing, use a soft dry cloth. Keep the product clean to ensure fault-free operation. -
Page 43: Warranty
Contact your local refuse disposal authority for more details of how to dispose of your worn-out product. To help protect the environment, please dispose of the product properly when it has reached the end of its useful life and not in the household waste. Informa- tion on collection points and their opening hours can be obtained from your local authority. - Page 44 The warranty for this product is 3 years from the date of purchase. Should this product show any fault in materials or manufacture within 3 years from the date of purchase, we will repair or re- place it – at our choice – free of charge to you. The warranty period begins on the date of purchase.
- Page 45 Legende der verwendeten Piktogramme ............Seite 47 Einleitung ..............Seite 47 Bestimmungsgemäße Verwendung ......Seite 48 Teilebeschreibung ............Seite 48 Lieferumfang ..............Seite 49 Technische Daten ............Seite 49 Allgemeine Sicherheitshinweise ..Seite 50 Sicherheitshinweise für Batterien / Akkus ....Seite 52 Vor der Inbetriebnahme Batterien einsetzen / austauschen ......Seite 53 Inbetriebnahme ..........Seite 54 Ein- / Ausschalten............Seite 54...
-
Page 46: Legende Der Verwendeten Piktogramme
Schutzhandschuhe tragen! Achtung! Schützen Sie sich vor Laserstrahlung! Nicht in den Laserstrahl blicken! Laser-Entfernungsmesser 20 m PLEM 20 A1 Einleitung Wir beglückwünschen Sie zum Kauf Ihres neuen Produkts. Sie haben sich damit für ein hochwertiges Produkt entschieden. Die Bedienungsanleitung ist Teil dieses Produkts. Sie enthält wichtige Hinweise für Sicherheit, Gebrauch und Entsorgung. -
Page 47: Bestimmungsgemäße Verwendung
Bestimmungsgemäße Verwendung Das Produkt eignet sich zum Messen von Entfernungen, Längen, Höhen, Abständen. Jede andere Verwendung oder Veränderung des Produkts gilt als nicht bestimmungsgemäß und birgt erhebliche Unfallgefahren. Für aus bestimmungswidriger Verwendung ent- standene Schäden übernimmt der Hersteller keine Haftung. Nicht für den gewerblichen Einsatz bestimmt. -
Page 48: Lieferumfang
Hinweis: Erster (vorheriger) Messwert wird in der Mitte angezeigt, nachdem der zweite (neue) Messwert erfolgreich ermittelt wurde. Lieferumfang 1 Laser-Entfernungsmessgerät 2 1,5 V-Batterien Typ LR03 (AAA) 1 Bedienungsanleitung Technische Daten Messbereich: 0,075–20 m* (Ausgangspunkt Oberkante) 0,175–20 m* (Ausgangspunkt Unterkante) Messgenauigkeit (typisch): ± 3,0 mm Kleinste Anzeigeneinheit: 1 mm Betriebstemperatur:... -
Page 49: Allgemeine Sicherheitshinweise
spiegelnd) und je heller der Laserpunkt gegenüber der Umgebungshelligkeit ist (Innenräume, Dämmerung). **) Bei ungünstigen Bedingungen wie z. B. starker Sonnenein- strahlung oder schlecht reflektierender Oberfläche beträgt die maximale Abweichung ± 8 mm auf 20 m. Bei günstigen Bedin- gungen ist mit einem Einfluss von ± 0,1 mm / m zu rechnen. Allgemeine Sicherheitshinweise Erstickungsgefahr! Verpackungsmaterialien (z. - Page 50 längere Zeit im Auto liegen. Lassen Sie das Produkt bei größeren Temperaturschwankungen erst austemperieren, bevor Sie es in Betrieb nehmen. Bei extremen Temperaturen oder Temperaturschwankungen kann die Präzision des Produkts beeinträchtigt werden. Vermeiden Sie heftige Stöße oder Stürze des Produkts. Schützen Sie sich vor Laserstrahlung! EN 60825-1:2014...
-
Page 51: Sicherheitshinweise Für Batterien / Akkus
Sicherheitshinweise für Batterien / Akkus LEBENSGEFAHR! Halten Sie Batterien / Akkus außer Reichweite von Kindern. Suchen Sie im Falle eines Ver- schluckens sofort einen Arzt auf! EXPLOSIONSGEFAHR! Laden Sie nicht auf- ladbare Batterien niemals wieder auf. Schließen Sie Batterien / Akkus nicht kurz und / oder öffnen Sie diese nicht. -
Page 52: Vor Der Inbetriebnahme
Entfernen Sie die Batterien / Akkus, wenn das Produkt längere Zeit nicht verwendet wird. Risiko der Beschädigung des Produkts Verwenden Sie ausschließlich den angegebenen Batterie- typ / Akkutyp! Setzen Sie Batterien / Akkus gemäß der Polaritätskennzeich- nung (+) und (-) an Batterie / Akku und des Produkts ein. Reinigen Sie Kontakte an Batterie / Akku und im Batteriefach vor dem Einlegen! Entfernen Sie erschöpfte Batterien / Akkus umgehend aus... -
Page 53: Inbetriebnahme
Legen Sie die (neuen) Batterien ein. Achten Sie auf die richtige Polarität entsprechend der Darstellung auf der Innenseite des Batteriefachs Schließen Sie den Batteriefachdeckel wie gezeigt (Abb. A). Inbetriebnahme Ein- / Ausschalten Drücken Sie zum Einschalten des Produkts die MEAS-Taste . -
Page 54: Messen Von Längen
Um die Auswahl zu bestätigen, drücken und halten Sie die MEAS-Taste , bis sich das Produkt einschaltet. Die folgenden Längeneinheiten stehen zur Auswahl: m Meter in Zoll Fuß ' " Fuß / Zoll Messen von Längen Drücken Sie die MEAS-Taste kurz ein weiteres Mal, um den Laserstrahl zu aktivieren. -
Page 55: Fehler, Störungen & Fehlerbehebung
Fehler, Störungen & Fehlerbehebung Problem Ursache Lösung ----- Berechnungsfehler Beachten Sie den zulässigen Messbereich. Umgebungstemperatur Beachten Sie die zu- zu gering oder zu hoch lässigen Umgebungs- temperaturen (0°–40°C). Gerätefehler Wenn das Symbol auch nach mehr- fachem Ein- und Ausschalten noch er- scheint, bringen Sie das Produkt zu einer Fachwerkstatt. -
Page 56: Lagerung
Das Produkt darf zu Reparaturzwecken nur von einer Fachkraft geöffnet werden. Verwenden Sie zum Reinigen des Gehäuses ein trockenes Tuch. Reinigen Sie das Produkt regelmäßig, im Idealfall nach jedem Gebrauch. Lagerung Sollten Sie das Produkt längere Zeit nicht benutzen, entnehmen Sie die Batterien und lagern Sie diese an einem sauberen, trockenen Ort ohne direkte Sonneneinstrahlung. -
Page 57: Garantie
Möglichkeiten zur Entsorgung des ausgedienten Produkts erfahren Sie bei Ihrer Gemeinde- oder Stadtverwaltung. Werfen Sie Ihr Produkt, wenn es ausgedient hat, im Interesse des Umweltschutzes nicht in den Hausmüll, sondern führen Sie es einer fachgerechten Entsorgung zu. Über Sammelstellen und deren Öffnungszeiten können Sie sich bei Ihrer zuständigen Verwaltung informieren. - Page 58 werden durch unsere im Folgenden dargestellte Garantie nicht eingeschränkt. Sie erhalten auf dieses Produkt 3 Jahre Garantie ab Kaufdatum. Die Garantiefrist beginnt mit dem Kaufdatum. Bitte bewahren Sie den Original-Kassenbon gut auf. Diese Unterlage wird als Nachweis für den Kauf benötigt. Tritt innerhalb von 3 Jahren ab dem Kaufdatum dieses Produkts ein Material- oder Fabrikationsfehler auf, wird das Produkt von uns –...
- Page 59 OWIM GmbH & Co. KG Stiftsbergstraße 1 DE-74167 Neckarsulm GERMANY Model-No.: HG02734 Version: 07 / 2017 Estado de las informaciones · Estado das informações Last Information Update · Stand der Informationen: 09 / 2017 · Ident.-No.: HG02734092017-ES / PT IAN 289679...
Need help?
Do you have a question about the PLEM 20 A1 and is the answer not in the manual?
Questions and answers