Mooer GE300 Owner's Manual
Amp modelling & synth & multi effects
Hide thumbs
Also See for GE300:
- Owner's manual (91 pages) ,
- Quick start manual (53 pages) ,
- How to use manual (30 pages)
Table of Contents
Advertisement
Quick Links
Advertisement
Table of Contents

Related Manuals for Mooer GE300


Summary of Contents for Mooer GE300
- Page 1 Amp modelling & Synth & Multi Effects...
-
Page 2: Table Of Contents
Contents Precautions Main Features Top Panel 03-04 Back Panel 05-06 Home Display 07-08 Footswitch Modes 09-10 CTRL Footswitches Recommended Setups 12-15 Effects Blocks 16-18 19-22 SYNTH 23-24 COMP 25-27 FXA / FXB 28-30 DS/OD 32-35 36-37 TONE CAP 40-51 53-57 FX LOOP 58-59 DELAY... - Page 3 SYSTEM Input Output 66-67 USB AUDIO 68-81 MIDI FS COLOR SCREEN RESET SAVE PRESET 86-90 TUNER LOOPER Firmware Update 93-94 SPECILICATIONS 95-96...
-
Page 4: Precautions
Precautions *Please read carefully before proceeding* Power Supply Please connect the designated AC adapter to an AC outlet of the correct voltage. Please be sure to use only an AC adapter which supplies 9V DC , 3A , center negative. Unplug the AC power adapter when not in use or during electrical storms. Please only use the original power supply included with your device. -
Page 5: Main Features
● Direct, low latency USB audio lets GE300 double up as a digital audio interface and become a ‘one-stop-shop’ solution for recording guitar. ● 30 minute stereo loop station with undo/redo, direct dubbing, reverse + ½ time effects. Looper sessions can be stored and backed up for import/export of audio files. -
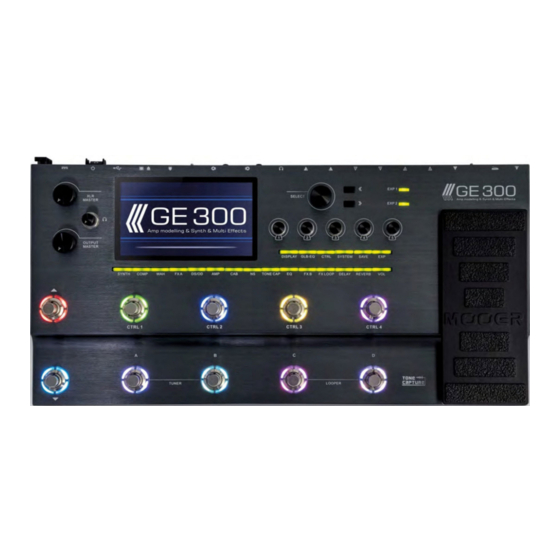
Page 6: Top Panel
Top Panel 04 05... - Page 7 Top Panel MASTER Independent volume controls for XLR, headphones and 1/4” jack outputs LCD screen 5-inch TFT monitor displays the GUI 1 – 5 Adjust individual parameters in the GUI SELECT Rotate / Press to make selections within the GUI <<...
-
Page 8: Back Panel
Back Panel... -
Page 9: Back Panel
L + R = STEREO output USB Type-B Connect to computer to record direct digital audio Interface with official MOOER software to edit and import/export presets Update firmware Cable tidy Loop the cable from your power supply to avoid accidental disconnection... -
Page 10: Home Display
Home Display GE300 has 2 main home displays. FOOTSWITCH DISPLAY and SIGNAL CHAIN DISPLAY Press the DISPLAY button at any time to return home Press the DISPLAY button again to toggle between the 2 home displays FOOTSWITCH DISPLAY This display is ideal for use during live performance. It displays various information about the current preset, in/out levels and footswitch functions... -
Page 11: Home Display
SIGNAL CHAIN DISPLAY GE300 has a customizable signal chain. In this HOME DISPLAY you can edit the order of your effects blocks and rearrange the SEND/RETURN, XLR OUT and master OUTPUT. EDIT CURSOR < SELECTION > Rotate the SELECT control knob to highlight effect block <... -
Page 12: Footswitch Modes
Footswitch Modes GE300 has two control schemes designed to cater for different users and allow personal customization of the footswitches. The Footswitch modes can be changed by going to SYSTEM > FS MODE. V1.0.0 SYSTEM INPUT OUTPUT USB AUDIO FS MODE... - Page 13 MODE 2 MODE 2 is designed for the user who wants instant access to more programmable CTRL footswitches within each preset. This is great for controlling the GE300 like a traditional pedalboard. OUTPUT INPUT EXP: SYNTH Pitch 1 V1.0. 0...
-
Page 14: Ctrl Footswitches
CTRL Footswitches The CTRL function in the GE300 allows users to completely customize the layout and function of their footswitches. Depending on which FOOTSWITCH MODE is selected, you can get instant access to either 4 or 8 CTRL footswitches within each preset. -
Page 15: Recommended Setups
Recommended Setups GE300 has many ways it can be used and many different rig scenarios it can be integrated into, thanks to the flexible I/O routing, multiple connection types and integrated effects loop. Here’s a few of our recommended setup solutions DI/BACKLINE (Digital Amp + Cab modelling) Thanks to the multiple output types, it’s incredibly easy to use both DI and backline rigs independently or simultaneously. - Page 16 If connecting DI to a full-range system via XLR and to a power amp + traditional guitar speaker via the jack OUTPUT simultaneously, put the CAB module last in your signal chain and route the OUTPUT before the CAB module. OUTPUT INPUT EXP1:SYNTH Pitch 1 XLROUT BPM 120 EXP2:SYNTH Pitch 1 UTPUT MOOER GE300 SYNTH COMP FX A DS/OD REVERB DELAY FX B TONE CAP 1/4' Output...
- Page 17 Connect the SEND from GE300 to the INPUT of your outboard effects, then connect the OUTPUT of your outboard effects to the RETURN of the GE300.
- Page 18 4 Cable Method (effects only) The GE300 can be connected up to your favourite guitar amplifier utilizing the 4 cable method (4CM). This will allow the GE300 to be used very effectively as an all-in-one pedalboard without any digital amp or cab modelling.
-
Page 19: Effects Blocks
EFFECTS BLOCKS All of the different effects algorithms and amp models in GE300 are grouped into categories called effects blocks. GE300 has 15 effects blocks in total and each effects block has a dedicated easy access button right on the front panel of the unit. -
Page 20: Synth
Routing effects blocks Effects blocks can be moved within the signal chain. Press the DISPLAY button until the signal chain screen is displayed. INPUT OUTPUT EXP1:A Gain XLROUT BPM 120 EXP2: Master UTPUT Dream Lead DS/OD SYNTH COMP FX A REVERB DELAY FX B... - Page 21 Note the Every effect block in GE300 (Except SYNTH. See SYNTH for more details) can be moved around to different positions in the signal chain just like changing the order of your effects pedals on a real pedalboard. Try experimenting with sound by...
- Page 22 SYNTH GE300 comes complete with a tri-voice polyphonic synthesis engine which can quickly and accurately track the notes from your instrument and transform them into classic synth sounds. OUTPUT INPUT EXP1: MERGE XLROUT BPM 108 EXP2: SYNTH Pitch 1 -23.8...
- Page 23 Voice Parameters Explanation Parameter Value Apply a filter to the synth voice. Filter LP – Low Pass Off, Lp, Hp, Bp, Pk. BP – Band Pass HP – High Pass PK - Peak Filter control mode and Mode parameter. Mode Static –...
- Page 24 -12.0 SYNTH ENGINE needs to track your instrument signal directly from the INPUT of GE300 to work correctly. So it must remain the first effect block in the preset signal chain and cannot be moved. However, the output of the SYNTH effect block can be routed anywhere in the signal chain, this is what the “Effect out port to”...
- Page 25 SYNTH SIGNAL PATH As you can see from the diagram, SYNTH ENGINE has 3 independent voices with their own parameters for waveform, pitch, attack, level, filter and arpeggiator. The signal path from the instrument input is split and routed directly to the front of each synth voice so they remain completely parallel and independent from one and other.
-
Page 26: Comp
COMP GE300 comes complete with 10 different models of compressor, spanning from super simple 2 knob stompboxes to advanced 3-band studio compressors. This assures there’s a compression model here which is suited for you. Explanation Numbers Name S-Comp 2 knob stompbox compressor. -
Page 27: Comp
Compressor parameters Explanation Parameter Value Sensitivity 0-100 Adjusts compression amout,0 is equal to no compression. Threshold -60.0dB – 0dB The threshold control sets the level at which the compression effect is engaged. Ratio 1.0 : 1 – 10.0 : 1 the amount of attenuation to be applied to the signal. -
Page 28: Wah
The GE300 has 10 different models of wah effects including classic and modern wah pedals, completely customizable rack style units, talk wahs, modulation, and envelope controlled auto wahs. Explanation Numbers Name Cry Wah Modelled after a GCB95 535 Wah Modelled after a modern 535q 846 Wah Modelled after a hand wired 60’s classic with Halo inductor... - Page 29 Wah parameters Explanation Parameter Value The position of the wah in it’s pedal sweep. 0 is equal to heel down, 100 is equal to toe down. *Notes: If you want to use the EXP pedal to control the wah sweep, assign “WAH > Position” Position 0-100 as the function in the EXP menu.
- Page 30 Touch Wah parameters Touch wah is an automatic sweeping band pass filter. The sweep is controlled by an envelope filter that reacts to the dynamics of your instrument. Explanation Parameter Value Attack Speed of the envelope. 100 is the fastest. 0-100 Sens Sensitivity of the envelope.
-
Page 31: Fxa / Fxb
Studio EQ Slow Gear Auto volume swell Adds a note one octave lower or higher Octave Phaser Based on the MOOER® NINETY ORANGE Square wave phase shifter Step Phaser Fat Phaser Low frequency phase shifter 6 Stage Analog Phaser Six stage phase shifter... - Page 32 FX Parameters Parameter Value Explanation -12dB – 12dB Adjusts the tone for the low frequency range. Low Mid Adjusts the tone for the low-middle frequency range. -12dB – 12dB Adjusts the tone for the Middle frequency range. -12dB – 12dB High Mid Adjusts the tone for the high-middle frequency range.
- Page 33 Sweep ( 6 Stage Analog Phaser, Moves the frequency response pattern through a six-octave or twelve-octave range. 0 - 100 12 Stage Analog Phaser) Resonance Changes the height and sharpness of the frequency response peaks. ( 6 Stage Analog Phaser, 0 - 100 12 Stage Analog Phaser) Feedback...
-
Page 34: Ds/Od
DS/OD GE300 has 31 different “gain based” Stompbox effects including distortions, overdrives, fuzz’s and boosters. Each one has been fastidiously modelled after a real-life pedal using similar techniques we employ to create our digital amplifier models. Explanation Numbers Name Based on B.K. Butler Tubedrive. -
Page 35: Amp
Ge300 has 108 digital amp models that utilize MOOER’s non-linear amp modelling technology. Each model has been designed based on samples taken directly from real-life tube amplifiers. Explanation Numbers Name US Blues JR Based on Fender Blues Junior ® ®... - Page 36 Explanation Numbers Name ® Eagle FB CH1 Based on ENGL Fireball 100 Clean Channel ® Eagle FB CH2 Based on ENGL Fireball 100 Distortion Channel ® Powerbell CL Based on ENGL E645 Clean Channel ® Powerbell DS Based on ENGL E645 Distortion Channel Blacknight CL Based on ENGL E650 Blackmore signature model Clean Channel ®...
- Page 37 Explanation Numbers Name ® Randy Devil CL Based on Randal Satan Clean Channel ® Randy Devil DS Based on Randall Satan Distortion Channel ® SLOW 100 CR Based on Soldano SLO-100 Crunch Channel ® SLOW 100 DS Based on Soldano SLO-100 Distortion Channel JET 100H CL Based on Jet City JCA100H Clean Channel ®...
- Page 38 Parameter Value Explanation Adjusts the input gain and preamp drive 0 - 100 Gain Adjusts the low frequency levels 0 - 100 Bass Adjusts the middle frequency levels 0 - 100 Adjusts the high frequency levels 0 - 100 Treble Each Amp model has 2 different modes Original: True recreation of the original amplifier Mode...
-
Page 39: Cab
GE300 comes from the factory with 43 pre-loaded speaker cabinet simulations which are non-linear algorithms derived from Impulse Response samples of real-life ® speaker cabinets. Each cab sim model has dual microphones with independent mic type, centre and distance parameters plus a progressive balance mix control. - Page 40 Shittcow 412 Based on VHT 412 Cabinet Acoustic 112 ® Based on MOOER 112 Acoustic Cabinet 44 - 63 Empty 3 Impulse Responses slots *NOTES: All product names belong to their owners and are only used in this product and manual as a reference to tone types.
- Page 41 The GE300 CAB module also has 20 empty model slots for you to load in your own 3rd party Impulse Responses via USB using the Studio for GE300 computer software. OUTPUT INPUT EXP1:REVERB Decay XLROUT BPM 120 EXP2:SYNTH Pitch 1...
- Page 42 has 3 different noise gate models which are ideal for getting rid of unwanted noise or using as a hard gate effect for tight, high gain rhythm playing. Name Numbers Explanation Noise Killer Hard noise gate with maximum damping Intel Reducer Intelligent background noise suppressor with automatic attack, release and damping Noise Gate Standard studio noise gate with detailed user controls...
-
Page 43: Tone Cap
TONE CAP Tone Capture is an intelligent learning and comparison engine that can be used to create your very own digital models by sampling real-life equipment. Tone capture has 3 different modes GUIT Instantly transform the sound of your guitar using samples you’ve created in tone capture GUIT mode. Sample and carry all your favourite guitars with you wherever you go. - Page 44 “4-position”, tight thrashing djent, Piezo electro- acoustic and much, much more. TONE CAPTURE GUIT mode can sample any guitar, provided it has some form of pickup, and create a detailed digital GUIT model using MOOER’s proprietary non- linear IR technology.
- Page 45 Capture Capture Connect the Guitar you wish to sample for the tone capture to the GE300’s INPUT This is known as the TARGET guitar Press footswitch A to begin the capture process and play the guitar until the countdown reaches 100%.
- Page 46 STEP 5 OUTPUT INPUT EXP1:SYNTH Pitch 1 XLROUT BPM 120.0 EXP2:SYNTH Pitch 1 Learning: Guit 01:Null High Output Target Source Active Capture Capture Press footswitch C to activate the tone capture Use control knobs 1-4 to adjust EQ and output volume to dial in the tone capture to your liking STEP 6 The tone capture has automatically been saved and named USER Select the Pencil icon...
- Page 47 First decide if you will capture a Stompbox or an amp. Connect the send of GE300 to the input of your Stompbox or amp Connect the return of GE300 to the output of your Stompbox or the send of your amp’s effects loop. STOMPBOX...
- Page 48 Input WARNING do not connect the speaker out of any amplifier to your GE300. This can result in damage to both your GE300 and your amplifier. Never operate your amplifier without a speaker or speaker load of the correct impedance connected to the amplifier’s speaker out...
- Page 49 TARGET as closely as possible Notes: 1.You need to adjust the stompbox or amp gain/drive in GE300 in order to match the target( you want to sample)’s gain/drive before capturing. For the best result, similar gain/drive and volume settings are necessary. For example, if you capture a lead channel amp with a clean amp model in the GE300, the result will be a clean sound.
- Page 50 STEP 5 Press footswitch C to begin the capture process and play the guitar until the countdown reaches 100%. For best results, we recommend playing the guitar strongly with an open chord first, then playing all the notes in your guitar across the full range of the instrument as much as possible. OUTPUT INPUT EXP1:SYNTH...
- Page 51 STEP 7 The tone capture has automatically been saved and named USER Select the Pencil icon enter a new name for the preset and press the SAVE button to confirm OUTPUT INPUT EXP1:SYNTH Pitch 1 XLROUT BPM 120.0 EXP2:SYNTH Pitch 1 User A B C D E F G H I J K L M N O P Q R S T U V W S Y Z a b c d e f g h i j k l m n o p q r s t u v w s y z...
- Page 52 Please note that all of the above elements will be part of the tone capture and will flavour the IR. Varying each of these elements for different models will yield different end results. STEP 1 Connect the GE300 SEND to the power amp input (you could also Connect the GE300 RETURN to the output of your MIC PREAMP Poweramp...
- Page 53 (AMP > send > CAB > return > TONE CAP) Turn the FX LOOP on or off to compare the real mic setup volume with the CAB. In the GE300, it is recommended to set it up at the same volume.
- Page 54 STEP 3 Press footswitch A to begin the capture process and wait until the countdown reaches 100% INPUT OUTPUT EXP1:SYNTH Pitch 1 XLROUT BPM 120.0 EXP2:SYNTH Pitch 1 Learning: IR 01:Null High Output Capture Active STEP 4 Press footswitch B to activate the new IR you have captured Use control knobs 1-4 to adjust EQ and output volume to dial in the Tone Capture to your preferences.
- Page 55 The EQ effects block of the GE300 has 8 different algorithm models which span from simple 3-band, 5-band, 6-band and 10-band equalizers with pre-set frequencies. Custom 3-band and fully customizable parametric EQ’s are recommend for advanced users. Name Explanation Numbers...
- Page 56 FX LOOP The FX LOOP of GE300 can be used to integrate your favourite external effects and preamps into the GE300 signal chain, or to integrate GE300 into creative and complex rig setups. We’ve included a few examples here but there are many possibilities.
- Page 57 Add an overdrive pedal It’s extremely easy to integrate your favourite Stompbox, rack effect or preamp pedal into the GE300 signal chain. DS/OD Output Input OUTPUT INPUT EXP1:SYNTH Pitch 1 OUTPUT INPUT EXP1:SYNTH Pitch 1 XLROUT XLROUT BPM 120 EXP2:SYNTH Pitch 1 BPM 120.0...
- Page 58 Add a stereo pedal In this example we’ve connected a stereo reverb pedal with it’s mix control set to fully wet Effect Pedal Output Input OUTPUT INPUT EXP1:SYNTH Pitch 1 XLROUT BPM 120 EXP2:SYNTH Pitch 1 Fx Loop -3.0dB Serial Mono Send Level Return Level...
- Page 59 In this example we’ve connected a tube amp into the FX LOOP with the intention to A/B it with the AMP effect block in the GE300 signal chain AMP Head Send Input or PA/Nonitor AMP Return GUITAR Notes: If you are using a PA / Monitor, please do not forget to turn on the CAB module; If you send the signal back to AMP RETURN, please turn off the CAB module.
-
Page 60: Fx Loop
OUTPUT INPUT EXP1:SYNTH Pitch 1 XLROUT BPM 120.0 EXP2:SYNTH Pitch 1 Empty SYNTH FX A DS/OD COMP FX A REVERB DELAY FX B TONE CAP Send Level Return Level Loop Mode Output Mode -3. 0dB Series Mono Notice that the LOOP MODE is set to serial and the send icon and return icon are before and after the AMP effects block in the signal chain. -
Page 61: Delay
DELAY The DELAY effects block of GE300 contains 14 different delay models including vintage tape, classic analog, retro digital and modern studio delay types providing something for everyone no matter what your flavour is. Explanation Numbers Name Digital Recreates the crystal-clear repeats of the 80’s delay units... -
Page 62: Delay
Parameter Explanation Value Feedback 0 - 100 Adjusts the number of delay repeats. 0 - 100 Adjusts the repeats volume level. 0 is total dry, 100 is total wet. 20ms – 2000ms Time / Sub-division Adjusts the delay repeat time in Milliseconds / Sets the delay repeat time in relation Tempo Sync On: to the preset tempo ( Tempo Sync On ) 1/4, 1/4D, 1/4T, 1/8,... -
Page 63: Reverb
REVERB The REVERB effects block of GE300 has 11 different reverb models including everything you need from vintage spring, subtle studio and immersive ambience. Numbers Name Explanation Room Small room reverb Concert hall reverb Hall Studio style plate reverb Plate Reverb with static filter effect... - Page 64 Parameter Explanation Value Pre Delay 0ms – 200ms Delay time before the first reflections can be heard. Decay Length of the reverb trails. 0 - 100 Low frequency EQ shelf. Off, 1Hz – 800Hz Low Cut High Cut Off, 20000Hz – 1000Hz High frequency EQ shelf Volume level of the reverb effect.
-
Page 65: Vol
The VOL effects block allows you to add a volume pedal anywhere you please within the signal chain of the GE300. When the VOL effects block is activated, the EXP 1 expression pedal will double up as a volume pedal when the EXP 1 LED is off. -
Page 66: Glb-Eq
GLB-EQ GLB-EQ is the global output EQ of the GE300. There is are individual global eq settings for each output of GE300 and this can be turned on or off at any time, irrespective of preset settings. This feature becomes very useful if using the GE300 to perform in live venues through varying different backline and front of house rigs. It allows you to quickly and easily compensate for the tonal qualities of your outboard gear or eliminate feedback without the need to edit each preset individually. -
Page 67: System
Different instruments output different signal levels. It’s important to match the input level of the GE300 to the output of your instrument to get the best performance out of the GE300. If the Input level of the GE300 is set too low then the dynamic range and response of the unit will be insufficient. If the input level of the GE300 is set too high then internal clipping and distortion can easily occur, which will degrade the overall sound. -
Page 68: Output
There are 4 different output modes which dictate what comes out of the left and right channels of the XLR Dry/Effect, and main OUTPUT. These settings are here to ensure GE300 is as flexible as possible for integration with Effect/Dry, all kinds of rig setups. -
Page 69: Usb Audio
USB AUDIO The USB port of GE300 can be connected to your computer and used to record fantastic guitar tones directly to your Digital Audio Workstation (DAW) without the need of a dedicated audio interface device. You can use your favourite headphones or powered studio monitors connected directly to the GE300 outputs. - Page 70 In RE-AMP mode, you can send audio tracks from your computer to be processed and have effects added by the GE300. For example, a non-processed guitar track could be played through the GE300 and have amp models and cabs added. A keyboard track could be played through the GE300 and have reverb added.
-
Page 71: Midi
CHANNEL – Select the MIDI channel that GE300 is receiving and listening to via the MIDI IN SYNC MIDI CLOCK- When turned ON, GE300 will synchronize its preset tempo with the incoming MIDI clock signal CC REFERENCE – Displays a table which shows the fixed CC mapping for remote control of GE300 parameter values via MIDI... -
Page 72: Midi
AMP ON/OFF 0-127 CAB ON/OFF 0-127 PC MAPPING- MIDI IN PC MAPPING allows you to customize which preset is selected on GE300 when it receives a PC message from an external device via the MIDI IN. V1.1.0 MIDI PATCH MIDI BANK... - Page 73 MIDI OUT – GE300 will transmit MIDI messages from the MIDI OUT port MIDI THRU- GE300 will allow MIDI messages to pass through from the MIDI IN port to the MIDI OUT port. This is useful when chaining multiple devices together and controlling them all from one master control device.
- Page 74 CC# Control Change Map STOP 0 - 127 Parameter Explanation Value CLEAR 0 - 127 0 - 127 UNDO / REDO MIDI BANK SELECT 0 - 1 0 - 127 REVERSE 0 - 127 SYNTH ON/OFF 1/2 SPEED 0 - 127 COMP ON/OFF 0 - 127 EXP1 ON/OFF...
- Page 75 PC# Program Change RX Receive Map Patch Midi Bank...
- Page 76 PC# Program Change RX Receive Map...
- Page 77 PC# Program Change RX Receive Map...
- Page 78 PC# Program Change RX Receive Map...
- Page 79 PC# Program Change RX Receive Map...
- Page 80 PC# Program Change RX Receive Map...
- Page 81 PC# Program Change TX Transmit Map PC# Program Change TX Transmit Map Patch . > / > 0> 1> 2> 3>...
- Page 82 PC# Program Change TX Transmit Map...
- Page 83 PC# Program Change TX Transmit Map...
- Page 84 PC# Program Change TX Transmit Map...
-
Page 85: Fs Color
FS COLOR GE300 can be assigned 7 different footswitch colors for any footswitch function. This FS COLOR page is for Preset and Looper function color definition. Enter FS COLOR page, use 1-5 knobs to assign your favourite color. FS COLOR V1.1.0... -
Page 86: Tap
Select how the TAP TEMPO works when a preset is selected. V1.1.0 Preset Global PRESET- The tap tempo is decided by the preset GLOBAL- Master tap tempo that overrides presets individual tap tempo OUTPUT INPUT XLROUT Notes: The BPM (Beat Per Minute) will show on main screen . -
Page 87: Screen
SCREEN LIGHT Rotate control knob 1 to adjust the display screen brightness RESET V1.1.0 SYSTEM Reset The Ge300 and Restore All Parameters? Select YES to RESET GE300 back to default firmware settings Select NO to cancel and exit the menu... -
Page 88: Save Preset
SAVE PRESET To save your preset, press the SAVE button. SAVE Us Deluxe A B C D E F G H I J K L M N O P Q R S T U V W S Y Z a b c d e f g h i j k l m n o p q r s t u v w s y z 1 2 3 4 5 6 7 8 9 0 _ Use control knobs 1-5 to edit characters. -
Page 89: Exp
GE300 parameters can be controlled on the fly using the built-in expression pedal (EXP 1) and/or an external expression pedal (EXP2). Calibrate It’s important to calibrate the expression pedal before setting functions Press the EXP button to enter the expression pedal edit screen... - Page 90 EXP > EXP 1 > Function In the EXP function screen you can assign the EXP pedal to control a single parameter of any effects block within your GE300 preset. With EXP 1 You can also choose to turn the effect block on/off using the toe down switch.
- Page 91 MERGE GE300 has a very exciting function named MERGE. MERGE allows you to simultaneously control any parameters, from any effects block, between any end points, in any direction, using an expression pedal. Press the EXP button, select an EXP pedal, select MERGE If using EXP 1 make sure the toe down switch has been activated and the EXP 1 LED is illuminated.
- Page 92 EXT CTRL (external control) The EXP 2 input of the GE300 can be used as an analog switch for controlling external devices, if the external device supports such a function. For example, many amplifiers have the option to switch channels using an analog footswitch.
- Page 93 Notes: 1. Connect EXT CTRL only to amplifiers that utilize "short-to-sleeve" footswitch inputs. Connecting to any other sort of input could cause permanent damage to both your amp and GE300! If you're not sure if your amp has short-to-sleeve inputs, contact the manufacturer.
-
Page 94: Tuner
TUNER GE300 has a built-in chromatic tuner to help you ensure you’re always in tune during a performance. Press footswitches A + B simultaneously to enter/exit the TUNER TUNER MUTE A=440Hz 1. Use control knob 1 to Select between- MUTE – Silent tuning BYPASS- Full sound whilst tuning 2. -
Page 95: Looper
LOOPER has a fully integrated loop station with up to 30 minutes of loop time. Press footswitches C + D simultaneously to enter/exit the LOOPER. INPUT CLIP OUTPUT CLIP EXP1:MERGE — EXP2:SYNTH Pitch1 LOOPER REC VOL :50 TIME:0.0 PLAY VOL:50 EXIT UNDO REVERSE... -
Page 96: Firmware Update
Firmware Update Connect the power supply while holding footswitch B & D and turn on the GE300. It will boot to Update Mode. Connect via USB to your Windows or MAC computer, then open the application... - Page 97 Press START to update the firmware. Do not disconnect the power to the GE300 or shut down the application while updating! GE 300 Amp modelling & Synth & Multi Effects LEAD GUITAR After the update is successful, it will automatically restart and show the latest version of the firmware.
-
Page 98: Specilications
SPECILICATIONS NO . of Effect Blocks Output NO . of Effect Types 1/4” unbalanced mono Type audio jack Patches 256 ( Preset ) 470 ohm Impedance IR Loading 20 slots Algorithm +12 dBu Maximum Output Level IR Format .wav IR Sampling Rate 44.1kHz(Full Sampling rate supported)... - Page 99 MIDI MIDI IN / OUT (THRU) 5 Pin Female Connector Type USB Type B USB 2.0, 2 IN 2 OUT, USB Audio 44.1kHz, 24bit EXP2 External Expression Jack Pui fst Others Type 1/4” TRS jack Impedance 10k – 100k ohm DC 9V, 3A, Power Supply Dimensions...
- Page 100 SHENZHEN MOOER AUDIO CO. LTD 6F, Unit D, Jinghang Building, Liuxian 3rd Road, Bao’an 71 District, Shenzhen, China. 518133...
Need help?
Do you have a question about the GE300 and is the answer not in the manual?
Questions and answers
piano effect