
Subscribe to Our Youtube Channel
Summary of Contents for Elma Modulgrav
- Page 1 Exit OPERATING INSTRUCTIONS Kolpingstraße 1-7 D-78224 Singen / Htwl. Postfach 280 D-78224 Singen / Htwl. Tel. +49 (0) 7731 882-0 Fax +49 (0) 7731 882 266 e-mail: info@elma-ultrasonic.com homepage: www.elma-ultrasonic.com...
-
Page 2: Table Of Contents
4 Technical Specifications page 5 Use and Operation page 8 Step By Step Instructions page 10 Proper Care page 22 Maintenance / Service page 22 Troubleshooting page 23 Spare Parts List page 24 Responsibility of Manufacturer page 24 mbC:\DB-pdf\BedAnl\Modulgrav\-GB-300102.doc... -
Page 3: General Information
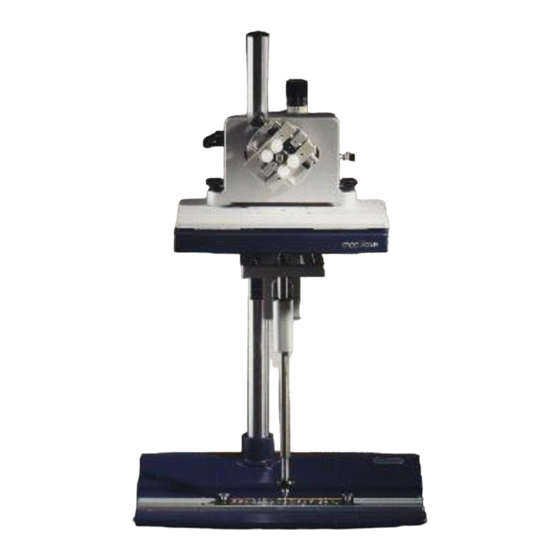
Quality from Tradition; Technology of Tomorrow General Information This engraving device of the type Modulgrav was manufactured in Germany by using high- quality material and state-of-the-art technology and was thoroughly tested before being shipped out. ATTENTION: The operating staff must have access to these operating instructions at any time. -
Page 4: Safety Instructions
Please check the device for possible transportation damage. Such damage cannot always be detected by looking at the shipping box. If the device shows any damage, please contact Elma to clarify claims settlements. Remove all safety devices which were necessary for transportation. -
Page 5: Technical Specifications
Distance between table and 175 mm top diamond position: Distance between short clamping device 115 mm and top diamond position: Distance between long clamping device 85 mm and top diamond position: Dimensions: 250 x 350 x 600 (depth x width x height) mbC:\DB-pdf\BedAnl\Modulgrav\-GB-300102.doc... - Page 6 12 mm Type expansion factors: Template model (height) Type adjustment Factor V 20 mm 7.5 mm 1.5 : 1 20 mm 0.8 mm 2.4 : 1 12 mm 4.9 mm 1.5 : 1 12 mm 1 mm 2.4 : 1 mbC:\DB-pdf\BedAnl\Modulgrav\-GB-300102.doc...
- Page 7 Quality from Tradition; Technology of Tomorrow Type Template – Areas Modulgrav 22.3.99 Maximum area on template rail: - 16 / +16 Type 0.8 Type 1.6 Type 2.7 Type 3.6 Type 4.6 Type 5.5 Type 6.5 area area area area area...
-
Page 8: Use And Operation
Before creating an engraved design, it is advisable to inspect the available space on the surface which will be engraved. To do this, trace the shape of the extreme values of the engraving template with the tracer without activating the mouse and observe the results underneath the engraving tool. mbC:\DB-pdf\BedAnl\Modulgrav\-GB-300102.doc... - Page 9 Please check whether you can use our settings, particularly when working with precious metals. Note regarding the use of expansion: If you use type or symbol models which excede the dimensions of the central template guide, the expansion lock must be moved from the upper to the lower bore. mbC:\DB-pdf\BedAnl\Modulgrav\-GB-300102.doc...
-
Page 10: Step By Step Instructions
ü Ring-Inside Engraving with Ring-Inside Module page 11 ü Ring-Outside Engraving with Ring-Outside Module page 13 ü Flat Engraving with Clamping Device page 15 ü Milling Engraving with Clamping Device page 17 ü Stretching Device – Mounting and Operating Instructions page 20 mbC:\DB-pdf\BedAnl\Modulgrav\-GB-300102.doc... - Page 11 Fix the limit stop (1) at the mark on the chisel holder (2) and lock with the srew. 4. Step Loosen clamping lever (1) at the type height adjustment and position fork (3) at the required type height (2) with thumb. Retighten clamping lever (1). mbC:\DB-pdf\BedAnl\Modulgrav\-GB-300102.doc...
- Page 12 (see table for suggestion). 9. Step Put tracer on first letter of word and start engraving. While tracing the letters, the lever of the mouse (1) must be activated. When replacing (2) the tracer, let go of the mouse lever. mbC:\DB-pdf\BedAnl\Modulgrav\-GB-300102.doc...
- Page 13 Quality from Tradition; Technology of Tomorrow Ring outside engravings with ring outside module 1. step Mount the module on the work surface of the Modulgrav. Tighten the two black fly nuts. 2. step Tighten the spanner on the side until stop (1) in the blue sections.
- Page 14 7. step Now push up the plastic arrow and start engraving. Please note: Choose your required size of engraving Adjust the engraving pressure to the material you work on. mbC:\DB-pdf\BedAnl\Modulgrav\-GB-300102.doc...
- Page 15 (1) on centering pin (2). If necessary, clamping devices must be adjusted with an angle tool. Lock clamping device by rotating it clockwise half a turn at black lever (3). Close grip jaws at clamping device by turning black control knob (4) (clockwise). mbC:\DB-pdf\BedAnl\Modulgrav\-GB-300102.doc...
- Page 16 If necessary, verify and correct: type height, position of template and position of clamping device. While tracing the letters, the lever of the mouse (1) must be activated. While replacing the tracer (2), let go of the mouse lever. mbC:\DB-pdf\BedAnl\Modulgrav\-GB-300102.doc...
- Page 17 Retighten clamping lever (1). 2. Step Loosen clamping lever at type height adjustment (1) and position fork to the required type height (2) with thumb (3). Retighten clamping lever (1). The reference height will be the underside of the fork (2). mbC:\DB-pdf\BedAnl\Modulgrav\-GB-300102.doc...
- Page 18 Check type range with the tracer (3), i.e. trace the shape of first and last letter and the middle part of the word. If necessary, verify and corrected: type height, position of template, miller position and position of the clamping device. mbC:\DB-pdf\BedAnl\Modulgrav\-GB-300102.doc...
- Page 19 Milling Speed). Put the tracer (2) on the first letter of the word and start milling. While tracing the letters, the mouse lever (1) must be activated. When replacing the tracer (2), let go of the mouse lever (1). mbC:\DB-pdf\BedAnl\Modulgrav\-GB-300102.doc...
- Page 20 Move the fork up as far as it will go. Put the guiding bushing aside (1). Remove the copying pin from the guiding bushing (2). Take the hinged fork off the guiding bushing (3). 3. Step Slide the stretching device onto the guiding bushing. mbC:\DB-pdf\BedAnl\Modulgrav\-GB-300102.doc...
- Page 21 To select the degree of letter stretching use the turning knob (1) and open the clamping lever (2). Move the stretching device into the required direction on the guiding bushing: Upper stop: no stretching Lower stop: maximum stretching After adjustment fix the stretching device. mbC:\DB-pdf\BedAnl\Modulgrav\-GB-300102.doc...
-
Page 22: Proper Care
No changes may be made to the settings of the linear guides. Performing changes to the linear guides will void your guarantee or warranty claim. If you require help from our technical support office, contact our service department in writing specifying the defect or problem in detail. mbC:\DB-pdf\BedAnl\Modulgrav\-GB-300102.doc... -
Page 23: Troubleshooting
(see table) Ring-Outside Engraving: see ring-inside engraving mbC:\DB-pdf\BedAnl\Modulgrav\-GB-300102.doc... -
Page 24: Spare Parts List
Elma, and if the device is used in compliance with the operating instructions. Device subject to technical changes!
Need help?
Do you have a question about the Modulgrav and is the answer not in the manual?
Questions and answers