Table of Contents
Advertisement
Advertisement
Table of Contents
Troubleshooting

Subscribe to Our Youtube Channel
Related Manuals for Freescale Semiconductor CodeWarrior TAP


Summary of Contents for Freescale Semiconductor CodeWarrior TAP
- Page 1 CodeWarrior TAP Probe User Guide Revised: 3 October 2012...
- Page 2 Semiconductor makes no warranty, representation or guarantee regarding the suitability of its products for any partic- ular purpose, nor does Freescale Semiconductor assume any liability arising out of the application or use of any product or circuit, and specifically disclaims any and all liability, including without limitation consequential or incidental dam- ages.
-
Page 3: Table Of Contents
1.1 What is CodeWarrior TAP Probe? ....... . . 5... - Page 4 Hardware Specifications 5.1 LEDs on CodeWarrior TAP Probe ....... .27 5.1.1 Transmit/Receive Indicator.
- Page 5 G.2 Troubleshooting Power Problems ....... . 72 Index CodeWarrior TAP Probe User Guide...
- Page 6 Table of Contents CodeWarrior TAP Probe User Guide...
-
Page 7: Introducing The Codewarrior Tap Probe
The CodeWarrior TAP probe uses advanced emulation technology to provide control and visibility into your target embedded system. Combined with a host debugger, the CodeWarrior TAP probe speeds the debugging process by letting you interactively control and examine the state of your target system. -
Page 8: Product Highlights
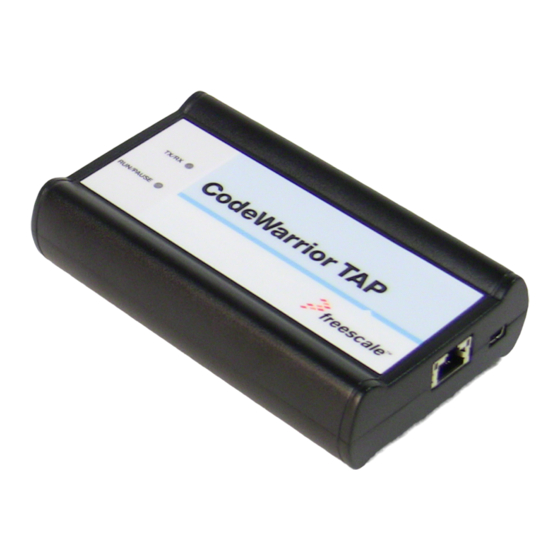
Introducing the CodeWarrior TAP Probe What is CodeWarrior TAP Probe? Figure 1.1 CodeWarrior TAP Probe 1.1.1 Product Highlights The CodeWarrior TAP probe has these features: • Supports the Power Architecture, StarCore, and ColdFire™ processors. Go to the http:// freescale.com/CWTAP for the latest supported Freescale processors •... -
Page 9: The Debugging Environment
– Program all onboard memories with support from correct host-level software 1.1.2 The Debugging Environment The CodeWarrior TAP probe works with the CodeWarrior debugger to give you control over the emulation functions and your target system. 1.1.3 CodeWarrior TAP Probe Benefits The CodeWarrior TAP probe provides these key benefits: •... -
Page 10: Operating Requirements
TAP probe directly to your host PC, or purchase a self-powered USB hub. If you only plan to use Ethernet communications, the CodeWarrior TAP probe can be powered from the external power supply provided with your unit. It can use line voltages of 100-240 VAC (50/60 Hz). - Page 11 1.2.3.2 Cycling Power to the System When you need to apply or cycle power to the CodeWarrior TAP probe, connect or disconnect the power cable from the power source or from the probe. After you have connected the probe to your target system, use the following sequence for applying or removing the power.
-
Page 12: Related Documentation
2. Turn off the CodeWarrior TAP probe power. NOTE In the case of PowerPC targets with a QACK signal, for the CodeWarrior TAP probe to properly stop and restart the target, the QACK signal must be pulled low. The CodeWarrior TAP probe pulls this signal low through the probe tip. -
Page 13: Connecting To A Network
This chapter explains how to connect the CodeWarrior TAP probe to an existing TCP/IP network. The CodeWarrior TAP probe is an Ethernet device that may be configured for TCP/IP either using DHCP to acquire its IP configuration (the default method) or through a static IP configuration. - Page 14 Figure 2.1 CodeWarrior TAP Probe with Ethernet Connector 2. Connect the other end of the RJ45 cable into the RJ45 connector of the Ethernet network or host computer. Figure 2.2 CodeWarrior TAP Probe with an RJ45 Cable Attached CodeWarrior TAP Probe User Guide...
-
Page 15: Customizing The Codewarrior Tap Probe
If you cannot use DHCP, you must configure the probe for your network using static IP address resolution. To manually configure the network settings of the CodeWarrior TAP probe for your network, access the probe configuration console as described below and use the probe on-board setup utility netparam to change the probe network settings. - Page 16 Connecting to a Network Customizing the CodeWarrior TAP Probe To Access the CodeWarrior TAP Configuration Console 1. Connect the other end of the USB cable to the USB connector of the CodeWarrior TAP probe (Figure 2.3). Figure 2.3 CodeWarrior TAP Probe with USB Cable Attached 2.
-
Page 17: Testing Network Communication
Example: Assign a static IP address and hostname to the CodeWarrior TAP probe If the CodeWarrior TAP probe has a static IP address of 195.121.1.2 and a hostname of lab01, enter the following commands: core> netparam static_ip_address 195.121.1.2 core>... - Page 18 Connecting to a Network Testing Network Communication CodeWarrior TAP Probe User Guide...
-
Page 19: Connecting To The Target System
Target system connections can be made using the debug ports (JTAG/COP, StarCore, or ColdFire BDM). The CodeWarrior TAP probe connects to the target system's JTAG header using a probe tip adapter and ribbon cable. The TAP probe is a powerful development tool for use with a wide variety of processors that use either JTAG/COP, ColdFire BDM, or StarCore debug interfaces. -
Page 20: Connecting To The Target System
2. Make sure that the USB cable from the TAP probe is not connected to the host computer. 3. Connect the probe tip to the CodeWarrior TAP probe. 4. Make sure that pin 1 of the gray ribbon cable connector aligns with pin 1 on the target’s debug port header. -
Page 21: Connecting To The Target System Serial Port
Figure 3.3 CW TAP Probe — Target Serial Connector The CodeWarrior TAP probe provides a serial port which can be configured to access the serial port of the target system. This is useful if you need to access the serial port of a remotely located target system over Ethernet from the host system. -
Page 22: Connecting The Codewarrior Tap Probe To The Target System
3.3.1 Connecting the CodeWarrior TAP Probe to the Target System A RJ25 cable (P/N 600-76822) is provided with the CodeWarrior TAP probe to connect to the serial port of your target system. To connect the serial cable between the CodeWarrior TAP probe and the serial port of the target system 1. - Page 23 Connecting to the Target System Connecting to the Target System Serial Port If the CodeWarrior TAP probe Target Serial port settings do not match the serial port settings of your target system, use the following steps: To configure the CodeWarrior TAP probe serial port 1.
-
Page 24: Accessing The Target Serial Port
Connecting to the Target System Serial Port 3.3.3 Accessing the Target Serial Port You can use telnet to connect to the CodeWarrior TAP probe Target Serial port and access the serial port of your target system remotely over Ethernet. To telnet to the Target Serial port 1. -
Page 25: Using The Codewarrior Tap Probe
2. Apply power to the target system. 3. Start the CW debugger. 4. Configure the debugger for the CodeWarrior TAP connection. LEDs are provided to indicate the status of the CodeWarrior TAP probe. For details on the LED indicators, refer to the CodeWarrior TAP Probe Specifications topic. -
Page 26: Run/Pause/Mixed Mode States
Using the CodeWarrior TAP Probe Debugging with the CodeWarrior TAP System • Connecting to Multiple TAP Probes Also refer to the debugger documentation to become familiar with the system operation. 4.1.1 Run/Pause/Mixed Mode States When the host debugger is connected to the target using the TAP probe, the probe is always in one of these states (modes): run, pause, or mixed mode. -
Page 27: Accessing A Ethernet Tap Probe Remotely
Using the CodeWarrior TAP Probe Accessing a Ethernet TAP Probe Remotely Figure 4.1 CodeWarrior TAP Probe — Bottom view To set up the debug connection, you will need to know the 12-digit TAP probe serial number, located on a label on the bottom of the device. - Page 28 Accessing a Ethernet TAP Probe Remotely Standalone PC Ethernet appendix. To identify the IP address of any probe on the subnet, refer to the Using CCS to Search for CodeWarrior TAP Probes topic. The login banner is displayed, followed by the core> command-line prompt.
-
Page 29: Hardware Specifications
Target Connectors on CodeWarrior TAP Probe • CodeWarrior TAP Probe Specifications 5.1 LEDs on CodeWarrior TAP Probe This figure shows the various LEDs of the CodeWarrior TAP probe. Figure 5.1 CW TAP Probe — LED Indicators CodeWarrior TAP Probe User Guide... -
Page 30: Transmit/Receive Indicator
Do not remove power, unplug the network, or press the reset button during firmware updates. • The LED flashes orange when the CodeWarrior TAP is communicating with the target. • The LED is unlit if the DCU probe is not powered on. -
Page 31: Rj45 Ethernet Connector With Link And Activity Indicators
The CodeWarrior TAP probe link and activity indicators are integrated into the RJ45 CodeWarrior TAP probe connector. The yellow indicator is turned on when the CodeWarrior TAP probe is connected to any network, and flickers when data is being transferred across the network. The green indicator is turned on when the CodeWarrior TAP probe is connected to a 100BaseT network, and flickers when data is being transferred across the network. -
Page 32: Rj45 Ethernet Connector
The Ethernet connector on the CW TAP probe is used to connect to a 10/100BaseT Ethernet. 5.2.2 USB Connector The USB port on the CodeWarrior TAP probe acts as both a virtual serial device and virtual Ethernet device. The virtual serial interface is used for configuring network communication, entering routing tables, and for diagnostics. -
Page 33: Probe Tip Connector
Hardware Specifications Target Connectors on CodeWarrior TAP Probe Figure 5.5 CW TAP Probe — Target Serial Connector This table shows the pinout definition of the Target serial port. Table 5.1 Pinout Definition of the Target Serial port Signal Ready To Send (RTS) -
Page 34: Electrical Characteristics
Hardware Specifications Target Connectors on CodeWarrior TAP Probe The probe tip consists of a 6-inch ribbon cable with the appropriate debug adapter attached. The ribbon cable has a red stripe down one side to indicate the location of pin 1. - Page 35 Hardware Specifications Target Connectors on CodeWarrior TAP Probe Table 5.3 Ethernet TAP Probe — Physical Characteristics Physical Characteristics Environmental Requirements 0 to 40 ° C (32 to 104 ° F) Operating temperature -40 to 70 ° C (-40 to 158 ° F)
- Page 36 Hardware Specifications Target Connectors on CodeWarrior TAP Probe CodeWarrior TAP Probe User Guide...
-
Page 37: A Ethernet Tap Probe Setup Utility Commands
Ethernet TAP Probe Setup Utility Commands This appendix explains how to access the CodeWarrior TAP probe internal setup utility. It describes all available setup utility commands and arguments. This appendix contains the following sections: • Connecting to the CodeWarrior TAP Probe Setup Utility •... -
Page 38: Ethernet Tap Probe Setup Utility Commands And Variables
To activate new settings, the unit must be rebooted. For more information on netparam command, refer to the Configuring the Ethernet TAP Probe Using netparam topic. Syntax netparam [add_host host ip_address] [add_route host gateway hop_#] [bootconfig {static | dhcp }[:host]] [delete_host host] [delete_route host] CodeWarrior TAP Probe User Guide... - Page 39 , and equivalent Default host to 0.0.0.0. Gateway IP address for probe, specified in dotted-decimal notation gateway hop_# Decimal number of gateway hops between Ethernet TAP probe and destination host or network {static | dhcp }[:host] bootconfig CodeWarrior TAP Probe User Guide...
- Page 40 Use the network DHCP protocol to resolve IP address, netmask, and dhcp default gateway (default) Host name for the CodeWarrior TAP probe. If dhcp is specified, the :host probe will attempt to register this host name with the DHCP server.
- Page 41 Set the default target system serial settings [9600 | 19200 | 38400 | 57600 | 115200] Choose a baud rate [data8 | data5 | data6 | data7] Specify data bits [stop1 | stop2] Specify stop bits CodeWarrior TAP Probe User Guide...
-
Page 42: Commands To Troubleshoot Communication
Use the host command to edit the host table by assigning hostnames to specific IP addresses without permanently storing the routing tables in the flash EPROM of the Ethernet TAP probe. Without options, it displays the current host table. Syntax host [add hostname ip_address | delete hostname ip_address] CodeWarrior TAP Probe User Guide... - Page 43 Use the hostname stored in Ethernet TAP probe host table (see the host command). Use the IP address of the host you are trying to reach. ip_address The size, in bytes, to use for request packets. size The number of packets to send. CodeWarrior TAP Probe User Guide...
- Page 44 Ethernet TAP probe flash EPROM. Without options, it displays the current route table or default gateway. Syntax route [add destination gateway | delete destination] Options Adds a dynamic route to the route table. add destination gateway Deletes a dynamic route from the route table. delete destination CodeWarrior TAP Probe User Guide...
-
Page 45: B Network Administration
CodeWarrior TAP is located in a protected network, an administrator will need to provide access to these ports if you want to connect to the CodeWarrior TAP from another network. This table lists the ports used by the CodeWarrior TAP and a brief description of each port. -
Page 46: Configuring The Ethernet Tap Probe Using Netparam
2. At the core> prompt, use netparam to specify the protocol appropriate to your network: netparam bootconfig dhcp[:hostname] DHCP is the default setting. If you specify a hostname for the CodeWarrior TAP probe, the probe will attempt to register the host name with the DHCP server, which may then update any name servers on the network. -
Page 47: Static Routing
If the CodeWarrior TAP probe uses DHCP to automatically acquire its network settings, it is most likely that a default gateway setting was acquired and the probe will be accessible on other subnets. -
Page 48: Changing An Existing Route Entry
The gateway_ip is the first gateway the probe traffic crosses when communicating with the destination workstation. The hop_# is the decimal number of gateways between the probe and the destination workstation. CodeWarrior TAP Probe User Guide... -
Page 49: Entering Static Routes
Each static route entry is made using a netparam command and consists of a network address and a host address. The netparam commands for the static route entries for Ethernet TAP probe goofy are: netparam add_route 198.9.231.0 198.9.230.1 1 CodeWarrior TAP Probe User Guide... -
Page 50: Using Ccs To Search For Codewarrior Tap Probes
VPNs. If your CodeWarrior TAP probe acquires its IP address using DHCP, but is not able to register its host name on the network, you will need the probe’s IP address. To find the probe’s address, perform the... - Page 51 • For Linux/Solaris, run the command: ccs/bin/ccs This will launch CCS and open the Command window automatically. Figure B.2 CCS Icon 2. The findcc command takes the following arguments when searching for CodeWarrior TAP probes: findcc cwtaps [-quiet|-verbose] B.3.0.1 Sample output % findcc cwtaps FSL021351 (192.168.0.145): CodeWarrior TAP...
- Page 52 Network Administration Using CCS to Search for CodeWarrior TAP Probes CodeWarrior TAP Probe User Guide...
-
Page 53: C Ethernet Tap Probe Firmware (Core)
The CodeWarrior TAP Boot Loader image performs hardware initialization and starts up the OS. When the CodeWarrior TAP first powers up, it executes the Boot Loader. This occurs while the heartbeat LED is solid red. The Boot Loader is not generally visible to the user and should rarely require reprogramming or updating. -
Page 54: Shell Software
To reprogram the firmware image 1. Launch CCS and open the CCS command window. For information on launching CCS, refer to the Using CCS to Search for CodeWarrior TAP Probes topic. 2. In the CCS Command window, enter the command: updatecwtap {hostname | ip_address} 3. - Page 55 Ethernet TAP probe resets during an update and can create a non- working state that may require factory repair. These procedures must be performed on each Ethernet TAP probe that you plan to use with the current version of debugger. CodeWarrior TAP Probe User Guide...
- Page 56 Ethernet TAP Probe Firmware (Core) Reprogramming the Ethernet TAP Probe Firmware Images CodeWarrior TAP Probe User Guide...
-
Page 57: D Jtag/Cop Connector Information
JTAG/COP Connector Information The CodeWarrior TAP JTAG/COP probe has a 16-pin connector which automatically supports target system signal levels from 1.2V to 3.3V. Figure D.1 shows the pin assignments of the probe JTAG/COP connector. Table D.1 lists JTAG/COP signal names, direction, pin numbers, descriptions, and drive capabilities for the probe JTAG/COP connector. - Page 58 50mA driver From Ethernet TAP probe connector No Connect - n/a - SRST Bi-directional Ω Open-drain. 5 to ground when asserted by Ethernet TAP probe, 22pF load when not asserted No Connect - n/a - CodeWarrior TAP Probe User Guide...
- Page 59 Ethernet TAP probe drives the TDI output with up to 50mA. The TDI trace should be kept short, and should maintain a "two-signal-width" spacing from any other parallel dynamic signal trace. TDI should have an RC termination option at the processor. CodeWarrior TAP Probe User Guide...
- Page 60 50mA. TMS should be kept as short as possible and maintain a "two-signal-width" spacing from any other parallel dynamic signal trace. TMS should have a termination option at the processor. No Connect Not required for emulation CodeWarrior TAP Probe User Guide...
- Page 61 Ethernet TAP probe senses CKSO to determine if the processor halted execution in a checkstop state. Must be wired to the target system. GND is connected directly to the ground inside the Ethernet TAP probe. CodeWarrior TAP Probe User Guide...
- Page 62 JTAG/COP Connector Information CodeWarrior TAP Probe User Guide...
-
Page 63: E Once Connector Information
OnCE Connector Information The CodeWarrior TAP OnCE probe has a 14-pin connector that automatically supports target system signal levels from 1.2V to 3.3V. Figure E.1 shows the pin assignments of the probe OnCE connector. Table E.1 lists OnCE signal names, direction, pin numbers, descriptions, and drive capabilities for the probe OnCE connector. - Page 64 22pF load when not asserted 50mA driver From Ethernet TAP probe connector Ω From target pull-down, plus 0.01uF load system Ω Reserved Bi-directional Open-drain, 5 to ground when asserted by Ethernet TAP probe, 22pF load when not asserted CodeWarrior TAP Probe User Guide...
- Page 65 50mA. The TCK trace run should be kept as short as possible, and should maintain a “two-signal-width” spacing from any other parallel dynamic signal trace. Must be wired to the target system. GND is connected directly to the ground inside the Ethernet TAP probe. CodeWarrior TAP Probe User Guide...
- Page 66 Must be wired to the target system processor. The Ethernet TAP probe drives the TRST output with up to 50 mA. The TRST trace run should be kept short, and should maintain a “two-signal-width” spacing from any other parallel dynamic signal trace. CodeWarrior TAP Probe User Guide...
-
Page 67: Coldfire Bdm Connector Information
ColdFire BDM Connector Information The CodeWarrior TAP ColdFire BDM probe has a 26-pin connector that automatically supports target signal levels from 1.2V to 3.3V. Figure F.1 shows the pin assignments of the probe BDM connector. Table F.1 lists BDM signal names, direction, pin numbers, descriptions, and drive capabilities for the probe BDM connector. - Page 68 ColdFire BDM Connector Information Figure F.1 CodeWarrior TAP Probe for ColdFire BDM Connector Pin Assignments Reserved BKPT DSCLK Reserved RESET PST3 PST2 PST1 PST0 DDATA3 DDATA1 DDATA2 DDATA0 Reserved Reserved PSTCLK Core Voltage Table F.1 CodeWarrior TAP Probe for ColdFire BDM Signal Directions...
- Page 69 ColdFire BDM Connector Information Table F.1 CodeWarrior TAP Probe for ColdFire BDM Signal Directions (continued) Signal Signal Direction Description Mnemonic - n/a - Reserved - n/a - RESET Bi-directional Ω Open-drain. 5 to ground when asserted by USB TAP probe, 22pF...
- Page 70 DSCLK DSCLK must be connected to the target’s processor. It is driven by the CodeWarrior TAP probe as an output with up to 50mA. This signal is the clock for the BDM interface. It is a good design practice to keep the trace length short and isolate the trace from other signals.
- Page 71 ColdFire BDM Connector Information Table F.2 CodeWarrior TAP Probe for ColdFire BDM Signal Recommendations and Requirements Signal Requirement Mnemonic Must be wired to the target. The CodeWarrior TAP probe uses this signal to determine if power is applied to the target. The...
- Page 72 ColdFire BDM Connector Information Table F.2 CodeWarrior TAP Probe for ColdFire BDM Signal Recommendations and Requirements Signal Requirement Mnemonic Must be wired to the target. GND is connected directly to the ground inside the CodeWarrior TAP probe. PSTCLK May be wired to the target. The CodeWarrior TAP probe uses this signal to support synchronous clocking mode.
-
Page 73: G Troubleshooting
Customer Support for assistance. G.1.1 Verify Network Communication If you want to verify that the CodeWarrior TAP is up and running on your network, enter the ping command at the core> prompt of the Ethernet TAP probe. CodeWarrior TAP Probe User Guide... -
Page 74: View Network Connections
To verify network communication 1. Connect to the Ethernet TAP probe internal setup utility, as explained in the Connecting to the CodeWarrior TAP Probe Setup Utility section. 2. Verify communication by entering this command at the core> prompt: ping ipaddress | hostname For example, to ping a hostname, named my_tap at IP address 128.9.230.61, enter the... - Page 75 Troubleshooting Troubleshooting Power Problems The LED labeled HEARTBEAT indicates whether the Ethernet TAP probe is receiving power. If this LED is not lit, check the connections to the external power supply. CodeWarrior TAP Probe User Guide...
- Page 76 Troubleshooting Troubleshooting Power Problems CodeWarrior TAP Probe User Guide...
-
Page 77: Index
35 finding IP address 48 target connection 17 Firmware updating 52 about 51 Commands updating the CodeWarrior TAP’s flash troubleshooting 40 EPROM 52 utility 36 Flash EPROM Communications updating the firmware 52 accessing serial port 22... - Page 78 52 Physical dimensions 33 Specifications Physical fit 32 AC 32 PING command 41 hardware 27 Power Starting CodeWarrior TAP System 23 problems, troubleshooting 72 Static IP 11 source 8 Static routing 45 probe Subnets 47 IP address 48 Support 2...
- Page 79 Target system control 7 TCP/IP 11 Technical support 2 Telnet to CodeWarriorTAP 36 Temperature range 33 TGTTY command 36 Troubleshooting commands 40 communications problems 71 power problems 72 Updating core software 52 Utility commands 36 Web address 2 CodeWarrior TAP Probe User Guide...
- Page 80 CodeWarrior TAP Probe User Guide...
Need help?
Do you have a question about the CodeWarrior TAP and is the answer not in the manual?
Questions and answers