Table of Contents
Advertisement
Quick Links
Advertisement
Table of Contents

Related Manuals for Freescale Semiconductor CodeWarrior TAP


Summary of Contents for Freescale Semiconductor CodeWarrior TAP
- Page 1 CodeWarrior TAP Probe User Guide Document Number: CWTAPUG Rev 10.x, 06/2014...
- Page 2 CodeWarrior TAP Probe User Guide, Rev. 10.x, 06/2014 Freescale Semiconductor, Inc.
-
Page 3: Table Of Contents
Connecting probe tip to target..........................23 Connecting to target system serial port...........................24 3.3.1 Connecting CodeWarrior TAP probe to target system..................25 3.3.2 Configuring target serial port..........................25 3.3.3 Accessing target serial port..........................26 CodeWarrior TAP Probe User Guide, Rev. 10.x, 06/2014 Freescale Semiconductor, Inc. - Page 4 Electrical characteristics............................38 5.3.4 Physical considerations............................39 Chapter 6 CodeWarrior TAP probe setup utility commands Connecting to CodeWarrior TAP probe setup utility.....................41 CodeWarrior TAP probe setup utility commands and variables..................42 6.2.1 Commands to configure communications......................42 6.2.1.1 netparam...............................42 6.2.1.2 tgtty..............................44 6.2.2 Commands to troubleshoot communication......................45 6.2.2.1 arp.................................45...
- Page 5 7.2.3.1 Specify default gateway or static route table (optional)..............52 7.2.4 Changing existing route entry..........................52 7.2.5 Entering static routes............................53 7.2.5.1 Static route example..........................54 Using CCS to search for CodeWarrior TAP probes.......................55 7.3.1 Sample output..............................56 Chapter 8 CodeWarrior TAP probe firmware (core) Boot loader..................................57 8.1.1...
- Page 6 Chapter 10 OnCE connector information Chapter 11 ColdFire BDM connector information Chapter 12 Troubleshooting 12.1 Troubleshooting communications problems........................77 12.1.1 Verify network communication.........................78 12.1.2 View network connections..........................78 12.2 Troubleshooting power problems...........................79 CodeWarrior TAP Probe User Guide, Rev. 10.x, 06/2014 Freescale Semiconductor, Inc.
-
Page 7: Introducing Codewarrior Tap Probe
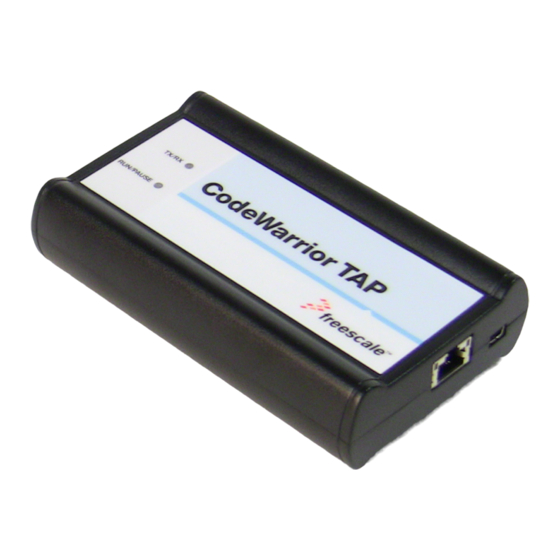
1.1 What is CodeWarrior TAP probe? The CodeWarrior TAP probe uses advanced emulation technology to provide control and visibility into your target embedded system. Combined with a host debugger, the CodeWarrior TAP probe speeds the debugging process by letting you interactively control and examine the state of your target system. -
Page 8: Product Highlights
What is CodeWarrior TAP probe? • The CodeWarrior TAP probe, which provides visibility into and control of your target system using a JTAG or BDM interface, and connects to your host computer through a USB 2.0, 10BaseT, or 100BaseT link. -
Page 9: Debugging Environment
• Program all onboard memories with support from correct host-level software 1.1.2 Debugging environment The CodeWarrior TAP probe works with the CodeWarrior debugger to give you control over the emulation functions and your target system. 1.1.3 CodeWarrior TAP probe benefits The CodeWarrior TAP probe provides these key benefits: •... -
Page 10: Target Connections
• Keep high, static-producing items, such as non-ESD-approved plastics, tape, and packaging foam away from the instrument and the target. The above precautions should be considered as minimum requirements for a static- controlled environment. CodeWarrior TAP Probe User Guide, Rev. 10.x, 06/2014 Freescale Semiconductor, Inc. -
Page 11: Operating Temperature
PC, or purchase a self-powered USB hub. If you only plan to use Ethernet communications, the CodeWarrior TAP probe can be powered from the external power supply provided with your unit. It can use line voltages of 100-240 VAC (50/60 Hz). -
Page 12: Cycling Power To System
Figure 1-2. CodeWarrior TAP probe with USB connector 1.2.3.2 Cycling power to system When you need to apply or cycle power to the CodeWarrior TAP probe, connect or disconnect the power cable from the power source or from the probe. After you have connected the probe to your target system, use the following sequence for applying or removing the power. -
Page 13: Related Documentation
NOTE In the case of PowerPC targets with a QACK signal, for the CodeWarrior TAP probe to properly stop and restart the target, the QACK signal must be pulled low . The CodeWarrior TAP probe pulls this signal low through the probe tip. - Page 14 Related documentation CodeWarrior TAP Probe User Guide, Rev. 10.x, 06/2014 Freescale Semiconductor, Inc.
-
Page 15: Connecting To Network
This chapter describes how to connect the CodeWarrior TAP probe to an existing TCP/IP network. The CodeWarrior TAP probe is a device that may be configured for either using to acquire its IP configuration (the default method) or through a static IP configuration. - Page 16 Connecting CodeWarrior TAP probe to network Figure 2-1. CodeWarrior TAP probe with Ethernet connector 2. Connect the other end of the RJ45 cable into the RJ45 connector of the Ethernet network or host computer. CodeWarrior TAP Probe User Guide, Rev. 10.x, 06/2014...
-
Page 17: Customizing Codewarrior Tap Probe
Chapter 2 Connecting to network Figure 2-2. CodeWarrior TAP probe with an RJ45 cable attached NOTE When you configure the debugger for the hardware connection, you will need to specify the CodeWarrior TAP probe IP address or hostname. The CCS... - Page 18 Figure 2-3. CodeWarrior TAP probe with USB cable attached 2. Wait for the TX/RX LED to start flashing green. 3. Identify the serial port device assigned to the CodeWarrior TAP. On Windows, click Start > Control Panel > Adminstrative Tools > Computer Management > Device CodeWarrior TAP Probe User Guide, Rev.
-
Page 19: Testing Network Communication
Example: Assign a static IP address and hostname to the CodeWarrior TAP probe If the CodeWarrior TAP probe has a static IP address of 195.121.1.2 and a hostname of lab01, enter the following commands: core>... - Page 20 IP address assigned to the CodeWarrior TAP probe. If no output is displayed on the screen, check the following: • The physical connections are tight. • The CodeWarrior TAP probe address and netmask in the...
-
Page 21: Connecting To Target System
Chapter 3 Connecting to target system To use your CodeWarrior TAP probe, you must have a prototype hardware or an evaluation board. This chapter explains how to connect a CodeWarrior TAP probe to the target system. This chapter explains: •... - Page 22 NOTE Pin 1 is clearly marked on the gray ribbon cable by a red line down one side of the cable and a small triangle in the plastic socket. CodeWarrior TAP Probe User Guide, Rev. 10.x, 06/2014 Freescale Semiconductor, Inc.
-
Page 23: Connecting Probe Tip To Target
Chapter 3 Connecting to target system 3.2.1 Connecting probe tip to target To connect the CodeWarrior TAP cable to the target debug port header: 1. Turn off the power to the target system. 2. Make sure that the USB cable from the TAP probe is not connected to the host computer. -
Page 24: Connecting To Target System Serial Port
Figure 3-3. CW TAP probe - target serial connector The CodeWarrior TAP probe provides a serial port which can be configured to access the serial port of the target system. This is useful if you need to access the serial port of a remotely located target system over Ethernet from the host system. -
Page 25: Connecting Codewarrior Tap Probe To Target System
A RJ25 cable (P/N 600-76822) is provided with the CodeWarrior TAP probe to connect to the serial port of your target system. To connect the serial cable between the CodeWarrior TAP probe and the serial port of the target system: 1. -
Page 26: Accessing Target Serial Port
3.3.3 Accessing target serial port You can use telnet to connect to the CodeWarrior TAP probe target serial port and access the serial port of your target system remotely over Ethernet. To telnet to the target serial port: 1. -
Page 27: Using Codewarrior Tap Probe
2. Apply power to the target system. 3. Start the CW debugger. 4. Configure the debugger for the CodeWarrior TAP connection. LEDs are provided to indicate the status of the CodeWarrior TAP probe. For details on the LED indicators, see LEDs on CodeWarrior TAP probe topic. -
Page 28: Run/Pause/Mixed Mode States
• For tools that do not support creating multiple TAP probe connections in the IDE, create a for each, using unique port numbers. Then for each device, start the CCS Console and configure the connection, specifying the probe serial number. Tools that CodeWarrior TAP Probe User Guide, Rev. 10.x, 06/2014 Freescale Semiconductor, Inc. -
Page 29: Accessing Codewarrior Tap Probe Remotely
\ccs\bin\ccs.cfg new commands. Figure 4-1. CodeWarrior TAP probe - bottom view To set up the debug connection, you will need to know the 12-digit TAP probe serial number, located on a label on the bottom of the device. - Page 30 Make sure the probe Target Serial port is physically connected to your target's serial port, and it is configured correctly. For more information, see Accessing target serial port topic. CodeWarrior TAP Probe User Guide, Rev. 10.x, 06/2014 Freescale Semiconductor, Inc.
-
Page 31: Hardware Specifications
Host connectors on CodeWarrior TAP probe • Target connectors on CodeWarrior TAP probe 5.1 LEDs on CodeWarrior TAP probe The figure below shows the various LEDs of the CodeWarrior TAP probe. CodeWarrior TAP Probe User Guide, Rev. 10.x, 06/2014 Freescale Semiconductor, Inc. - Page 32 LEDs on CodeWarrior TAP probe Figure 5-1. CW TAP probe - LED indicators CodeWarrior TAP Probe User Guide, Rev. 10.x, 06/2014 Freescale Semiconductor, Inc.
-
Page 33: Transmit/Receive Indicator
• The LED flashes orange (1 Hz) during configuration of the network/USB interface. • The LED flashes green (1 Hz) after network/USB interface has is successfully configured. During firmware updates, the LED flashes green at a higher frequency (5Hz). CodeWarrior TAP Probe User Guide, Rev. 10.x, 06/2014 Freescale Semiconductor, Inc. -
Page 34: Run/Pause Indicator
The CodeWarrior TAP probe link and activity indicators are integrated into the RJ45 CodeWarrior TAP probe connector. The yellow indicator is turned on when the CodeWarrior TAP probe is connected to any network, and flickers when data is being transferred across the network. The green indicator is turned on when the CodeWarrior TAP probe is connected to a 100BaseT network, and flickers when data is being transferred across the network. -
Page 35: Rj45 Ethernet Connector
Figure 5-3. CW TAP probe - host side view 5.2.1 RJ45 Ethernet connector The Ethernet connector on the CW TAP probe is used to connect to a 10/100BaseT Ethernet. 5.2.2 USB connector CodeWarrior TAP Probe User Guide, Rev. 10.x, 06/2014 Freescale Semiconductor, Inc. -
Page 36: Target Connectors On Codewarrior Tap Probe
Target connectors on CodeWarrior TAP probe The USB port on the CodeWarrior TAP probe acts as both a virtual serial device and virtual Ethernet device. The virtual serial interface is used for configuring network communication, entering routing tables, and for diagnostics. The virtual Ethernet device is used by the debugger to communicate with the CodeWarrior TAP. - Page 37 Receive Data (RxD) Transmit Data (TxD) Ground Clear To Send (CTS) Pin 1 is on the right side as you look at the RJ-11 socket (locking tab on the bottom). CodeWarrior TAP Probe User Guide, Rev. 10.x, 06/2014 Freescale Semiconductor, Inc.
-
Page 38: Probe Tip Connector
Electrical Characteristics Target voltage levels supported 1.2V to 3.3V; 5V tolerant probe power consumption from target Less than 50 mA to detect target power USB Power Supply 5V, 500mA CodeWarrior TAP Probe User Guide, Rev. 10.x, 06/2014 Freescale Semiconductor, Inc. -
Page 39: Physical Considerations
Chapter 5 Hardware specifications NOTE Bus powered USB hubs are not designed to provide 500mA to devices. The CodeWarrior TAP must be directly connected to a self-powered hub, PC, or the AC adapter included in the kit. 5.3.4 Physical considerations This table shows the physical characteristics of the probe. - Page 40 Target connectors on CodeWarrior TAP probe CodeWarrior TAP Probe User Guide, Rev. 10.x, 06/2014 Freescale Semiconductor, Inc.
-
Page 41: Codewarrior Tap Probe Setup Utility Commands
Note that if you lose your Ethernet connection by improperly configuring the CodeWarrior TAP probe from a telnet session, then you will have to connect to the USB port to re-establish network communications. -
Page 42: Codewarrior Tap Probe Setup Utility Commands And Variables
EPROM of CodeWarrior TAP probe. Entered without options, it displays all current settings. To change parameters, specify one or more options. To activate new settings, the unit must be rebooted. For more information on netparam command, see... - Page 43 IP address to use for host, specified in dotted-decimal notation add_route host gateway hop_# Adds a route to CodeWarrior TAP probe static route table. Table entries are automatically entered into the system on reset. If the specified parameters are invalid for the operating network, they are not stored.
-
Page 44: Tgtty
CodeWarrior TAP probe setup utility commands and variables Table 6-1. Netparam parameters (continued) Field Description (without also entering the netmask), the CodeWarrior TAP probe uses the standard netmask assigned to that IP address. mask - Netmask in dotted-decimal format (for example, 255.255.0.0). -
Page 45: Commands To Troubleshoot Communication
Chapter 6 CodeWarrior TAP probe setup utility commands Table 6-2. Default target settings (continued) Default Set the default target system serial settings Define parity [noparity | oddparity | evenparity |lowparity | highparity] Enable or disable hardware flow control [<rtscts | nortscts>]... -
Page 46: Netstat
IP host addresses without permanently storing the routing tables in the flash EPROM of the CodeWarrior TAP probe. Without options, it displays the current host table. Syntax host [add hostname ip_address | delete hostname ip_address] Options Table 6-4. -
Page 47: Route
6.2.2.5 route Use the command to test network routing without permanently storing the routing route tables in the CodeWarrior TAP probe flash EPROM. Without options, it displays the current route table or default gateway. Syntax route [add destination gateway | delete destination] Options Table 6-7. - Page 48 CodeWarrior TAP probe setup utility commands and variables CodeWarrior TAP Probe User Guide, Rev. 10.x, 06/2014 Freescale Semiconductor, Inc.
-
Page 49: Network Administration
7.1 CodeWarrior TAP probe network ports Software uses several network ports to communicate with a CodeWarrior TAP. In case the CodeWarrior TAP and host software are on the same network, you do not need to be aware of these ports. -
Page 50: Configuring Codewarrior Tap Probe Using Netparam
7.2.1 Configuring dynamic IP address To configure a dynamic IP address: 1. Connect to the CodeWarrior TAP probe internal setup utility, as explained in the Connecting to CodeWarrior TAP probe setup utility topic. 2. At the... - Page 51 If you do not have a DHCP server on your network or you prefer to manually configure your network settings, the CodeWarrior TAP probe is capable of storing its IP address and netmask in flash memory. When bootconfig is set to static, the CodeWarrior TAP probe uses this stored information to resolve its own IP and netmask requests.
-
Page 52: Static Routing
If the CodeWarrior TAP probe uses DHCP to automatically acquire its network settings, it is most likely that a default gateway setting was acquired and the probe will be accessible on other subnets. -
Page 53: Entering Static Routes
Chapter 7 Network administration Before entering the static routes, make a map of all gateway paths between the CodeWarrior TAP probe as starting point and each workstation that must have access to To change an existing routing entry: 1. At the prompt, delete the existing routing entry: core>... -
Page 54: Static Route Example
For example, the CodeWarrior TAP probe goofy on network 198.9.230.0 communicates directly with workstation elmer. When static routing is used, a routing entry is required on a CodeWarrior TAP probe for each workstation on a non-local network that accesses it. The CodeWarrior TAP probe goofy requires two entries, for workstation tweety on network 198.9.231.0 and... -
Page 55: Using Ccs To Search For Codewarrior Tap Probes
Chapter 7 Network administration Figure 7-2. Three Class C networks connected by a single router Each of the three CodeWarrior TAP probe hosts must have a static route entry for each remote workstation that accesses it. 7.3 Using CCS to search for CodeWarrior TAP probes... -
Page 56: Sample Output
Using CCS to search for CodeWarrior TAP probes This will launch CCS and add a CCS icon (see CCS icon topic) to your taskbar. Double-click that icon in the taskbar to open the Command window. • For Linux/Solaris, run the command: ccs/bin/ccs This will launch CCS and open the Command window automatically. -
Page 57: Codewarrior Tap Probe Firmware (Core)
The CodeWarrior TAP Boot Loader image performs hardware initialization and starts up the OS. When the CodeWarrior TAP first powers up, it executes the Boot Loader. This occurs while the heartbeat LED is solid red. The Boot Loader is not generally visible to the user and should rarely require reprogramming or updating. -
Page 58: Shell Software
Reprogramming CodeWarrior TAP probe firmware images When the CodeWarrior TAP probe finishes executing the Boot Loader, it loads the OS. This is indicated by the prompt in the CodeWarrior TAP probe's setup utility, and by core flashing a orange or green heartbeat LED. To reprogram the OS image stored in the... - Page 59 CodeWarrior TAP probe resets during an update and can create a non-working state that may require factory repair. These procedures must be performed on each CodeWarrior TAP probe that you plan to use with the current version of debugger. CodeWarrior TAP Probe User Guide, Rev. 10.x, 06/2014...
- Page 60 Reprogramming CodeWarrior TAP probe firmware images CodeWarrior TAP Probe User Guide, Rev. 10.x, 06/2014 Freescale Semiconductor, Inc.
- Page 61 Chapter 9 JTAG/COP connector information The CodeWarrior TAP JTAG/COP probe has a 16-pin connector which automatically supports target system signal levels from 1.2V to 3.3V. CodeWarrior TAP probe for JTAG/COP connector pin assignment shows the pin assignments of the probe JTAG/COP connector.
- Page 62 Figure 9-1. CodeWarrior TAP probe for JTAG/COP connector pin assignments Table 9-1. CodeWarrior TAP probe for JTAG/COP signal directions JTAG/COP pin Signal mnemonic Signal direction Description From target system 17pF load QACK From CodeWarrior TAP probe 100ohm pull-down connector From CodeWarrior TAP probe...
- Page 63 Chapter 9 JTAG/COP connector information Table 9-1. CodeWarrior TAP probe for JTAG/COP signal directions (continued) JTAG/COP pin Signal mnemonic Signal direction Description - n/a - 1. 14.7KOhm pull-up to buffered TGT PWR. Table 9-2. CodeWarrior TAP probe for JTAG/COP signal recommendations and...
- Page 64 Table 9-2. CodeWarrior TAP probe for JTAG/COP signal recommendations and requirements (continued) JTAG/COP pin Signal mnemonic Requirement HALTED Need not be wired to the target system. The CodeWarrior TAP probe does not currently use this signal. TGT PWR Must be wired to the target system. The...
- Page 65 Chapter 9 JTAG/COP connector information Table 9-2. CodeWarrior TAP probe for JTAG/COP signal recommendations and requirements (continued) JTAG/COP pin Signal mnemonic Requirement Must be wired to the target system. GND is connected directly to the ground inside the CodeWarrior TAP probe.
- Page 66 CodeWarrior TAP Probe User Guide, Rev. 10.x, 06/2014 Freescale Semiconductor, Inc.
- Page 67 Chapter 10 OnCE connector information The CodeWarrior TAP OnCE probe has a 14-pin connector that automatically supports target system signal levels from 1.2V to 3.3V. CodeWarrior TAP probe OnCE connector pin assignments shows the pin assignments of the probe OnCE connector.
- Page 68 Figure 10-1. CodeWarrior TAP probe OnCE connector pin assignments Table 10-1. CodeWarrior TAP probe OnCE signal directions OnCE pin Signal mnemonic Signal direction Description From CodeWarrior TAP probe 50mA driver connector - n/a - From target system 17pF load - n/a -...
- Page 69 Chapter 10 OnCE connector information 1. 14.7Kohm pull-up to buffered VDD. Table 10-2. CodeWarrior TAP probe OnCE signal recommendations and requirements OnCE pin Signal mnemonic Requirement Must be wired to the target system processor. The CodeWarrior TAP probe drives the TDI output with up to 50mA.
- Page 70 Table 10-2. CodeWarrior TAP probe OnCE signal recommendations and requirements (continued) OnCE pin Signal mnemonic Requirement Must be wired to the target system. The CodeWarrior TAP probe uses this signal to determine if power is applied to the target system. This signal is also used...
- Page 71 Chapter 11 ColdFire BDM connector information The CodeWarrior TAP ColdFire BDM probe has a 26-pin connector that automatically supports target signal levels from 1.2V to 3.3V. CodeWarrior TAP probe for ColdFire BDM connector pin assignments shows the pin assignments of the probe BDM connector.
- Page 72 Figure 11-1. CodeWarrior TAP probe for ColdFire BDM connector pin assignments Table 11-1. CodeWarrior TAP probe for ColdFire BDM signal directions BDM pin Signal mnemonic Signal direction Description Reserved -n/a- BKPT Bi-directional Open-drain. 5ohm to ground when asserted by USB TAP...
- Page 73 Chapter 11 ColdFire BDM connector information Table 11-1. CodeWarrior TAP probe for ColdFire BDM signal directions (continued) BDM pin Signal mnemonic Signal direction Description PST2 CodeWarrior 17pF load PST1 CodeWarrior 17pF load PST0 CodeWarrior 17pF load DDATA3 CodeWarrior 17pF load...
- Page 74 Table 11-2. CodeWarrior TAP probe for ColdFire BDM signal recommendations and requirements (continued) BDM pin Signal mnemonic Requirement RESET Must be wired to the target. During reset, the CodeWarrior TAP probe drives RESET to ground through a 100ohm resistor. Must be wired to the target processor.
- Page 75 Chapter 11 ColdFire BDM connector information Table 11-2. CodeWarrior TAP probe for ColdFire BDM signal recommendations and requirements (continued) BDM pin Signal mnemonic Requirement Reserved Need not be wired to the target. The CodeWarrior TAP probe does not currently use this signal.
- Page 76 CodeWarrior TAP Probe User Guide, Rev. 10.x, 06/2014 Freescale Semiconductor, Inc.
- Page 77 • Make sure the CodeWarrior TAP probe is receiving power. See LEDs on CodeWarrior TAP probe topic for a description of the status LEDs. • Make sure the CodeWarrior TAP probe is running the OS software. For more information on loading the OS software, see CodeWarrior TAP probe firmware (Core) topic.
- Page 78 CodeWarrior TAP probe, contact the Customer Support for assistance. 12.1.1 Verify network communication If you want to verify that the CodeWarrior TAP is up and running on your network, enter the ping command at the core prompt of the CodeWarrior TAP probe.
- Page 79 12.2 Troubleshooting power problems If the CodeWarrior TAP probe behaves erratically, check the connections to the external power supply. The LED labeled HEARTBEAT indicates whether the CodeWarrior TAP probe is receiving power. If this LED is not lit, check the connections to the external power supply.
- Page 80 Troubleshooting power problems CodeWarrior TAP Probe User Guide, Rev. 10.x, 06/2014 Freescale Semiconductor, Inc.
- Page 81 OnCE Connecting power supply cable OnCE connector information Connecting probe tip to target OnCE header Connecting to CodeWarrior TAP probe setup utility Operating requirements Operating system Connecting to multiple TAP probes Operating temperature Connecting to network Connecting to target system...
- Page 82 Transmit/Receive LED Troubleshooting Troubleshooting communications problems Troubleshooting power problems USB cable USB connector Using CCS to search for CodeWarrior TAP probes Using CodeWarrior TAP probe Verify network communication View network connections What is CodeWarrior TAP probe? CodeWarrior TAP Probe User Guide...
- Page 83 Freescale, the Freescale logo, and CodeWarrior are trademarks of Freescale Semiconductor, Inc., Reg. U.S. Pat. & Tm. Off. All other product or service names are the property of their respective owners. © 2012–2015 Freescale Semiconductor, Inc.
Need help?
Do you have a question about the CodeWarrior TAP and is the answer not in the manual?
Questions and answers