
Subscribe to Our Youtube Channel
Related Manuals for Vertiv Liebert Mini-Mate MT048


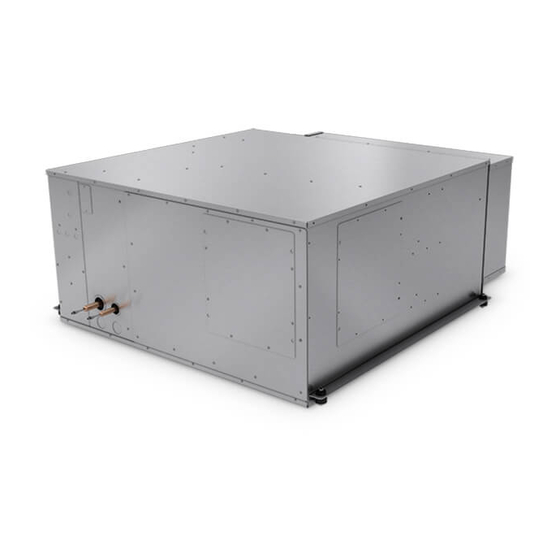
Summary of Contents for Vertiv Liebert Mini-Mate MT048
- Page 1 Liebert® Mini-Mate™ Variable Capacity Thermal Management Systems Installer/User Guide 3, 4 and 5 Ton (10.5, 14 and 17.5 kW) Capacity, Ceiling-mounted, 60 Hz...
- Page 2 The products covered by this instruction manual are manufactured and/or sold by Vertiv This document is the property of Vertiv and contains confidential and proprietary information owned by Vertiv. Any copying, use or disclosure of it without the written permission of Vertiv is strictly prohibited.
-
Page 3: Table Of Contents
7.2 Electrical Installation Checks 7.3 Piping Installation Checks 7.4 Other Installation Checks 8 Initial Start-up Checks and Commissioning Procedure for Warranty Inspection 9 Maintenance 9.1 Filters 9.1.1 Filter-replacement 9.2 Blower Drive System—EC Fans 9.2.1 Fan Impellers and Bearings Maintenance Vertiv | Liebert® Mini-Mate™ Installer/User Guide |... - Page 4 9.6 Electric Reheat Maintenance 9.7 Thermostatic Expansion Valve (TXV) Maintenance 9.7.1 Determining Suction Superheat 9.7.2 Adjusting Superheat Setting with the TXV 10 Preventive Maintenance Checklist Appendices Appendix A: Technical Support and Contacts Appendix B: Submittal Drawings Vertiv | Liebert® Mini-Mate™ Installer/User Guide |...
-
Page 5: Important Safety Instructions
1 IMPORTANT SAFETY INSTRUCTIONS SAVE THESE INSTRUCTIONS This manual contains important safety instructions that should be followed during the installation and maintenance of the Liebert® Mini-Mate. Read this manual thoroughly before attempting to install or operate this unit. Only qualified personnel should move, install or service this equipment. Adhere to all warnings, cautions, notices and installation, operating and safety instructions on the unit and in this manual. - Page 6 Install a water-tight drain pan with a drain connection under the cooling unit. We recommend installing monitored leak detection equipment for the unit and supply lines. Check drain lines periodically for leaks, sediment buildup, obstructions, kinks and/or damage and verify that they are free running. Vertiv | Liebert® Mini-Mate™ Installer/User Guide...
-
Page 7: Agency Listed
NOTICE Risk of improper water supply. Can reduce humidifier efficiency or obstruct humidifier plumbing. Do not use completely demineralized water with this unit. The water must contain minerals for the electrode principle to work. Do not use a hot water source. It will cause deposits that will eventually block the fill-valve opening. - Page 8 This page intentionally left blank Vertiv | Liebert® Mini-Mate™ Installer/User Guide...
-
Page 9: Nomenclature And Components
2 NOMENCLATURE AND COMPONENTS This section describes the model number for Liebert® Mini-Mate units and components. 2.1 Mini-Mate Model-number Nomenclature The tables below describe each digit of the 25-digit configuration number. The 14-digit model number consists of the first 10 digits and last 4 digits of the configuration number. Table 2.2 below describes each digit of the model number. -
Page 10: Component Location
The unit component locations are described in the submittal documents included in the Submittal Drawings on page 53. The following tables list the relevant documents by number and title. Table 2.3 Component-location Drawings Document Number Title DPN004808 Evaporator Unit, 3-ton DPN004179 Evaporator Unit, 4-ton and 5-ton Vertiv | Liebert® Mini-Mate™ Installer/User Guide... -
Page 11: Pre-Installation Preparation And Guidelines
Allow at least the minimum recommended clearances for maintenance and service. See the appropriate submittal drawings for dimensions. • We recommend installing a water detection system. Contact your Vertiv representative for information. 3.1 Planning Dimensions The unit dimensions described in the submittal documents included in the Submittal Drawings page 53. -
Page 12: Location Considerations For Outdoor Condensing Unit
For operation in the Heating mode, the Liebert® Mini-Mate unit’s return-air requirements for proper unit operation are: • Maximum humidity: less than 80% RH and less than 64°F (17.8°C) dew point. • Maximum dry bulb of 80°F (27°C) Vertiv | Liebert® Mini-Mate™ Installer/User Guide... -
Page 13: Mini-Mate Unit Weights
• Carefully inspect all items for visible or concealed damage. • Report damage immediately to the carrier and file a damage claim with a copy sent to Vertiv or to your sales representative. Equipment Recommended for Handling the Unit: •... - Page 14 This page intentionally left blank Vertiv | Liebert® Mini-Mate™ Installer/User Guide...
-
Page 15: Piping And Refrigerant Requirements
4 PIPING AND REFRIGERANT REQUIREMENTS All fluid and refrigeration connections to the unit, with the exception of the condensate drain and humidifier supply line, are sweat copper. Factory-installed piping brackets must not be removed. Field- installed piping must be installed in accordance with local codes and must be properly assembled, supported, isolated and insulated. -
Page 16: Refrigerant Piping Guidelines For Air-Cooled Systems
Refrigerant oil – do not mix oil types. Refer to ASHRAE Refrigeration Handbook for general, good-practice refrigeration piping. NOTE: All indoor and outdoor suction-line piping must have 1/2 in. minimum of insulation. All outdoor insulation must be UV and ozone resistant. Vertiv | Liebert® Mini-Mate™ Installer/User Guide... -
Page 17: Refrigerant-Line Sizes And Equivalent Lengths
NOTE: Proper safety equipment and proper refrigeration tools are required when working with R-410A refrigerant. Check unit serial tag for correct refrigerant type before topping-off or recharging a system. NOTE: Refrigerant R-410A uses a POE (polyolester) lubricant. The refrigerant must be introduced and charged from the cylinder only as a liquid. -
Page 18: Additional Oil Requirements For Digital-Scroll Compressors
Do not mix oils of different viscosities. • Consult your Vertiv sales representative, visit https://www.vertivco.com/en-us/support/, or contact the compressor manufacturer if questions arise. System charges may require additional oil charge to be added. See Table 4.7 on the facing page, for the amount required for various system charge levels. - Page 19 12 (350) 18 (530) * System Charge = indoor unit + condensing unit + refrigerant lines. For system charges over 80lb. (36.3 kg), consult your Vertiv representative. Source: DPN003950 Rev 5. Table 4.8 Compressor oil types for R-410A Refrigerant Compressor Type...
-
Page 20: Drain And Humidifier Piping
Do not route the humidifier supply line in front of the filter-box access panel. 4.3.2 Drain Line Installation Requirements NOTICE Risk of water backing up in the drain line. Leaking and overflowing water can cause equipment and building damage. Vertiv | Liebert® Mini-Mate™ Installer/User Guide... - Page 21 Do not install an external trap in the drain line. This line already has a factory-installed trap inside the cabinet. Installation of a second trap will prevent drain-water flow and will cause the water to overflow the drain pan. This line may contain boiling water. Use copper or other material that is rated for handling boiling water for the drain line.
-
Page 22: Condensate-Drain Pump Kit
The following tables list the relevant documents by number and title. Table 4.10 Condensate-drain Pump Drawings Document Number Title DPN004806 Condensate-pump connection locations, 3-ton models DPN004077 Condensate-pump connection locations, 4- and 5-ton models Vertiv | Liebert® Mini-Mate™ Installer/User Guide... -
Page 23: Electrical Connection Requirements
5 ELECTRICAL CONNECTION REQUIREMENTS WARNING! Arc flash and electric shock hazard. Open all local and remote electric power-supply disconnect switches, verify with a voltmeter that power is Off and wear appropriate, OSHA-approved personal protective equipment (PPE) per NFPA 70E before working within the electric control enclosure. -
Page 24: Low-Voltage Electrical Field Connections
For the wall-mounted temperature/humidity sensor: • Plug the factory-supplied, CANbus cable into P66 on the iCOM-control board in the Mini-Mate module and into P66, Ethernet connection on the temperature/humidity sensor. Vertiv | Liebert® Mini-Mate™ Installer/User Guide... - Page 25 Figure 5.1 Typical Electrical Field-connection Overview Item Description 1 to 6 Terminal connections between the evaporator module and the condensing unit Terminal strip in the evaporator module iCOM-control board in the evaporator module Condensing unit iCOM-display, field-mounted Field-supplied CAT5 cable Field-supplied, shielded Class 1 wiring 13 to 15 Terminal-strip connections on evaporator module for wiring connected to the harness wires from the wall-mount display.
- Page 26 This page intentionally left blank Vertiv | Liebert® Mini-Mate™ Installer/User Guide...
-
Page 27: Installation
6 INSTALLATION Refer to the appropriate installation procedures depending on the size and type of your Mini-Mate System 6.1 Installing Ceiling-mounted Evaporators WARNING! Risk of ceiling collapse and heavy unit falling. Can cause building and equipment damage, serious injury or death. Verify that the supporting roof structure is capable of supporting the weight of the unit(s) and the accessories, see Table 3.2 on page 13. -
Page 28: Installing Air-Distribution Components For Evaporators
When using the plenum, mount the evaporator above the bottom of the T-bar supports with at least 30-in. (762 mm) clearance from return-air end to wall (for replacing filter). • Follow the installation instructions included with the plenum kit. Vertiv | Liebert® Mini-Mate™ Installer/User Guide... -
Page 29: Installing A Bottom-Discharge Grille For 4-Ton And 5-Ton Models
6.2.4 Installing a Bottom-discharge Grille for 4-ton and 5-ton Models The optional, bottom-discharge grille is a 3-way louvered-air grille, painted white, and added to a T-bar grid assembly for air discharge directly into room from the bottom of the unit. Use a separate filter-box kit for filtration and connection to field-provided room-air-return ductwork. - Page 30 This page intentionally left blank Vertiv | Liebert® Mini-Mate™ Installer/User Guide...
-
Page 31: Checklist For Completed Installation
7 CHECKLIST FOR COMPLETED INSTALLATION 7.1 Moving and Placing Equipment Unpack and check received material. 2. Proper clearance for service access has been maintained around the equipment. 3. Equipment is level and mounting fasteners are tight. 7.2 Electrical Installation Checks Supply voltage and phase matches equipment nameplate. - Page 32 This page intentionally left blank Vertiv | Liebert® Mini-Mate™ Installer/User Guide...
-
Page 33: Initial Start-Up Checks And Commissioning Procedure For Warranty Inspection
8 INITIAL START-UP CHECKS AND COMMISSIONING PROCEDURE FOR WARRANTY INSPECTION WARNING! Arc flash and electric shock hazard. Open all local and remote electric power-supply disconnect switches, verify with a voltmeter that power is Off and wear appropriate, OSHA-approved personal protective equipment (PPE) per NFPA 70E before working within the electric control enclosure. - Page 34 This page intentionally left blank Vertiv | Liebert® Mini-Mate™ Installer/User Guide...
-
Page 35: Maintenance
NOTICE Risk of improper filter installation. Can cause filter collapse and airflow reduction. To maximize the performance and reliability of the equipment, use only Vertiv filters. Contact your Vertiv representative to order replacement filters. Verify that filters are installed and positioned so the air-flow direction marked on the filter is the same direction as unit air flow. -
Page 36: Filter-Replacement
The unit panels must be in place and closed to find this point. 5. Start the blower and turn the switch counterclockwise until the alarm is energized. 6. Turn the adjusting knob one turn clockwise or to the desired filter change point. Vertiv | Liebert® Mini-Mate™ Installer/User Guide... -
Page 37: Blower Drive System-Ec Fans
9.2 Blower Drive System—EC Fans WARNING! Risk of electric shock. Can cause serious injury or death. Open all local and remote electric power-supply disconnect switches and verify with a voltmeter that power is off before opening the fan motor electric-connection enclosure. Use only fully-trained and qualified HVAC technicians to replace or perform maintenance on the EC fans. -
Page 38: Fan Assembly Troubleshooting
Once the fault condition is cleared, there are certain conditions in which the motor will automatically resume operation. NOTE: Further troubleshooting procedures relating to fan connection/operation in the thermal management unit are included in Blower troubleshooting. Vertiv | Liebert® Mini-Mate™ Installer/User Guide... - Page 39 EC-fan Fault Conditions Table 9.2 EC-fan Fault Conditions Fault Reset Trigger Description Condition Power The Hall Effect Sensor is used to monitor fan speed. If there is a communication error from the Hall-IC error reset/Manual Hall-ICs, the motor is switched off and automatically restarted if no faults are recognized. The motor will come to a stop in the event of mains interruption (failure of a fuse or mains Line failure Automatic...
- Page 40 Motor size "D": 3 x M16 and 1 x seal insert with Control-system connection two 5-mm holes. • Motor size "G": 3 x M20 and 1 x seal insert with two 6-mm holes. Cable-entry points with plastic fastener Slot for add-on module Mains connection Vertiv | Liebert® Mini-Mate™ Installer/User Guide...
-
Page 41: Direct-Drive Blower System
EC-fan Low-voltage Tests • Check control input at the control-system connection (E1 and GND). Confirm that there is a control voltage present at the connection. NOTE: Use the GND in the connector. Do not connect the control ground to the PE in Main connector! •... -
Page 42: Operating The Humidifier
This lowers the mineral concentration and returns the canister to “steady state” operation and prolongs canister life. The frequency of drains depends on water conductivity. Vertiv | Liebert® Mini-Mate™ Installer/User Guide... -
Page 43: Replacing The Canister
If adjustment is necessary and a change of three to four percent in either direction does not permit normal operation of the unit, consult your Vertiv supplier. POT1 controls the duration of the drain cycle. The pot is clearly marked in seconds. This adjustment is factory-set at 60 seconds and should not be readjusted without consulting your Vertiv supplier. -
Page 44: Humidifier Troubleshooting
Check the fill-valve screen opening and capillary tube for obstructions. Check the keep up with steam water-supply pressure (minimum 10 psig). output 9.5 Condensate-drain and Condensate-pump System Maintenance 9.5.1 Condensate Drain Check for and clear obstructions in tubing during routine maintenance. Vertiv | Liebert® Mini-Mate™ Installer/User Guide... -
Page 45: Condensate Pump
9.5.2 Condensate Pump WARNING! Risk of electric shock. Can cause injury or death. Open all local and remote electric power-supply disconnect switches and verify that power is Off with a voltmeter before working within the condensate pump electrical connection enclosure. The Liebert® iCOM™ does not isolate power from the unit, even in the “Unit Off”... - Page 46 This page intentionally left blank Vertiv | Liebert® Mini-Mate™ Installer/User Guide...
-
Page 47: Preventive Maintenance Checklist
10 PREVENTIVE MAINTENANCE CHECKLIST Source: DPN002953, Rev 2 Inspection Date Job Name Indoor Unit Model # Indoor Unit Serial Number # Condensing Unit Model # Condensing Unit Serial # Room Temperature/Humidity ° % Ambient Temperature ° Not all units will have all components. To determine your unit’s configuration, compare the Indoor Unit Model # above and the information in the Components and Nomenclature section. - Page 48 Check/Verify control operation (Sequence) 2. Check/Test changeover device(s) (if equipped) 3. Check/Test water-detection device(s) (if equipped) Refrigeration Piping Check refrigerant lines (clamps secure/no rubbing/no leaks) 2. Check for restriction temperature drop across filter drier Vertiv | Liebert® Mini-Mate™ Installer/User Guide...
- Page 49 MAINTENANCE NOTES Name Signature Company Make photocopies for your records. Compare readings/information to previous maintenance worksheet. To locate your local Vertiv representative for Vertiv-engineered parts, check https://www.vertivco.com/en-us/support/ or Call 1-800-543-2778. 10 Preventive Maintenance Checklist...
- Page 50 This page intentionally left blank Vertiv | Liebert® Mini-Mate™ Installer/User Guide...
-
Page 51: Appendices
APPENDICES Appendix A: Technical Support and Contacts A.1 Technical Support/Service in the United States Vertiv™ Corporation 24x7 dispatch of technicians for all products. 1-800-543-2378 Liebert® Thermal Management Products 1-800-543-2778 Liebert® Channel Products 1-800-222-5877 Liebert® AC and DC Power Products 1-800-543-2378 A.2 Locations... - Page 52 This page intentionally left blank Vertiv | Liebert® Mini-Mate™ Installer/User Guide...
-
Page 53: Appendix B: Submittal Drawings
Appendix B: Submittal Drawings The submittal drawings are in the order of document part number (DPN). Table B.1 below, groups the drawings by topic/application. Table B.1 Submittal-drawings Contents Document Number Title Mini-Mate Component Location DPN004808 Evaporator Unit, 3-ton DPN004179 Evaporator Unit, 4-ton and 5-ton Mini-Mate Planning Dimensions - Split-system Evaporators DPN004800 Cabinet dimensions, 3-ton DX module... - Page 54 This page intentionally left blank Vertiv | Liebert® Mini-Mate™ Installer/User Guide...
- Page 55 LIEBERT MINI-MATE VARIABLE CAPACITY CABINET DIMENSIONAL DATA 4 & 5 TON DIRECT EXPANSION FAN/COIL MODULE Discharge Right Side Return Air Side Front of Unit Side of Unit of Unit of Unit 49" 15" 1/8" Optional 575V Dia. Fan Service 1245mm 381mm (3mm) Transformer...
- Page 56 LIEBERT MINI-MATE VARIABLE CAPACITY PRIMARY CONNECTION LOCATIONS 4 & 5 TON DIRECT EXPANSION FAN/COIL MODULE Left Side Front of Unit Right Side Rear of unit of Unit side of unit 1 7/8" NOTE: ROUTE SUPPLY LINE TO CLEAR 48mm HANGING RODS AND FILTER ACCESS Optional 1/4"...
- Page 57 LIEBERT MINI-MATE VARIABLE CAPACITY ELECTRICAL FIELD CONNECTIONS 4 & 5 TON DIRECT EXPANSION FAN/COIL MODULE 1 2 3 Electrical Entrance for Optional Detail A Condensate Pump Front of Unit [ Panels removed for clarity] HIGH VOLTAGE FEATURES: 1. High Voltage Entrance: located on right side of unit. 2.
- Page 58 LIEBERT MINI-MATE VARIABLE CAPACITY ELECTRICAL FIELD CONNECTIONS 4 & 5 TON DIRECT EXPANSION FAN/COIL MODULE 5 6 58 59 75 76 94 95 96 97 91 92 93 80 81 11 12 13 15 1 2 3 37C 37 38 24 50 51 55 56 70 71 84 85 14 60 38C 37B 37C 1 2 3 37C 38C 37B 37C...
- Page 59 LIEBERT MINI-MATE VARIABLE CAPACITY GENERAL ARRANGEMENT SPLIT SYSTEMS W/ AIR COOLED CONDENSING UNIT Schrader Port with Valve Core High Pressure Cut Out Switch Condenser Coil Digital Scroll Compressor Discharge Schrader Port Temperature with Valve Core Thermistor Atmospheric Pressure Suction Line Relief Valve 3 - Way Head Pressure...
- Page 60 LIEBERT MINI-MATE VARIABLE CAPACITY OPTIONAL FIELD INSTALLED CONDENSATE PUMP CONNECTION LOCATIONS 4 & 5 TON MODELS 3/8" (9.5mm) Compression Fitting 3/4" (19mm) NPT-Female Drain Connection Condensate Drain Drain Line (field supplied) Connection Power Supply from Condensate Pump Electric Service Power Block Support Bracket in Fan/Coil Module.
- Page 61 LIEBERT MINI-MATE VARIABLE CAPACITY DIMENSIONAL DATA 4 & 5 TON DIRECT EXPANSION FAN/COIL MODULE OPTIONAL FILTER BOX & DISCHARGE DUCT FLANGE Optional Filter Box Alternate air discharge location for duct flange. Remove panel and cover rear discharge opening before attaching duct flanges. Discharge Air Duct Flange Supplied with Filter Box Shaded area indicates a recommended...
- Page 62 LIEBERT MINI-MATE VARIABLE CAPACITY COMPONENT LOCATION DIAGRAM 4&5 TON EVAPORATOR UNIT Front of Unit Front of Unit 1 Variable Speed Direct Drive Fan with EC Motor 2 Evaporator Coil 3 Humidifier (optional) 4 Electric Box 5 Smoke Sensor (optional) 6 Electric Reheat (optional) DPN004179 REV : 1 Page :1 /1...
- Page 63 LIEBERT MINI-MATE VARIABLE CAPACITY 4 & 5 TON GENERAL ARRANGEMENT, DIMENSIONAL DATA & FIELD CONNECTIONS LIEBERT iCOM™ WALLMOUNT DISPLAY Front of Unit Right Side of Unit Entrance for Customer Low Volt Connections. Shaded area indicates a recommended clearance of 30" (762 mm) for fan access and removal.
- Page 64 LIEBERT MINI-MATE VARIABLE CAPACITY CABINET DIMENSIONAL DATA 3 TON DIRECT EXPANSION FAN/COIL MODULE Rear of Unit Front of Unit Discharge Side Return Air Side of Unit of Unit 11 3/4" 298mm 10 7/8" 13 7/8" 13 7/8" 276mm 352mm 352mm 17 7/8"...
- Page 65 LIEBERT MINI-MATE VARIABLE CAPACITY PRIMARY CONNECTION LOCATIONS 3 TON DIRECT EXPANSION FAN/COIL MODULE Front of Unit Rear of Unit Left Side of Unit Right Side of Unit 5 1/8" 2 5/16" Entrance for Customer High 130mm 59mm Volt Connections Optional 1/4" (6mm) O.D. Compression Fitting.
- Page 66 LIEBERT MINI-MATE VARIABLE CAPACITY ELECTRICAL FIELD CONNECTIONS 3 TON DIRECT EXPANSION FAN/COIL MODULE Detail A 10 PLUG P74 & TB3 PLUG P64 PLUG P66 Detail B Front of Unit [ Panels removed for clarity] Left Side of Unit HIGH VOLTAGE FEATURES: High Voltage Entrance: located on top and left side of unit.
- Page 67 LIEBERT MINI-MATE VARIABLE CAPACITY ELECTRICAL FIELD CONNECTIONS 3 TON DIRECT EXPANSION FAN/COIL MODULE Detail A STANDARD LOW VOLTAGE FEATURES: (See Detail A) 11. Condensing Unit (DX system only) : Field supplied Class 1 wiring between Evaporator and Condensing unit to terminals 1,2,3,4,5 and 6. 12.
- Page 68 LIEBERT MINI-MATE VARIABLE CAPACITY ELECTRICAL FIELD CONNECTIONS 3 TON DIRECT EXPANSION FAN/COIL MODULE 37C 38C 37B 38B 37C 38C 37B 38B Detail B OPTIONAL LOW VOLTAGE TERMINAL PACKAGE: (See Detail B) 16. Remote Unit Shutdown, two additional pairs Replace existing jumper between terminals 37B & 38B and 37C & 38C with normally closed switch having minimum 75VA, 24VAC rating.
- Page 69 LIEBERT MINI-MATE VARIABLE CAPACITY 3 TON GENERAL ARRANGEMENT, DIMENSIONAL DATA & FIELD CONNECTIONS LIEBERT iCOM™ WALLMOUNT DISPLAY Optional Filter Box Shown Shaded area indicates a recommended clearance of 30" (762 mm) for component access and removal. Front of Unit Left Side of Unit Entrance for Customer Low...
- Page 70 LIEBERT MINI-MATE VARIABLE CAPACITY DIMENSIONAL DATA OPTIONAL FIELD INSTALLED FILTER BOX & DISCHARGE DUCT FLANGE 3 TON MODEL Optional Field Installed Filter Box Front of Unit Rear of Unit Air discharge location Shaded area indicates a recommended for duct flange clearance of 30"...
- Page 71 LIEBERT MINI-MATE VARIABLE CAPACITY OPTIONAL FIELD INSTALLED CONDENSATE PUMP CONNECTION LOCATIONS 3 TON MODEL Fan Coil Unit Air Outlet Duct Electrical Entrance for Condensate Pump Connection 3/4" (19mm) NPT-Female Condensate Drain Connection 3/8" (9.5mm) Compression Fitting Drain Connection Field Supplied Drain Line Field Supplied Rigid Piping (Support as Required) 3/4"...
- Page 72 LIEBERT MINI-MATE VARIABLE CAPACITY OPTIONAL FIELD INSTALLED AIR DISTRIBUTION PLENUM 3 TON MODEL Cover Plate supplied with Plenum Air Discharge out sides of plenum 6" 152mm Return Side of Unit Front of Unit Removable panel on 48" 3 1/4" side of plenum. Minimum 1219mm 83mm 5"...
- Page 73 LIEBERT MINI-MATE VARIABLE CAPACITY COMPONENT LOCATION DIAGRAM 3 TON EVAPORATOR UNIT Front of Unit 1 Direct Drive Fan with Variable Speed EC Motor 2 Evaporator Coil 3 Humidifier (optional) 4 Electric Box 5 Smoke Sensor (optional) 6 Electric Reheat (optional) DPN004808 REV : 0 Page :1 /1...
- Page 74 LIEBERT MINI-MATE VARIABLE CAPACITY UNIT TO UNIT NETWORK CONNECTIONS TWO 3 TON UNITS NETWORKED ETHERNET CABLE DO NOT USE CANBUS DO NOT USE CANBUS (FIELD SUPPLIED) CONNECTORS CONNECTORS TERMINALS TERMINALS 13,14 AND 15 13,14 AND 15 REAR VIEW OF DISPLAY REAR VIEW OF DISPLAY SITE AND BMS SITE AND BMS...
- Page 75 LIEBERT MINI-MATE VARIABLE CAPACITY UNIT TO UNIT NETWORK CONNECTIONS TWO OR MORE 3 TON UNITS NETWORKED USING SWITCH ETHERNET CABLE DO NOT USE CANBUS (FIELD SUPPLIED) CONNECTORS TERMINALS 13,14 AND 15 REAR VIEW OF DISPLAY SITE AND BMS COMMUNICATION CONNECTIONS ETHERNET CABLE ETHERNET RS485...
- Page 76 LIEBERT MINI-MATE VARIABLE CAPACITY UNIT TO UNIT NETWORK CONNECTIONS TWO 4-5 TON UNITS NETWORKED ETHERNET CABLE DO NOT USE CANBUS DO NOT USE CANBUS (FIELD SUPPLIED) CONNECTORS CONNECTORS TERMINALS TERMINALS 13,14 AND 15 13,14 AND 15 REAR VIEW OF DISPLAY REAR VIEW OF DISPLAY ETHERNET CABLE ETHERNET CABLE...
- Page 77 LIEBERT MINI-MATE VARIABLE CAPACITY UNIT TO UNIT NETWORK CONNECTIONS TWO OR MORE 4-5 TON UNITS NETWORKED USING SWITCH ETHERNET CABLE DO NOT USE CANBUS (FIELD SUPPLIED) CONNECTORS TERMINALS 13,14 AND 15 REAR VIEW OF DISPLAY ETHERNET CABLE U2U NETWORKING SWITCH (FIELD SUPPLIED) iCOM I/O BOARD...
- Page 78 LIEBERT MINI-MATE VARIABLE CAPACITY 4 & 5 TON OPTIONAL SUPPLY GRILLE DIMENSIONAL DATA Optional Return ‰ ‰ T-BAR T-BAR Air Filter 24" See DPN004055 for 610mm cabinet dimensions. 3 9/16" 90mm ‰ T-BAR Front of Unit 24" 610mm ‰ T-BAR 17 3/4"...
- Page 79 Vertiv | Liebert® Mini-Mate™ Installer/User Guide...
- Page 80 VertivCo.com | Vertiv Headquarters, 1050 Dearborn Drive, Columbus, OH, 43085, USA © 2018 Vertiv Co. All rights reserved. Vertiv and the Vertiv logo are trademarks or registered trademarks of Vertiv Co. All other names and logos referred to are trade names, trademarks or registered trademarks of their respective owners. While every precaution has been taken to ensure accuracy and completeness herein, Vertiv Co.
Need help?
Do you have a question about the Liebert Mini-Mate MT048 and is the answer not in the manual?
Questions and answers