
Related Manuals for ISA ZERO TOUCH T5


Summary of Contents for ISA ZERO TOUCH T5
- Page 1 ZERO TOUCH T8 OR ISA S.r.l. Via del Lavoro, 5 06083 Bastia Umbra - Perugia - Italy Tel. +39 075 80171 - Fax +39 075 8000900 www.isaitaly.com ZERO TOUCH USE AND MAINTENANCE MANUAL 428000729137...
-
Page 2: Table Of Contents
NOTES / IMPORTANT NOTES MANUFACTURER WARRANTY TERMS AND CONDITIONS EQUIPMENT IDENTIFICATION COMPOSITION LOAD / UNLOADING OF PRODUCTS LOAD OF PRODUCTS USING THE SPIKE TEMPERATURE PROBE USE OF THE LAMP UV (OPTIONAL) SAFETY SAFETY DEVICES PRESENT FIXED PROTECTIONS ISOLATING THE ELECTRIC POWER SUPPLY RESIDUAL RISKS RISKS OF CONTACT WITH LIVE PARTS FIRE... - Page 3 ATTACHMENT WIRING DIAGRAM - 412100768000 WIRING DIAGRAM - 412100770100 The manual contains symbols to attract the reader’s attention and highlight particularly important aspects. The table below illustrates the meaning of the various symbols used. Read the instructions manual Use of protective clothing Requests for maintenance or operations must Danger: Live electrical parts be carried out by qualifi...
-
Page 4: Notes / Important Notes
Keep this manual in a safe place. It should be available for consultation near the equipment at all times. If lost or destroyed, you can request a copy of the manual from ISA by specifying the exact model, serial number and year of manufacture. - Page 5 Note In order not to compromise functionality and safety of the appliance, the particularly complex installation and maintenance activities are not documented in this manual and are performed by specialised ISA technicians. ZERO TOUCH USE AND MAINTENANCE MANUAL...
- Page 6 1. NOTES / IMPORTANT NOTES Never use electric devices inside this appliance. Do not use mechanical or other means to accelerate the defrosting process, other than recommended by the manufacturer. Keep the air vents in the casing of the appliance or in the structure built into the wall free of obstructions.
- Page 7 1. NOTES / IMPORTANT NOTES R290 - REFRIGERANT (WHERE APPLICABLE) The refrigerant R290 is a gas that is compatible with the environment, but highly fl ammable. Pay close attention during transport, installation and that the destruction not to damage the refrigerant pipelines. IN THE EVENT OF DAMAGE: Keep fl...
- Page 8 INTRODUCTION ISA employs materials of the best quality and as they enter the company, we constantly monitor their storage and the use as part of the manufacturing process to prevent damage, deterioration and failure.
- Page 9 1. NOTES / IMPORTANT NOTES The safety requirements, indications, standards and notes illustrated in the various chapters of the manual are aimed at establishing a code of conduct and a series of obligations to be observed when performing the various activities, in order to create safe conditions for personnel, the equipment and the surrounding environment.
-
Page 10: Manufacturer
2. MANUFACTURER ISA S.r.l. Via del Lavoro, 5 06083 - Bastia Umbra - Perugia - Italy Tel. +39 075 80171 Fax +39 075 8000900 www.isaitaly.com 3. WARRANTY TERMS AND CONDITIONS The seller's warranty on the equipment is valid for 12 (TWELVE) months from the date of delivery. -
Page 11: Equipment Identification
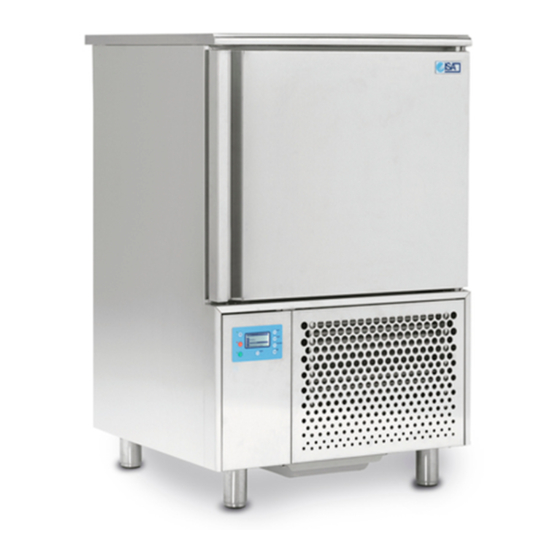
4. EQUIPMENT IDENTIFICATION • Find the label affi xed on the machine to read the technical data. • Check the machine model and the power supply voltage before you perform any operation. • If you uncover mismatches, contact the manufacturer or the company that supplied the machine immediately. Manufacturer’s address Absorption of Heating Elements Symbols of Compliance... -
Page 12: Use
5. USE This appliance is exclusively intended to: PRODUCT BLAST CHILLING AND FREEZING The manufacturer is not liable for injury to persons or damage to property or the appliance itself caused by the displaying of products other than those described above. THE APPLIANCE IS INTENDED FOR PROFESSIONAL USE. -
Page 13: Load / Unloading Of Products
5.2 LOAD / UNLOADING OF PRODUCTS LOAD It recommends the use of kitchen gloves to avoid burns during contact with hot trays and trolleys. UNLOADING We recommend the use of gloves suitable for trays and cold trucks. 5.3 LOAD OF PRODUCTS •... - Page 14 • In the event that the machine is not fully loaded, distribute the tins and trays evenly inside the machine and avoid overcrowding one area. • Position the trays and tins as far inside the refrigerated chamber as possible, making sure they are as close to the evaporator as possible.
-
Page 15: Using The Spike Temperature Probe
5.4 USING THE SPIKE TEMPERATURE PROBE The spike probe should only be used by authorised personnel trained in blast chilling techniques. Keep out of the reach of children. The probe should only be used for the purpose for which it was designed; reading the temperature at the heart of a food product which requires blast chilling or freezing. -
Page 16: Use Of The Lamp Uv (Optional)
5.5 USE OF THE LAMP UV (OPTIONAL) The UV lamp sterilizing function (optional) must only be used for the purpose for which it was designed: sterilize internal unit surfaces. Attention Avoid exposure and / or observation of UV lamps. PRE-COOLING Prior to carrying out either fast blast chilling or freezing operations, it is necessary to pre-cool the system in order to further reduce operating times. -
Page 17: Safety
6. SAFETY The equipment is fi tted with safety devices. Purchaser must instruct the user to staff about the risks, the safety devices and the general rules regarding safety provided for by the legislation of the country where the equipment is installed. Users / operators must be aware of the position and operation of all controls and of the equipment characteristics;... -
Page 18: Fire
6.6 FIRE Danger In the event of a fi re, immediately disconnect the master switch from the main power supply line. 6.7 EXPLOSIVE ATMOSPHERE The equipment must not be located in an area classifi ed as an explosion risk according to 1999/92/EC such as: Zone 0 An area in which there is a permanent, long-lasting or frequently explosive atmosphere made up of a... -
Page 19: Cooling
6.13 COOLING During different operations to perform on the counter, such as cleaning or loading goods, it is necessary to handle products and/or counter parts at a low temperature with the risk of “cold injury” for the operators and/or accidental slipping hazard. -
Page 20: Disposal Of Waste Material
7. DISPOSAL OF WASTE MATERIAL During normal operation, the appliance does not generate any environmental contamination. At the end of its life cycle, or if it is necessary to proceed to permanent decommissioning, we recommend following the procedures below: DISPOSAL (USER) The symbol, applied to either the product or its packaging, indicates that the product should not be considered as normal domestic waste, but should be taken to a waste collection point for the... -
Page 21: Installation
8. INSTALLATION This manual supplies the information necessary for correct unpacking, procedures for positioning and connection to mains electricity. 8.1 STORAGE AND UNPACKING The appliance, with or without the packaging, should be carefully stored inside warehouses or in areas away from the elements and direct sunlight, at a temperature between 0 and +40 °C. The appliance should only be moved by qualifi... -
Page 22: Maintenance
9. MAINTENANCE The Staff in charge of the appliance must control and respect the expiry dates for maintenance, given in the table below, calling the authorised Technical After-sales assistance when indicated. OPERATION FREQUENCY AUTHORISED PERSONNEL CLEANING THE EXTERNAL SURFACES CLEANING THE ACCESSIBLE INTERNAL PARTS (without the use of tools) CONTROL POWER SUPPLY CABLE, USER... -
Page 23: Faults - Technical After-Sales Assistance
If the control unit is set up especially for must R290 refrigerant, it must only be replaced with an original replacement from ISA. Replace the temperature probes only after checking which of the two is not operating effi ciently. -
Page 24: Alarms List (Where Present)
10.1 ALARMS LIST (WHERE PRESENT) ALARM DESCRIPTION OUTPUTS AUTHORISED PERSONNEL Broken thermostat probe. • The alarm starts a few seconds after the probe breaks down; it stops a few Compressor output according to seconds after the probe starts working again properly. “COn”... -
Page 25: Technical Specifications
11. TECHNICAL SPECIFICATIONS T8 OR Lenght 1435 External dimensions Depth Height Weight (net) Lenght External dimensions Depth Height Weight (net) Lenght External dimensions Depth Height 1270 Weight (net) Lenght External dimensions Depth Height 1750 Weight (net) Lenght External dimensions Depth Height 1950 Weight (net) -
Page 26: Containers Arrangement
11.1 CONTAINERS ARRANGEMENT ZERO TOUCH 428000729137 USE AND MAINTENANCE MANUAL... -
Page 27: Kit Supports Ice Cream
11.2 KIT SUPPORTS ICE CREAM ZERO TOUCH USE AND MAINTENANCE MANUAL 428000729137... - Page 28 11.2 KIT SUPPORTS ICE CREAM ZERO TOUCH 428000729137 USE AND MAINTENANCE MANUAL...
- Page 29 11.2 KIT SUPPORTS ICE CREAM ZERO TOUCH USE AND MAINTENANCE MANUAL 428000729137...
-
Page 30: Installation
11.3 INSTALLATION Attention t is fundamental to respect the distances indicated (mm) for correct installation of the appliance. 11.4 LOAD LIMITS Attention It is fundamental not to exceed the load limits indicated in order not to alter the correct air circulation and thus prevent a high product temperature. -
Page 31: Positioning/Levelling
11.5 POSITIONING/LEVELLING Attention ADJUSTABLE LEVELING FEET The equipment is set up with adjustable leveling feet in height. LEVELLING It is absolutely necessary after placement level the equipment to the fl oor. Attention UNIDIRECTIONAL ROLLER - PIVOTING WHEELS The equipment is set up with two unidirectional rollers and two pivoting wheels (with brakes) to facilitate handling and positioning. -
Page 32: Control Panel
12. CONTROL PANEL START-UP Press the master switch network. Plug the appliance in at the socket supplied by the customer, ensuring that the plug is fi tted with an earth contact and that there are no multiple sockets connected to it; the equipment automatically starts. The equipment starts automatically. -
Page 33: Cleaning
13. CLEANING EXTERNAL STAINLESS STEEL Only use warm water and non-aggressive detergents and then rinse and dry using a soft cloth. ACRYLIC OR POLYCARBONATE Wash with lukewarm water, using a soft cloth or a chamois cloth. Do not use detergents, alcohol, acetone or solvents. Do not use abrasive cloths or sponges. - Page 34 13. CLEANING CONDENSING UNIT Attention Turn off the product, wait a few hours until the equipment of the condensing unit has reached a temperature close to that of the environment. Remove the screws fi xing the protection grid (front and rear) and remove them as shown.
- Page 35 13. CLEANING SEAL DOOR Attention Clean the door gaskets every three months, the seals must be kept clean and fl exible to ensure the perfect fi t. A light application of “Vaseline” on the zipper seals help keep them fl exible and ensure good adhesion. ZERO TOUCH USE AND MAINTENANCE MANUAL...
-
Page 36: Prolonged Appliance Switch-Off
14. PROLONGED APPLIANCE SWITCH-OFF • Remove the product contained in the cabinet and put it immediately in a relevant cold storage container in order to guarantee correct preservation. • Open the equipment and wait for it to reach room temperature and then clean it. •... - Page 37 ATTACHMENT 1 - WIRING DIAGRAM - 412100768000 ZERO TOUCH USE AND MAINTENANCE MANUAL 428000729137...
- Page 38 ATTACHMENT 2 - WIRING DIAGRAM - 412100770100 ZERO TOUCH 428000729137 USE AND MAINTENANCE MANUAL...
- Page 40 Bastia Umbra - Perugia Italy Tel. +39 075 80171 Fax +39 075 8000900 www.isaitaly.com...
- Page 41 Controller for top-class blast chillers, with colour TFT touch-screen graphic display, in split version that can be built into the unit 1 of 30...
- Page 42 Important Read this document carefully before installation and before using the device and take all the prescribed precautions. Keep this document with the device for future consultation. The following symbols are used in this document: indicates a suggestion indicates a warning. The device must be disposed of according to local regulations governing the collection of electrical and electronic waste.
- Page 43 Index USER INTERFACE ..........................4 Status and black-out ..........................4 Prima accensione del dispositivo ......................4 Switching the device on and off ......................4 Lock/unlock keypad ..........................5 Silencing the buzzer ..........................5 ...
- Page 44 USER INTERFACE Status and black-out The interface has the following operating modes: “off” (device is not powered); “stand-by” (the device is powered but switched off); “on” (the device is powered, switched on and awaiting start-up of an operating cycle); “run” (the device is powered, switched on and running an operating cycle).
- Page 45 Lock/unlock keypad The keypad can be locked by setting parameter E7 to 1, locking the keypad after the period of inactivity set by parameter E8. If the keypad is locked, a pop-up will appear when it is touched indicating that it is locked and how to unlock it. It can be unlocked by dragging a finger to the right.
- Page 46 FUNCTION MODES Initial information on operating cycles The device is capable of operating in the following modes: temperature controlled blast chilling and conservation hard temperature controlled blast chilling and conservation time controlled blast chilling and conservation hard time controlled blast chilling and conservation temperature controlled blast-freezing and conservation soft temperature controlled blast-freezing and conservation time controlled blast-freezing and conservation...
- Page 47 Selecting the operating mode All the operating functions can be accessed from the Home screen by selecting the desired area. Enables the blast chilling mode in which it is possible to select/set a standard blast chilling/blast-freezing cycle, a multineedle probe or multi-timer cycle, see chapter 7. Enables special cycles in which it is possible to select one of the special cycles available according to the configuration of the machine, see chapter 4.
- Page 48 BLAST-CHILLING MODE Press on this area to open the screen shown below. Each areas allows you to reach the following cycles: blast chilling, blast-freezing, continuous cycle and customized cycle, details below. CHILLING Enables selection of a standard blast chilling cycle, uploading the relevant pre-settings.
- Page 49 Blast chilling/blast-freezing and conservation Pressing one of these areas redirect you to blast chilling or blast-freezing cycle setup. TEMPERATURE CONTROL If enabled, the needle probe lights up blue by default. With needle probe error the cycle always run with time control. TIME CONTROL press timer area time controlled area will light up blue.
- Page 50 When a cycle is properly finished, the needle probe has reached the right temperature or the time period is finished, the buzzer sounds and the conservation phase begins. The conservation phase is not timed and is only terminated when the key is pressed.
- Page 51 Continuous cycle Pressing this area enables selection of a continuous cycle and it can be run in multi needle probe mode if a temperature controlled cycle has been selected, multi-timer mode time controlled cycle has been selected. If only a single needle probe has been selected, only the multi- timer mode can be used.
- Page 52 3.3.2 Multi-timer mode The time controlled cycle makes it possible to set up to four timers. The cycle starts up activating only the first timer with its pre-set values. The other timers and their pre-set values can be enabled by pressing the pencil icon and setting a time once the cycle is underway.
- Page 53 The customized cycle starts up and activates the first phase, which by default is a needle probe phase. It is possible to change the probe phase to a time controlled phase and to set the relative set points. To add any more phases press area , while to eliminate any phase previously set in the program, press area .
- Page 54 3.5.3 Setting the cycle duration Proceed as described for the cabinet set point, after pressing area for the cycle duration. 3.5.4 Setting the fan speed To modify this, press area for the fan speed and the screen shown below will open. Set the desired value pressing the key.
- Page 55 3.6.1 Needle probe insertion test If the needle probe is enabled or if parameter P3 is set to a value other than 0, temperature controlled cycles are preceded by a two-phase test to check that the needle probe is correctly inserted. If the needle probe is not enabled or if parameter P3 is set at 0, only time controlled cycles can be selected.
- Page 56 If the temperature controlled cycle is not completed in the allotted time, this problem will be signalled by the appearance of the alarm icon, but the blast chilling cycle will still continue. In temperature controlled cycles, pressing the key will bring up the screen granting access to the following functions.
- Page 57 Fish sanitation Pressing this area enables selection of a fish sanitation cycle. This special cycle consists of the following phases: - blast chilling with the cabinet set point set by parameter r19 and with the product temperature set point set by parameter r20; - holding for the time period set by parameter r21 and the cabinet set point given by r20;...
- Page 58 Thawing Pressing this area enables selection of a thawing cycle, managed according to the load of product to be thawed, in compliance with the maximum quantity stated by the manufacturer. To make it easy, the quantity of product to be selected is divided into three load bands for each of which the controller will load three different sets of parameters, according to the following framework.
- Page 59 Defrosting Pressing this area enables selection of a manual defrosting cycle, which is started up by pressing area . When the cycle starts up the following page is displayed. INTERVAL OF DEFROST during the holding phase the defrost interval is defined with poarameter d0<>0. Regardless of how have been started up, defrosting cycles are managed by the following parameters.
- Page 60 Ice cream hardening Pressing this area enables selection of an ice cream hardening cycle. This is a time controlled blast-freezing cycle with the set point provided by parameter r8 and the duration by parameter r24. At the end of the time set by r24, there is no move to a conservation phase, the hardening cycle continues until the is pressed.
- Page 61 Heating the needle probe Pressing this area enables selection of a needle probe, or probes, heating cycle. This cycle can also be run automatically if the key is pressed during conservation, following a blast chilling/defrosting cycle. The function can be activated by parameter and can only be used if u1=2 or u3=1.
- Page 62 Proofing Pressing this area enables selection of a proofing cycle. This function can only be enabled if an expansion has been set (parameter E12=1). 4.8.1 Description of proofing It provides a complete control for retarding-proofing cabinets for bread or pastry. A proofing cycle consists of four phases with different temperatures, relative humidity and time periods, one following on from the other, as in the sequence described below.
- Page 63 Slow cooking Pressing this area enables selection of a slow cooking cycle. This function can only be enabled if an expansion has been set (parameter E12 = 1). After selection of the slow cooking function, a screen will appear on which it is possible to view and modify the relevant set points and to decide whether to set up a temperature or time controlled process.
- Page 64 RECIPE BOOK MODE Pressing this area on the Home page opens the following screen. This screen grants access to a recipe book divided into four categories: blast chilling, blast-freezing, proofing slow cooking. The icons representing the last two categories are only displayed if the functions have been enabled using the relevant parameters.
- Page 65 Pre-set blast chilling recipes Cabinet setting -25°C Phase 1 Needle probe setting 20°C Ventilation setting Cabinet setting -5°C Phase 2 Needle probe setting 3°C Ventilation setting Cabinet setting 5°C Conservation Needle probe setting 2°C Ventilation setting Cabinet setting -25°C Phase 1 Duration setting 27 min Ventilation setting...
- Page 66 Saving a recipe It is possible to save both time and temperature controlled cycles. In the latter case the time required to reach the core temperature is saved. Recipes can be saved in the following ways. During conservation after customized blast chilling/blast-freezing cycle.
- Page 67 PRE-COOLING MODE Pressing this area on the Home page enables selection of a pre-cooling cycle. This cycle is similar to a normal blast chilling cycle and it may precede all operating cycles. Pressing the area in question opens the following screen. Set the required set point value and press area to start the cabinet pre-cooling cycle.
- Page 68 ALARM LIST CODE REASON INFORMATION LINKS Date and time of HACCP Date lost for long black-out. Clock Error alarms are not log. Alarm output activated. during stand-by, possible to set or start any cycle. during blast chilling freezing, the cycle runs with the compressor always ON.
- Page 69 input sensor bypassed. Check the parameter P0 value. NEEDLE Needle Needle probe/sensor 2 error. Check probe damages. PROBE probe/sensor 2 input sensor Check the probe connection. SENSOR 2 error. bypassed. Check the cabinet temperature.. Check the parameter P0 value. NEEDLE Needle Needle probe/sensor 2 error.
- Page 70 maximum duration (HACCP alarm). Check condenser Condenser fan are forced CONDENSER High Condenser temperature. OVERHEAT temperature alarm. Check parameter C6. Alarm output activated. Compressor locked Check the condenser temperature during “stand-by” it prevents COMPRESSOR alarm high Check parameter C7 to select and start a cycle. LOCKED condenser Turns power supply off and clean...
- Page 72 Bastia Umbra - Perugia Italy Tel. +39 075 80171 Fax +39 075 8000900 www.isaitaly.com...
Need help?
Do you have a question about the ZERO TOUCH T5 and is the answer not in the manual?
Questions and answers