Table of Contents
Advertisement
Quick Links
Full Strip down and Re-assembly procedure for the 10KG Demolition Hammer
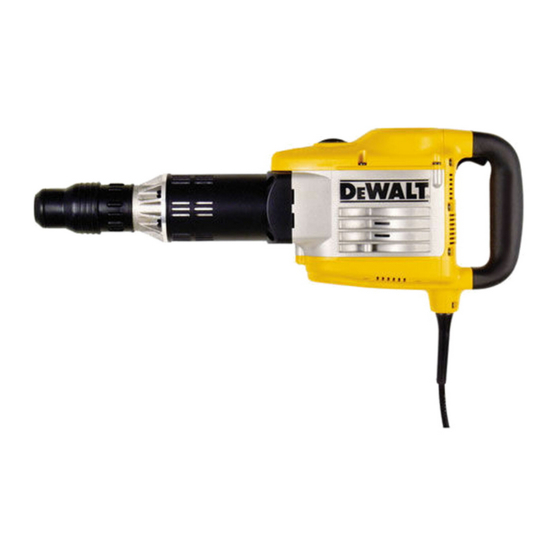
D25900K.
This procedure is in Four main sections.
1. General Information / Tooling
2. Total Strip Down.
3. Re-assembly.
Motor Unit
Switch
Unit
Anti-Vibration
Tool Holder
Piston &Cylinder
Beat Piece & Ram
Crankcase
Gearbox
Page 1 of 63
Advertisement
Table of Contents

Subscribe to Our Youtube Channel
Related Manuals for DeWalt D25900K


Summary of Contents for DeWalt D25900K
- Page 1 Full Strip down and Re-assembly procedure for the 10KG Demolition Hammer D25900K. This procedure is in Four main sections. 1. General Information / Tooling 2. Total Strip Down. 3. Re-assembly. 4. Routine Servicing. Motor Unit Switch Unit Anti-Vibration Tool Holder Piston &Cylinder...
- Page 2 INDEX. Page 3 General Information. Page 4 Service Kits Page 5 Hand Tools Required Page 6-8 Service Tooling. Dismantle Page 9-10 Remove Tool Holder and Beat Piece. Page 11-15 Tool Holder Assembly. Page 16-17 Anti-Vibration Unit. Page 18-25 Motor and Gearbox unit . Re-assembly Page 26-29 Gearbox and Crankshaft.
- Page 3 SECTION ONE. General Information. ONLY THE CORRECT GREASE MUST BE USED When repairing this product it is very important to keep the working area clean and free from any dust or debris. If any contamination is allowed within the Tool holder, Anti-vibration unit or Gear Box this will cause premature failure of the Product.
- Page 4 Service Kits. Four Service kits will be available that contain all the O Rings, Grease, Brushes, Snap Rings, Seals that are required when Servicing. The first service kit is used when the unit comes in for its first brush change after 250 hours. The Major Kit is used when the unit requires a complete strip down and rebuild.
- Page 5 Hand Tools required. Soft faced mallet. T Handled Torx Screw Drivers. TX10. TX15. TX20. Long Nose pliers. Torque wrench. ½ in Drive. Torque Screwdriver. Allen Keys. Size various Circlip Pliers. Internal, External. Press. Vice. Two legged puller. Page 5 of 63...
- Page 6 Service tooling 559617-99 Crank Gear Removal & Assembly Tool. Used to fit Double Gear ( 42 ) in conjunction with a Press. Will remove and replace the crank gear ( 43 ) in conjunction with a Torque Wrench Used to fit Armature Seal (36) & Bearing (35) in conjunction with Service Tool 559621-99.
- Page 7 559621-99 Armature Seal & Bearing assembly Tool. Used to fit Seal (36) & Bearing (35) 559620-99 Spindle Seal & Tool Holder assembly Tool. Used to fit Seal (108) & Spring Guide (98) Page 7 of 63...
- Page 8 559619-99 Snap Ring assembly Tool. Used to remove and fit Snap Ring (88). Page 8 of 63...
- Page 9 SECTION TWO Remove Tool Holder and Beat Piece. Remove Side handle (59) if fitted. Undo six screws (102) remove Tool Holder Assembly (111) a flat bladed screwdriver may be required to Gently lever the housing away from the Anti-vibration unit. Beware that the internal components will fall out from the Tool Holder Remove item (72) from inside the Housing.
- Page 10 Remove Beat Piece Bearing item (110) from Spindle (107) (this may be tight), Remove O Ring (109). Pull off Rubber Seal item (87). From end of Tool Holder Unit. Page 10 of 63...
- Page 11 Dismantle Tool Holder Assembly. Service Tooling 559619-99 Snap Ring Assembly tool. Clamp Service tool into a vice. Important Note, Fit insert from Service Jig into the Tool Holder spindle, be careful not to damage the Seal. Make sure that the insert stays in position otherwise the Seal inside the Spindle could be damaged, then lower the Tool Holder onto the Jig..
- Page 12 Fit nut to threaded rod and tighten until the washer (89) is just clear of the Snap Ring (86). Be careful not to over tighten. Using circlip pliers and a small flat bladed screwdriver prise the Snap Ring from the groove then maneuver it past the large groove to clear the Spindle Remove the nut and the Three Legged part from the Jig.
- Page 13 Remove Spring (93) from Tool Holder assembly. Remove Bush (94). Depress Bush (96) and remove Locking Piece (92 x 2), Bush (96) and spring (97) Remove the Tool Holder Assembly from the Service Jig. Make sure the insert remains in place until the Tool Holder Unit is clear of the Threaded Spindle of the service Jig.
- Page 14 Lift off housing complete with the Turning sleeve Assembly from Spindle (107). Remove Spring Guide item (98) from Turning Sleeve Assembly Lever out Spring (99) BEWARE the Spring will be under tension. Remove SA Sleeve item (100). Page 14 of 63...
- Page 15 Pull off Turning sleeve item (101) from Housing. Remove O Ring (104). Remove O Ring (74). If Spindle is to be re-used then remove the following. O-Ring (74). Seal (108). This completes the strip down of the Tool Holder Unit. Page 15 of 63...
- Page 16 Anti-vibration unit. IMPORTANT NOTE ALL O RINGS MUST BE REPLACED AFTER DISMANTLING. Remove Cover (66) Pull the split apart and slide off Housing (78). Undo the 4 Screws (65) Holding the Anti-Vibration unit to the Motor Housing. Use a broad flat bladed screwdriver to carefully lever the Anti- Vibration unit from the Motor Housing.
- Page 17 Remove Anti-vibration components (80,81,82,83,86). From inside the housing. Remove Cylinder (75). Push on exposed part at the wide end of Housing by the 4 boltholes. Remove Ram (76). Push through from the wider end of Cylinder using a non-metallic object, to avoid any damage to the Cylinder or Ram.
- Page 18 Dismantle Motor and Gearbox IMPORTANT NOTE ALL O RINGS MUST BE REPLACED AFTER DISMANTLING. Remove Handle / Switch Remove Switch handle Cover (19) 8 Screws Remove Adapter (15) from Switch and remove Actuator Rod (14) from Trigger (12). Remove cord clamp (25) 2 Screws Remove Switch Clamp (24) 1 Screw.
- Page 19 Armature & Field. Remove top Motor Cover (57) 5 Screws. Remove Electronic (54) 2 Screws, from inside Cover. Undo fan Screw (11). Grip outside edge of Fan; Use protective gloves, the edge of the Fan is very sharp. Lift off fan (10). Remove both the Terminals from the Brush Assembly.
- Page 20 Remove Brushes (8) Use a small Allen key to pull the spring clear of the Brush. Remove the brush and disconnect from Brush Holder. Fit new Brushes and leave spring resting on the side ready to reassemble. Keeping the spring in this position will allow new brushes to be fitted waiting for re-assembly.
- Page 21 Drift out Field and housing (2) by lightly tapping on opposite sides of Main Casting (44). Remove seal (33) Remove SA Cover (53) 3x Screws, Remove O ring (52) This must be replaced. Remove Piston SA (51).This is only possible if the Anti-vibration unit has been removed.
- Page 22 Turn housing over Remove Gear Case Cover (30). Remove Seal (32). Remove the cover (21). Remove Snap Ring (16) from Armature shaft groove, this must be spread wide enough to clear the splines on the Armature shaft. The Snap Ring must not be reused. If replacing the Armature a new Snap ring will be supplied and fitted.
- Page 23 Clamp Service Jig ( 559617-99) in a Vice. Position the Main casting on to the Jig 559617-99. Make sure the pin on the CrankShaft (45) locates into the recess on the Jig. Then locate the socket part of the Jig into the large Gear(43).
- Page 24 Remove Circlip (37) Push Bearings(41) and Spacers (39,40) through from the large gear side using a press and a suitable size drift. Remove the Main casting from the service jig Remove the CrankShaft assembly using a press. Push through from the outside. The CrankShaft bearings can not be replaced due to misalignment problems when refitting.
- Page 25 Remove the Circlip (34) from the Armature Bearing. Press out the Armature Bearing. (35) Remove the seal (36) This must be replaced. This completes the Full Strip Down of the product. Page 25 of 63...
- Page 26 SECTION THREE. Re-assembly of Gearbox & Crankshaft . Service Tooling required 559618-99/ 559617-99 / 559621-99. Make sure the Ring Seal (46) is fitted to Crank Shaft SA (45) Place Main Housing on Press base so the threaded part of the Crank Shaft can be pushed through. Press Crankshaft into Main Housing to its limit.
- Page 27 REMOVE BAR FROM UNDERSIDE OF SERVICE JIG 559617-99 Place Main Housing on to Service Jig 559617-99 Make sure the pin on the CrankShaft (45) locates into the recess on the Jig. Fit new Armature Seal to Main Housing Use Service Tool and press 559621-99.
- Page 28 Double gear Assembly. Gear (42) 579782-00 Bearings (41) 330003-67 x 2 Small Spacer (40) 578451-00 Large Spacer (39) 578452-00 CirClip (37) 324821-03 Press one Bearing (41) into Double Gear, to its limit. Fit both Spacers into the Gear Assembly one resting on the inner and the other on the outer race of the Bearing one inside the other.
- Page 29 Place the assembled Double Gear SA onto the spindle and, using a suitable sized drift to fit on the inner race of theBearing. Press down fully. Important note it may be better to clamp the Jig into a vice before tightening the Large Gear.
- Page 30 Service Tooling 559618-99. Make sure the Snap Ring is in place on the Armature. If the Armature has been replaced it will be supplied with the Ring fitted. Place main Housing onto Service Jig 55918-99. Place Armature into Main Housing through the Bearing making sure the splines mesh with the Double Gear.
- Page 31 Fit the Seal (33) to the Field Housing (2). Fit the Motor pot over the Armature and into the Main Housing making sure the Seal (33) remains in place Push down until seated correctly. Fit the Bearing (5) into the Insulator (4) Then Fit to the Brush Assembly If not already done fit new Brushes to the Brush Assembly and leave in this position.
- Page 32 Place the Brush Assembly (3) in position over the Armature Shaft and push down. Do not fix into place until the wires have been positioned correctly. Ensure the two short black wires are positioned one either side of the Brush Assembly through the recess as shown. Then connect to the terminal on the Brush holder The remaining two long wires with the black terminal attached pass through the recess and under the wire trap as shown.
- Page 33 Reconnect the Terminal from the Field to the Brush Assembly Reconnect the Switch Lead (18) to the brush assembly and pass the wire under the wire trap. Fit four new Screws (58) and tighten to 3 Nm Fit the fan (10) to the Armature shaft and tighten the Screw to 5 Nm.
- Page 34 Re-assembly of Crank Case , Piston and Gear case. Jigs Required 559618-99. Total amount of Grease (800) 83 Grams 5 Grams on the Piston 39 Grams in Gearbox and 39 Grams in Crankcase. The piston is also available as a SA 579779-00. Piston (50) 579774-00 Con Rod (38) 487234-00 O Ring (49) 487213-00...
- Page 35 Refit Piston SA into CrankCase. Position the CrankShaft Pin so the Con Rod can be fitted through the front of. Main Housing. Leave the piston in this position ready to fit the Anti-Vibration unit. Distribute 39 Grams of Item (800) Grease into CrankCase. Make sure a new O Ring (52) is fitted then Refit the Cover (53).
- Page 36 Remove Housing from Service Jig and turn over. Fit a new Seal (32) to the Main Housing make sure the seal fits into the groove in the housing. Fit cover (21). Distribute 39 Grams of item (800) Grease over the Gears. Fit Gear Case Cover (30).
- Page 37 Reassemble the Switch / Handle. Fit motor Leads to the switch Fit the Power Cord leads to the Switch. Position suppressor as shown. Locate Switch into position. Fit Switch Clamp. Fit Power Cord and cord Clamp Tighten the screws to 1.8 Nm Locate the Motor Cable and Cable Tie as shown.
- Page 38 Fit two the two spring loaded pins (17) to the trigger (13). Keep hold of the two spring loaded Pins during this operation Position the Trigger into the housing in the Brush Assembly. Line up the holes and push the pin (12) through the Housing and into the Trigger, and centralize.
- Page 39 Fit Switch Handle Cover (19). Tighten the 6 Screws (58) to 3Nm Tighten the 2 Screws (26) to 1.8 Nm This completes the reassemble of the Switch Handle Assembly. Page 39 of 63...
- Page 40 Reassemble Cylinder and Ram. Amount of Grease (800) 10 Grams to be distributed between Ram & Cylinder. Housing (78) 579769-00. Cylinder (75) 579770-00. O-Ring (74) 323711-41 Ram (76) 579780-00 O-Ring (73) 487279-00 O-Ring (77) 487296-00 Fit newO Ring (74) over wide end of Cylinder.
- Page 41 Grease the inside of the Front Housing and the outside of the Cylinder with item (800). Fit the Ram (76) into the Cylinder (75) with the O-Ring entering last. Use the Service Tool 559620-99 to push the Ram down until it reaches the bottom.
- Page 42 Reassemble Anti-Vibration Unit. Total amount of Grease (800) 39 Grams. Spring x 2 (81) 487247-00. Guide x 2 (82) 576489-00. Counterweight (83) 579781-00. Spring Guide grooved (86) 576488-00 Spring Guide smooth (80) 487293-00 Fit the 2 Guides (82) to the Counterweight (83) with the tapered diameter into the internal bore of the Counterweight.
- Page 43 Grease around the Counterweight SA, place over the cylinder and onto the Spring. Lightly grease both ends of the remaining Spring (81) place over Cylinder onto the Counterweight. Place the Grooved Spring Guide (86) onto the Spring with the recess facing down. Page 43 of 63...
- Page 44 Refit the Anti-Vibration Unit to the Main housing, this can be made easier if the Switch Handle is clamped into a vice. Protect the Handle from damage by using soft jaws or rag. Make sure the narrow rib on the Front Housing is facing the Gearbox and holding the internal parts in position.
- Page 45 SDS Spindle. Service Tool 559620-99 If the Spindle is being replaced it will be supplied with the seal already fitted. Spindle 579773-00. Beat piece seal 487243-00. Fit new seal (108) into Spindle (107) using the Service Tool 559620-99. Make sure the Seal is fitted to the Service Tool in the correct position with the spring against the shoulder, see photo.
- Page 46 Spindle & Flange Assembly. Spindle (107) 579773-00 Flange (103) 579778-00 O Ring (74) small 38 x 2.5 323711-41. O Ring (71) large 43 x 5.5 487298-00. O Ring (104) 323711-40 58 x 2.0 Fit a new small O Ring (74) into the groove under the Hexagon on the outside of the Spindle.
- Page 47 Smear a little grease item (800) into recess in the Flange (103), then fit a new large O Ring (74) into recess. Fit new O Ring (104) to the groove in the flange. Place the Flange (103) over the thin end of the spindle (107) and push down fully.
- Page 48 Turning Sleeve Assy. Locking Sleeve (100) 487267-00 Locking Spring (99) 487289-00 Turning Sleeve (101) 487237-00 Spring Guide (98) 487268-00 Place the Locking Sleeve (100) on the bench with the teeth down, seat the hexagon coil of the spring on the hexagon of the sleeve. The angled end the spring must be facing down and lying next to the lip.
- Page 49 Place the Locking Sleeve and Spring, with the teeth facing down, inside the turning sleeve. Ensure the angled end of the spring coil slots into one of the holes on the inside of the Sleeve (101) Push the Spring (99) down with the angled end in the hole. Using the Service Tool place the hexagon end into the hexagon of the locking sleeve.
- Page 50 Place the Spring Guide (98) into the turning sleeve with the hexagon facing down interlocking with the locking sleeve. Make sure the Hexagon on both the Guide and locking Sleeve line Hold the white plastic guide in place to prevent the spring becoming dislodged, then place the Turning Sleeve SA over the Spindle with the ridged diameter facing down.
- Page 51 Tool bit locking Assembly. Locking Piece (95) 487239-00 x 2 Washer (96) 487240-00 Bush Damper (94) 487249-00 Spring (93) 487218-00 Conical Spring (97) 487216-00 Fit the conical spring (97) over the spindle, with the tapered end up. Fit the washer (96) over the spindle so it lies on the spring with the recess Push down the washer (96) until it is clear of the two slots in the spindle.
- Page 52 Place the Bush Damper (94) over the spindle so it rests on the locking pieces with the taper facing down. Place the Spring (93) over the spindle and let it rest on the locking sleeve. This completes the Re-assembly of the Tool Bit Locking assembly. Page 52 of 63...
- Page 53 Sliding Sleeve/ Snap Ring Assembly. Use Service Tool 559619-99. Sliding Sleeve (91) 487236-00 Locking Bush (92) 487246-00 Damper (90) 486244-00 Washer (89) 487241-00 Seal (87) 487238-00 Snap Ring (88) 487205-00 Place the Locking Bush (92) into the wide end of the Sliding Sleeve (91) and make sure that it is seated correctly.
- Page 54 Snap Ring Assembly Clamp Service Tool 559620-99 in vice. Fit insert from Service Jig into the spindle be careful not to damage the Seal . Place Flange and Spindle SA on Service Jig, MAKE SURE THE PROTECTIVE INSERT STAYS INSIDE THE SPINDLE WHILE THE FLANGE IS LOWERED ONTO THE SERVICE TOOL.
- Page 55 Fit Sliding Sleeve Assembly over spindle. Press the sliding sleeve down until Spindle shows through the center of the Washer, Make sure the Washer has the recess facing up. HOLD IN THIS POSITION THROUGHOUT THE FOLLOWING OPERATION. Screw the Cone Shaped part of the Service jig down until it comes in contact with the Spindle and lock with a spanner ( DO NOT OVER TIGHTEN).
- Page 56 Place Collet over Cone and position the spacer washer with the recess facing down. Push down until the threaded rod protrudes sufficiently to fit the nut. Screw down the nut until the Snap Ring is in the Groove in the Spindle Four clicks should be heard.
- Page 57 Check that the Snap Ring is correctly seated. Fit the Seal (87). Check that the Sliding Sleeve (91) can be pulled down and returns to its start position. Check the Turning Sleeve rotates anti-clockwise. This completes the Sliding Sleeve / Snap Ring Re-assembl Page 57 of 63...
- Page 58 Beat piece Assembly. Total amount of Grease (800) 7 Grams. Beat piece (67) 579832-00 Bush Damper (70) 579786-00 Damper (69) 487288-00 O Ring (109) 487299-00 35 x 5 Washer (68) 487270-00 Bearing (110) 579785-00 Grease all round the inner bore of the Spindle with item (800) Fit new O Ring (109) push down until it lies in the recess then re-grease the inner bore of the Spindle.
- Page 59 Lightly coat the outside diameter of Bearing Bush (110) with Grease item (800). Push the smallest diameter into the bore of the tool holder until it reaches its limit. Coat the Beatpiece with grease (800) up to the smallest ridge Then place the greased end of the Beatpiece into the Tool Holder.
- Page 60 Lightly coat the inside diameter of Bush (70) with grease (800) then push in the Damper (69) until it reaches its limit. Place the Washer (68) into the Bush (70) with the internal taper facing up. Coat the outside diameter of the Bush Damper Assembly with the small diameter facing up, place over the Beatpiece and into the tool holder Assembly.
- Page 61 Lightly Grease the Bush (72). Fit new O-Ring (71) to the Bush. Place the Bush into the Front housing with the O-Ring facing up. Make sure the internal components of the Tool Holder do not fall out when fitting to the Front Housing Fit the Tool Holder Unit to the Front Housing lining up the six screw holes Tighten the 6 Screws in this Sequence to 10 Nm.
- Page 62 SECTION FOUR. Routine Servicing When the unit comes in to Service for changing the brushes, typically after 250 to 300 hrs. The following items should be carried out. - Replace O-Ring 487213-00 (49) on Piston. - Replace O-Ring 323711-44 (79) on Main Housing. - Replace O-Ring 487296-00 (77) on Ram.
- Page 63 Fault finding. Unit Lacks Power. Worn O-Rings on the Piston and Cylinder Low Motor Speed, check No Load Amps Worn Piston or Cylinder. Faulty Electronics. Motor Speed incorrect Armature / Field faulty. Check No Load Amps Faulty electronics Fan Loose on Armature Shaft ( motor running to fast) . Magnetic ring missing from fan (motor running to fast).
Need help?
Do you have a question about the D25900K and is the answer not in the manual?
Questions and answers